

Over the years of running my own repair and maintenance business, tool organization has always been one of my biggest challenges. It seems that no matter how many toolboxes, chests, and bags I’ve owned, my tools were always in a constant state of disarray.
Screwdrivers scattered amongst wrenches, sockets buried under oil-stained rags – it was a never-ending battle to find what I needed when a job required it. Between service calls, I would spend more time digging through the mess than actually completing repairs.
That all changed when I finally invested in a heavy-duty, professional-grade tool chest and committed to developing an organized system for storing and retrieving my tools efficiently. In this blog post, I will share the approach I developed that keeps my tool chest neat and all of my tools easily accessible. Following these organizing tactics on how to organize tool chest could help bring order to your tool situation and help you work more quickly and productively.
Nodded Materials
The first step to organizing your tool chest is to gather all of the necessary materials. You will need:
- A Quality, Heavy-duty Tool Chest With Multiple Drawers and Compartments.
- Drawer Liners or Mats for Each Drawer in Your Tool Chest.
- Labels for Each Drawer and Compartment.
- Various Sized Dividers.
- A Label Maker (Optional).
11 Step-by-step Guidelines on How to Organize Tool Chest
Step 1: Empty Out Your Tool Chest
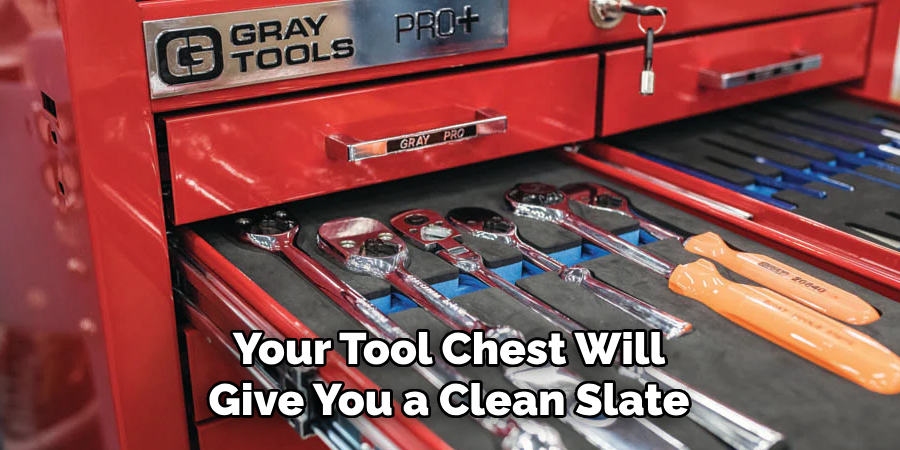
Emptying out your tool chest will give you a clean slate to work with and allow you to see all of the tools that have been hiding in the corners and crevices of your old, disorganized chest. You may even find some tools that you forgot you had! It’s also a good opportunity to do a quick inventory and get rid of any tools that you no longer use or need.
Step 2: Clean and Line the Drawers
Once your tool chest is empty, take the time to clean out each drawer thoroughly. Wipe down any dirt or grime and then line each drawer with a liner or mat of your choice. This will not only protect your tools from scratches but also make cleaning your chest in the future much easier. The liner will also prevent tools from sliding around in the drawer and keep them in place.
Step 3: Sort Your Tools by Category
Start categorizing your tools into groups such as screwdrivers, wrenches, sockets, etc. This will help you see how much space each category takes up and determine which compartments or drawers the different categories will go in. But first, continue to the next step before putting anything back into the chest. Otherwise, you might find yourself repeating the process all over again.
Step 4: Decide on Drawer and Compartment Placement
Based on the amount of space each tool category takes up, decide where to group them together in your chest. Keep commonly used tools closer to the top drawers for easy access. Consider placing heavier tools in bottom drawers for better balance. You may also want to group tools by their function or the types of repairs they are used for.
Step 5: Utilize Dividers
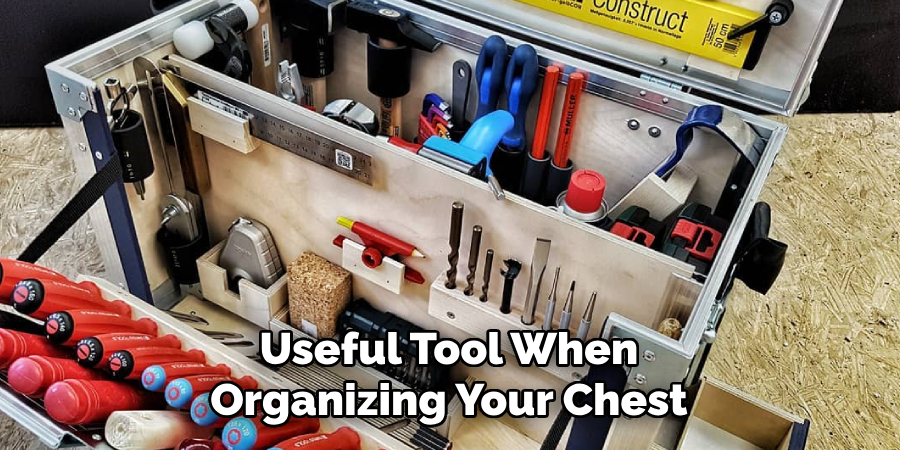
Dividers are a useful tool when organizing your chest because they allow you to create customized compartments that fit your specific tools. You can cut them to size or purchase pre-made ones. This will help keep tools from sliding around and make everything look more orderly. But be sure to leave some extra space for future tool purchases.
Step 6: Label Each Drawer and Compartment
Using labels for each drawer and compartment will save you time when searching for a specific tool. It will also help you quickly put away tools in their designated spot, maintaining the organization of your chest. A label maker is great to use for this step, but you can also handwrite them or use pre-made labels. However, you choose to label it, make sure it is clear and easy to read for quick reference.
Step 7: Put Your Tools Back Into the Chest
Now that everything is clean and organized, it’s time to start putting your tools back into the chest. Remember to keep similar tools together in their designated drawers and compartments. This will make it easier to find what you need when you are in the middle of a repair. It’s also important to put tools back in their designated spot after use, to maintain the organization and efficiency of your tool chest.
Step 8: Arrange Your Tools Strategically
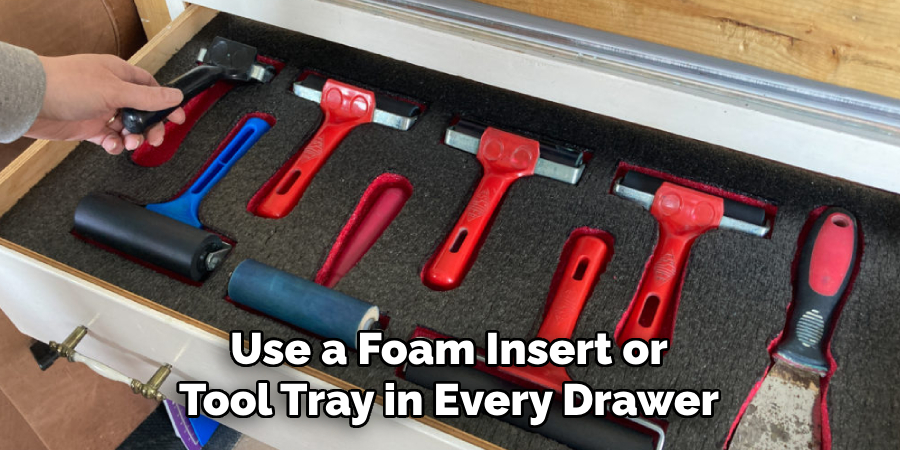
Apart from grouping similar tools together, consider the placement and arrangement of your tools within each drawer. Smaller or more delicate tools can be placed on top of larger ones to prevent damage.
You can also use foam inserts or tool trays to keep tools in place and easily visible. But be sure to keep an eye on the weight distribution in each drawer to prevent any damage or tipping of your tool chest.
Step 9: Maintain the Organization
Maintaining an organized tool chest is crucial in keeping your tools easily accessible. Be sure to put tools back in their designated spots after each use and regularly clean out and reorganize drawers if necessary. This will save you time and frustration in the long run. You may also want to consider implementing a regular cleaning and organizing schedule for your tool chest.
Step 10: Upgrade Your Tool Chest As Needed

As your business grows and you acquire more tools, you may find that your current tool chest no longer meets your needs. Don’t be afraid to upgrade to a larger or more specialized chest if necessary. Keep in mind the organization tactics you have implemented and make sure your new chest has enough space and compartments to accommodate your tools.
Step 11: Enjoy an Efficient, Organized Tool Chest
Congratulations! You now have a clean, organized and efficient tool chest. Say goodbye to digging through piles of tools or losing valuable time looking for the right one. With this system in place, you will be able to quickly find and grab any tool you need and get back to work in no time.
Enjoy the productivity boost that comes with an organized tool chest! By following these 11 guidelines on how to organize tool chest, you can say goodbye to a messy, disorganized tool chest and hello to a neat and efficient one. Remember to regularly maintain your organization system for optimal results. Happy organizing!
Frequently Asked Questions
Q: Can I Use a Regular Household Label Maker for Labeling My Tool Chest Drawers?
A: Yes, a regular label maker can be used for this purpose. However, make sure to use durable and waterproof labels to withstand the potential wear and tear of a tool chest environment. You can also use pre-made labels specifically designed for tool chests.
Q: How Often Should I Reorganize My Tool Chest?
A: It is recommended to reorganize your tool chest every 6-12 months, depending on the frequency of use and the number of new tools acquired. Regularly cleaning out and organizing drawers can also help prevent any buildup of dirt or grime.
Q: Can I Use a Foam Insert or Tool Tray in Every Drawer?
A: It is not necessary to use a foam insert or tool tray in every drawer, but it can be helpful for smaller or delicate tools. Use them only where needed to avoid overcrowding and weight distribution issues. However, you may want to consider using them for bottom drawers as they tend to hold heavier tools.
Q: Is It Necessary to Categorize Tools in My Tool Chest?
A: While it is not necessary to categorize tools, it can make organizing and finding specific tools easier. You may also want to consider grouping tools by function or type of repair they are used for. Find a system that works best for you and your business needs. Happy organizing!
Conclusion
In conclusion, organizing your tool chest may seem like a daunting task, but it is an essential step in creating an efficient and functional workspace. By following the tips and techniques discussed in this blog post on how to organize tool chest, you can make your tool chest not only organized but also more accessible and easy to use.
Remember to declutter regularly, categorize your tools, and label them correctly for easy identification. Additionally, investing in quality storage solutions like drawer dividers and foam inserts can save you time and frustration in the long run.
Don’t be afraid to get creative with your organization system based on your individual needs and preferences. Above all, having a well-organized tool chest will not only make your projects run smoother but also provide a sense of satisfaction and pride in a job well done. So go ahead, roll up those sleeves, and get started on transforming your tool chest into a perfectly organized hub of productivity! Trust me; it will be worth it.