
As winter unleashes its icy grip, tire chains become a valuable ally in navigating snow-covered roads. However, once the treacherous conditions subside, knowing how to properly remove tire chains is essential for both your vehicle’s well-being and the longevity of the chains themselves. In this guide, we’ll explore the step-by-step process of how to remove tire chains, demystifying the task for drivers seeking a smooth transition from winter driving to clearer conditions.

From identifying the connection points to ensuring a safe and efficient removal, we’ll provide insights for drivers at every level of experience. Join us on this journey as we unravel the intricacies of tire chain removal, empowering you to seamlessly transition from winter’s embrace and maintain your vehicle’s optimal performance year-round.
The Purpose of Tire Chains
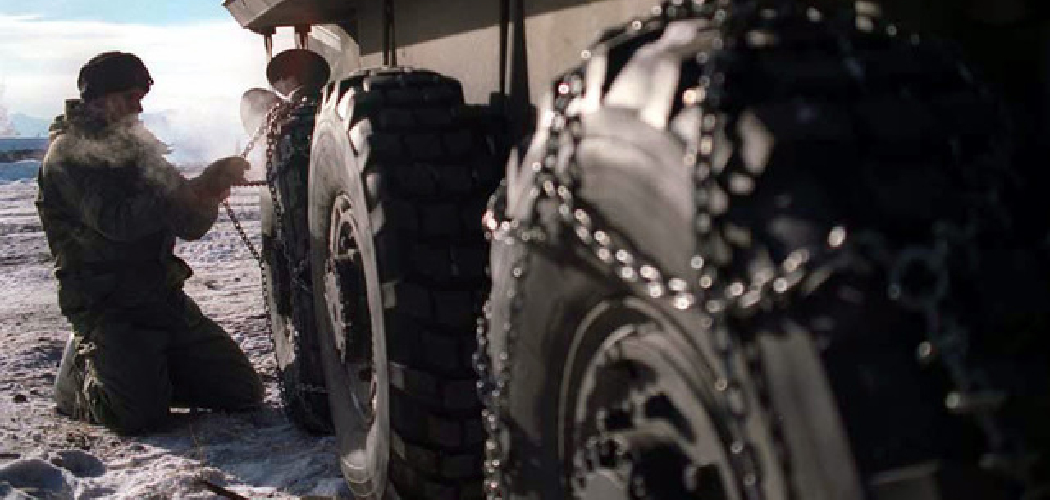
Tire chains, also known as snow chains, serve a critical role in ensuring safe travel during harsh winter conditions. They are designed to provide added traction and control on icy or snow-covered roads where regular tires can easily slip. The chains work by digging into the surface of the snow and ice, allowing the tire to grip the road more effectively.
This reduces the risk of skidding or sliding, especially when driving uphill, downhill, or around corners. Not only do tire chains enhance safety, but they also offer peace of mind for drivers navigating winter’s most challenging weather conditions. Despite their rugged exterior, tire chains are not designed for constant, long-term use, hence the need to understand how to remove them properly when they’re no longer needed.
Tools and Equipment
Before you begin the process of removing tire chains, it’s important to gather the right tools and equipment. This will ensure a safe and efficient removal. Here’s what you’ll need:
- Gloves: A durable pair of gloves will protect your hands from the cold and potential injury from the chains.
- Floor Mat: A floor mat or piece of cardboard can provide a clean and comfortable area to kneel when removing the chains.
- Tire Chain Tensioner or Bungee Cord: Although not always necessary, these can be helpful if the chains have become too tight on the tires.
- Flashlight: If you’re removing the chains in low light conditions, a flashlight can be handy to ensure you can clearly see what you’re doing.
10 Methods How to Remove Tire Chains
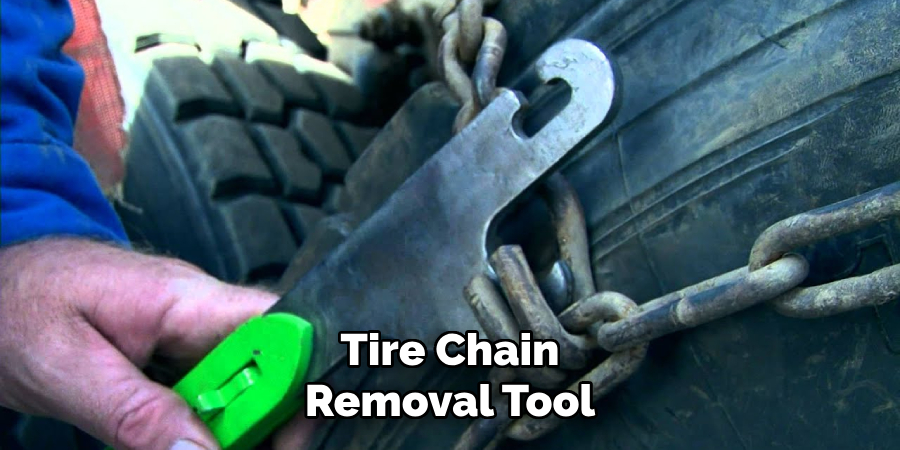
1. Use a Tire Chain Removal Tool
The most common and efficient way to remove tire chains is by using a tire chain removal tool. This tool is specifically designed to make the process easier and quicker, as it allows you to disengage the chain from the tire without having to get on your hands and knees.
2. Drive Over a Flat Surface
If the terrain allows for it, one method of removing tire chains is by driving over a flat surface. This will help to loosen any snow or ice that may have accumulated on the chains, making them easier to remove.
3. Use Your Vehicle’s Weight
Another method is to use your vehicle’s weight to help loosen the chains. You can do this by slowly driving forward while someone pulls on the chain from behind.
4. Apply Pressure with Your Foot
If you are unable to drive over a flat surface or use your vehicle’s weight, you can also apply pressure with your foot. Simply stand on the chain near the tire and push down with your foot to help loosen it.
5. Use a Hammer or Mallet
For stubborn chains, you can use a hammer or mallet to gently tap on the links and break up any ice or snow that may be holding them in place.
6. Apply Heat
If there is thick ice buildup on your tire chains, you can try applying heat with a hairdryer or hot water to melt it away before attempting to remove them.
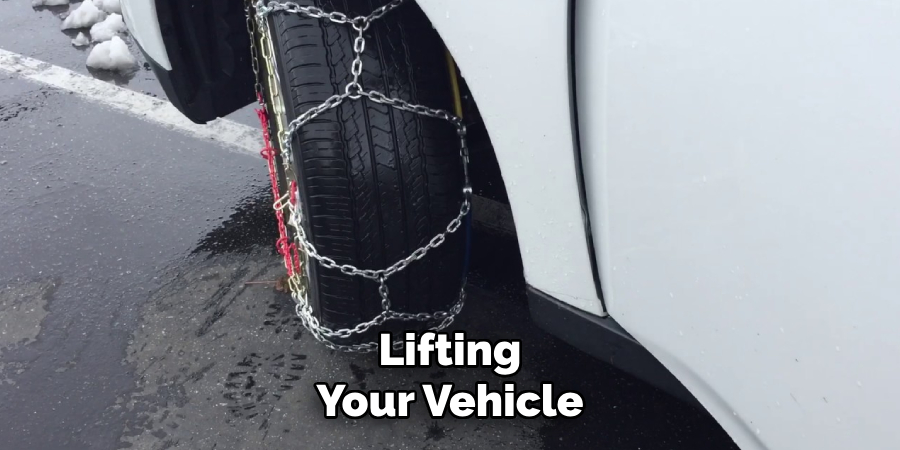
7. Lift Your Vehicle
In some cases, lifting your vehicle off the ground may be necessary in order to remove tire chains. This can be done using a jack or other lifting equipment.
8. Wear Gloves
When handling tire chains, it’s important to wear gloves for protection against sharp edges and potential frostbite from handling cold metal.
9. Read Manufacturer Instructions
Always refer to the manufacturer’s instructions for specific guidance on how to properly remove their brand of tire chains.
10. Practice Proper Storage
To make the process of removing tire chains easier in the future, it’s important to practice proper storage when not in use. This includes cleaning and drying them before storing them in a dry, cool place.
Checking for Slack
After you have successfully removed the tire chains, it is important to check for any slack in the chains. Over time and use, chains may stretch and become loose. A loose chain is less effective, poses a safety risk, and can damage your vehicle. Here’s how to check for slack:
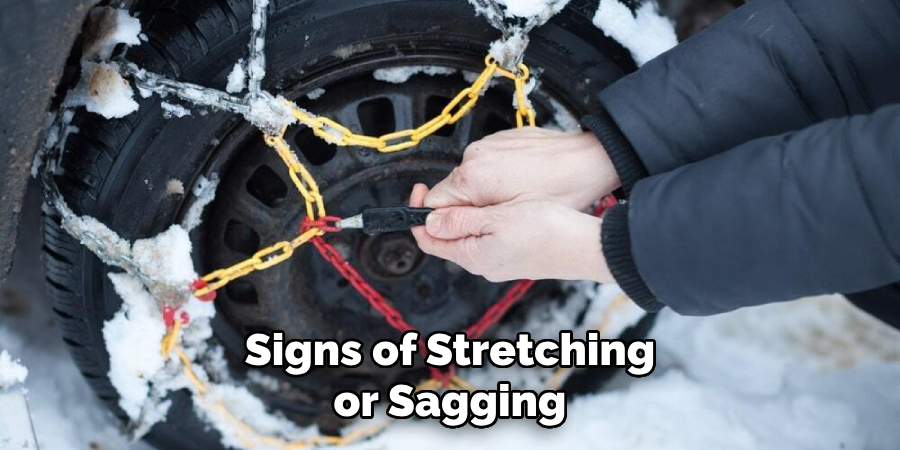
- Examine the Chains: Inspect the chains closely. Look for any signs of stretching or sagging, which could indicate that the chains have become slack.
- Feel for Slack: Hold the chains in your hands and feel for any elements that might wiggle or move easily. This could be another indication of slack in the chains.
- Test the Tension: If your chains have tensioners, check their position. If they are not in line with the rest of the chain, this could indicate that your chains are slack.
- Confirm with a Professional: If you’re uncertain, take your chains to a professional for confirmation. They can quickly identify and rectify any issues with slack.
Unfastening Connections
After assessing the slack in your chains, the next step in removing tire chains is unfastening the connections between the chains. Here’s how to proceed:
- Locate the Fastening Points: Begin by identifying the fastening points of the chains. These are typically located on the inside and outside of the tire and are where the chains connect together.
- Undo the Outside Connection: Start with the connection on the outside of the tire. This will typically be a hook, clasp, or latch mechanism. Carefully unhook or unlatch it to disconnect the chain.
- Undo the Inside Connection: Next, move to the connection on the inside of the tire. In most cases, this will be a lever or latch that can be unfastened with a simple upward motion. If it’s difficult to reach or see the connection, use your flashlight to better illuminate the area.
- Pull the Chains Off the Tire: With both connections unfastened, you should now be able to pull the chains off the tire. Start from the top and gradually work your way down, making sure to pull the chains away from the vehicle to avoid scratching or damaging the tire.
- Inspect the Chains: Once removed, inspect the chains for any signs of damage or excessive wear. Address any issues before storing the chains to ensure they are ready for future use.
Safety Precautions
When removing tire chains, it’s paramount to take certain safety precautions to avoid any injury or damage to your vehicle. Here are some guidelines you should follow:
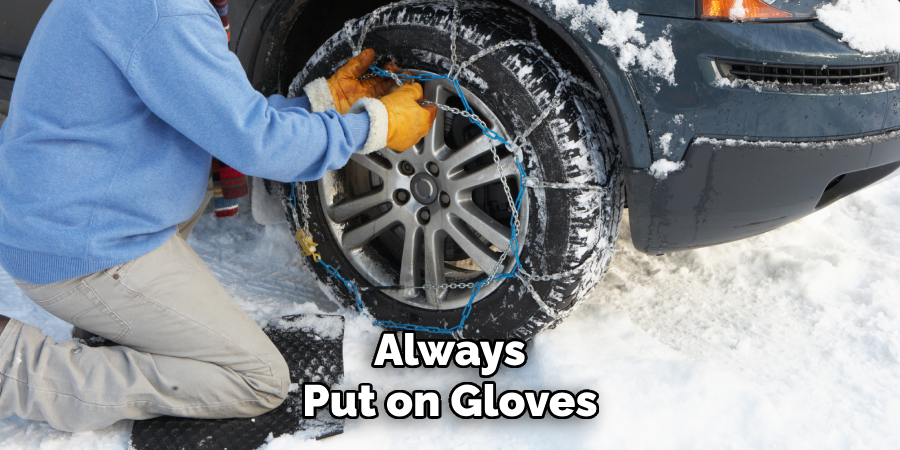
- Wear Protective Gear: Always put on gloves to protect your hands from the cold and potential sharp edges on the chains. Additionally, consider wearing a reflective vest if you’re doing this at the side of a road, especially in low light conditions.
- Use Proper Tools: Use the correct tools – like a tire chain removal tool or a mallet – to avoid damaging the chains or the vehicle tires. Using improvised or inappropriate tools can lead to accidents.
- Ensure Good Visibility: If you’re removing the chains in low light, use a flashlight or a headlamp. Visibility is key to a successful and safe removal process.
- Work on Flat and Stable Ground: Always try to remove tire chains on flat and stable ground. Doing this on a slope or uneven terrain can cause the vehicle to move unexpectedly.
- Avoid Rushing: Take your time to carefully unfasten and remove the chains. Rushed actions can result in mistakes, which could damage the chains or your vehicle, or even cause injury.
- Follow Manufacturer’s Instructions: Different tire chains might have unique features or removal methods. Always refer to and follow the manufacturer’s instructions for the safe removal of the chains.
Conclusion
In conclusion, knowing how to remove tire chains is an essential skill for any driver who frequently travels through snowy and icy conditions. By following the steps outlined in this post and with some practice, you’ll be able to easily remove your tire chains without any frustration or difficulty.
Remember to always double-check your chain installation before hitting the road and never skip steps during either the installation or removal process. Stay safe and stay informed by regularly checking your local weather forecast and preparing for any potential winter storms. We hope this guide has provided you with valuable knowledge and confidence in removing tire chains when needed.