

Are you tired of struggling with a spongy clutch pedal and weak clutch engagement? Do you find yourself constantly wondering why your clutch isn’t functioning as smoothly as it should? If so, you’re not alone.
Many car owners experience similar issues with their clutch systems, and it can be frustrating trying to figure out the culprit. But fear not, because in this blog post, we’re going to guide you through the process of gravity bleeding a clutch, a simple yet effective technique that can greatly improve the performance of your clutch.
Whether you’re a seasoned mechanic or a novice car enthusiast, this step-by-step guide on how to gravity bleed clutch will provide you with the knowledge and confidence you need to tackle this task and get your clutch working like a dream. So roll up your sleeves, grab your tools, and get ready to say goodbye to clutch problems once and for all.
Why Do You Need to Bleed Your Clutch?
Before we dive into the details of how to gravity bleed a clutch, let’s first understand why it’s necessary in the first place. Clutch systems, like any other hydraulic system, require regular maintenance and bleeding to remove air bubbles that can build up over time.
When air enters the hydraulic lines, it creates pockets of pressure that prevent the smooth flow of fluid, resulting in a spongy clutch pedal and weak clutch engagement.
What You’ll Need
Before we get started, make sure you have the following tools and materials on hand:
- A Wrench or Socket Set
- Brake Fluid
- Clear Plastic Tubing (Approximately 2 Feet Long)
- Empty Bottle or Container
- An Assistant to Help You Pump the Clutch Pedal
10 Simple Step-by-step Guidelines on How to Gravity Bleed Clutch
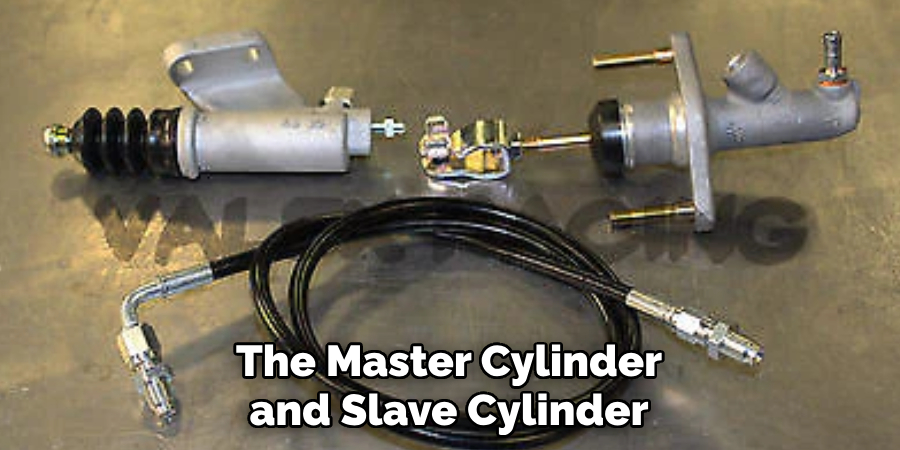
Step 1: Locate the Master Cylinder
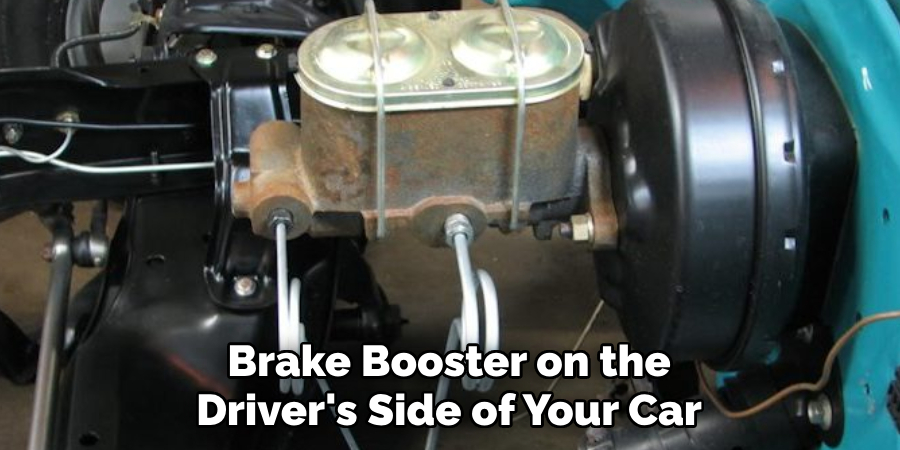
The master cylinder is a small reservoir located near the brake booster on the driver’s side of your car. It has a cap that you can unscrew to access the fluid inside. It’s essential to make sure that the master cylinder is full before you begin bleeding. You don’t want to run out of fluid in the middle of the process. It can cause more air to enter the system, and you’ll have to start over.
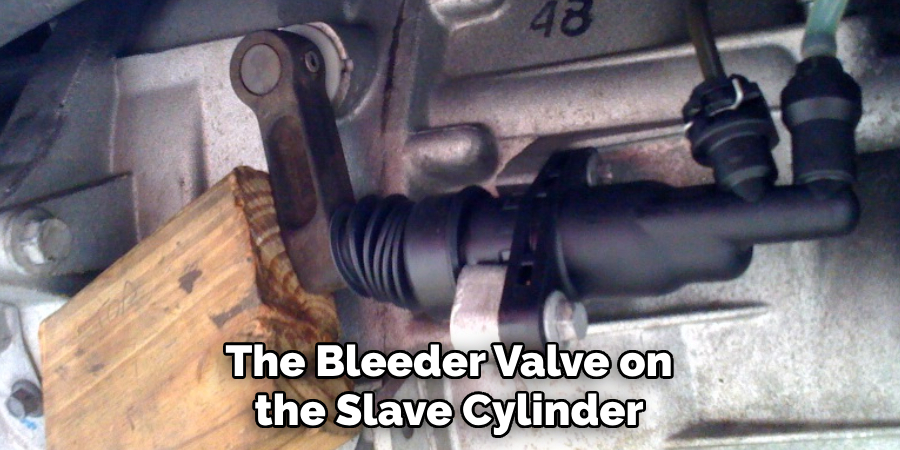
Step 2: Locate the Slave Cylinder
The slave cylinder is typically located near your transmission. Look for a small container with a bleeder valve on it. The bleeder valve is where you will attach the plastic tubing in later step. You can also consult your car’s manual for the exact location if needed. The important thing is to make sure you can access the bleeder valve easily.
Step 3: Prepare the Empty Bottle or Container
Place an empty bottle or container near the slave cylinder. Make sure it’s positioned in such a way that the plastic tubing can reach inside without kinking or bending. Otherwise, the fluid won’t flow freely, and the process may not be as effective. You may also need to secure the container in place with tape or clamps. It’s essential to have a place to collect the old fluid as it comes out.
Step 4: Attach the Plastic Tubing
Once you’ve positioned the bottle or container, attach the plastic tubing to the bleeder valve on the slave cylinder. Make sure it’s securely in place and won’t come loose during the process. You can also have your assistant hold onto it to ensure it stays in place. Otherwise, you’ll have to start over if the tubing comes off.
Step 5: Open the Bleeder Valve
Using your wrench or socket set, open the bleeder valve on the slave cylinder. This will allow fluid and air bubbles to escape through the plastic tubing and into the container below. It’s essential to keep the valve open until all air bubbles have stopped coming out. You may need to adjust your wrench or socket as you go.
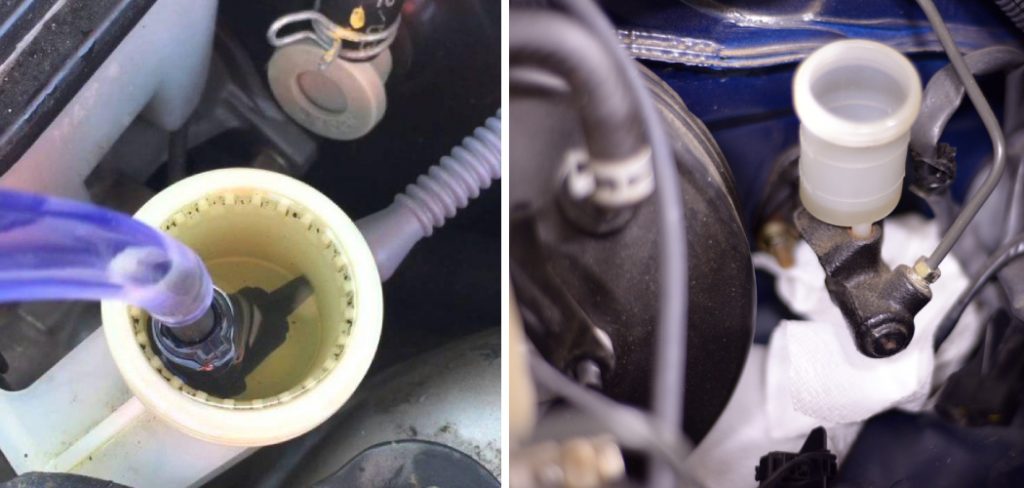
Step 6: Top Up the Master Cylinder
While your assistant holds down the clutch pedal, use a funnel to pour fresh brake fluid into the master cylinder. Make sure not to overfill it and keep an eye on the fluid level as you go. You want to maintain a steady supply of brake fluid to prevent air from entering the system. But at the same time, you don’t want to overfill it and cause a mess.
Step 7: Repeat the Process
Continue opening and closing the bleeder valve while topping up the master cylinder with fresh brake fluid until you no longer see any air bubbles in the plastic tubing. This may take several tries, depending on how much air is trapped in the system. Be patient and keep an eye on the fluid levels to prevent any mishaps. You may also need to take breaks in between if the fluid starts to overflow.
Step 8: Close the Bleeder Valve
Once you no longer see any air bubbles, close the bleeder valve tightly. Make sure it’s fully closed to prevent any new air from entering the system. This step is crucial for ensuring that your clutch system functions as it should. It’s also a good idea to double-check that there are no air bubbles left before moving on to the next step.
Step 9: Clean Up
Use a clean cloth or paper towel to wipe off any excess brake fluid from the master cylinder and slave cylinder. You want to make sure everything is clean and free of debris before you close everything back up. The last thing you want is for dirt to enter the system and cause more problems down the line. If you have any extra brake fluid, make sure to dispose of it properly. You don’t want to pollute the environment.
Step 10: Test Your Clutch
Now it’s time to test your newly gravity-bled clutch. Have your assistant step on the clutch pedal a few times while you observe its performance. If everything was done correctly, you should notice a significant improvement in how the pedal feels. It should be firmer and more responsive, with no sponginess or uneven engagement. Congratulations, you’ve successfully gravity bled your clutch!
Following these simple steps on how to gravity bleed clutch can save you time and money, as well as improve your driving experience. Regularly bleeding your clutch will ensure that it functions optimally and prevent any potential problems down the line. So remember to add this task to your car maintenance checklist and enjoy a smooth clutch every time you drive. Happy driving!
Frequently Asked Questions
Q1: Can I Gravity Bleed My Clutch Alone?
A1: While it is possible to gravity bleed your clutch alone, having an assistant to help hold the plastic tubing and pump the clutch pedal can make the process much easier and more effective. You can also use a one-man brake bleeder tool if you prefer to do it alone.
Q2: Do I Need Special Tools for Gravity Bleeding My Clutch?
A2: No, you don’t need any special tools for gravity bleeding your clutch. However, having a wrench or socket set on hand is necessary to open and close the bleeder valve. You may also need a funnel to top up the master cylinder with fresh brake fluid.
Q3: How Often Should I Gravity Bleed My Clutch?
A3: It’s recommended to bleed your clutch at least once every two years or whenever you notice any issues with its performance. However, if you frequently engage in heavy clutch usage, such as during racing or off-roading, it’s best to bleed it more often to maintain optimal performance.
Q4: Can I Use Any Type of Brake Fluid for Gravity Bleeding My Clutch?
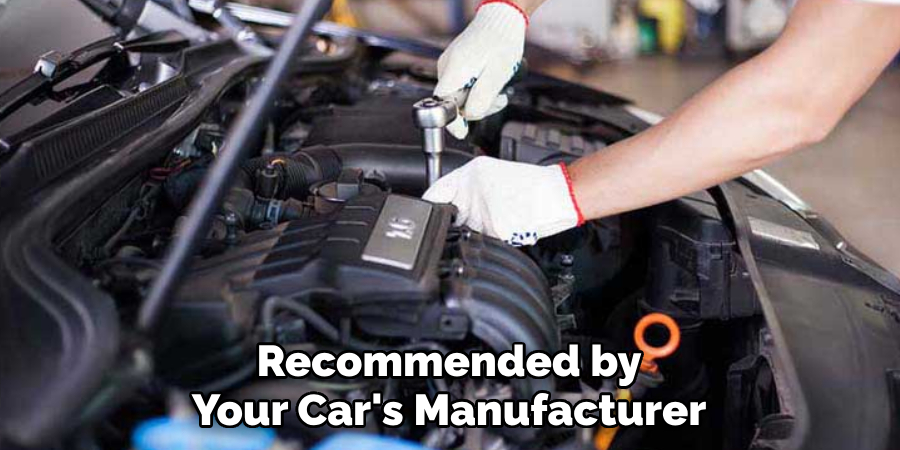
A4: It’s essential to use the correct type of brake fluid as recommended by your car’s manufacturer. Using the wrong type can cause damage to your clutch system and void any warranties. Check your car manual or consult a professional mechanic if you’re unsure which brake fluid to use.
Conclusion
Now that you have a better understanding of the gravity bleed clutch method and its benefits, it’s time to put your knowledge into practice. Remember to always follow safety precautions and double-check all connections before attempting this procedure.
As you work through the steps, don’t be afraid to ask for help or seek guidance if needed. With practice and patience, you will soon become an expert at gravity bleeding your clutch. And with its many advantages, such as saving time and money, it’s a skill worth mastering.
So say goodbye to air bubbles and spongy pedals and hello to smooth, efficient clutch operation! Don’t let fear hold you back from giving it a try – embrace the challenge and enjoy the satisfaction of a job well done. Keep your car running smoothly and keep grinding those gears with confidence using the gravity bleed method! Thanks for reading this article on how to gravity bleed clutch.