

Repairing a pitted windshield is crucial not only for maintaining the aesthetic appeal of your vehicle but also for ensuring optimal visibility and safety while driving. Windshield pitting, caused by the abrasive action of dust, sand, and other debris over time, can create a multitude of tiny craters on the glass surface that scatter light and impair the driver’s vision, especially under direct sunlight or at night. This introduction will guide on how to repair pitted windshield you through the steps to assess the damage and provide do-it-yourself solutions to repair a pitted windshield, helping you restore clarity and extend the lifespan of your windshield.
What Causes Windshield Pitting?
The windshield is an essential component of your vehicle, providing structural support and protecting you from incoming objects while driving. However, like any other part of the car, it can suffer wear and tear over time due to exposure to various environmental elements. One of the main reasons for windshield pitting is the constant friction between the glass surface and tiny particles carried by the wind while driving. These particles, such as dust, sand, and debris, can be abrasive and cause small craters to form on the windshield’s surface.
Needed Materials
Before beginning the repair process, it is important to gather all necessary materials to ensure a successful outcome. Here are some items you will need:
Glass Cleaner and Microfiber Cloth
Cleaning the windshield is essential before starting any repair work. Use a glass cleaner to remove any dirt, grime, or debris from the surface, as these can interfere with the repair process.
Water and Soap Solution
This solution will be used to clean and prep the damaged area before applying the resin.
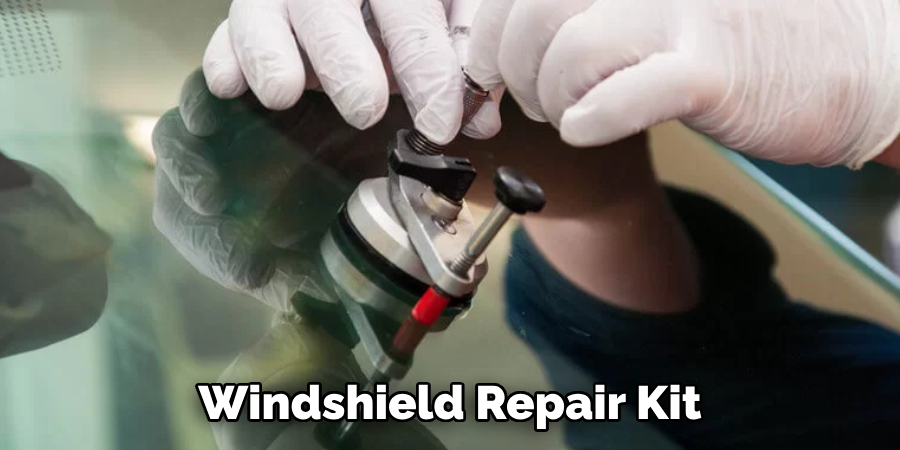
Windshield Repair Kit
You can easily find a windshield repair kit at any auto supply store or online. These kits usually contain resin, curing strips, and other essential tools for repairing pitted windshields.
Razor Blade
A razor blade will be needed to remove any excess resin from the surface after the repair process is complete.
10 Step-by-step Guidelines on How to Repair Pitted Windshield
Step 1: Assess the Damage
Thoroughly inspect your windshield to determine the extent of the damage. If you notice pitting on a specific area, mark it with tape or a marker to guide you during the repair process. The size and depth of the pitting will determine the necessary repair method. You may also want to check if your windshield has a warranty that covers pitting repairs. It may be more cost-effective to have it repaired by a professional if that is the case. However, if the damage is minor, you can attempt to repair it yourself.
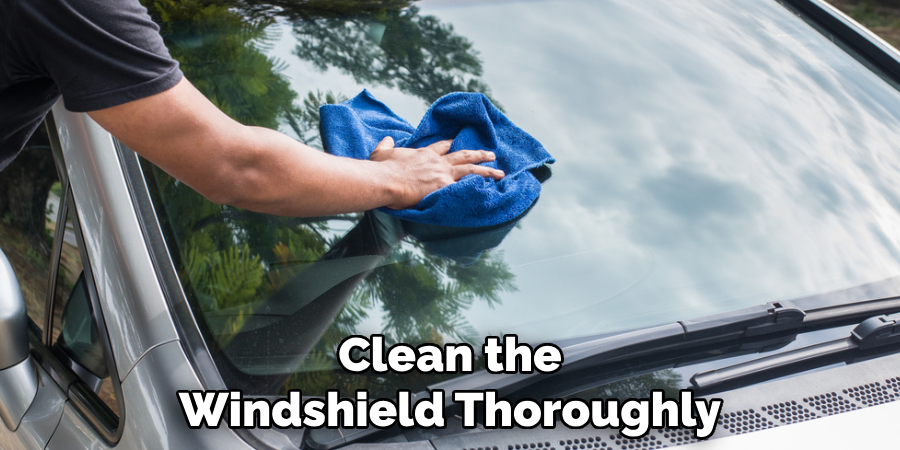
Step 2: Clean the Windshield
Use a glass cleaner and a microfiber cloth to clean the windshield thoroughly. Wipe down the surface in a circular motion to remove any dirt or debris that may interfere with the repair process. You may also use a water and soap solution to remove any stubborn grime. It is essential to have a clean and dry windshield before proceeding with the repair. You may also want to cover the car’s interior with a tarp or plastic sheet to protect it from any spills. It is also recommended to work in a well-ventilated area.
Step 3: Prepare the Repair Kit
Read and follow the instruction manual provided with the repair kit before proceeding. Ensure that all necessary tools and materials are readily available and within reach. But remember not to remove the resin from its packaging until you are ready to use it, as exposure to light and air can affect its effectiveness. You may also want to warm up the resin by placing it in a bowl of hot water for a few minutes, as this will make it easier to apply. The ideal temperature for the resin is around 32°C (90°F). It is also recommended to wear gloves during the repair process.
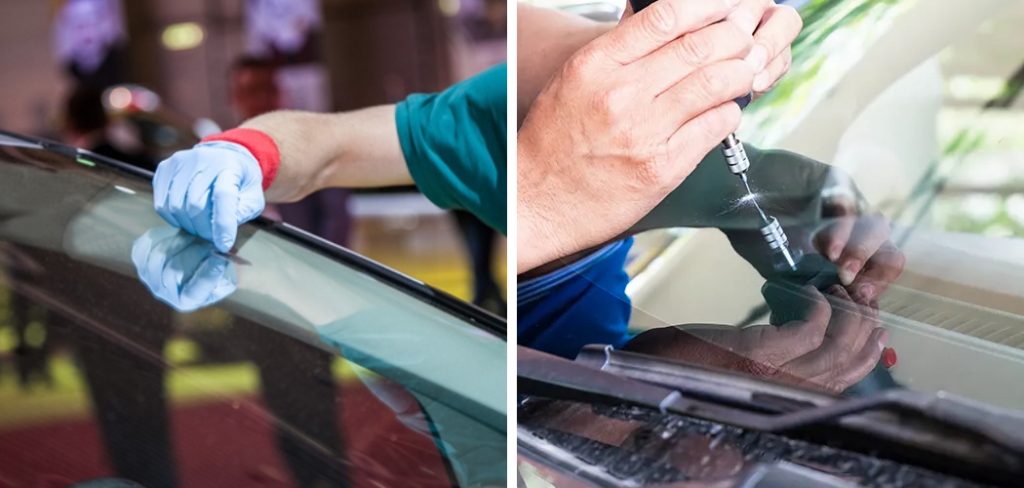
Step 4: Apply Resin to the Pitted Area
Use the provided applicator tool or syringe to apply the resin directly onto the pitted area. Be careful not to touch or smear the surrounding undamaged areas, as the resin will create a noticeable patch. Apply enough resin to fill each pit completely. If necessary, you may use a razor blade to remove any excess resin that may have spread outside the pits. The resin should be slightly higher than the undamaged areas surrounding it. This will ensure that after curing, the surface will be level. Although the resin may appear clear, it will harden and become transparent after curing.
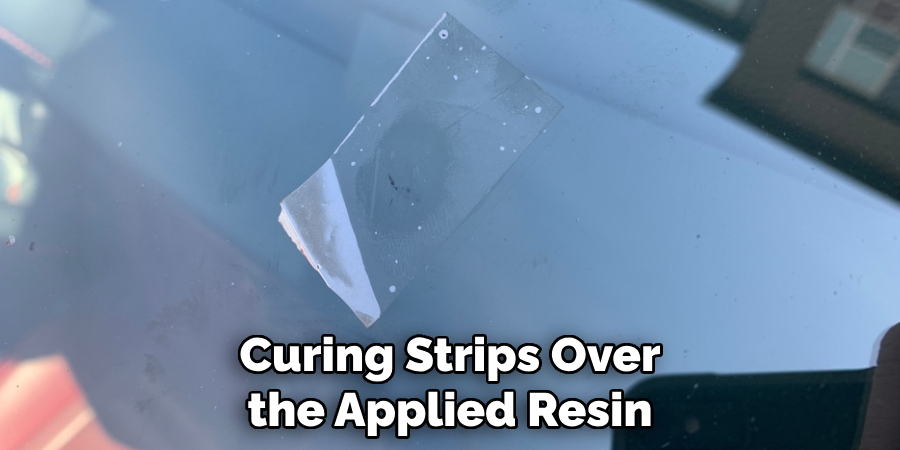
Step 5: Apply Curing Strips
Place the provided curing strips over the applied resin, ensuring that they cover each pit completely. Gently press down on the stripes to remove any air bubbles and to ensure that all pits are filled with resin. But be careful not to press too hard as this may spread the resin out of place. The curing strips will prevent any dust or debris from settling on the resin while it cures.
If the resin is not covered correctly, the repair may not be successful. The curing time may vary depending on the repair kit’s instructions, but it is usually around 30 minutes to an hour. It is essential not to move the car during this time to allow the resin to cure properly.
Step 6: Let it Cure
The curing process can take anywhere from 30 minutes to a few hours, depending on the repair kit you are using. But make sure to check and follow the instructions provided in your kit’s manual. The curing process is essential as it ensures that the resin hardens fully, creating a strong bond with the windshield and filling in any pits and cracks. Thus, it is crucial not to skip this step or rush the process, as it may affect the repair’s success. You may also want to cover the area with a plastic sheet to protect it from dust and debris while curing.
Step 7: Remove Curing Strips
After the appropriate curing time has passed, carefully remove the curing strips by gently peeling them off one by one. Bending and peeling them off too quickly may cause the resin to shift, affecting the repair. Use a razor blade to remove any excess resin that may have spread out of the pits and onto undamaged areas. Carefully scrape off any excess resin until the surface is smooth and level.
It is essential to be gentle during this step to avoid damaging the repair. You may also use a glass cleaner to clean the surface and remove any remaining residue. The windshield should now be smooth and clear, with all pits and cracks filled in.
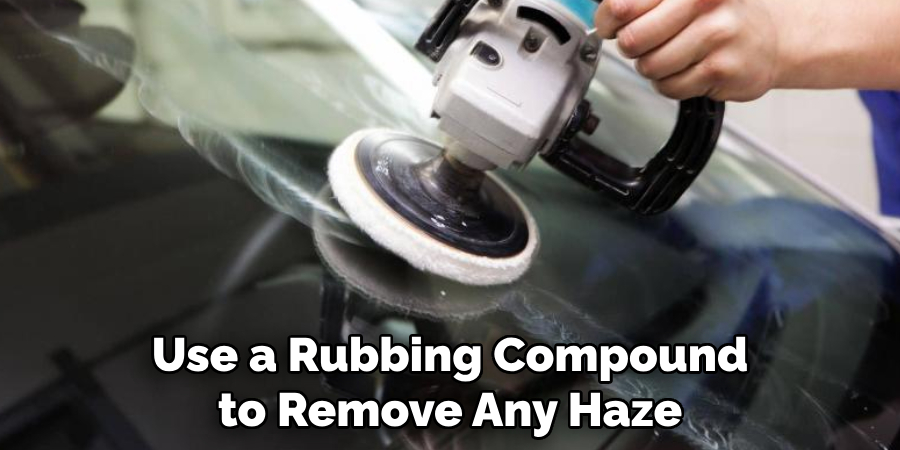
Step 8: Polish the Surface
Use a glass polish or rubbing compound to remove any haze or discoloration that may have formed on the surface after curing. Apply a small amount of polish onto a clean cloth and gently rub it in circular motions over the repaired area. This will help restore the surface’s clarity and shine, making the repair less noticeable. You may also want to use a glass cleaner to remove any excess polish and leave your windshield sparkling clean.
The repaired area may still have a slight imperfection, but it should be significantly less noticeable than before. You may need to repeat this step a few times for optimal results. The repair is now complete, and your windshield should look as good as new!
Step 9: Allow Time for Final Curing
The resin will continue to harden and cure over time, so it is essential to allow at least an additional 24 hours before driving your car. During this time, avoid extreme temperatures and physical impact on the repaired area. This will ensure that the repair is fully cured and has a strong bond with the windshield, making it more durable and long-lasting.
The final result should be a smooth, clear, and strong repair that will keep your windshield looking like new. Remember to regularly check the repaired area for any signs of damage or changes in appearance.
Step 10: Prevention is Key
While it is possible to repair a pitted windshield, prevention is always the best option. To avoid costly repairs and replacements, make sure to regularly clean your windshield and protect it from any potential damage. Avoid using harsh chemical cleaners or abrasive materials that may cause scratches or pits on the surface. If you notice any small chips or cracks forming, address them immediately before they turn into larger and more costly repairs. With proper care, your windshield can last for many years without the need for repair or replacement. Stay safe on the road by taking care of your windshield and addressing any issues promptly.
Following these steps on how to repair pitted windshield will help you repair a pitted windshield and restore its clarity and strength. With the right tools and techniques, you can save yourself time and money by repairing instead of replacing your windshield. Remember to always follow the instructions provided in your repair kit and to take proper precautions during each step.

Advanced Repair Techniques for Severe Pitting
For more severe cases of pitted windshields, advanced repair techniques may be necessary. These techniques involve using specialized tools and equipment to remove the damaged layer of glass and replace it with a new one. This method is more costly and time-consuming than regular windshield repairs but can result in a fully restored and stronger windshield.
Some advanced repair techniques for severe pitting include:
Sanding and Polishing:
In this method, a specialized sander is used to remove the damaged layer of glass and polish the surface to restore its clarity. This technique requires a high level of expertise and may not always be successful.
Resurfacing:
Similar to sanding and polishing, resurfacing involves using a specialized tool that removes the top layer of glass and replaces it with a new one. This method is more precise and can result in a smoother surface.
Glass Filling:
In this technique, a specialized resin is used to fill in the pits and cracks and create a strong bond with the glass. This method is ideal for severe pitting cases and can result in a durable repair.
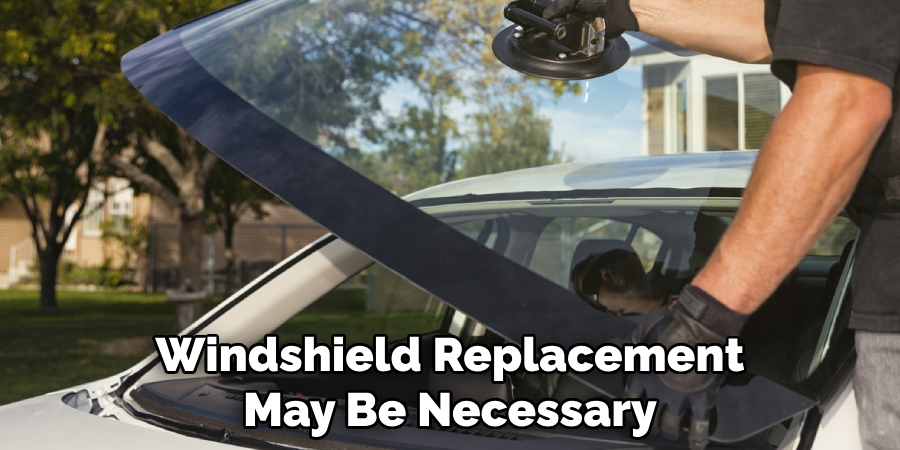
Replacement:
For extreme cases of pitting, windshield replacement may be necessary. A new windshield will be installed using adhesive and sealant to ensure a secure fit. This option is more costly but may be the only solution for severely damaged windshields.
Remember to consult a professional before attempting these advanced repair techniques, as they require specialized tools and expertise. Prevention is still key, so make sure to regularly maintain and protect your windshield to avoid severe pitting in the future. With proper care, you can keep your windshield looking like new for years to come.
Preventive Maintenance and Best Practices
To prevent pitting on your windshield, it is essential to practice good preventive maintenance and follow some best practices. Here are a few tips to keep in mind:
- Regularly Clean Your Windshield With Mild Soap and Water.
- Avoid Using Harsh Chemical Cleaners or Abrasive Materials.
- Park Your Car in Shaded Areas When Possible to Protect It From Direct Sunlight and Extreme Temperatures.
- Address Small Chips and Cracks Immediately Before They Turn Into Larger and More Costly Repairs.
- Avoid Slamming Car Doors or Placing Heavy Objects on the Windshield.
- Schedule Regular Inspections With a Professional to Check for Any Signs of Damage or Wear.
- Consider Using a Windshield Protectant to Add an Extra Layer of Protection to Your Windshield.
By following these preventive maintenance tips, you can keep your windshield in top condition and prevent pitting from occurring. Remember that your windshield is an essential safety feature of your car, so taking care of it should be a priority.
Safety Considerations and Environmental Impact
When repairing a pitted windshield, it is important to take proper precautions to ensure your safety and the environment’s protection. Wear gloves and protective eyewear to avoid direct contact with resin or glass particles. Properly dispose of any used materials, such as curing strips and excess resin, according to local regulations. Avoid performing repairs in extreme temperatures or direct sunlight, as this can affect the resin’s curing process. If you are unsure about how to perform a windshield repair safely, consult a professional.
Additionally, consider the environmental impact of repairing your windshield instead of replacing it. By repairing, you are preventing unnecessary waste and conserving resources used in manufacturing new windshields. This small effort can make a significant difference in reducing our carbon footprint and preserving the environment.

Real-Life Examples and Case Studies
To gain a better understanding of how to repair pitted windshields, here are two real-life examples and case studies:
- A Car Owner Noticed Small Pits Forming on Their Windshield but Didn’t Address Them Immediately. Over Time, the Pitting Became More Severe, and They Were Unsure if It Could Be Repaired. They Consulted a Professional Who Used an Advanced Glass Filling Technique to Repair the Pitted Areas Successfully.
- A Truck Driver Parked Their Vehicle in Extreme Temperatures and Noticed That the Windshield Had Developed Large Cracks Due to Severe Pitting. They Contacted a Professional Who Recommended Replacing the Windshield Due to Its Extensive Damage. The New Windshield Was Installed, and Preventive Measures Were Discussed to Avoid Pitting in the Future.
- These Examples Highlight the Importance of Regular Maintenance and Addressing Pitting Promptly to Avoid Costly Repairs or Replacements.
Frequently Asked Questions
Q: Can I Repair a Pitted Windshield on My Own?
A: Yes, it is possible to repair a pitted windshield using a DIY repair kit. However, it is essential to carefully follow the instructions and take proper precautions during each step. If you are uncomfortable with the process or have severe pitting, it is best to consult a professional.
Q: Can I Prevent Pits from Forming on My Windshield?
A: While some pits may be unavoidable, you can prevent them from forming by regularly cleaning and maintaining your windshield. Avoid using harsh chemicals or abrasive materials that may cause scratches, and address any small chips or cracks immediately before they turn into larger pitting.
Q: How Long Will a Repaired Windshield Last?
A: With proper care, a repaired windshield can last for many years. However, it is essential to regularly check the repaired area for any signs of damage or changes in appearance. If you notice any issues, address them promptly to prevent further damage.
Q: Can Pitted Windshields Affect My Car’s Safety?
A: Yes, pitted windshields can affect your car’s safety as they may obstruct your vision and compromise the structural integrity of the glass. It is essential to repair or replace a pitted windshield as soon as possible to ensure safe driving conditions. Remember, safety should always be your top priority on the road.
Conclusion
In conclusion, addressing windshield pitting is not just a matter of aesthetics but an essential step in preserving visibility and ensuring driving safety. By evaluating the extent of damage and applying DIY techniques, such as using a glass resin repair kit, you can mitigate minor pitting effectively. However, for more severe cases or if you’re unsure about the repair process, consulting with a professional is recommended to guarantee the structural integrity of your windshield.
Remember, whether you decide on self-repair or seek professional help, the sooner you attend to the pitting, the better you can maintain your windshield’s clarity and functionality. Thanks for reading this article on how to repair pitted windshield.

About
JeepFixes Team is a skilled author for Jeep Fixes, bringing 6 years of expertise in crafting a wide range of jeep fixes. With a strong background in jeep fixes work, JeepFixes Team’s knowledge spans various types of fixtures, from decorative pieces to functional hardware, blending precision with creativity. His passion for jeep fixes and design has made him a trusted resource in the industry.
Professional Focus:
Expert in Jeep Fixes : JeepFixes Team aesthetic specializes in creating durable and innovative jeep fixes, offering both appeal and functionality. His work reflects a deep understanding of jeep fixes techniques and materials.
Sustainability Advocate : He is dedicated to using sustainable practices, ensuring that every fixture is crafted with eco-friendly methods while maintaining high-quality standards.
In his writing for jeep fixes, JeepFixes Team provides valuable insights into the latest trends, techniques, and practical advice for those passionate about jeep fixes, whether they are professionals or DIY enthusiasts. His focus on combining artistry with engineering helps others discover the true potential of jeep in design.