

Fuel pump replacement is a common maintenance task for many vehicle owners. While swapping out the old pump for a new one sounds relatively straightforward, there is an important step that is often overlooked: priming the fuel pump. An unprimed fuel pump will struggle to build adequate fuel pressure, leaving your engine sputtering and reluctant to start. Improperly priming the pump can also cause damaging air pockets to enter the fuel system.
In this guide, I’ll walk you through the simple priming process of how to prime fuel pump after replacing. I’ll also cover some common symptoms of an unprimed pump and how to avoid sending air into the fuel lines.
Let’s start with the straightforward steps to prime the fuel pump and run your engine smoothly again.
What Will You Need?
Before you start, gathering all the necessary tools and materials is essential. Here’s a list of items that you’ll need for this process:
- New fuel pump
- Hand-operated vacuum pump (optional)
- Fuel pressure gauge (optional)
- Clean rag
- Vehicle owner’s manual
Once everything is ready, follow the steps below to prime your fuel pump safely.
10 Easy Steps on How to Prime Fuel Pump After Replacing
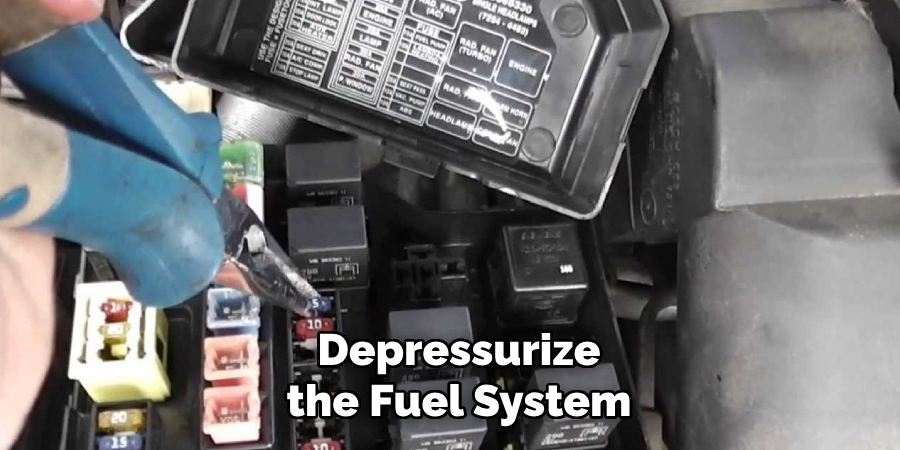
Step 1. Depressurize the Fuel System:
The first step is to depressurize the fuel system to avoid any potential fuel sprays when disconnecting the pump. You can remove the fuel pump fuse while the engine is running. The machine will eventually die out once the fuel system is depressurized.
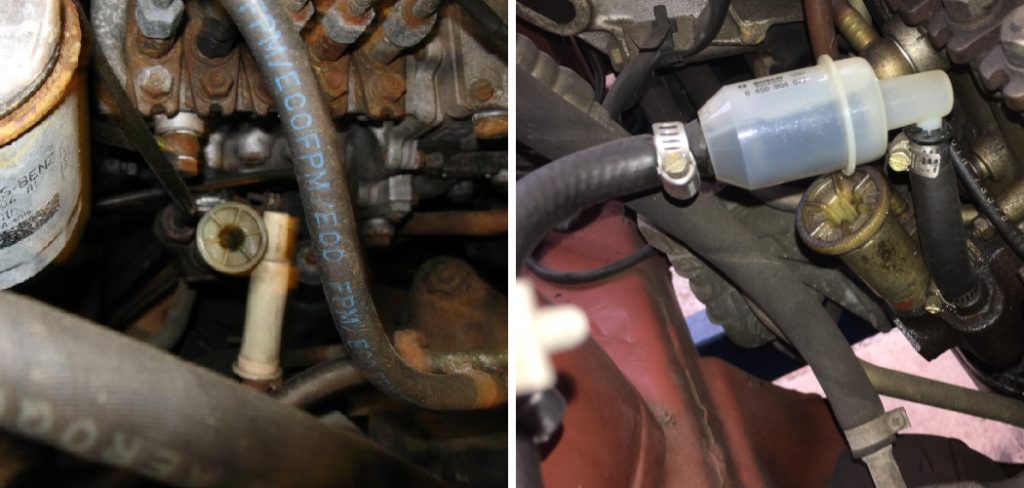
Step 2. Disconnect and Replace the Fuel Pump:
Next, disconnect the negative terminal of your car’s battery for safety. Following your vehicle’s manual, locate and disconnect the old fuel pump. Replace it with the new one, ensuring all connections are secure. Remember to replace the fuel filter if necessary as well.
Step 3. Reconnect the Battery and Fuel Pump Fuse:
After replacing the fuel pump, reconnect the negative terminal of your car’s battery. Then, reinsert the fuel pump fuse back into its rightful slot in the box. This readies the vehicle for the priming process, ensuring that your new fuel pump has adequate fuel supply before you start the engine.
Step 4. Prime the Fuel System:
To start the priming process, turn the ignition key to the ‘ON’ position without starting the engine. This allows the new fuel pump to push fuel through the lines and into the engine. Repeat this process several times, waiting for a few seconds between each cycle. You should hear the fuel pump hum for a couple of seconds every time you turn the key to the ‘ON’ position, indicating that it’s working correctly and pushing fuel into the engine.
Step 5. Check for Fuel Leaks:
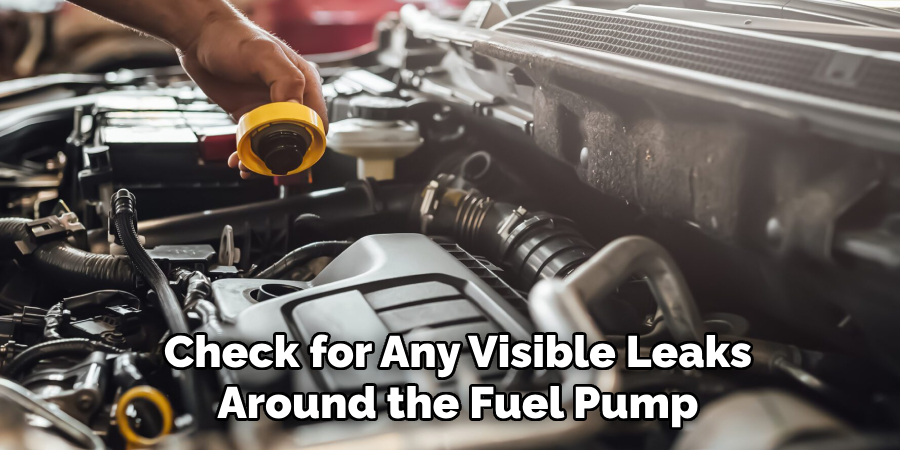
Once the fuel system has been primed, check for any visible leaks around the fuel pump and fuel lines. If you notice any fuel dripping or accumulating in any area, it indicates a leak. In this case, turn off the ignition immediately and tighten any loose connections. Safety should always be the priority. If the leaks persist, seek professional help.
Step 6. Start the Engine:
Now that your fuel system is primed and leak-free, it’s time to start the engine. Turn the ignition key to start the vehicle. The motor might take more time to start as the fuel is still filling up all the nooks and crannies of the fuel system. This is perfectly normal. However, if the engine doesn’t start after a few attempts, you might need to repeat the priming process or check for other issues.
Step 7. Monitor the Engine:
After the engine has started, let it run for a few minutes while you monitor its performance. Pay attention to any unusual sounds, vibrations, or changes in RPM (revolutions per minute). These could indicate that the fuel pump isn’t delivering fuel properly or that air may be in the fuel lines. If you observe any such signs, it’s best to turn off the engine and consult a professional mechanic.
Step 8. Check Fuel Pressure:
If your vehicle hasn’t shown signs of problems and seems to be running smoothly, it’s still a good idea to check the fuel pressure if you have a fuel pressure gauge. This step ensures that the system’s fuel pressure is within the recommended range as per your vehicle’s manual.
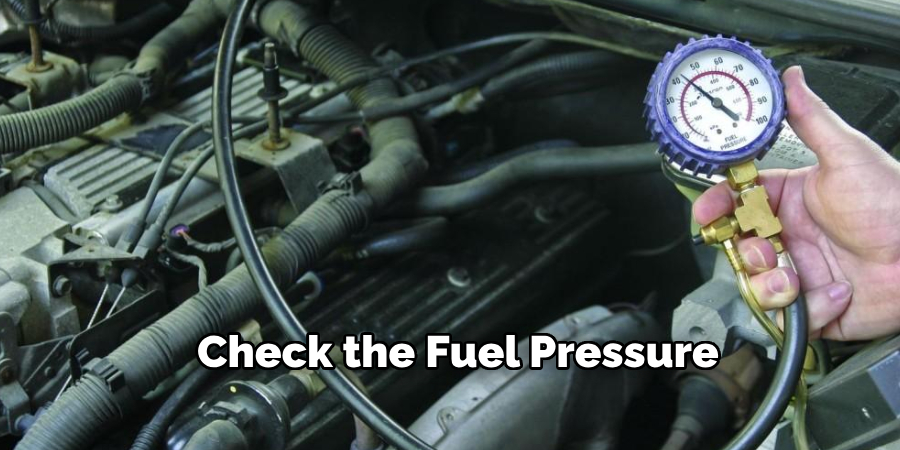
Attach the fuel pressure gauge to the appropriate fuel rail, turn on the ignition without starting the engine, and take a reading. If the fuel pressure is within the correct range, your priming process has been successful. If not, you may have to consult a professional mechanic.
Step 9. Perform a Test Drive:
After ensuring that the fuel pressure is within the recommended range and there are no visible leaks or irregular engine performance, it’s time to perform a test drive. This step lets you observe how your vehicle performs under different driving conditions, ensuring the new fuel pump functions correctly.
During the campaign, keep an eye and ear out for any unusual noises, hesitation, or stuttering from the engine, as these may indicate an issue with the fuel delivery. The priming process was likely successful if your vehicle usually operates without any issues. If you encounter any problems while driving, it’s best to consult with a professional mechanic.
Step 10. Regular Maintenance:
Remember that routine maintenance is crucial to keep the fuel pump and your vehicle running smoothly. Regularly check the fuel filter and replace it as necessary, as a clogged filter can strain the pump unnecessarily. Watch for changes in your vehicle’s performance, which may indicate a potential issue.
Maintaining a full gas tank can also help keep the fuel pump in good condition, as the gasoline can act as a coolant for the pump. If you notice any problems, seek help from a professional mechanic promptly. This final step concludes our guide on how to prime a fuel pump after replacing it. Safe driving!

Following these ten easy steps, you can safely prime your fuel pump after replacing it and ensure that your vehicle’s engine has a steady fuel supply.
5 Additional Tips and Tricks
Tip 1. Keep a Spare Fuse:
Always keep a spare fuel pump fuse in your vehicle. This can come in handy in the future if you need to replace the fuse during a road trip or in an emergency.
Tip 2. Use Fuel System Cleaner:
Regularly using a fuel system cleaner can help keep your fuel pump and lines clean and functioning correctly. This can prevent clogs and extend the life of your fuel pump.
Tip 3. Avoid Running on Empty:
Try to avoid running your vehicle on a near-empty tank of gas. This can cause the fuel pump to work harder and potentially overheat, leading to premature failure.
Tip 4. Consult with a Professional Mechanic:
If you encounter any issues during the priming process or while driving, it’s best to consult with a professional mechanic. They have the expertise and tools to diagnose and fix any problems correctly.
Tip 5. Replace the Fuel Pump as Recommended:
Lastly, replace your fuel pump according to the manufacturer’s recommended schedule or when it shows signs of wear and tear. This can prevent unexpected breakdowns and keep your vehicle running smoothly.
With these additional tips, you can effectively maintain your fuel pump and ensure that your vehicle’s engine has a steady fuel supply for optimal performance.
5 Things You Should Avoid
1. Ignoring Warning Signs:
Pay attention to any warning signs your vehicle may be giving you. If your car is stalling, making unusual noises, or the ‘Check Engine’ light comes on, seek professional assistance immediately. These could be indicators of a problem with the fuel pump.
2. Incorrect Installations:
Avoid installing the fuel pump yourself if you lack confidence in your skills. Fuel pumps are crucial components of the vehicle, and incorrect installations can lead to severe engine damage.
3. Delaying Fuel Filter Changes:
Never delay changing your fuel filter as per the manufacturer’s recommended schedule. A dirty fuel filter can strain the pump, reducing lifespan and efficiency.
4. Neglecting Regular Inspections:
Avoiding regular fuel system inspections, especially after a fuel pump replacement, is not advised. Regular checks can help identify potential issues early on, preventing costly repairs and breakdowns.
5. Using Low-Quality Replacement Parts:
Do not use low-quality fuel pumps or related components when replacing parts. Low-quality parts may not perform adequately, leading to premature failure and other engine problems. Always use features that meet or exceed OEM specifications.
By avoiding these common mistakes, you can prolong the life of your fuel pump and ensure that it continues to function correctly for years to come.
Conclusion
How to prime fuel pump after replacing it is a crucial skill for any car owner. It ensures the optimal functioning of your vehicle and saves you time and money in the long run. By following the steps outlined in this post, you can confidently take on this task and have your car running smoothly in no time. But don’t just stop at priming your fuel pump; take the time to maintain your vehicle regularly and address any issues as they arise.
Whether changing your oil, rotating your tires, or checking your fluids, staying on top of car maintenance will prolong the life of your vehicle and give you peace of mind on the road. Remember, it’s always a good idea to consult with a professional if you are unsure about any steps or encounter unexpected difficulties during the process.
So don’t hesitate to seek their assistance whenever needed.