
Embarking on the journey of owning a fifth wheel can lead to a wealth of adventure and freedom on the open road. However, ensuring a safe and proper setup starts with understanding how to install fifth wheel hitch on your rig.

This comprehensive guide offers step-by-step instructions, from selecting the right hitch to the final testing phase, designed to empower truck owners with the knowledge to confidently install their hitch. Whether you’re a seasoned traveler or a newcomer to towing, our breakdown will help smooth and secure your installation process, getting you ready for your next big haul.
Preparation and Planning
Preparation is key in learning how to install fifth wheel hitch. This phase encompasses evaluating the correct hitch type for your vehicle and understanding the regulations that apply.
A. Choosing the Right Fifth Wheel Hitch for Your Truck and Trailer
Selecting the appropriate fifth wheel hitch is crucial for the safety and reliability of your trailer towing experience. It involves understanding the weight ratings of your truck and trailer, also known as Gross Vehicle Weight Rating (GVWR) and Gross Trailer Weight Rating (GTWR), to ensure capacities align.
Additionally, you must consider the make and model of your truck to ensure bed compatibility, given that some hitches are specific to certain bed sizes or may require additional mounting kits. There are several styles of hitches, including fixed, sliding, and articulating options, each suited to different towing needs and bed lengths.
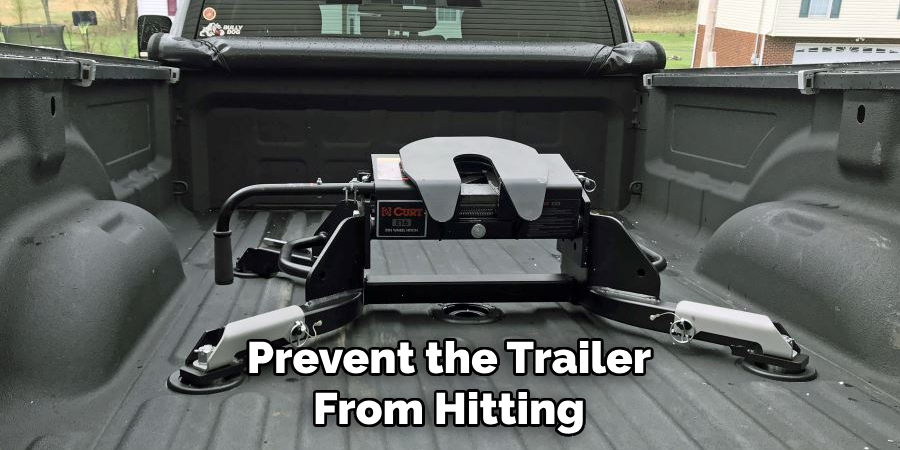
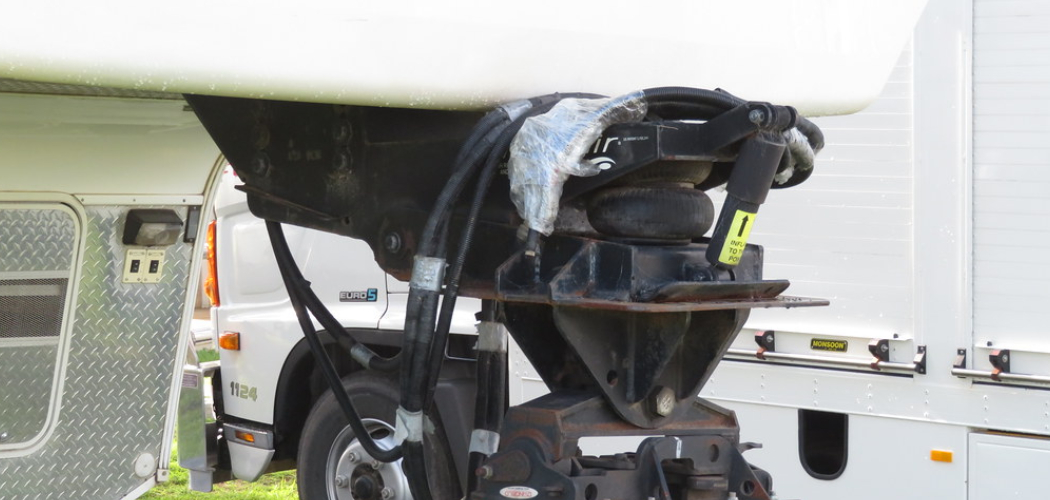
Short-bed trucks often require a sliding hitch to prevent the trailer from hitting the cab during sharp turns. Alongside personal preference, legal requirements and safety protocols must be adhered to, including weight limits and proper mounting techniques set forth by local and federal statutes. Ignorance of these rules could lead to accidents or legal penalties.
B. Gathering Necessary Tools and Equipment
Before commencing installation, assemble all the necessary tools to avoid any interruptions during the process. A complete set usually includes various sized wrenches, appropriate sockets, a reliable drill with assorted bits for making pilot holes, and a torque wrench to ensure bolts are tightened to the manufacturer’s specifications.
Don’t forget safety equipment like gloves and goggles to protect yourself during the procedure. Having all your tools and safety gear laid out will streamline the installation process and contribute to a successful installation.
Truck Bed Preparation
Proper preparation of the truck bed is a critical component to ensure that the hitch is installed safely and securely to handle the weight and movement of the trailer.
A. Removing the Spare Tire (if Necessary)
If your truck features a spare tire stored beneath the bed, it’s imperative to remove it to gain unhindered access to the area where the hitch will be mounted. This is typically achieved through the release mechanism provided by the vehicle’s manufacturer.
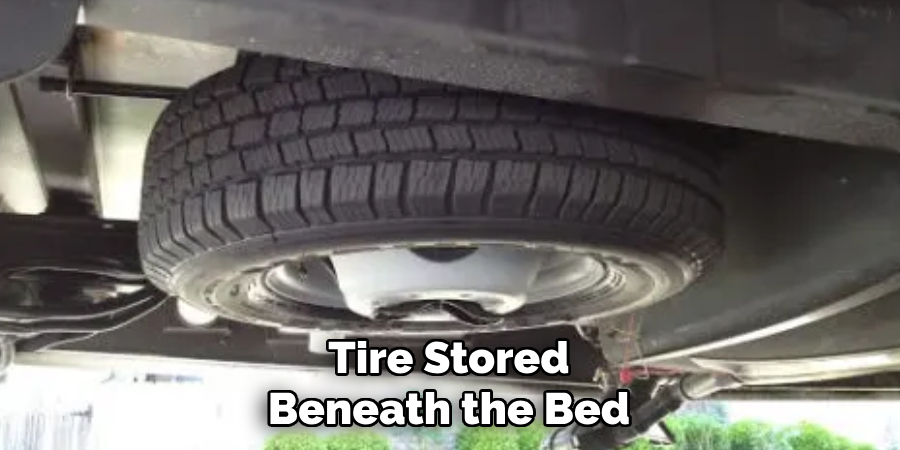
Ensure the vehicle is parked on level ground and that any tools required for the removal of the spare tire are on hand. Storing the tire in a secure location during the installation will provide you with more space to work and prevent any potential damage to the tire.
B. Locating the Truck Frame and Measuring for Drilling
Identifying the truck’s frame rails and crossmembers is the first step in preparing the bed for drilling. These are the primary support structures on which the hitch will rely once installed. Begin by consulting the manufacturer’s instructions or templates provided with your hitch to mark the drilling points accurately. Measure twice to avoid any drilling mistakes, which can be costly and time-consuming.
The exact location for drilling will depend on the size of your truck bed and the type of hitch being installed, but generally align with the pre-existing holes in the frame rails or a specified distance from certain reference points like the rear axle or the end of the bed.
C. Drilling Pilot Holes and Prepping the Bed
Once the locations for the holes have been marked, the next step is to drill pilot holes. Start by donning safety gear, including protective goggles and gloves, to safeguard against metal shavings and debris. Utilize sharp, properly sized drill bits for the pilot holes, which will guide your later drilling with larger bits.
These smaller preliminary holes help to prevent misalignment or shifting when drilling the final holes. Be sure to remove any burrs or sharp edges around these pilot holes with a metal file to provide a clean, smooth surface for installing the hitch components.
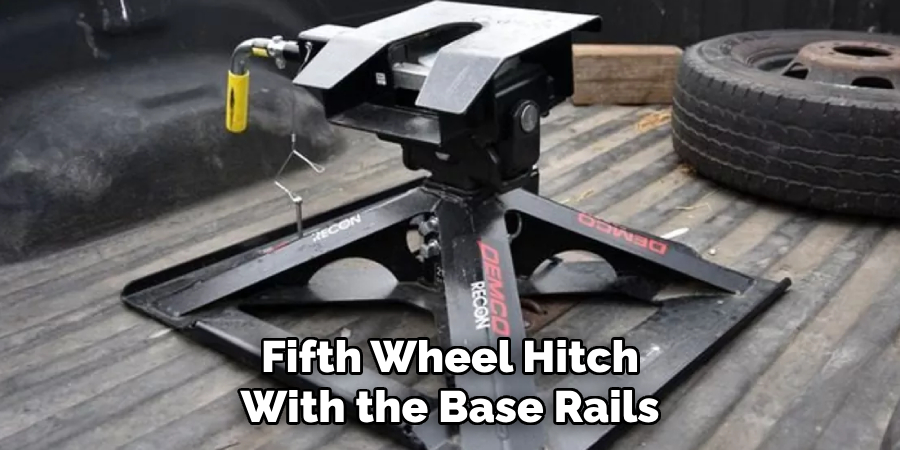
How to Install Fifth Wheel Hitch: Base Rail Installation
After preparation, the next critical step is installing the base rails — the foundation to which the fifth wheel hitch will attach, requiring precise alignment and secure attachment.
1. Positioning and Securing the Front Base Rail
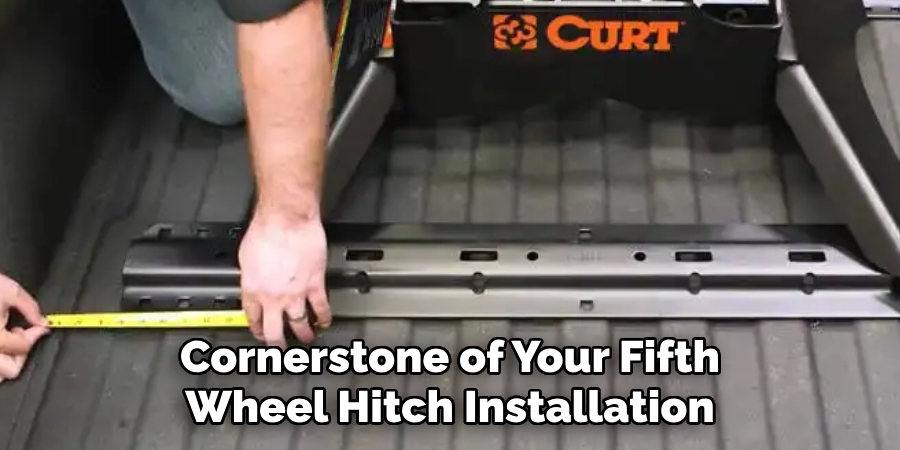
The front base rail is the cornerstone of your fifth wheel hitch installation. Begin by aligning the base rail with the pilot holes you’ve drilled in the truck bed, ensuring that the measurements correspond with the dimensions provided in the hitch’s installation guide.
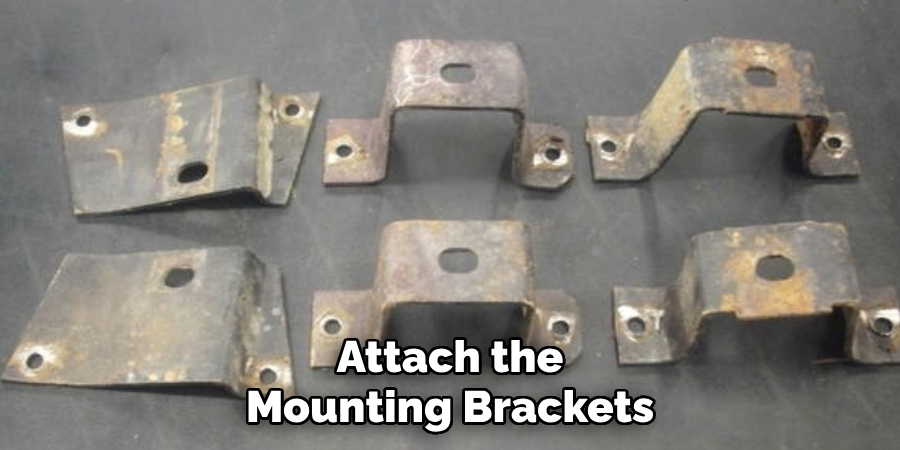
This step must be done with precision; any deviation can affect the fit and performance of the hitch. Once aligned, the mounting brackets, which anchor the rail to the truck frame, can be attached. Position the brackets according to the manufacturer’s instructions, as these can vary between hitch models.
With the brackets in place, insert the bolts through the base rail and brackets, fastening them by hand initially to allow for small adjustments. Once all bolts are in place and the rail is appropriately aligned, use a torque wrench to tighten the bolts to the specifications provided by the manufacturer.
This ensures a secure attachment while preventing the bolts from being over-tightened and potentially damaging the truck frame or base rail. Consistent torque across all bolts is necessary for a balanced and reliable installation.
2. Installing the Rear Base Rail
The process for installing the rear base rail is much like that of the front rail but requires equal attention to detail. Again, ensure the rear base rail and the front base rail align with your pilot holes.
This step will likely require you to measure the distance between the front and rear rails carefully to match the requirements of your specific hitch type. Accurate spacing is vital for the correct positioning of the hitch and can impact the distribution of the trailer’s weight.
Attach the mounting brackets to the truck’s frame, aligning them with the rear base rail, just as you did with the front. Once the brackets are aligned, start threading the bolts by hand to secure the base rail. After all bolts are in position, use the torque wrench to tighten them to the manufacturer’s recommended torque settings.
This rear rail must be as secure as the front one, as it will bear significant weight and stress while towing. Double-check the torque of all bolts once more to ensure the installation is as stable and secure as possible before moving on to the next steps.
With both base rails installed, your truck bed is now equipped with the structural foundation needed to support your fifth wheel hitch, bringing you closer to enjoying the freedom and capabilities of your fifth wheel setup and ensuring a responsible and safe towing adventure.
How to Install Fifth Wheel Hitch: Fifth Wheel Head Installation
With the base rails properly installed, the next critical phase involves attaching the fifth wheel head. This component is the pivot point for your trailer and must be secured precisely to ensure safe towing.
1. Attaching the Head to the Base Rails
Aligning the head of the fifth wheel hitch with the base rails is a key step in the installation process. Carefully place the head onto the base rails so that the mounting holes line up.
It’s paramount to utilize the hardware supplied by your hitch manufacturer, as these are specifically designed to withstand the rigors of towing. Often, these will include bolts, washers, and locking pins or clips.
Once the head is aligned, insert the hardware through the corresponding holes and hand-tighten to secure its position. This allows for any necessary adjustments before final installation. Utilize a torque wrench, and adhere strictly to the hitch manufacturer’s torque specifications when tightening the bolts.
Over- or under-tightening can severely affect the performance and safety of the hitch. Go through the tightening sequence recommended in the installation manual, usually in a cross pattern, to evenly distribute pressure and maintain proper alignment.
2. Connecting Electrical Components (if applicable)
If your fifth wheel hitch includes electronic components, it’s essential to integrate the wiring for the brake and reverse light systems of your trailer. Start this process by locating your truck’s wiring harness, usually found near the vehicle’s rear. You’ll often find a plug specifically for towing purposes that you can link to your trailer’s wiring.
Using the appropriate connectors, which are often provided with the hitch or can be purchased separately, connect the trailer’s electrical systems to your truck’s harness. Make sure to follow any diagrams or instructions that come with the hitch or connectors to ensure proper integration. After making the connections, secure the wires to prevent them from dragging or becoming tangled.
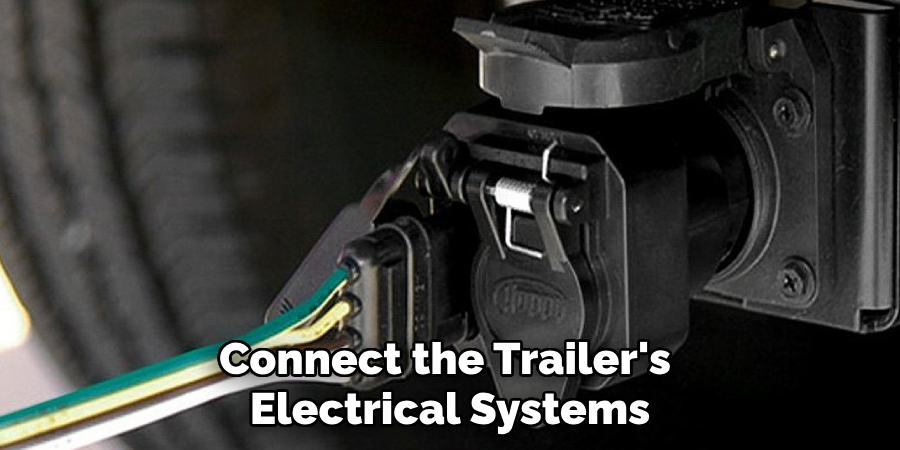
These electrical components are crucial for signaling and safety on the road. Testing the connections is necessary – you’ll want to check brake lights, turn signals, and the reverse lighting system to confirm they synchronize properly with the truck’s inputs. Any issues with wiring can lead to dangerous situations on the road and must be corrected before towing.
Your installation is nearly complete, with the head firmly in place and the electrical components connected and tested. Your rig is nearly ready to hit the open road, providing the assurance that your fifth wheel setup is not only secure but also fully compliant with all the necessary safety standards for a serene and secure journey.
Final Touches and Testing
Before embarking on a journey with your fifth wheel, ensuring everything is in top-notch condition is critical for safety and performance. This final phase involves meticulous checks and test runs.
A. Double-checking All Connections and Bolts for Tightness
As the proverbial saying goes, ‘an ounce of prevention is worth a pound of cure.’ Prior to coupling your trailer, revisit each installed component. With a torque wrench in hand, methodically go through each bolt and connection.
This is not merely a cursory glance but a crucial step to reaffirm the structural integrity of your hitch assembly. Any loosened bolt can translate to compromised safety during travel. The goal is to eliminate any potential for movement within the hitch components that could amplify under the stress of the road.
B. Inspecting Welds and Ensuring Proper Clearance
The sturdiness of your fifth wheel hitch depends not only on bolts and brackets but also on the integrity of welds that hold these parts in tandem. Inspect each weld critically for signs of wear, cracking, or imperfections that may have been overlooked.
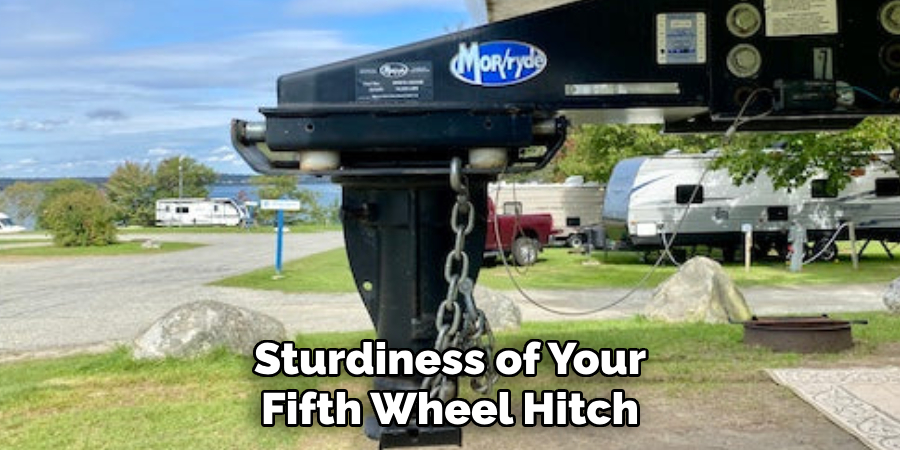
Additionally, ensure that there is sufficient clearance between the fifth wheel hitch and the bed of your truck, as well as around the wheel wells and tailgate area. Adequate space is vital to prevent contact during maneuvers, which could damage your truck or interfere with the freedom of movement needed for the trailer.
C. Testing the Hitch with a Trailer
With an attention to detail befitting a space shuttle pre-launch check, the actual coupling of the trailer is your mission’s ‘go/no-go’ moment. Gently back the truck until the fifth wheel head engages with the kingpin of the trailer. A satisfying click and the visual confirmation of a locked position signal a successful initial engagement. However, this is just the starting line.
Now begins the systematic testing of the entire setup. Start with static checks: verify that all lights, including brake lights and turn signals, are functioning in unison with the truck’s systems. Following this, conduct a slow roll test in an open area, free from traffic and obstacles.
Observe the connection’s behavior, ensuring no excessive play or noise emanating from the hitch point. Incrementally increase the speed and incorporate gentle turns to simulate real-driving conditions.
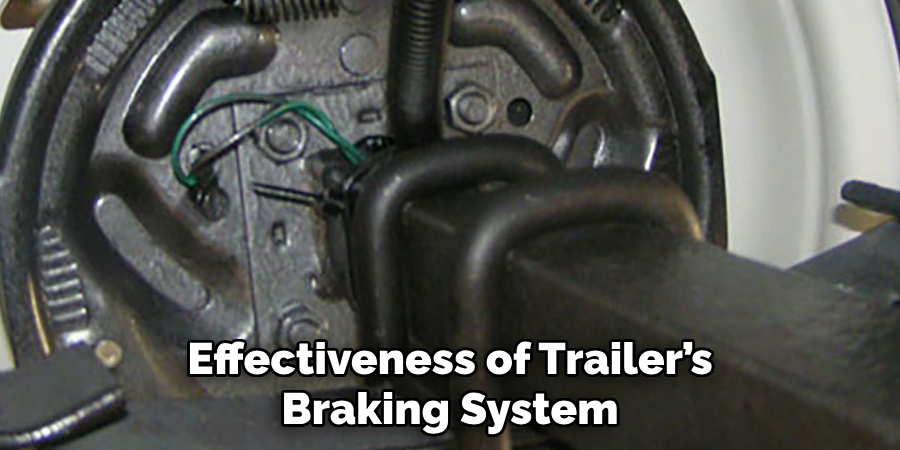
Deploy your brake system during this test. The objective here is to establish the responsiveness and effectiveness of the trailer’s braking system in concert with the truck’s. This connection between mechanisms is crucial for your on-road safety and that of the vehicles around you.
Only when every light illuminates as intended, and every turn and stop retains the smooth synergy of a well-rehearsed duet can you consider your installation a success, priming you for the confident exploration that lies ahead with your fifth wheel.
That’s it! You’ve now learned how to install fifth wheel hitch, the steps involved, and the precautions necessary to guarantee a safe ride. Remember that even with proper installation and testing, it’s always advisable to double-check your hitch setup before each trip.
With practice comes perfection – make an effort to sharpen your installation skills through regular maintenance checks or by following useful tips from experienced RVers on online forums or at campgrounds.
Maintenance and Safety Tips
A. Regular Inspection and Maintenance of the Hitch
Regular inspections of your fifth wheel hitch are paramount to ensure a safe and reliable towing experience. Every journey should begin with checking for any loose bolts, signs of wear and tear, and the potential onset of corrosion.
Over time, environmental elements and the rigorous demands of towing can compromise the hitch. Preventative maintenance, including periodic retightening of hardware, lubrication, and cleaning to prevent rust, will prolong the life and functionality of your towing system.
B. Proper Weight Distribution and Towing Practices
Understanding and adhering to weight capacities is critical to safe fifth wheel towing. Never exceed the Gross Trailer Weight (GTW) or the Gross Vehicle Weight Rating (GVWR), as doing so can strain your hitch and vehicle, compromising handling and braking.
Implementing the correct loading guidelines will ensure proper weight distribution; too much weight on either the hitch or the tail can lead to trailer sway and reduced maneuverability.
Safe driving habits are also vital; this includes increasing following distances, anticipating stops for smooth braking, and practicing wide turns. When hitched, the entire rig must be seen as a singular unit, requiring an adjusted driving approach for the safety of all road users.
C. Trailer Care and Tire Maintenance
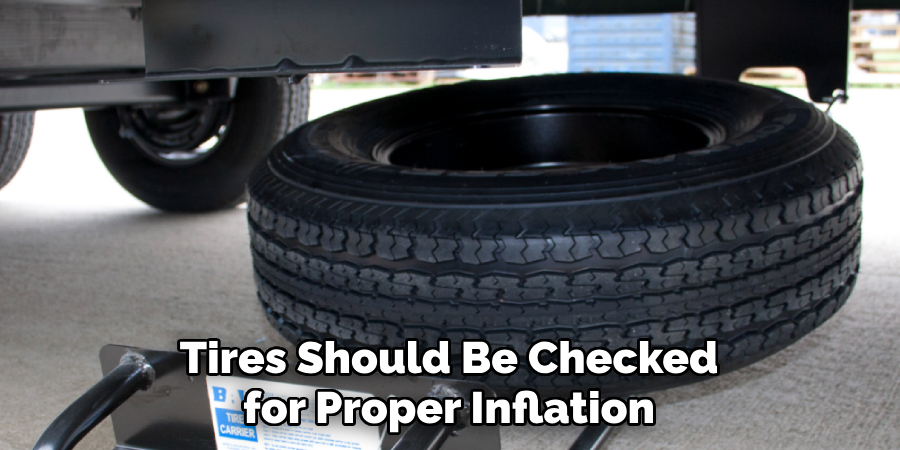
Finally, the care of your trailer and especially its tires, should not be neglected. Tires should be checked for proper inflation before each trip, as incorrect tire pressure can lead to poor handling, increased wear, or even catastrophic blowouts.
Regular inspections for tire tread depth and overall condition are necessary to preempt potentially hazardous situations. Maintaining your trailer tires in optimal condition is essential for reliability and safety during your travels.
Troubleshooting and Additional Resources
Troubleshooting is an integral step in ensuring your fifth wheel towing experience is safe and efficient. Below are common installation challenges and ways to address them.
A. Addressing Common Installation Issues
Installing a fifth wheel hitch can present challenges such as misaligned components, loose bolts, and electrical problems. Misalignment may occur if the base rails are not parallel or the hitch is not centered.
This can cause difficulty in coupling and can place undue stress on the towing vehicle and trailer. Ensure all measurements are precise during installation and double-check before finalizing any mounts.
For loose bolts, frequent checks are necessary, as vibration from the road can loosen connections over time. Re-tighten bolts according to the manufacturer’s specified torque settings. Failing to do so could result in a hitch failure.
Electrical problems often manifest in non-functional lights or brakes. A multimeter can help trace faults to issues with the wiring, fuses, or connectors. Ensure all electrical connections are clean, secure, and free from corrosion. Dielectric grease can protect against moisture and future electrical issues.
B. Seeking Professional Help When Needed
Complex installations or troubleshooting challenges may require professional assistance. A qualified technician can provide peace of mind by ensuring your hitch is installed correctly, especially if your rig setup has unique specifications or if you encounter persistent issues.
Electrical faults, especially those intermittent in nature, can be difficult to diagnose and resolve. Professional diagnostic equipment and expertise may be needed if standard troubleshooting does not rectify lighting or braking issues.
Furthermore, if you’re experiencing repeated alignment or attachment issues, consult a professional. They can identify less obvious problems, such as frame warping or additional supports needed to withstand the weight and pressures of towing.
Never hesitate to seek help when safety is at stake. Professional installers can also offer valuable advice and insights into best towing practices and proper maintenance and can recommend products or modifications to enhance safety and performance.
They remain an invaluable resource, and their guidance can steer you toward countless miles of satisfying and secure travel with your fifth wheel.
Conclusion
In the journey of towing with a fifth wheel, the adage ‘an ounce of prevention is worth a pound of cure’ rings especially true. The process, from the initial “how to install fifth wheel hitch” to the regular drumbeat of maintenance and safety checks, requires a deliberate and informed approach.
This journey begins with a meticulous installation, ensuring every bolt, bracket, and electrical connection is in its rightful place and fulfilling its purpose without fault.
The key steps—selecting the right hitch, installing the base rails and hitch assembly, and wiring up the electrical components—are but the foundation for a larger edifice of responsible towing practices. Let each step lay the groundwork for a future of secure, reliable travels with your fifth wheel.
Regular inspections that root out the beginnings of wear, careful attention to weight distribution and towing practices, and an unwavering commitment to trailer care, particularly tire maintenance, establish a rhythm of diligence that will safeguard you on the road.
Moreover, it’s wise to recognize when certain circumstances are beyond the ken of personal skills and to seek the expert assistance of professionals. They serve as guardians and guides in the domain of towing, where their expertise can remedy complex challenges and enlighten you towards betterment in your towing endeavors.
By embracing thoroughness in installation and steadfastness in maintenance, the fifth wheel enthusiast ensures their own safety and that of their fellow travelers. Your fifth wheel setup’s freedom and capabilities are not without responsibility; with every mile trekked, remember that the rig behind you is a testament to the care you’ve invested.
So tow with confidence, harnessing the full potential of your investment, and let the open road be a canvas to the art of your travels—carefully plotted, securely hitched, and joyously embarked upon.