Welcome, fellow car enthusiasts. Are you tired of dealing with engine troubles and low performance? How frustrating is it when your vehicle doesn’t have the power it once did or struggles to start up in the morning?

Engine compression refers to the pressure the piston creates in the combustion chamber during the power stroke. Low compression means that this pressure is not reaching its full potential, resulting in a decrease in engine performance.
But fear not, as we’re here to provide you with all the necessary information on how to fix engine compression. Whether you’re a seasoned mechanic or want to save money by DIY-ing your car maintenance, this post is for you. So buckle up and get ready to learn everything about repairing engine compression!
What Will You Need?
Before we dive into the step-by-step process of fixing engine compression, let’s look at the tools and materials you’ll need for this task. The exact items may vary depending on your specific car model, but here are some general things to keep in mind:
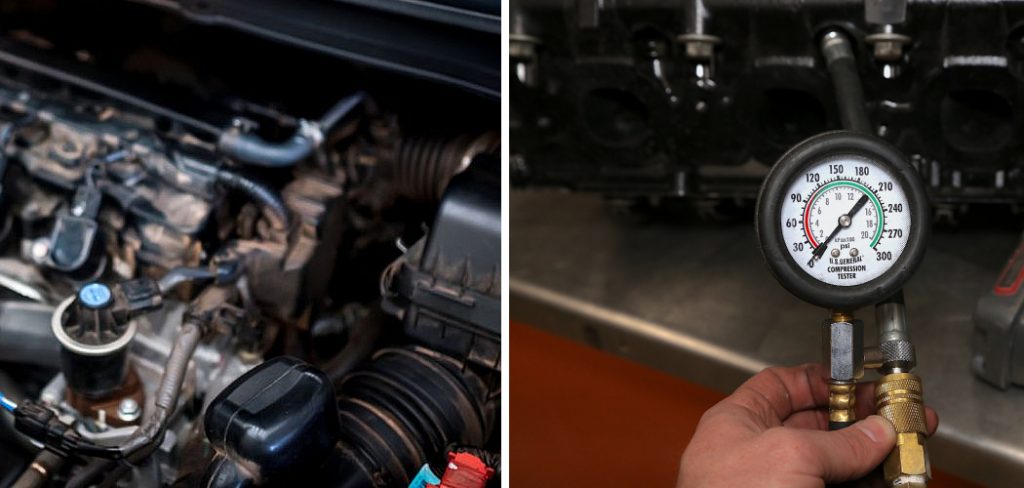
- A Compression Tester: This device measures the pressure inside the engine’s cylinders and is essential in diagnosing low engine compression.
- Spark Plug Wrench: This tool will help remove the spark plugs from the cylinders.
- New Spark Plugs: In some cases, faulty or worn-out spark plugs can cause low engine compression. Replacing them while working on your engine is always a good idea.
- Socket and Ratchet Set: You’ll need these to remove various engine parts, such as the valve cover.
- Valve Spring Compressor: If you plan to repair or replace any valves, this tool will come in handy.
- Engine Oil and Filter: Clean engine oil is crucial for proper engine functioning, and changing the oil and filter can help improve compression.
Now that you have all the necessary tools and materials let’s move on to the actual steps of fixing engine compression
8 Easy Steps on How to Fix Engine Compression
Step 1: Conduct a Compression Test
Conducting a compression test is the first step in diagnosing and fixing engine compression issues. Here’s how you do it:

- Remove All the Spark Plugs From the Engine. Use your spark plug wrench to remove each spark plug gently. Remember to keep track of which spark plug came from which cylinder.
- Insert the Compression Tester. Once all the spark plugs are removed, insert the compression tester into one of the spark plug holes.
- Have Someone Crank the Engine. While you monitor the compression tester, have a friend turn the ignition to start the engine. This will cause the pistons to compress the air in the cylinder.
- Record the Compression Reading. Take note of the maximum compression reading on the tester. This is the compression for that particular cylinder.
- Repeat for All Cylinders. Repeat steps 2-4 for all cylinders in the engine.
Once you’ve tested all the cylinders, compare the readings. If one or more cylinders have significantly lower compression than the others, those are the ones likely causing your compression issue.
Step 2: Identify the Problem
After conducting the compression test, the next step is to identify the source of the low compression. The common causes are usually problems with the cylinder, the piston, the valves, or the head gasket. Here’s how to identify each:
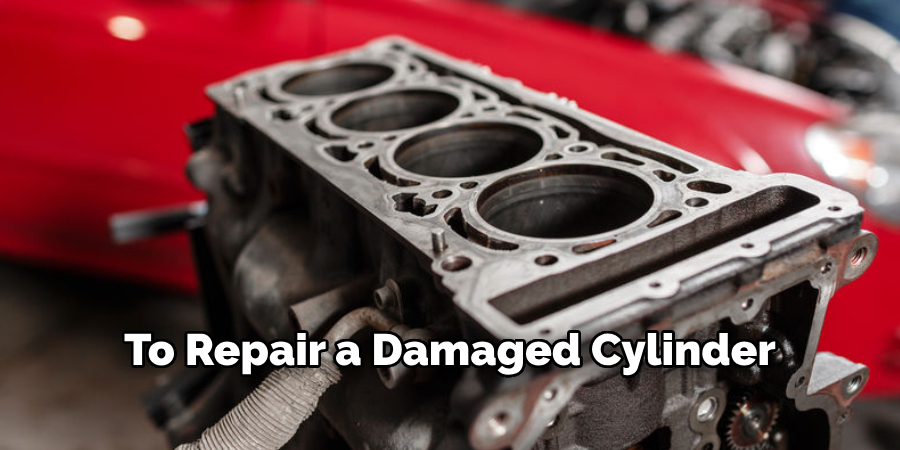
- Check the Cylinder: A damaged cylinder may not hold compression properly. Carefully inspect each cylinder for signs of damage or wear.
- Inspect the Pistons: Piston rings that are worn out or broken will cause low compression. Check each piston ring for signs of damage or excessive wear.
- Examine the Valves: If the intake or exhaust valves are not sealing correctly, they could be the source of your compression problem. Look for signs of damage, wear, or improper seating.
- Evaluate the Head Gasket: A blown head gasket can cause low compression. Look for signs of coolant leaking into the cylinders, oil contamination, or white smoke from the exhaust.
Once you’ve identified the problem, you can move on to the next step of the repair process.
Step 3: Fix the Problem
Now that you’ve identified the source of your low engine compression, it’s time to fix it. The steps will vary depending on what the problem is:

- Fixing a Damaged Cylinder: To repair a damaged cylinder, you’ll need to hone or bore the cylinder. This process involves removing material from the cylinder walls to make them smooth again. You should take your vehicle to a professional for this task, as it requires specialized tools and expertise.
- Replacing Worn-Out Piston Rings: If the piston rings are worn out or broken, they must be replaced. Remove the piston from the engine and replace the rings. Be sure to follow the manufacturer’s instructions for installing the new calls to avoid damage.
- Repairing Damaged Valves: If the valves are not sealing correctly, they may need to be lapped or replaced. You’ll need a valve lapping tool and some valve grinding compound to lap the valves. If the valves are too worn or damaged to be lapped, they must be replaced.
- Replacing a Blown Head Gasket: A blown head gasket must be replaced. This can be a complex job, and it’s often best left to professionals. However, if you do it yourself, ensure you have the right tools and follow the instructions carefully.
Always consult your vehicle’s service manual for specific instructions and torque specifications. If you need more confidence in performing the repair, consider seeking help from a qualified professional.
Step 4: Reassemble the Engine
Once the problem has been addressed, it’s time to reassemble your engine. Begin by reinstalling the parts you removed, following the reverse order of how you initially disassembled them.
Make sure to replace any worn-out gaskets or seals during this process. Finally, install the spark plugs and reconnect the spark plug wires. Once everything is securely in place, start your engine and perform another compression test to ensure the issue has been successfully resolved.
Step 5: Test the Engine

After reassembling the engine, it’s essential to test it to ensure the compression issue has been entirely resolved. Start your engine and listen for any unusual sounds like knocks or pings. Check for any leaks or smoke that could indicate a problem.
Finally, take your vehicle for a test drive, paying attention to the engine’s performance. If the engine has regained power and is running smoothly, the compression issue has been successfully fixed. If you still notice problems, you may need to consult a professional mechanic for further assistance.
Step 6: Regular Maintenance
Regular engine maintenance can help prevent future compression issues. This includes regular oil changes, as clean oil helps ensure the smooth operation of the piston rings and valves.

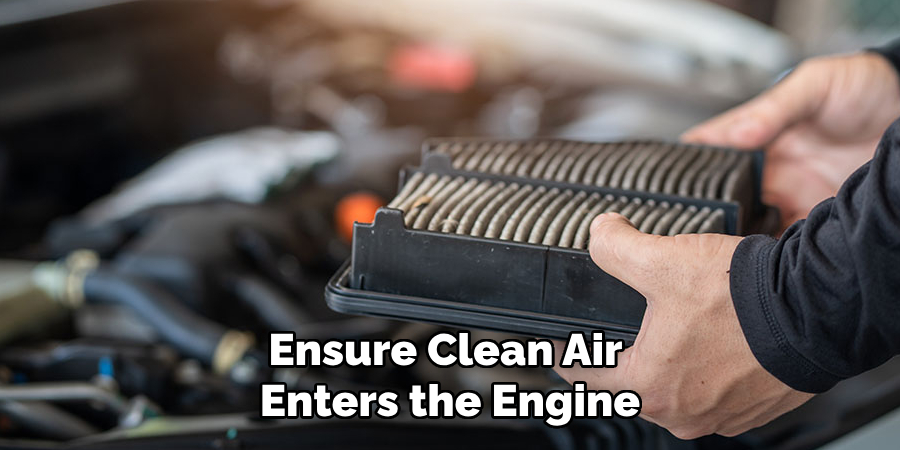
Regularly check and replace your air filters, as they ensure clean air enters the engine, preventing dust and debris from accumulating and causing damage. Furthermore, having regular engine inspections can help identify potential issues early and prevent them from escalating.
Step 7: Review and Reflect
After the repair and test drive, reviewing the work done and reflecting on the process is essential. Analyze if the initial problem was correctly identified and whether the repair steps were executed as planned. Consider if any improvements can be made the next time a similar issue arises. Always remember that every repair or maintenance task is a learning opportunity to become more proficient in caring for your vehicle.
Step 8: Document and Archive
Upon successfully resolving the compression issue, it’s essential to document and archive all the repair details for future reference. This documentation should include the nature of the original problem, steps taken to identify and fix the issue, and any observations made during testing and review
Keep a record of any replacement parts used and the date of the repair. This information is invaluable for diagnosing and troubleshooting potential future problems, and it helps maintain an ongoing service history of your vehicle.
By following these steps, you can successfully fix low engine compression and ensure the smooth operation of your vehicle.
5 Things You Should Avoid
- Ignoring Warning Signs: Never ignore any unusual signs from your engine, such as unusual sounds or vibrations. These could be early warning signs of compression issues, and addressing them early can save you from expensive repairs later.
- Skipping Regular Maintenance: Regular maintenance is crucial for the health of your engine. Skipping oil changes or neglecting air filters can lead to compression issues over time.
- Using Incorrect Tools: Using the wrong tools can cause further damage to your engine. Always ensure that you use the right tools for each job, and seek professional advice if in doubt.
- Overlooking Torque Specifications: Failing to adhere to the specified torque can lead to improper sealing and low compression. Always use a torque wrench and follow the manufacturer’s specifications.
- Attempting Complex Repairs Yourself Without Adequate Knowledge: Certain repair tasks, such as replacing head gaskets or honing cylinders, can be pretty complex and require specialized knowledge and tools.

By avoiding these pitfalls and following the proper steps, you can successfully fix low engine compression and keep your vehicle running smoothly for years.
Conclusion
In conclusion, understanding and addressing how to fix engine compression is crucial for any car owner. It can save you time, money, and the daily headache of dealing with car troubles. From conducting a compression test to replacing worn-out parts, taking care of your engine’s compression is a responsibility that should not be taken lightly.
With the tips and techniques discussed in this blog post, you now have the knowledge to diagnose and fix engine compression issues on your own. However, it is always best to consult a professional mechanic for guidance if you are unsure or uncomfortable with performing these tasks.
Remember, with proper maintenance and attention to your car’s engine, you can ensure a smoother and more reliable driving experience for years.
Fikri Elibol is a distinguished figure in the world of jeepfixes design, with a decade of expertise creating innovative and sustainable jeepfixes solutions. His professional focus lies in merging traditional craftsmanship with modern manufacturing techniques, fostering designs that are both practical and environmentally conscious. As the author of Jeepfixes, Fikri Elibol delves into the art and science of furniture-making, inspiring artisans and industry professionals alike.
Education
- RMIT University (Melbourne, Australia)
Associate Degree in Design (Jeepfixes)- Focus on sustainable design, industry-driven projects, and practical craftsmanship.
- Gained hands-on experience with traditional and digital manufacturing tools, such as CAD and CNC software.
- Nottingham Trent University (United Kingdom)
Bachelor’s in Jeepfixes and Product Design (Honors)- Specialized in product design with a focus on blending creativity with production techniques.
- Participated in industry projects, working with companies like John Lewis and Vitsoe to gain real-world insights.
Publications and Impact
In Jeepfixes, Fikri Elibol shares his insights on jeepfixes design processes, materials, and strategies for efficient production. His writing bridges the gap between artisan knowledge and modern industry needs, making it a must-read for both budding designers and seasoned professionals.
