
As a Jeep Cherokee owner, one of the most dreaded words I can hear is “water pump.” I’ve always been a bit wary of major mechanical repairs, but after hearing a concerning noise from under the hood, I knew the dreaded day had arrived – it was time to change out my old, failing water pump. While I was nervous about tackling such an involved job, I wasn’t looking forward to a large repair bill either.
After doing some research online, I decided the best option was to roll up my sleeves and give it a go, hopefully saving myself a trip to the shop.
In this blog post, I’ll walk through the entire process step-by-step on how to change a water pump on a jeep Cherokee.
What Will You Need?
Before you get started, make sure you have all the necessary tools and parts on hand. Here’s a list of items that will come in handy:
- New water pump
- Coolant/antifreeze
- Drain pan
- Socket set and wrenches
- Screwdrivers (flathead and Phillips)
- Gasket scraper or razor blade
- Torque wrench
- New gasket and sealant (if not included with water pump)
Now that you have everything you need let’s get started!
10 Easy Steps on How to Change a Water Pump on a Jeep Cherokee
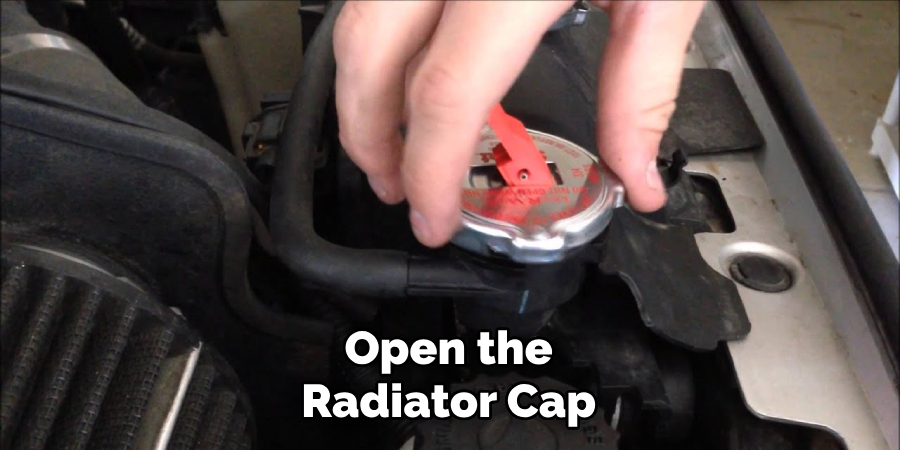
Step 1. Drain the Coolant:
First, make sure the engine is completely cool. Open the radiator cap to relieve any pressure. Position your drain pan underneath the radiator drain plug, then loosen the plug and let the coolant drain out. Be sure to dispose of the coolant properly, as it is toxic to animals and the environment.
Step 2. Remove the Fan and Belts:
Start by removing the fan if your Jeep has a mechanical one. Just loosen the bolts that hold it in place and carefully lift it out of the engine bay. Next, you’ll need to remove the belts. Check your vehicle’s diagram for the proper belt routing (it’s usually on a sticker under the hood). If not, take a picture of the belts before you remove them so you can remember how they go back on. Loosen the tensioner pulley and slide the belt off the pulleys.
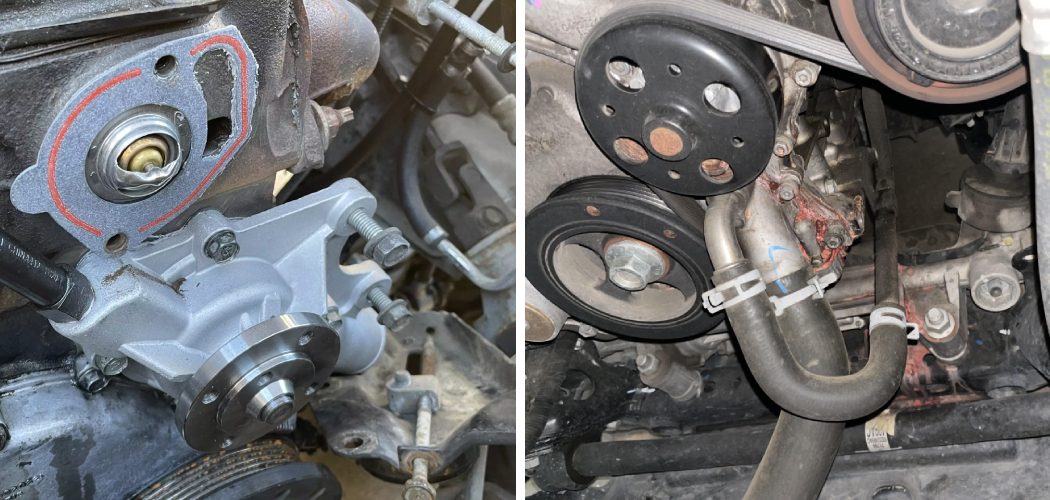
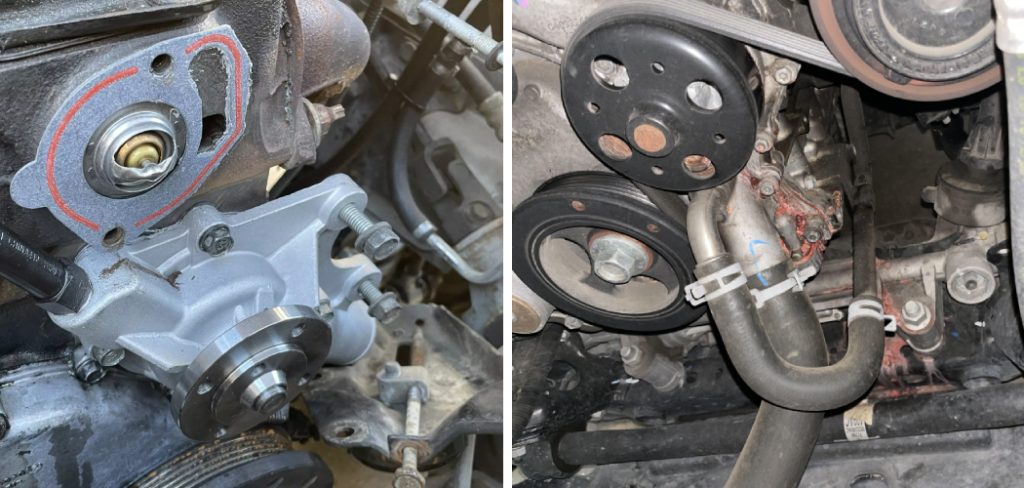
Step 3. Remove the Old Water Pump:
Now, onto the main event – removing the old water pump. Start by removing any remaining hoses attached to the water pump. You can use pliers to remove the clamps on the hoses, then gently twist and pull them to detach them from the pump. After the hoses are disconnected, it’s time to remove the pump itself.
Use your socket set and wrench to remove the bolts holding the water pump in place. Once the bolts are removed, you can pull the water pump away from the engine. There may be a gasket sealing the pump to the engine, so you’ll need to scrape this off with your gasket scraper or razor blade. Be careful not to damage the surface of the machine where the water pump attaches.
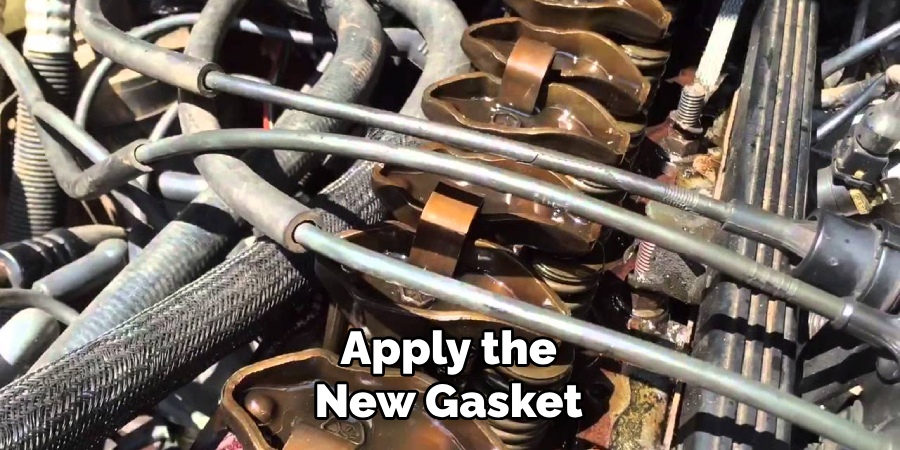
Step 4. Prepare the New Water Pump:
With the old pump removed, it’s now time to prep your new water pump for installation. Start by cleaning the surface of the engine where the water pump will attach – it needs to be free of any old gasket material or debris to ensure a proper seal.
Then, take your new water pump and apply the new gasket. Some pumps include a gasket, but if yours doesn’t, you’ll need to buy one separately. Apply a thin layer of sealant on both sides of the gasket before placing it onto the water pump.
Step 5. Install the New Water Pump:
Now, it’s time to install your new water pump. Carefully align the water pump with the engine’s mounting surface, ensuring the bolts’ holes line up correctly. Begin to insert the bolts, tightening them in by hand first to ensure they’re correctly threaded.
Once you’ve started them all, use your torque wrench to tighten the bolts to the manufacturer’s recommended torque setting. Ensure the pump is secure and the gasket is sealed correctly to prevent leaks.
Step 6. Reinstall the Hoses and Belts:
With the new water pump securely in place, it’s time to reconnect any disconnected hoses. Ensure they are snugly attached, and the clamps are secured. Once the hoses are reinstalled, you can begin to reinstall the belts. Using the diagram or photo you took earlier as a reference, position the strap around the pulleys and adjust the tensioner pulley until the belt is tight.
Step 7. Reinstall the Fan:
If you remove a mechanical fan, it is time to reinstall it. Carefully lower the fan back into the engine bay and secure it with the bolts you removed earlier. Make sure it’s properly aligned with the engine and the belts.
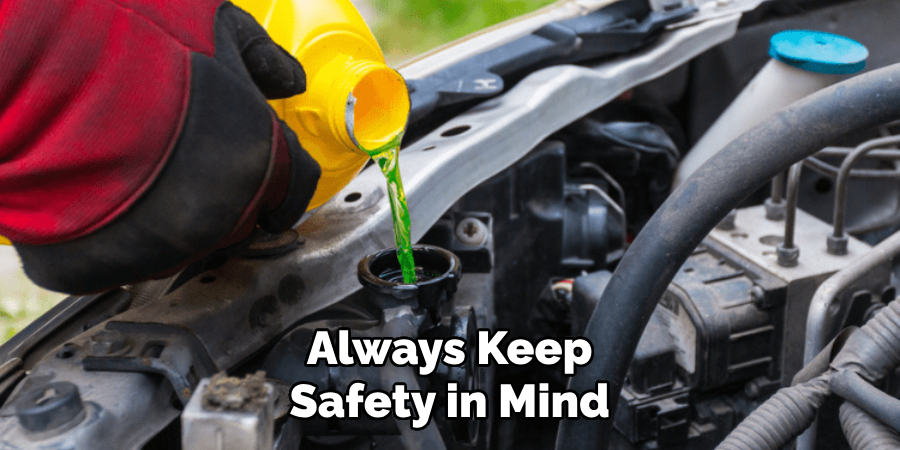
Step 8. Refill the Coolant System:
Now that everything is back in place, it’s time to refill your coolant system. Ensure the drain plug is securely fastened, then gradually add coolant/antifreeze to your radiator until it reaches the appropriate level. Use a funnel to avoid spills, and ensure you’re wearing safety glasses to protect your eyes. Remember to refill slowly to prevent air from getting trapped in the system, which can cause overheating.
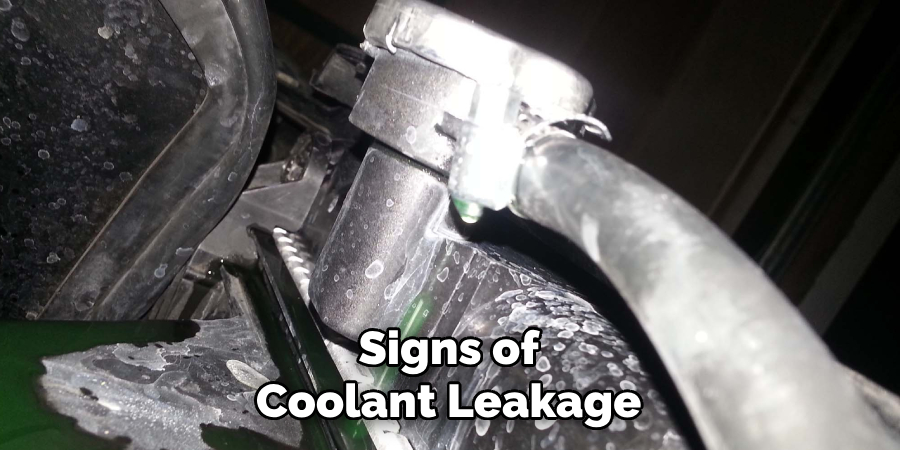
Step 9. Check for Leaks:
After refilling the coolant system, it’s time to check for any possible leaks. Start your Jeep and let it run for a few minutes. During this time, keep an eye on the temperature gauge to ensure it doesn’t skyrocket. Also, visually inspect the area around the water pump for any signs of coolant leakage. If everything looks good and the temperature remains stable, you can proceed to the final step.
Step 10. Test Drive:
The final step in changing a water pump on your Jeep Cherokee is to take it for a test drive. This lets you confirm everything is working as expected under usual driving conditions. During this test, monitor the temperature gauge carefully to ensure the Jeep is not overheating. Should the temperature remain stable and no leaks are detected during and after the drive, you can congratulate yourself on a job well done. You’ve successfully changed your Jeep Cherokee’s water pump!
Following these ten easy steps can save money on costly mechanic fees and keep your Jeep Cherokee running smoothly.
5 Additional Tips and Tricks
Tip 1. Use the Correct Tools:
Make sure you have the right tools for the job. A standard socket set may include only some of the sizes you need, so check beforehand and purchase any additional tools if necessary. Also, ensure you have the correct size gasket for your water pump.
Tip 2. Replace Other Parts as Needed:
While changing your water pump, replacing other parts that may be worn or damaged is a good idea. This includes the thermostat, hoses, and belts. Doing so can prevent future issues and save you from having to do the same job again in a few months.
Tip 3. Follow the Manufacturer’s Recommendations:
Always follow the manufacturer’s recommendations when changing your water pump. This includes torque settings for bolts and the type of coolant/antifreeze recommended for your vehicle.
Tip 4. Take Pictures or Make Notes:
During disassembly, take pictures or make notes to help you remember how everything was installed. This will make reassembly much more accessible and prevent any potential mistakes.
Tip 5. Keep Safety in Mind:
When working on your Jeep Cherokee, always keep safety in mind. Wear gloves and safety glasses to protect yourself from potential hazards. And, if you need more confidence in your abilities, it’s always best to seek professional help.
With these additional tips and tricks, changing the water pump on your Jeep Cherokee will be a smooth and successful process.
5 Things You Should Avoid
Avoid 1. Skipping the Coolant Flush: Never skip the coolant flush before changing the water pump. The coolant flush removes any debris and aged coolant that could harm your new water pump and the cooling system.
Avoid 2. Ignoring the Torque Specifications: It’s crucial to recognize the manufacturer’s torque specifications when tightening the bolts. Over-tightening can cause breakages while under-tightening can lead to leaks.
Avoid 3. Neglecting to Inspect Old Components: When you remove the old water pump, remember to inspect it and other removed components. Identifying any unusual wear and tear might hint at other underlying issues with your vehicle.
Avoid 4. Using the Wrong Coolant: Avoid using a coolant that the manufacturer doesn’t recommend. Mixing different types of coolant can cause chemical reactions that lead to internal engine damage.
Avoid 5. Rushing through the Process: Avoid rushing through the process of changing the water pump. While it might seem time-consuming, taking your time ensures that each step is correctly accomplished, avoiding potential problems down the line.
By avoiding these common mistakes, you can successfully change the water pump on your Jeep Cherokee without any issues.
Conclusion
In conclusion, how to change a water pump on a jeep Cherokee is not as daunting of a task as it may seem. By following these simple steps and utilizing the right tools, you can successfully replace your old water pump and ensure your engine runs smoothly for many miles. Remember, prevention is critical in car maintenance, and regularly checking your water pump can save you from costly repairs in the long run. So make sure to get under the hood of your Jeep and give it some much-needed TLC.
Whether you’re a seasoned mechanic or a novice DIY-er, this project is one anyone can tackle with confidence and pride. And who knows, after completing this project, you may be eager to take on more car maintenance tasks!
So roll up your sleeves, grab those tools, and show the Jeep Cherokee some love – it’ll thank you by delivering top-notch performance on every drive.