

Introducing a critical tool for engine maintenance—the piston stop tool. This simple yet effective device is essential for anyone needing to perform repairs or adjustments on an engine, specifically when setting the timing or changing camshafts and clutches. The piston stop tool is designed to temporarily halt the piston’s motion, allowing you to find the top dead center (TDC) position accurately and safely.
Whether you’re a seasoned mechanic or a DIY enthusiast, understanding how to use a piston stop tool properly can save time and prevent potential damage to your engine.
In the following guide on how to use a piston stop tool, we’ll provide a step-by-step guide on utilizing this invaluable tool, ensuring you can confidently perform maintenance tasks that require precise piston positioning.
What are the Benefits of Using a Piston Stop Tool?
Before we dive into the steps on how to use a piston stop tool, let’s first discuss why this tool is essential for engine maintenance. Here are some benefits of using a piston stop tool:
- Accurate TDC Positioning: The piston stop allows you to find the top-dead-center position precisely and accurately, which is crucial for tasks such as setting the timing or changing camshafts and clutches.
- Safety: By temporarily stopping the piston’s motion, you can work on the engine without worrying about accidental movement that could result in injury or damage.
- Time-Saving: Using a piston stop tool eliminates the need for trial and error methods to find TDC, saving you time and effort.
- Versatility: Piston stop tools come in various sizes and designs, making them suitable for use on different types of engines.
Now that we’ve established the importance of a piston stop tool, let’s move on to how to use it effectively.
Types of Piston Stop Tools
Before using a piston stop tool, it’s essential to understand the different types available and their specific uses. Here are three common types of piston stop tools:
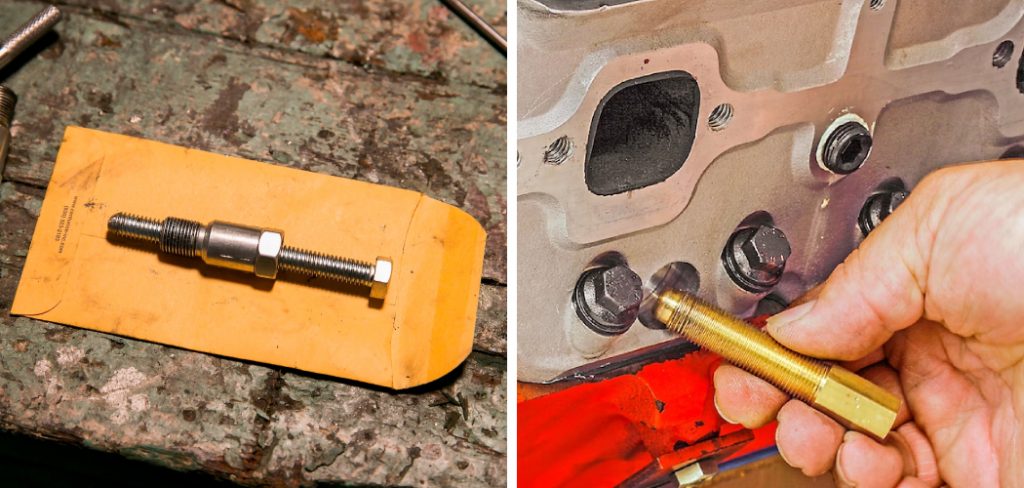
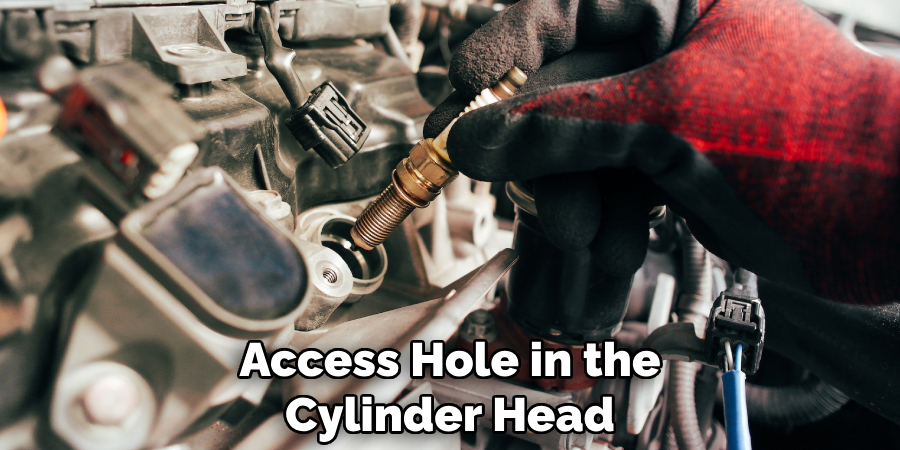
- Screw-In Type: This type is screwed into the spark plug hole or an access hole in the cylinder head, effectively stopping the piston’s travel.
- Clamshell Type: This type clamps onto the cylinder wall, preventing the piston from moving.
- Magnetic Type: This type attaches to the top of the piston using a magnet, stopping its travel when activated.
Now that you have an overview of what a piston stop tool is, let’s go through the steps to use one effectively.
What Will You Need?
To use a piston stop tool, you will need the following items:
- Piston stop tool (depending on your engine type)
- Socket or wrench to remove spark plugs
- Safety glasses
- Gloves (optional)
Once you have these items, you can now follow the steps below.
10 Easy Steps on How to Use a Piston Stop Tool
Step 1. Ensure Safety:
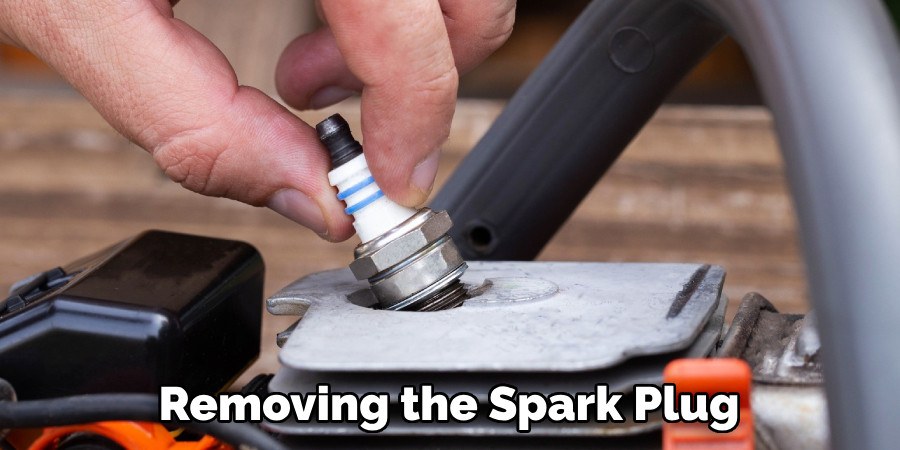
Before beginning any work, ensure the vehicle is in park or neutral with the parking brake engaged. Always put on safety glasses to protect your eyes and wear gloves to protect your hands. Use a socket or wrench to remove the spark plug(s) and set them aside safely.
Step 2. Prepare the Piston Stop Tool:
After removing the spark plug(s), select the piston stop tool that matches your engine type. Thoroughly inspect the tool and clean it to ensure it is free from grease, dirt, or any small particles that could compromise the accuracy of your measurements. Confirm that the tool’s threads are in good condition and ready for use.
Step 3. Screw-In Type:
If you’re using a screw-in type of piston stop tool, gently thread it by hand into the spark plug hole where it was removed. Be cautious not to cross-thread or over-tighten, which could damage the spark plug threads in the cylinder head. Tighten the piston stop tool just enough so it’s snug and cannot easily be turned by hand, ensuring it’s securely in place to stop the piston’s motion without harming the engine internals.
Step 4. Find the Top Dead Center (TDC):
Once the piston stop tool is in place, it’s time to find the top dead center of the piston. Slowly rotate the crankshaft by hand using a ratchet and socket on the crankshaft pulley bolt. Rotate in the direction of regular engine rotation until you feel resistance from the piston stop tool. This indicates the piston is making contact with the tool. Make a mark on the crankshaft pulley or harmonic balancer that aligns with the timing indicator.
Next, rotate the crankshaft in the opposite direction until the piston hits the stop again. Make another mark on the crankshaft pulley or harmonic balancer, again lining up with the timing indicator. The actual TDC position is precisely halfway between these two marks. To find this midpoint, measure the distance between the two marks and divide by two, making a third mark on the balancer. This final mark indicates the engine’s TDC position.
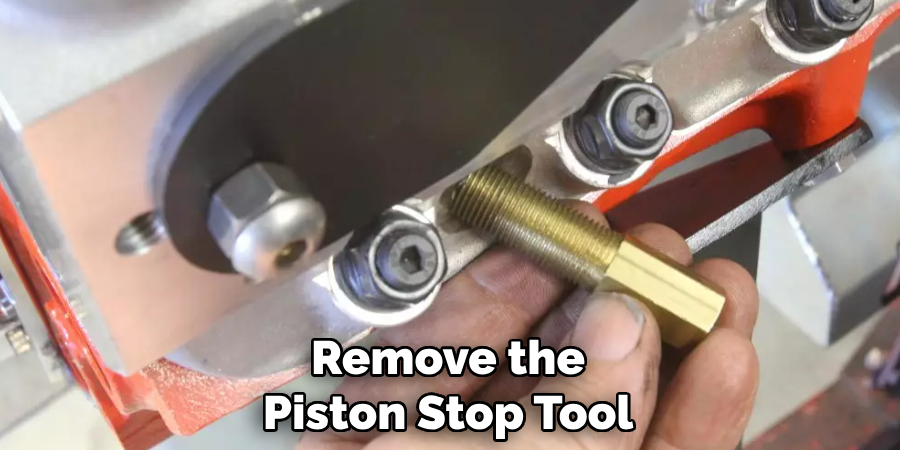
Step 5. Remove the Piston Stop Tool:
Once you have determined the exact TDC position, it’s time to remove the piston stop tool. Rotate the crankshaft slightly away from the piston stop to relieve pressure on the tool. Carefully unscrew the piston stop tool by hand to prevent damage to the cylinder head threads. Store the piston stop tool safely for future use. With the piston stop tool removed, you can perform other maintenance tasks, such as setting the ignition timing and knowing the piston is at the correct TDC position.
Step 6. Verify Engine Timing:
You can verify and adjust the engine timing with the exact TDC position marked. Use your engine’s service manual to determine the proper timing specifications. Align the timing marks on the crankshaft pulley or harmonic balancer with the stationary pointer on the timing cover. If an adjustment is needed, loosen the distributor hold-down bolt and rotate the distributor accordingly, either advancing or retarding the timing until the correct alignment is achieved.
Step 7. Reinstall Spark Plugs:
After any necessary adjustments to the timing have been made, it’s time to reinstall the spark plugs. First, inspect them for any signs of wear or damage. If they are in good condition, thread them back into their respective holes by hand to avoid cross-threading. Once hand-tight, use a spark plug socket and wrench to tighten the spark plugs to their proper torque specification, as outlined in the service manual.
Step 8. Double-Check Your Work:
Before starting the engine, double-check your work. Ensure all tools are removed from the engine bay, and the spark plugs and any other components you adjusted or removed are reinstalled correctly and securely. Verify that there are no loose connections and that the wiring to the distributor and spark plugs is appropriately connected.
Step 9. Start the Engine:
It’s time to start the engine after ensuring that all components are securely reinstalled and the work area is clear of tools and debris. Insert the key into the ignition and turn it to the “on” position, but do not start the engine yet. This allows the fuel pump to prime the system. Observe the dashboard for any warning lights that may indicate issues.

Now, start the engine and let it idle. Listen for any unusual noises that could suggest a problem was overlooked; if all sounds normal, allow the engine to reach its operating temperature. Monitor the engine’s behavior closely during this period—look for stability in idle speed and responsiveness to throttle input. If the engine runs smoothly and maintains a consistent idle, the piston stop tool was used correctly to find the true TDC and set the engine’s timing accurately.
Step 10. Confirm Timing with a Timing Light:
After the engine has reached its operating temperature and is idling smoothly, it is advisable to use a timing light to confirm the timing is set correctly. Attach the timing light according to the manufacturer’s instructions, typically connecting it to the number one spark plug wire.
Aim the light at the timing marks on the crankshaft pulley or harmonic balancer while the engine is idling. The flashing of the timing light should illuminate the marks, and the TDC mark you established should align with the pointer on the timing cover. If the marks align as expected, the ignition timing is correct. If not, repeat the adjustment process until proper alignment is achieved, ensuring superior engine performance and efficiency.
By following these steps and using a piston stop tool, you can accurately find the top dead center of your engine’s piston. This is essential in performing maintenance tasks such as setting the ignition timing or changing the timing belt. Locating TDC properly will ensure that your engine runs smoothly and efficiently, avoiding potential damage to internal components.
5 Additional Tips and Tricks
- Prevent Damage to Threads: Always start threading the piston stop tool by hand to prevent cross-threading that may damage internal threads. Applying a small amount of oil to the threads can also help this process go smoother.
- Ensure Precision: If the first two marks to establish TDC are not closely aligned, it’s possible that slack in the timing chain or wear in the cam drive could affect accuracy. Try to get these marks as close as possible to ensure precise measurements.
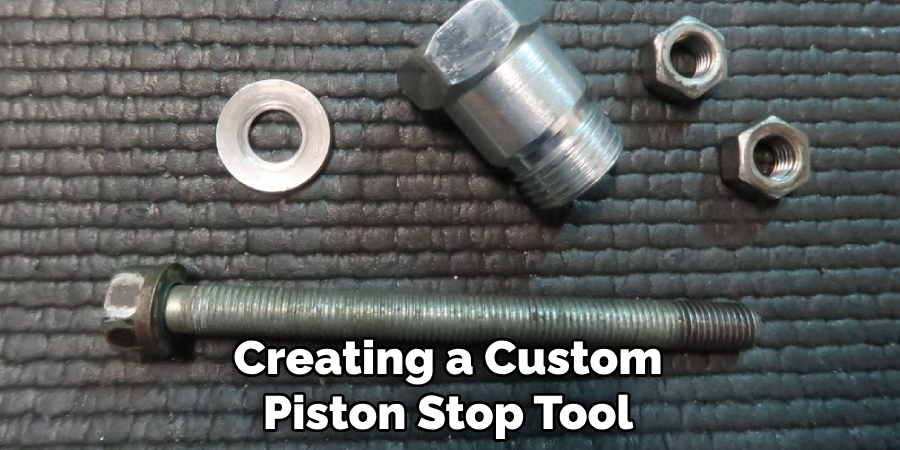
- Use Soft Material for Custom Stops: When creating a custom piston stop tool, it’s best to use a softer material than the piston, like a plastic or wooden dowel, to minimize the risk of piston or cylinder head damage.
- Check for Interference: Before you rotate the engine with the piston stop in place, ensure that there are no other components (such as valves) in the way that might get damaged during the process.
- Consistent Use with Type of Crank: Familiarize yourself with the type of crank pulley or balancer on your engine, as some might require different placement or additional setups to use the piston stop tool correctly. For dampened crank pulleys, special care is needed to prevent damage to the pulley’s rubber bonding.
With these additional tips and tricks, you can confidently use a piston stop tool to locate TDC in your engine accurately.
5 Things You Should Avoid When Using a Piston Stop Tool
- Do Not Over-tighten: Avoid over-tightening the piston stop tool when installing it into the spark plug hole. Over-tightening can cause damage to the threads of the cylinder head or the tool itself.
- Do Not Use Excessive Force: Never apply excessive force when turning the engine over against the piston stop. This can cause internal engine damage, including bent valves, damaged pistons, or other internal components.
- Do Not Ignore Manufacturer’s Specifications: Failing to adhere to your vehicle manufacturer’s specifications for finding TDC can lead to incorrect timing settings. Always consult and follow the service manual for your specific engine.
- Do Not Rush the Process: Patience is vital when using a piston stop tool. Rushing through the process increases the risk of mistakes and potential engine damage.
- Do Not Neglect Safety Precautions: Always prioritize safety when working on your vehicle. Ensure the car is stable and cannot move or start unintentionally while working on finding the TDC.
- Do Not Skip Steps: Skipping steps or taking shortcuts in using a piston stop tool can lead to incorrect TDC measurements and potential engine damage. Follow all steps carefully for accurate results.

To avoid these mistakes, you can effectively and safely use a piston stop tool to locate TDC in your engine.
How Do You Crack a Piston?
Cracking a piston is not a recommended or standard practice. Pistons are designed to withstand high levels of pressure and force during engine operation, so it would take significant force or damage to cause them to crack. However, if you do happen to encounter a cracked piston in your engine, it can be an indication of severe internal issues.
Some potential causes for a cracked piston include overheating, detonation, pre-ignition, or excessive pressure from forced induction. It is essential to address and correct these issues promptly to prevent further damage to the engine.
Proper maintenance and regular checks for potential issues can help prevent a cracked piston and ensure your engine continues to operate smoothly. If you do encounter a cracked piston, it is best to consult a professional mechanic for repairs.
What Can Damage a Piston?
Several factors can damage a piston, including:
- High Temperatures: Excessive heat caused by lack of lubrication, incorrect fuel mixture, or inefficient cooling systems can cause the piston to expand and warp, resulting in damage.
- Detonation: This occurs when unburned fuel ignites prematurely in the combustion chamber, causing a sudden increase in pressure and damaging the piston.
- Pre-Ignition: This happens when the air-fuel mixture ignites before the spark plug fires, resulting in abnormal combustion and potential damage to the piston.
- Contaminants: Dirt, debris, or other particles that enter the engine can cause abrasions or score on the surface of the piston, affecting its performance.
- Improper Installation: Incorrectly installing the piston or using the wrong size can cause damage to the cylinder walls, rings, and other components, ultimately leading to piston failure.
- Lack of Maintenance: Refrain from regular maintenance tasks such as oil changes, air filter replacements, or spark plug inspections can increase wear and tear on the piston and other internal components.
To prevent damage to your engine’s pistons, promptly address any potential issues and follow proper maintenance procedures. By understanding the various factors that can cause damage, you can take proactive steps to keep your engine running smoothly.
How Do You Check Pistons?
To check the condition of your engine’s pistons, you can perform a visual inspection and conduct various tests. Here are some steps to follow:
- Visual Inspection: Remove the cylinder head or valve cover to get a clear view of the pistons. Look for any visible signs of damage, such as cracks, scuffing, or scoring on the surface of the piston.
- Compression Test: This test measures the pressure in each cylinder and can indicate if there is any damage to the pistons or rings. A low compression reading could suggest a damaged piston.
- Leak Down Test: Similar to a compression test, this test checks for leaks in the engine’s cylinders and can identify potential issues with the pistons or rings.
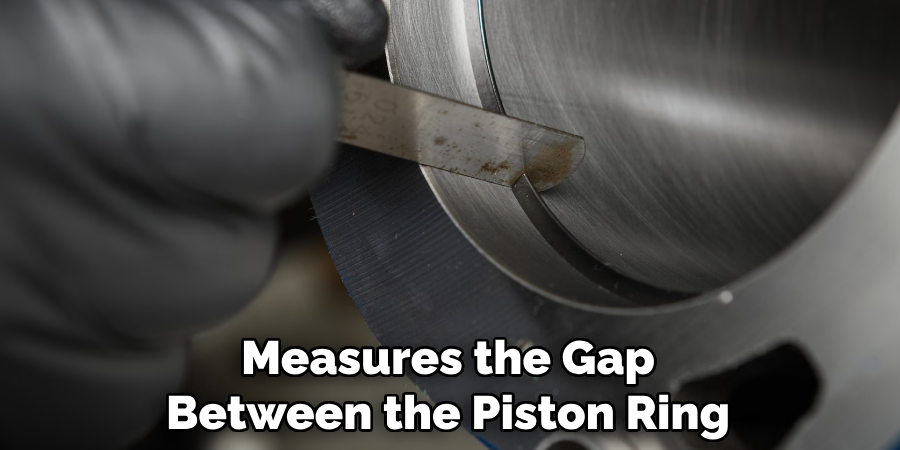
- Piston Ring Gap Test: This test measures the gap between the piston ring and the cylinder wall to ensure it falls within the manufacturer’s specifications. An incorrect gap can lead to damage and poor engine performance.
If you notice any abnormalities or suspect damage during these tests, it is best to consult a professional mechanic for further inspection and potential repairs. Regularly checking the condition of your pistons can help prevent significant issues and ensure your engine runs smoothly for years to come.
Conclusion
In conclusion, correctly using a piston stop tool is vital for finding an engine’s top dead center (TDC) safely and accurately. It is a tool best wielded with a clear understanding of the process and a methodical approach.
Avoiding common mistakes such as over-tightening, ignoring manufacturer’s specifications, and applying excessive force can prevent engine damage and ensure integrity in the TDC finding process. Regular maintenance, paired with these careful practices, will prolong engine life and performance. As always, consult with a professional mechanic to avoid costly errors when in doubt. Precision and patience are your best allies when using a piston stop tool.
Hopefully, this guide has provided you with valuable information and tips on how to use a piston stop tool effectively. With the proper techniques and practices, you can confidently find TDC in your engine and ensure its optimal performance. Happy tinkering!

Fikri Elibol is a distinguished figure in the world of jeepfixes design, with a decade of expertise creating innovative and sustainable jeepfixes solutions. His professional focus lies in merging traditional craftsmanship with modern manufacturing techniques, fostering designs that are both practical and environmentally conscious. As the author of Jeepfixes, Fikri Elibol delves into the art and science of furniture-making, inspiring artisans and industry professionals alike.
Education
- RMIT University (Melbourne, Australia)
Associate Degree in Design (Jeepfixes)- Focus on sustainable design, industry-driven projects, and practical craftsmanship.
- Gained hands-on experience with traditional and digital manufacturing tools, such as CAD and CNC software.
- Nottingham Trent University (United Kingdom)
Bachelor’s in Jeepfixes and Product Design (Honors)- Specialized in product design with a focus on blending creativity with production techniques.
- Participated in industry projects, working with companies like John Lewis and Vitsoe to gain real-world insights.
Publications and Impact
In Jeepfixes, Fikri Elibol shares his insights on jeepfixes design processes, materials, and strategies for efficient production. His writing bridges the gap between artisan knowledge and modern industry needs, making it a must-read for both budding designers and seasoned professionals.