
Setting valves on a small block chevy is an important task that every car owner must know. Valves play a crucial role in the proper functioning of the engine by allowing air and fuel into the combustion chamber and expelling exhaust gases. If the valves are not set correctly, it can result in poor performance, loss of power, and even engine damage.
The main advantage of learning how to set valves on a small block chevy is that it allows you to properly maintain and tune your engine for optimal performance. By setting the valves correctly, you can ensure that your engine is running smoothly and efficiently, which can improve its overall lifespan. In this blog post, You will learn in detail how to set valves on a small block chevy.
Step-by-step Instructions for How to Set Valves on a Small Block Chevy
Step 1: Inspect the Valves
Before beginning any adjustments, it is important to inspect the valves for any signs of wear or damage. Look for pitting, grooves, or cracks on both the valve face and seat. If there is significant damage, the valves may need to be replaced.
Step 2: Gather Necessary Tools
To properly set the valves on a small block Chevy engine, you will need a few tools including a feeler gauge, valve spring compressor, and a socket wrench set. Make sure all tools are clean and in good working condition before starting.
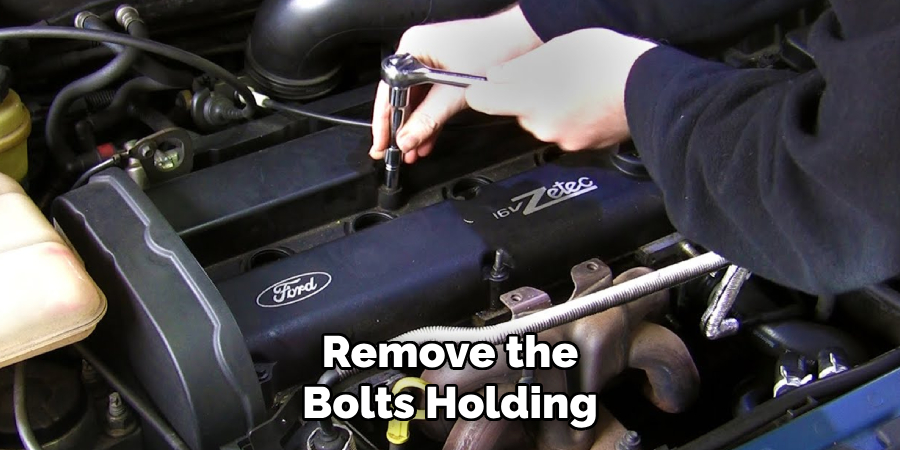
Step 3: Remove Valve Covers
Using your socket wrench, remove the bolts holding the valve covers in place and carefully lift off the cover. This will expose the rocker arms, pushrods, and valve springs. To begin adjusting the valves, rotate the engine until the number one cylinder is at top dead center on the compression stroke. Then follow these steps for each valve:
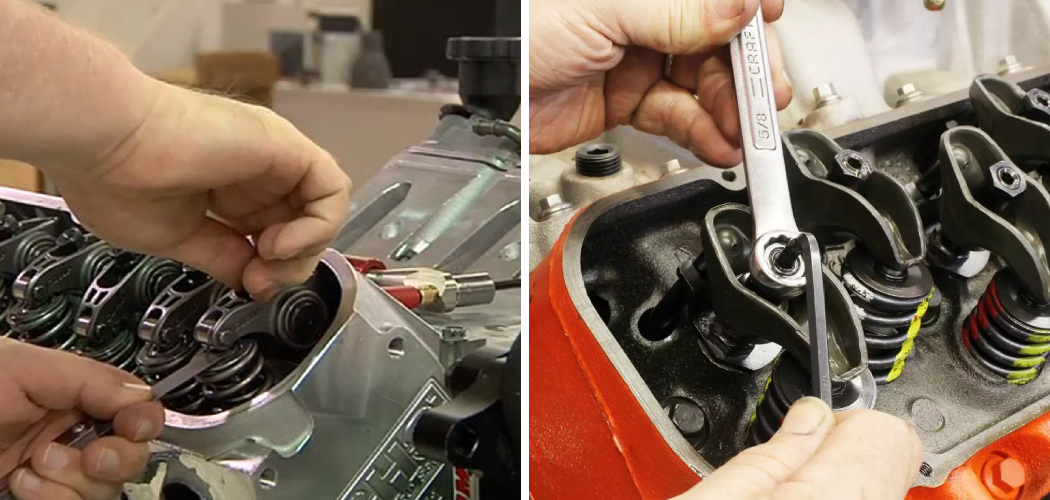
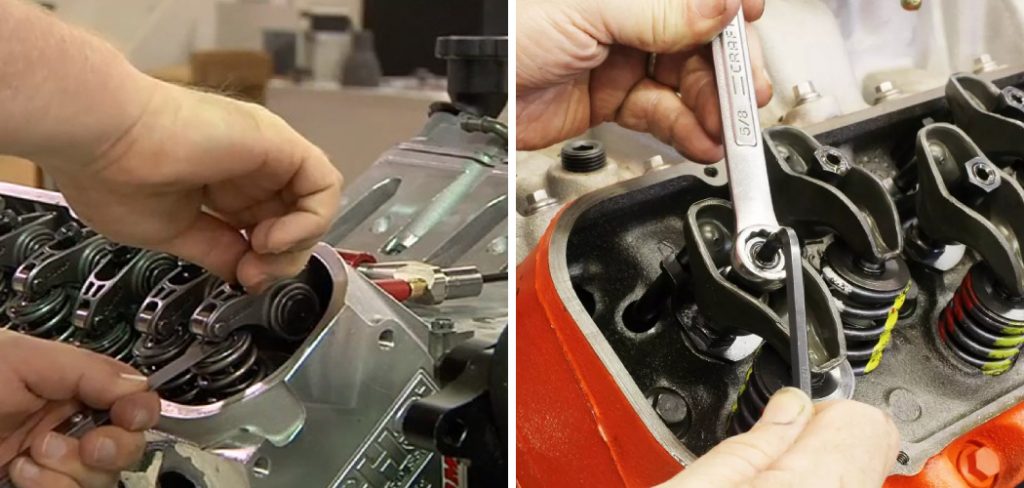
- Loosen the rocker arm nut using a socket wrench
- Insert the proper size feeler gauge between the valve stem and rocker arm pad
- Tighten the rocker arm nut until you feel slight resistance on the feeler gauge, then give it an additional 1/4 turn
Step 4: Adjust Remaining Valves
Following the same steps as above, adjust the remaining valves in firing order sequence (1-8-4-3-6-5-7-2). Using a valve spring compressor, check the pressure of each valve spring. If it falls outside of the manufacturer’s recommended range, you may need to replace the springs or use shims to adjust.
Step 5: Reinstall Valve Covers
Once all valves have been adjusted and checked, reinstall the valve covers using your socket wrench. Start the engine and let it run for a few minutes to allow the valves to settle into their adjusted positions. Listen for any unusual noises or vibrations that may indicate an issue with the valve adjustments.
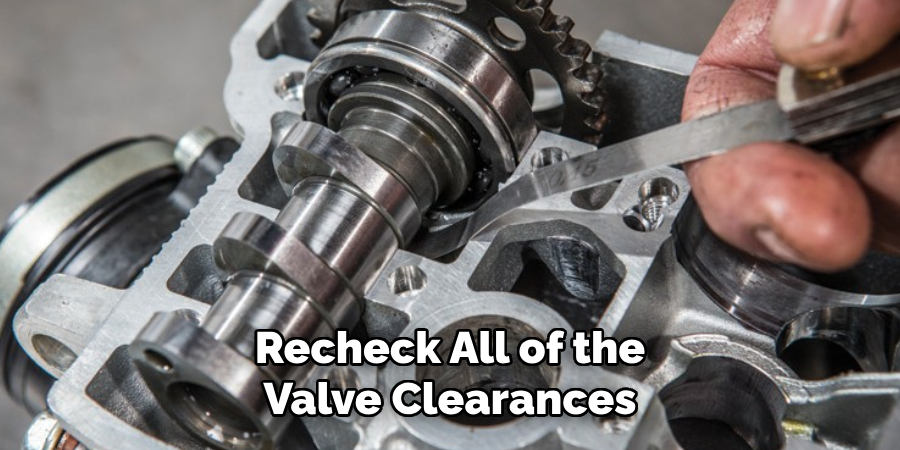
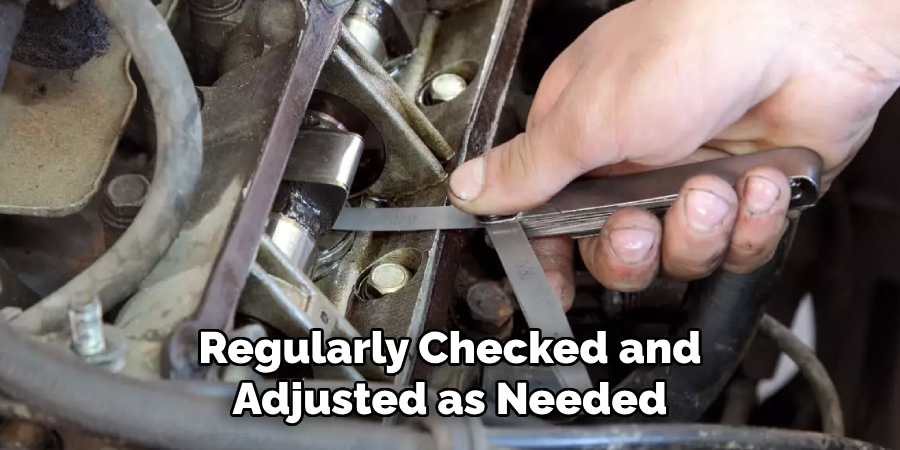
Step 6: Recheck Valve Clearances
After running the engine, recheck all of the valve clearances using your feeler gauge. If any adjustments are needed, repeat steps 4 and 5.
It is important to regularly maintain your valves by checking and adjusting them as needed. This will help ensure optimal engine performance and longevity. Refer to your owner’s manual for recommended maintenance intervals or consult a mechanic if unsure. Additionally, always use high-quality valve components when replacing or adjusting valves for best results.
Safety Tips for How to Set Valves on a Small Block Chevy
- Always wear protective gear when working on a car engine, including safety glasses, gloves, and long-sleeved clothing.
- Before starting any work, make sure to disconnect the battery to prevent electrical shock or damage to the vehicle’s computer system.
- Use a valve spring compressor tool to safely remove and install valve springs without causing damage.
- When setting valve lash, make sure the engine is at top dead center (TDC) on the compression stroke. This will ensure accurate adjustment.
- Take your time and double-check all adjustments to ensure they are correct before moving on to the next valve.
- Use a quality torque wrench to tighten bolts and nuts to the manufacturer’s specifications. Over-tightening can cause damage, while under-tightening can result in loose parts and potential engine failure.
- Keep a fire extinguisher nearby when working on an engine to be prepared for any potential fires.
By following these safety tips, you can ensure a safe and successful valve adjustment on your small block Chevy engine. In addition to these specific tips, it is important to always exercise caution when working with any type of machinery or tools. Always read instructions carefully and ask for help if you are unsure about how to perform a particular task.
Importance for Setting Valves on a Small Block Chevy
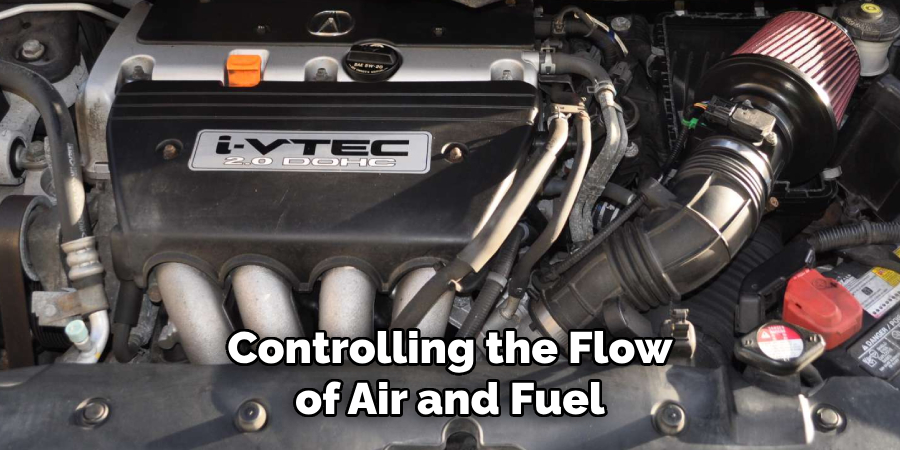
Setting valves on a small block Chevy engine is an essential task for ensuring optimal performance and longevity of the engine. Valves are among the most critical components in an internal combustion engine, responsible for controlling the flow of air and fuel into the cylinders and expelling exhaust gases out.
Properly set valves ensure that this process happens smoothly, resulting in efficient combustion and power delivery. In this section, we will discuss the importance of setting valves on a small block Chevy engine and why it should not be overlooked.
1. Increased Engine Efficiency
One of the primary reasons for setting valves on a small block Chevy is to improve engine efficiency. Over time, valves can become worn or misaligned due to regular use, leading to poor sealing and reduced power output. By setting valves to the correct specifications, you can ensure that they are closing and opening at the precise time and angle, allowing for maximum air and fuel intake into the cylinders. This results in improved combustion, better fuel economy, and increased engine efficiency.
2. Preventing Engine Damage
Incorrectly set valves can have a significant impact on an engine’s performance and longevity. If valves are not adjusted correctly, they may not close completely, causing hot gases to escape back into the intake manifold. This can lead to overheating of the engine and potential damage to other components such as the pistons and cylinder walls. Additionally, if valves are set too tight, they can cause excessive wear on valve seats and guides, leading to poor sealing and reduced performance.
3. Maintaining Consistent Performance
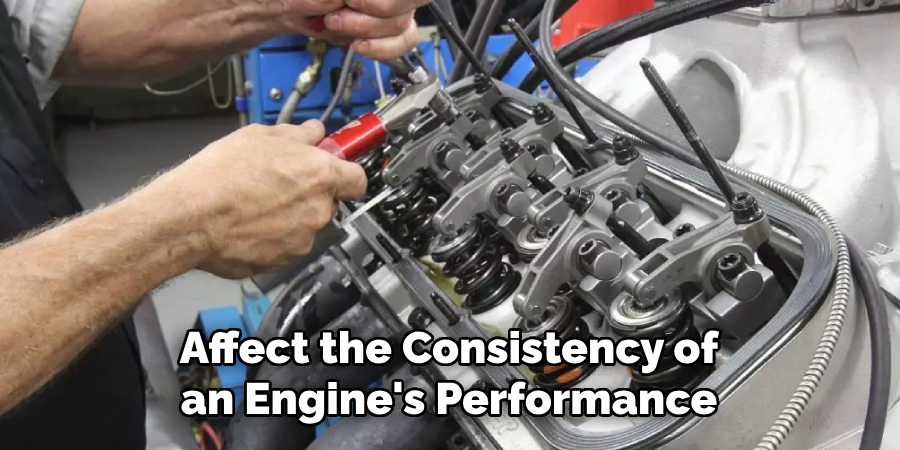
Valve settings can also affect the consistency of an engine’s performance. If valves are not set correctly, they may open and close at different times, resulting in uneven power delivery and potential misfires. This can be especially problematic in high-performance engines where precise timing is crucial for optimal performance. By setting valves to the correct specifications, you can ensure consistent and reliable power delivery from your small block Chevy engine.
4. Extending Engine Life
Regularly setting valves on a small block Chevy can also contribute to extending the engine’s overall lifespan. By ensuring that valves are properly adjusted, you reduce the risk of damage to other components such as the camshaft and lifters. This is because properly set valves place less stress on these parts, allowing them to function more efficiently and last longer. Additionally, proper valve settings can also prevent premature wear on the valves themselves, ensuring they last for many miles of use.
With proper valve settings, you can keep your small block Chevy running smoothly for miles to come. So it is highly recommended to regularly check and adjust your valves according to the manufacturer’s specifications.
Valve Adjustment Techniques for Solid Lifters
Valve adjustment is an essential maintenance procedure for internal combustion engines with solid lifters. Solid lifters are the most common type of mechanical valve train, found in many American and European-made vehicles. It is important to regularly check and adjust the valves to ensure optimal engine performance and longevity. There are two main methods of adjusting solid lifter valves: the “Rule of Nine” method and the “Zero Lash” method. Both methods have their own advantages and disadvantages.
Rule of Nine Method:
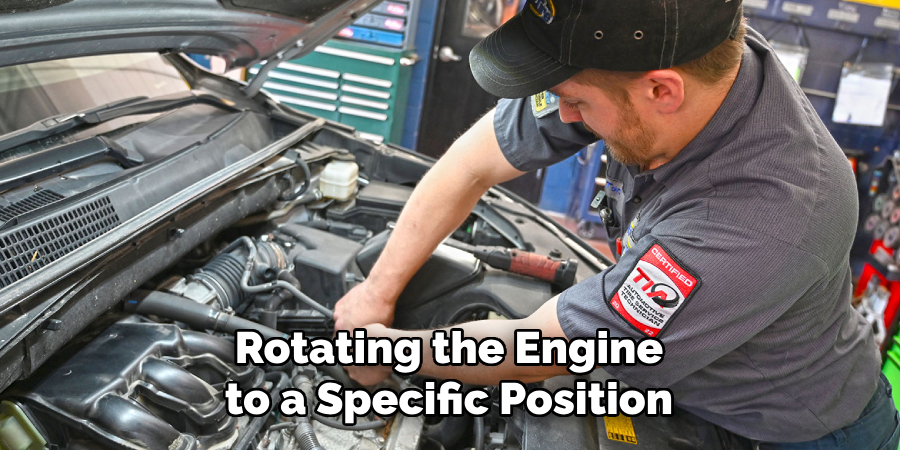
The “Rule of Nine” method is based on the principle of ensuring equal amounts of clearance between each valve and its corresponding rocker arm. This method involves rotating the engine to a specific position (usually TDC, or top dead center) and adjusting the intake and exhaust valves for a specific cylinder, according to a predetermined order.
Pros:
- Easy to Follow: The “Rule of Nine” method is straightforward and easy to understand, making it accessible for beginners.
- Can be Done Without Special Tools: This method can be performed using basic hand tools, making it more cost-effective.
Cons:
- Time-consuming: Adjusting each valve individually can be a time-consuming process, especially for engines with multiple cylinders.
- Requires Precise Engine Positioning: The accuracy of this method heavily relies on the correct positioning of the engine, which can be challenging for some vehicles.
Zero Lash Method:
The “Zero Lash” method focuses on adjusting the valves to have zero clearance. This ensures that there is no play between the valve and its corresponding rocker arm, providing more precise valve control.
Pros:
- Less Time-consuming: Adjusting valves to zero clearance can be a quicker process compared to the “Rule of Nine” method.
- Better Performance: Zero lash adjustments result in tighter tolerances, allowing for improved engine performance.
Cons:
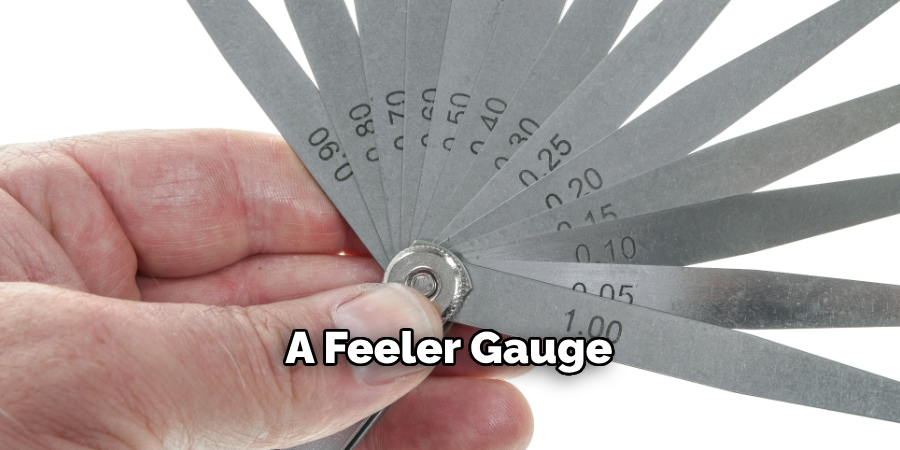
- Requires Special Tools: This method requires specialized tools such as a feeler gauge and a dial indicator, making it more expensive.
- Not Suitable for All Engines: The “Zero Lash” method may not be suitable for some engines, especially those with high performance modifications or aftermarket parts.
Regardless of the method chosen, regular valve adjustments are crucial for maintaining a healthy engine and optimal performance. Additional factors to consider when performing valve adjustments include proper torque specifications, understanding how to read valve clearances, and following recommended maintenance intervals.
Special Considerations for Setting Valves on a Small Block Chevy
When setting valves on a small block Chevy engine, there are several special considerations that should be taken into account. These include:
- Valve Lash: One of the most important aspects of valve setting is ensuring proper valve lash. This refers to the gap between the rocker arm and the valve stem when the lifter is at its lowest point in the camshaft lobe. The correct valve lash for a small block Chevy engine is typically between 0.020 to 0.022 inches for the intake valves and 0.022 to 0.024 inches for the exhaust valves.
- Cylinder Head Selection: The type of cylinder heads used on a small block Chevy can also affect valve setting. For example, if using aluminum heads, the valve lash may need to be adjusted slightly differently due to the different expansion rate of aluminum compared to iron. It’s important to consult the manufacturer’s recommendations for proper valve lash when using aftermarket cylinder heads.
- High Performance Applications: In high performance applications, it is common to set the valves with a little more lash in order to allow for better heat dissipation and increased performance. However, this should only be done by those experienced and knowledgeable in engine building as it can affect engine longevity if not done correctly.
- Hot vs Cold Engine: It’s important to set valves on a cold or room temperature engine, as the metal expands when heated and can affect valve lash measurements. If setting valves on a hot engine, it’s recommended to wait for the engine to cool down before finalizing valve lash adjustments.
- Regular Maintenance: Valve setting is not a one-time task and should be regularly checked and adjusted as needed. This is especially important after the initial break-in period of a new engine, as valves may settle into their seats and require re-adjustment.
By considering these special considerations, you can ensure proper valve setting on your small block Chevy engine for optimal performance and longevity. It’s always best to consult a professional or refer to manufacturer recommendations when in doubt about valve setting for your specific engine setup.
Troubleshooting Valve Adjustment Issues for Setting Valves on a Small Block Chevy
Even with careful consideration and following recommended procedures, there may be times when issues arise during valve setting on a small block Chevy engine. Some common troubleshooting tips for valve adjustment include:
- Uneven Valve Lash: If the valve lash is not consistent across all valves, it could indicate an issue with the rocker arm or pushrod. Check for any bent or damaged components and replace as needed.
- Noisy Valves: If the valves are making a loud or unusual noise, it could indicate that the valve lash is too loose. However, if tightening the valve lash does not resolve the issue, it may be a sign of worn out valve train components such as springs or lifters.
- Difficulty Turning Engine Over: If you encounter difficulty turning the engine over after setting the valves, it could be caused by excessive valve lash. This can occur if the rocker arm nut is not properly torqued down or if there is damage to the pushrod or lifter.
- Excessive Valve Lash: In some cases, you may encounter issues with the valves having too much lash even after correct adjustments have been made. This could be due to incorrect length pushrods, incorrect rocker arm geometry, or other factors. It’s important to thoroughly check all components and make any necessary adjustments.
- Valve Lash Changing Over Time: If you notice that the valve lash is changing over time, it could indicate an issue with the valve train components wearing out or becoming damaged. Regularly checking and adjusting valve lash can help catch and address these issues before they cause further damage to the engine.
By being aware of these potential troubleshooting scenarios, you can quickly identify and resolve any issues that may arise during valve setting on a small block Chevy engine. Regular maintenance and attention to detail are key in ensuring optimal performance and longevity for your engine.
Conclusion
The main disadvantage of setting valves on a small block Chevy is the complexity and precision required to do it correctly. It can be a time-consuming process that requires specialized tools and knowledge. If not done properly, it can result in engine damage or poor performance. In conclusion, setting valves on a small block Chevy engine is a crucial aspect of engine maintenance and can greatly impact the performance and longevity of your engine.
By following proper procedures and considering special considerations such as valve lash, cylinder head selection, and regular maintenance, you can ensure optimal valve settings for your specific setup. However, in case of any issues during valve adjustment, it’s important to troubleshoot and address them promptly to prevent further damage to the engine.
With attention to detail and regular maintenance, your small block Chevy engine can continue running at its best for years to come. I hope reading this post has helped you learn how to set valves on a small block chevy. Make sure the safety precautions are carried out in the order listed.