
Are you tired of dealing with a leaking windshield every time it rains? A leaky windshield can not only be frustrating, but it can also cause damage to your vehicle’s interior. Luckily, sealing a leaking windshield is a simple DIY task that can save you time and money.
A leaking windshield is a nuisance and a potential hazard, compromising the integrity of your vehicle’s cabin and possibly causing further damage. A proper fix is essential for safe driving, whether caused by a faulty seal or a recent windshield replacement.

In this guide, we’ll walk you through the step-by-step process of how to seal a leaking windshield using tools and materials that are readily available and affordable. With attention to detail and a careful hand, you can restore your windshield’s seal and protect your car’s interior from the elements.
What Are the Benefits of Sealing a Leaky Windshield?
Aside from preventing water from entering your car, sealing a leaking windshield can also provide other benefits. Some of them include:
- Protecting Your Vehicle’s Interior: Water damage can be costly to fix and may lead to mold and mildew growth, harming your health.
- Preventing Rust Formation: Constant exposure to moisture can cause rust to form on your car’s metal components, leading to structural damage.
- Improving Visibility: A leaking windshield can cause fogging or condensation, obstructing your view while driving. Sealing the leak will ensure a clear picture of the road at all times.
- Saving Money: By fixing the issue yourself, you’ll save on labor costs and prevent potential damages that may be more expensive to fix in the long run.
These are just some of the benefits you can enjoy by adequately sealing your windshield. Now, let’s move on to the steps you need to follow in order to seal a leaking windshield.

What Will You Need?
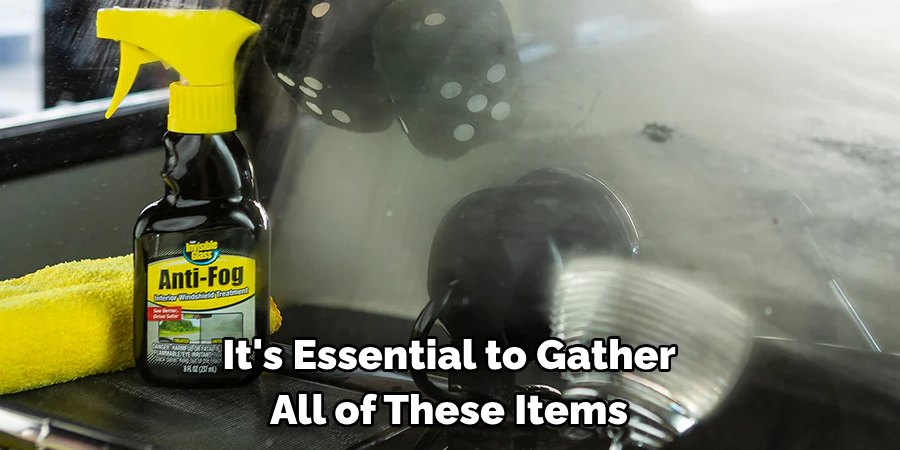
Before sealing your leaking windshield, ensure you have the necessary tools and materials. Here’s a list of items that you may need:
- Clean cloth or paper towels
- Windshield sealant/adhesive
- Caulking gun (if using tube sealant)
- Razor blade/scraper
- Fine grit sandpaper
- Isopropyl alcohol
- Painter’s tape
It’s essential to gather all of these items before you start the sealing process. This will prevent any delays or interruptions and ensure a smooth and successful project.
10 Easy Steps on How to Seal a Leaking Windshield
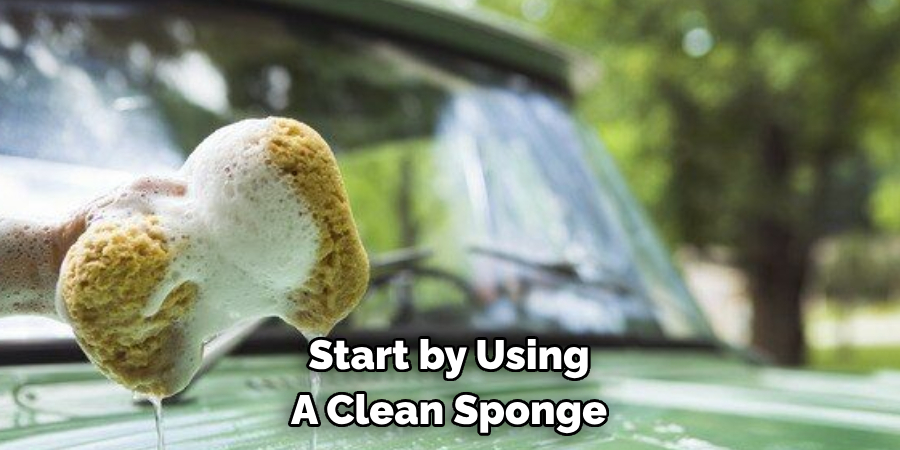
Step 1: Clean the Windshield
The first step in sealing a leaking windshield is to clean it thoroughly. Any surface debris, dirt, or residue can interfere with the sealant’s ability to adhere to the glass properly. Start by using a clean cloth or paper towel to wipe away any superficial dirt. Then, take the razor blade or scraper and carefully remove any old sealant, being cautious not to scratch the glass.
Once you’ve cleared away major obstructions, use fine grit sandpaper to lightly sand the area where you’ll apply the new sealant. This helps create a rough surface for better adhesion. Finish the cleaning process by wiping down the windshield with isopropyl alcohol to remove any remaining dirt and oils, ensuring a clean surface for the sealant to bond. Allow the windshield to dry completely before proceeding to the next step.
Step 2: Apply Painter’s Tape
With a clean and prepped windshield, the next step is to apply painter’s tape around the perimeter of the area where you’ll apply the sealant. This tape will act as a barrier to ensure that the sealant is applied in a straight, clean line and does not spread onto unaffected windshield areas. Make sure the tape is placed precisely where you want the edges of the sealant to be, providing a neat and tidy finish after its removal. It’s crucial to take your time during this step, as careful taping can significantly affect the final appearance of the seal.
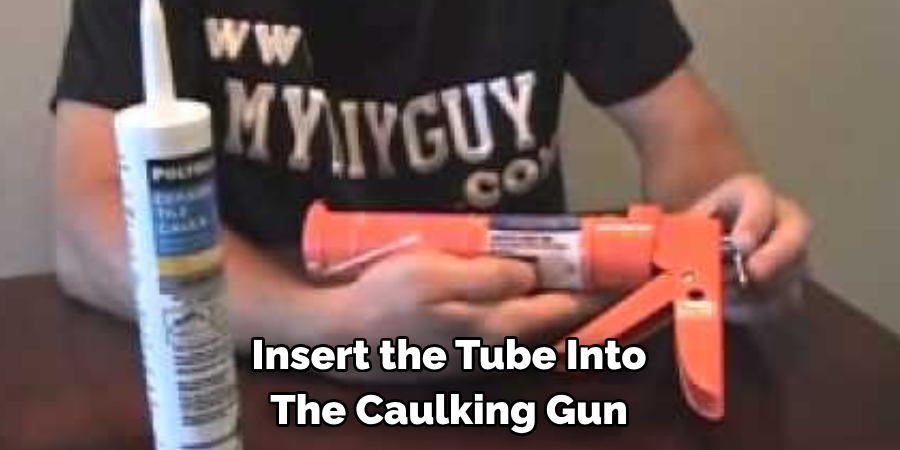
Step 3: Prepare the Sealant
Now that the area is taped off, it’s time to prepare your windshield sealant. If you’re using a tube of sealant with a caulking gun, ensure the sealant is at room temperature for better flow. Cut the tip of the sealant tube at a 45-degree angle for more straightforward application. If the sealant doesn’t come with an applicator tip, you may need to purchase one separately.
Insert the tube into the caulking gun and practice dispensing some sealant onto a piece of paper or cardboard to get a feel for the pressure required to get a steady flow. Remember, it’s always better to start with a smaller hole and enlarge it if necessary than to start with one that’s too large and dispenses too much product.
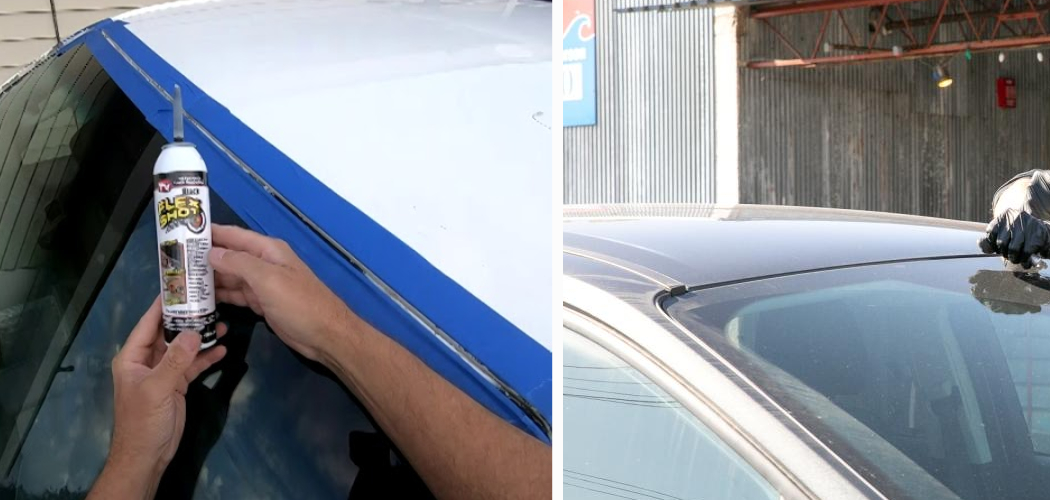
Step 4: Apply the Sealant
Now, apply the sealant to the windshield. Start at one end of the taped area and slowly move the caulking gun along the seam, keeping a consistent pressure to ensure a steady stream of sealant. Be sure to fill the gap completely, avoiding gaps and air bubbles.
If you encounter a void, go back and fill it in before the sealant dries. It’s better to apply too much than not enough—you can permanently remove the excess water. After applying the sealant, use a flat tool or your finger (wearing a latex glove) to smooth out the sealant before it begins to set. This will give it a clean, professional appearance and ensure that it’s well-seated against the glass and the vehicle body.
Step 5: Remove Painter’s Tape
Once you have smoothed out the sealant, the next step is to remove the painter’s tape carefully. It’s best to do this while the sealant is still wet to avoid lifting any dried sealant with the tape, which could create an uneven edge or compromise the watertight seal.
Slowly peel the tape away at a 45-degree angle, not touching the fresh sealant. Removing the tape creates a clean, sharp edge and ensures no residual adhesive is left on the glass or vehicle frame. After removing the tape, inspect the sealant’s edges to ensure they’re smooth and even. If any adjustments are needed, do so promptly with a flat tool or your gloved finger before the sealant dries completely.
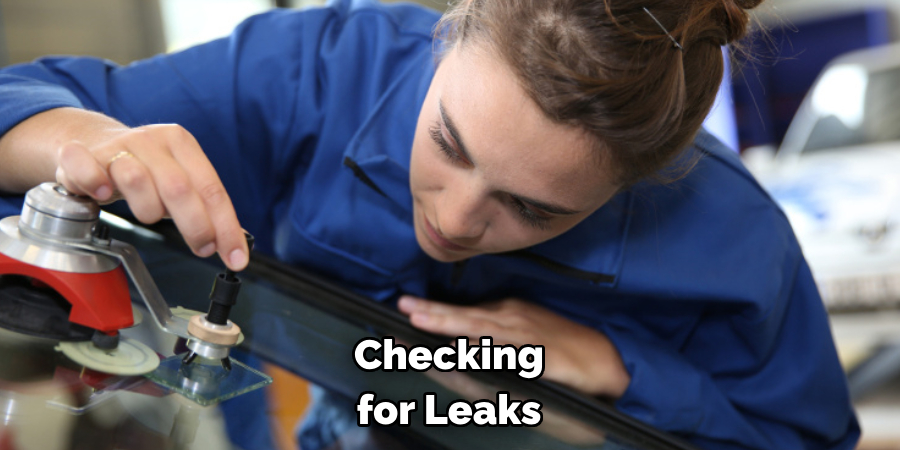
Step 6: Check for Leaks
After the sealant has been applied and the edges have been tidied, checking for leaks before it dries completely is essential. Carefully inspect the sealed area and look for any signs of moisture or air bubbles that might indicate an incomplete seal. If you discover areas that aren’t fully sealed, apply additional sealant as needed.
To test for leaks, you can pour a small amount of water over the sealed area or use a hose to spray water on the exterior of the windshield gently. Watch from the inside to see if any water seeps through. Fixing potential leaks at this stage is crucial for ensuring a watertight seal once the sealant has fully cured.
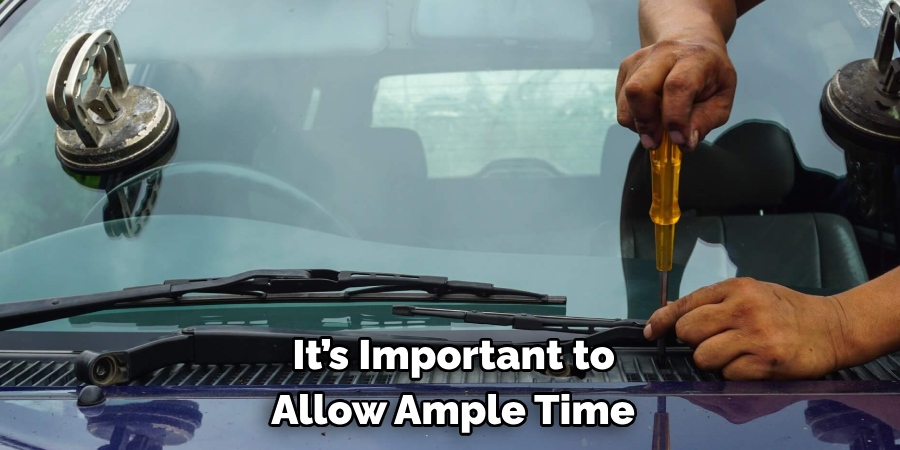
Step 7: Allow the Sealant to Cure
Now that you’ve checked for leaks and ensured a watertight seal, it’s time for the sealant to cure. Follow the manufacturer’s instructions regarding the cure time, which typically ranges from several hours to a full day.
During this period, do not move the vehicle or expose the sealant to water, as this could disrupt the setting process. It’s crucial to give the sealant enough time to fully harden to provide a lasting, robust seal against the elements. Once the prescribed time has elapsed, check the sealant to ensure it’s firm and wholly adhered to both the glass and the vehicle’s frame.
Step 8: Conduct a Final Inspection
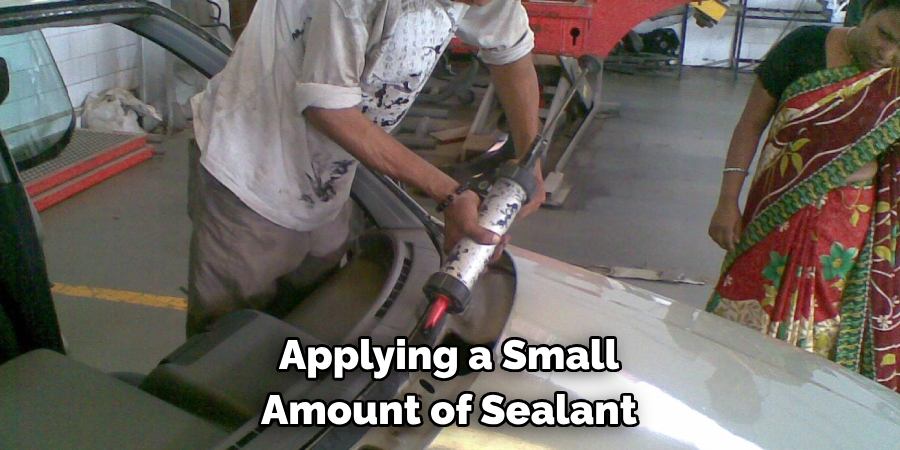
After allowing sufficient time for the sealant to cure, conduct a final thorough inspection of the windshield to ensure the integrity of the seal. Examine the area around the sealed edges for signs of shrinkage, cracking, or detachment, which can happen if the sealant hasn’t cured properly.
Applying a small amount of sealant to the affected areas may be necessary if there are any imperfections. Touch the sealant gently to confirm it’s firm and no longer tacky, indicating it’s dry. Check the vehicle’s interior for any signs of water damage or leaks that may have been missed during the initial leak check. If everything appears intact, the windshield is now ready to face the rigors of the road, protecting you from the elements with its restored seal.
Step 9: Clean Up and Dispose of Materials
With the windshield sealed and the sealant fully cured, it’s time to clean up your work area. Dispose of used sealant tubes, gloves, and other disposable materials in accordance with local waste disposal regulations. Any tools used, such as the caulking gun or smoothing tools, should be cleaned with the appropriate solvents to remove residual sealant. Be sure also to remove any adhesive residue from the vehicle’s surface if present. Proper cleanup ensures that your tools remain in good condition for future use and that your workspace is safe and free from potentially hazardous materials.
Step 10: Conduct a Follow-Up Inspection
After the sealant has been given ample time to endure the stresses of daily use, it is prudent to conduct a follow-up inspection. This step ensures that the sealant continues to adhere correctly and that no cracks or leaks have developed. Examine the edges for any gaps or signs of wear.
Subject the windshield to various conditions, such as driving at highway speeds, car washes, and temperature fluctuations, to test the seal’s durability. If you notice any issues during this inspection, apply additional sealant to maintain a protective barrier against the elements. This proactive approach can significantly prolong the life of your windshield seal, ensuring continued safety and comfort in your travels.
You can confidently and effectively repair your windshield seal by following these steps. Whether it’s a small gap or a larger crack, taking the time to attend to this issue is crucial for maintaining the structural integrity of your vehicle and ensuring your safety on the road.
5 Additional Tips and Tricks
- Ensure a Clean Surface: Before applying any sealant to your windshield, ensure the area around the leak is thoroughly cleaned of dust, dirt, or debris. Use a high-quality glass cleaner and a microfiber cloth to avoid scratching the glass.
- Apply Sealant Properly: Use a windshield sealant specifically designed for automotive glass. Carefully apply the sealant to the leak using a caulking gun for an even distribution, ensuring it fills the crack or gap.
- Use Painter’s Tape: To create a straight and clean line where you apply the sealant, put the painter’s tape above and below the area of the leak. Remove the tape before the sealant dries completely for a professional-looking finish.
- Allow Proper Drying Time: After sealing the leak, it’s important to allow ample time for the sealant to cure. Check the manufacturer’s instructions for the recommended drying time to ensure the best bond.
- Regular Checks and Maintenance: Monitor the sealed area regularly, especially after harsh weather conditions. In case of any deterioration, apply a fresh coat of sealant to maintain the windshield’s integrity.
Remember, these fixes are often temporary. For a long-term solution, consult with a professional auto glass technician.
5 Things You Should Avoid
- Refrain From Ignoring Preparation: Skipping the cleaning stage can lead to poor sealant adhesion and a failed repair. Any residue left on the glass can interfere with the application, so preparation is just as necessary as the sealing process itself.
- Avoid Using Non-automotive Products: Household caulks and sealants are not designed for use on vehicles and can cause more damage to your windshield. Always choose a product specifically formulated for automotive glass repair.
- Refrain From Using Excessive Sealant: Applying too much sealant can make the surface messy and uneven, which may obstruct your view. Use the minimum amount needed to cover the leak without overapplying.
- Do Not Use the Vehicle Immediately: Driving before the sealant has fully cured can cause the seal to break or the leak to worsen. Always wait for the full recommended drying time specified by the product’s instructions.
- Never Ignore Safety Measures: When working with chemicals and sharp objects like a caulking gun, wearing appropriate safety equipment like gloves and safety glasses is essential. Also, ensure you’re in a well-ventilated area to avoid inhalation of fumes.
With these tips in mind, you can effectively and safely seal a leaking windshield.
What Kind of Sealant Do You Use for a Windshield Leak?
When addressing a windshield leak, selecting the proper sealant is crucial. Opt for a high-quality urethane windshield adhesive designed specifically for automotive use. This type of sealant ensures a durable bond and can withstand the environmental stresses that a car endures, such as temperature fluctuations, moisture, and vibrations. Always check the label for UV resistance and make sure the cure time suits your needs. Selecting a sealant with a warranty is also advisable, offering you added assurance of its reliability and effectiveness.
Why Does My Windshield Leak When It Rains?
There are several reasons why your windshield may leak during rainstorms:
- Worn Out Sealant: Over time, the sealant that keeps your windshield in place can deteriorate and lose its effectiveness, allowing water to seep through.
- Damaged Windshield: If there are cracks or chips in the glass, water can quickly enter through these openings.
- Poor Installation: If your windshield wasn’t correctly installed, there may be gaps between the glass and the frame, leading to leaks during heavy rain.
- Clogged Drainage Tubes: These tubes are responsible for draining water away from your windshield. If they become blocked with debris, water can accumulate and eventually leak into the car.
- Old Weatherstripping: This is the rubber seal around the edges of your windshield. Rain can enter through these gaps if it has worn out or pulled away from the glass.
If you’re experiencing a leaky windshield during rainy weather, it’s essential to address and resolve the issue promptly to prevent further damage to your vehicle.
What is the Best Glue to Seal a Windshield?
When sealing a windshield, the best type of glue is a high-strength urethane adhesive. This type of glue is specifically designed for automotive glass and provides a robust and long-lasting bond. It also has properties that make it resistant to environmental factors such as temperature changes and moisture, ensuring the seal remains intact over time.
In addition to using the correct type of glue, it’s also essential to follow proper application techniques and allow adequate time for the adhesive to cure. This will ensure a successful and durable seal for your windshield. If you need help deciding which type of glue to use or how to apply it, consult with a professional auto glass technician for expert advice.
So, always choose wisely when selecting the best glue to seal your windshield, and follow the recommended steps for a successful repair.
Conclusion
In conclusion, effectively sealing a leaking windshield is manageable if approached with the right tools and knowledge. Start by thoroughly cleaning the affected area, choosing a high-quality automotive glass sealant, applying it precisely, and allowing proper drying time for a strong bond.
Avoid common mistakes, such as using non-automotive products or ignoring prep work, to ensure a clear and lasting seal. Regular maintenance checks post-repair are essential to prolong the efficacy of your work. If a temporary fix isn’t sufficient, or if you need more certainty about any step in the process, seeking professional help is always the best course of action to guarantee the safety and integrity of your vehicle.
Hopefully, this guide has provided you with valuable insights on how to seal a leaking windshield and avoid potential damage to your car. Remember, prevention is key, so be sure to regularly inspect your windshield for any signs of leaks and address them promptly.