

The Throttle Position Sensor (TPS) plays a critical role in a vehicle’s engine management system, providing crucial input to regulate fuel injection and optimize engine performance. When signs of a malfunctioning TPS emerge, such as poor acceleration, erratic idling, or unexplained stalling, it becomes imperative to replace the sensor promptly.
In this article, we embark on a comprehensive guide on how to replace TPS sensor, demystifying the process for both seasoned mechanics and those new to DIY automotive tasks.
From locating the TPS on your vehicle to safely disconnecting and removing the old sensor, we navigate through each step with precision. Armed with essential tools and a systematic approach, enthusiasts can undertake this replacement confidently, restoring the throttle’s precision and ensuring smooth engine operation. Join us on a journey to empower car owners with the knowledge needed to tackle this crucial repair and maintain optimal vehicle performance.
Importance of the Throttle Position Sensor (TPS)
The Throttle Position Sensor (TPS) is an important component of a vehicle’s engine management system. It is responsible for monitoring the position of the throttle valve and providing feedback to the engine control unit (ECU). This information is crucial for proper fuel injection, ignition timing, and overall engine performance.
When the TPS fails or malfunctions, it can cause a range of issues such as poor fuel efficiency, engine hesitation, and even stalling. Therefore, knowing how to replace the TPS is essential for maintaining a properly functioning vehicle.
Disconnecting the Vehicle’s Battery
Before beginning the process of replacing a TPS sensor, it is important to disconnect the vehicle’s battery. This precautionary measure will help prevent any potential electrical shocks or damage to the vehicle’s electronic components.
Locating the TPS Sensor
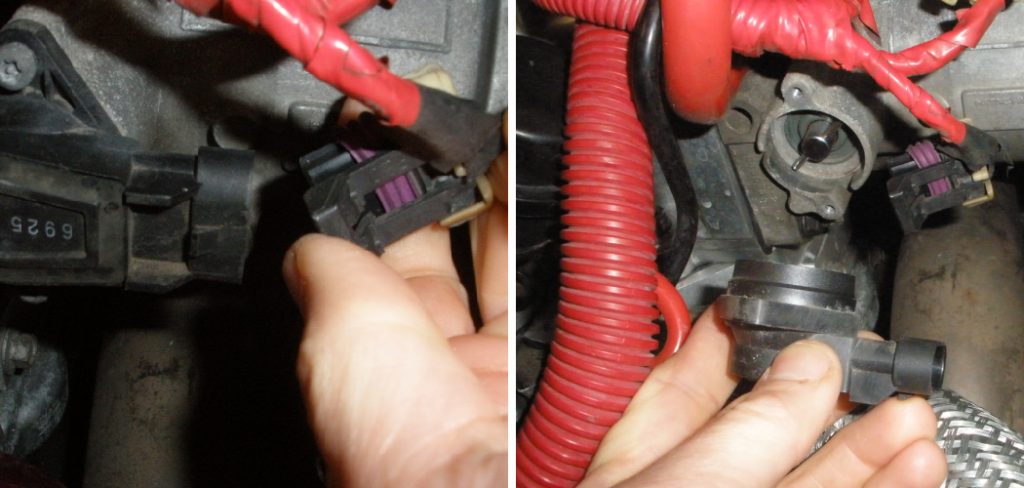
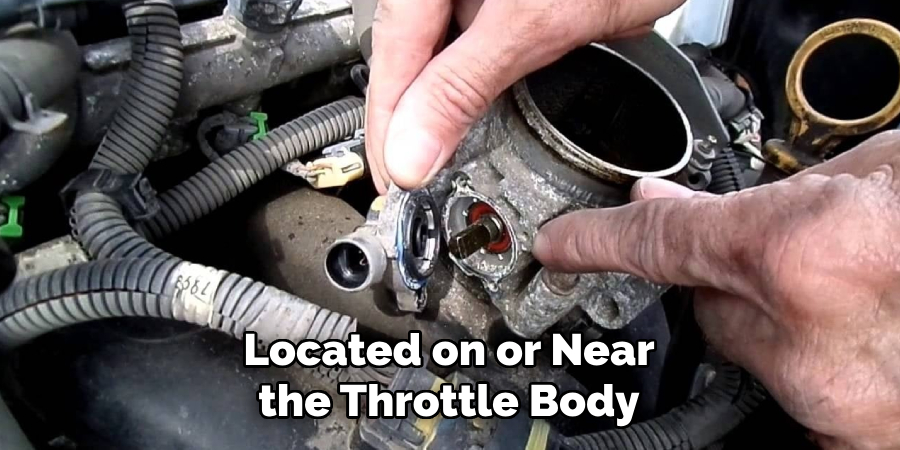
The throttle position sensor (TPS) is typically located on or near the throttle body of the engine. Refer to your vehicle’s manual or do some research to determine the exact location of the TPS sensor in your specific make and model.

10 Methods How to Replace TPS Sensor
1. Diagnose the Problem
Before replacing the TPS sensor, it is important to diagnose the issue to ensure that it is indeed the sensor causing the problem. This can be done through a diagnostic scan tool or by visually inspecting the sensor for any physical damage. It is also important to check for any error codes related to the TPS sensor.
2. Gather Necessary Tools
To replace the TPS sensor, you will need a few basic tools, such as a socket wrench set, pliers, and a screwdriver. It is also recommended to have some electrical contact cleaner on hand to clean any connectors. Depending on the location of your TPS sensor, you may also need a jack and jack stand to elevate the vehicle for easier access.
3. Disconnect Battery
To avoid any electrical issues, disconnect the negative terminal of your car’s battery before starting any work on the TPS sensor. This will also prevent any accidental shocks or short circuits. However, if your vehicle has an anti-theft system or a radio that requires a code after battery disconnection, make sure you have this information before disconnecting the battery.
4. Locate TPS Sensor
The location of the TPS sensor may vary depending on your vehicle’s make and model. However, it is typically located on or near the throttle body. If you are unsure of its location, consult your vehicle’s manual or search for a diagram online.
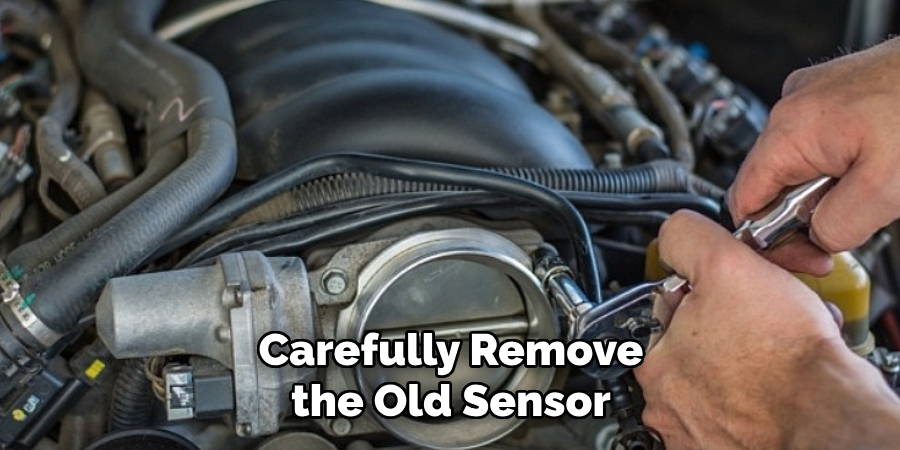
5. Remove Old Sensor
Using your socket wrench set, carefully remove any bolts holding the TPS sensor in place. Then gently pull out the old sensor from its connector. Be careful not to damage any wires or connectors while doing this. Though it may seem intimidating, replacing the TPS sensor is a fairly simple process that can be done by most car owners.
6. Clean Throttle Body
While you have access to the throttle body, take this opportunity to clean it with some throttle body cleaner. This will help improve performance and prevent future issues. While the throttle body is off, you can also clean or replace the idle air control valve (IACV), which controls the airflow when the throttle is closed.
7. Install New TPS Sensor
Carefully insert the new TPS sensor into its connector and secure it in place with bolts using your socket wrench set. Make sure the bolts are tightened securely but not too tight to avoid damaging the sensor. To ensure proper installation, double-check the position of the sensor and its connection to the throttle body.
8. Reconnect Battery
Once you have completed installing the new TPS sensor, reconnect your car’s battery by attaching the negative terminal. This will reset the ECU and allow it to calibrate the new sensor. It is important to note that some vehicles may require an idle relearn procedure after replacing the TPS sensor. Refer to the manufacturer’s instructions for more information.
9. Reset ECU
To ensure that your car recognizes the new TPS sensor, you may need to reset your engine control unit (ECU). This can be done by disconnecting your car’s battery for a few minutes or using a diagnostic scan tool. Refer to your car’s manual for specific instructions on how to reset the ECU.

Additionally, some cars may require a relearn procedure after replacing the TPS sensor. This procedure involves following specific driving patterns to allow the car’s computer to recalibrate and adjust to the new sensor. Again, refer to your car’s manual for detailed instructions on how to perform the relearn procedure.
10. Test Drive
After completing all steps, take your car for a test drive to ensure that everything is functioning properly. If the issue persists, it may be necessary to seek professional help or further diagnose the issue. Once you are satisfied with the replacement of your TPS sensor, it is important to keep an eye on it and make sure that it continues to function correctly. Regular maintenance checks can help prevent any future issues with your TPS sensor.
Things to Consider When Replacing a TPS Sensor
A throttle position sensor (TPS) is an important component in your car’s engine management system. It measures the position of the throttle plate, which controls the amount of air flowing into the engine. This information is then used by the engine control unit to adjust fuel delivery and ignition timing, ensuring efficient engine performance.
Over time, a TPS sensor may become faulty or fail completely. When this happens, it’s important to replace it as soon as possible to avoid potential engine problems. Here are some things to consider when replacing a TPS sensor:
1. Identifying the issue
Before replacing your TPS sensor, it’s important to make sure that it is indeed the source of your car’s issues. Common symptoms of a faulty TPS sensor include poor engine performance, stalling, and difficulty starting the car. However, these symptoms could also be indicative of other issues such as a dirty air filter or a malfunctioning fuel pump. It’s important to properly diagnose the issue to avoid unnecessary replacement.
2. Choosing the right replacement
When it comes to replacing your TPS sensor, it’s important to choose the right replacement for your specific vehicle. Not all sensors are made equal and using the wrong one could cause further issues with your engine. Consult your car’s manual or speak with a trusted mechanic to determine the correct replacement for your TPS sensor.
3. Proper installation
Replacing a TPS sensor is not a difficult task, but it’s important to follow proper installation procedures. Make sure the engine is off and disconnect the negative battery cable before beginning. Carefully remove the old sensor, taking note of its position and orientation. Install the new sensor in the same manner and reconnect any wiring or connectors.
4. Testing
After installation, it’s important to test your car to ensure that the new TPS sensor is functioning correctly. Turn on the engine and allow it to idle for a few minutes before revving the engine. Pay attention to any changes in performance or any warning lights that appear on your dashboard.
5. Regular maintenance
To prevent future issues with your TPS sensor, it’s important to include regular maintenance of this component in your car’s overall maintenance schedule. This can include cleaning the sensor and its connections, as well as replacing it every few years or whenever symptoms of a faulty sensor arise.
Conclusion
In conclusion, learning how to replace TPS sensor can seem like a daunting task, but with the right guidance and proper preparation, it can be a smooth and simple process. By following the steps outlined in this post and utilizing the tips and tricks shared, you will be able to successfully replace your TPS sensor on your own.
Not only does this save you time and money compared to going to a mechanic, but it also gives you the satisfaction of being able to take care of your own vehicle repairs. So don’t hesitate to tackle this task yourself and see the results for yourself. Be sure to share your success stories in the comments below and let us know how this guide helped you! Now go out there and confidently replace your TPS sensor like a pro!

Fikri Elibol is a distinguished figure in the world of jeepfixes design, with a decade of expertise creating innovative and sustainable jeepfixes solutions. His professional focus lies in merging traditional craftsmanship with modern manufacturing techniques, fostering designs that are both practical and environmentally conscious. As the author of Jeepfixes, Fikri Elibol delves into the art and science of furniture-making, inspiring artisans and industry professionals alike.
Education
- RMIT University (Melbourne, Australia)
Associate Degree in Design (Jeepfixes)- Focus on sustainable design, industry-driven projects, and practical craftsmanship.
- Gained hands-on experience with traditional and digital manufacturing tools, such as CAD and CNC software.
- Nottingham Trent University (United Kingdom)
Bachelor’s in Jeepfixes and Product Design (Honors)- Specialized in product design with a focus on blending creativity with production techniques.
- Participated in industry projects, working with companies like John Lewis and Vitsoe to gain real-world insights.
Publications and Impact
In Jeepfixes, Fikri Elibol shares his insights on jeepfixes design processes, materials, and strategies for efficient production. His writing bridges the gap between artisan knowledge and modern industry needs, making it a must-read for both budding designers and seasoned professionals.