

Replacing the intermittent wiper relay is an essential task that every car owner should know how to do. Not only does it save you time and money from having to go to a mechanic, but it also ensures that your windshield wipers are functioning properly at all times.
The main advantage of replacing an intermittent wiper relay is improved functionality and safety. When a relay malfunctions, it can cause the wipers to operate erratically or not at all, which can be dangerous in hazardous weather conditions. You can find step-by-step instructions on how to replace intermittent wiper relay in this blog article.
Gathering Necessary Tools and Equipment
- Screwdriver (Phillips and flathead)
- Pliers
- Hammer
- Measuring tape
- Level
- Electric drill
- Screws (various sizes and types)
- Nails (various sizes)
- Anchors
- Wall hooks
- Ladder
When it comes to home improvement projects, having the right tools is essential. It can save you time, money, and frustration in the long run. If you’re planning on tackling a DIY project, it’s important to gather all the necessary tools and equipment before starting.
Step-by-step Instructions for How to Replace Intermittent Wiper Relay
Step 1: Inspect the Symptoms
If your vehicle’s intermittent wiper function is not working properly, it might be due to a faulty relay. The first step is to inspect the symptoms and determine if they are related to a bad relay or another issue with the wiper system.

Some common symptoms of a faulty intermittent wiper relay include erratic wiping speeds, wipers randomly turning on or off, and the wipers stopping in the middle of a wipe. If you are experiencing any of these issues, it is likely that the intermittent wiper relay needs to be replaced.
Step 2: Gather Necessary Tools and Materials
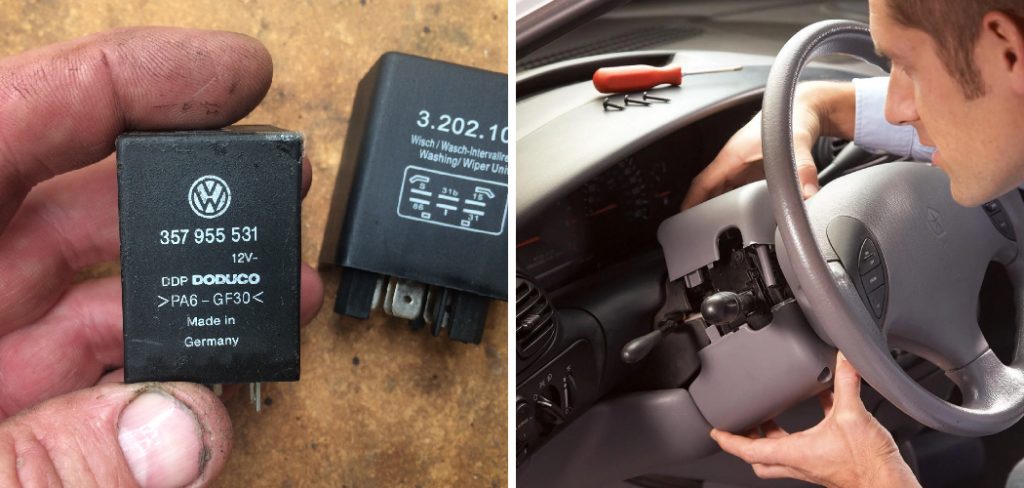
Before beginning the replacement process, make sure you have all the necessary tools and materials on hand. You will need a socket or wrench set, screwdriver, new intermittent wiper relay, and potentially a flashlight to help you see under the dashboard.
The next step is to locate the intermittent wiper relay. It is typically located in the fuse box or power distribution center under the dashboard on the driver’s side. Refer to your vehicle’s manual for specific location instructions, as it may vary depending on the make and model.
Step 3: Disconnect the Battery
To ensure safety, it is important to disconnect the vehicle’s battery before proceeding with the replacement. This will prevent any electrical shocks while working on the wiper relay.
Once you have located the fuse box or power distribution center, remove the cover to access the wiper relay. You may need to use a screwdriver or release clips to remove the cover, depending on your vehicle’s model.
Step 4: Identify and Remove the Old Relay

The intermittent wiper relay is usually labeled as such and can be easily identified by its shape and size. Once located, carefully remove the old relay from its socket using a pair of pliers or your fingers. Be sure to avoid touching any other electrical components while doing so. Next, insert the new intermittent wiper relay into the empty socket. Make sure it is securely in place and properly aligned with the wiring.
Step 5: Reattach Fuse Box Cover
Once the new relay is inserted, reattach the fuse box cover and secure it back in place. Make sure all clips or screws are firmly in place to prevent any rattling or loose connections. With the new relay installed, reconnect the vehicle’s battery and test out the wiper system to ensure the issue has been resolved.
Step 6: Dispose of Old Relay
Properly dispose of the old intermittent wiper relay according to your local regulations and guidelines. This will help ensure environmental safety and proper recycling of electrical components.
Replacing a faulty intermittent wiper relay is a relatively simple process that can be done at home with basic tools. However, if you are not comfortable doing it yourself, it is always best to seek professional help. Regular maintenance and inspections of your vehicle’s wiper system can also help prevent issues with the intermittent wiper function in the future.
Safety Tips for How to Replace Intermittent Wiper Relay
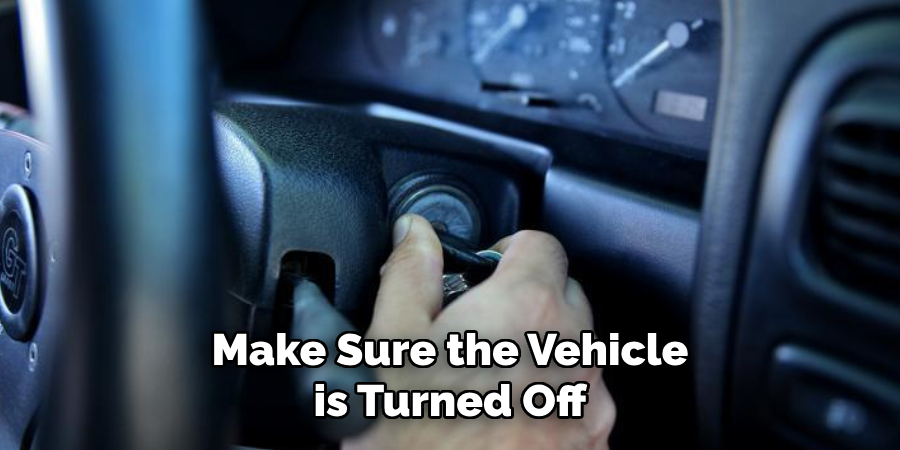
- Make sure the vehicle is turned off and the keys are removed from the ignition before starting any work.
- Always refer to your vehicle’s manual for specific instructions and safety precautions.
- Wear appropriate protective gear, such as gloves and safety glasses, when working with electrical components.
- Disconnect the battery before replacing any electrical parts to prevent electric shock or damage to the vehicle’s system.
- Use caution when handling the new relay to avoid damaging it or causing any malfunctions.
- Double check all connections and wiring before starting the vehicle again.
- If you are unsure of how to properly replace the intermittent wiper relay, seek professional help or consult with a mechanic.
By following these safety tips, you can safely replace the intermittent wiper relay in your vehicle without any risks or accidents. Remember to always prioritize your safety and follow proper procedures when working with electrical components in your car.
Importance of Replacing Intermittent Wiper Relay
- Improved Visibility: The intermittent wiper relay is responsible for controlling the speed and timing of your windshield wipers. If it is malfunctioning, your wipers may stop working or they may operate at a constant speed, making it difficult to see during rain or other inclement weather. Replacing the relay will ensure that your windshield wipers are functioning properly and providing you with maximum visibility on the road.
- Prevents Potential Accidents: As mentioned, a malfunctioning intermittent wiper relay can greatly affect your visibility while driving. This can be very dangerous, especially during heavy rain or snow. By replacing the relay, you are taking proactive measures to prevent potential accidents caused by poor visibility.
- Protects Your Windshield Wipers: A faulty intermittent wiper relay can also put unnecessary strain on your windshield wipers. If the wipers are constantly operating at a high speed or stopping abruptly, it can cause them to wear out faster and potentially break. Replacing the relay will ensure that your wipers are working properly and not causing any additional damage.
- Saves Money in the Long Run: Ignoring a faulty intermittent wiper relay can lead to more serious and expensive issues down the road. For example, if your wipers are constantly running at a high speed, it can drain your car’s battery quickly. Replacing the relay will prevent these types of issues and save you money on potential repairs.
- Maintains Vehicle Safety: In addition to improved visibility on the road, proper functioning windshield wipers also contribute to overall vehicle safety. They are an important part of your car’s safety system and should be regularly maintained and replaced when necessary.
- Prevents Distractions While Driving: Malfunctioning windshield wipers can be a major distraction while driving, especially during heavy rain or snow. They can cause you to take your eyes off the road and focus on trying to fix them, increasing the risk of accidents. Replacing the intermittent wiper relay will ensure that your wipers are working properly and allow you to focus on driving safely.
- Improves Overall Driving Experience: Having a reliable and functioning intermittent wiper relay can greatly improve your overall driving experience. No more constantly adjusting your wipers or struggling to see through streaks on your windshield. By replacing the relay, you can enjoy a smooth and stress-free drive in any weather conditions.

Signs of Replacing Intermittent Wiper Relay
As mentioned earlier, recognizing the signs of a failing intermittent wiper relay is crucial in order to avoid any potential safety hazards. Here are 7 common symptoms that indicate your intermittent wiper relay may need to be replaced:
- Intermittent Wipers Not Working: The most obvious sign of a faulty wiper relay is when your vehicle’s wipers stop working altogether. This can happen suddenly or gradually over time, but either way, it’s a sure sign that something is wrong with the relay.
- Wipers Stuck on One Speed: If your wipers are stuck on one speed and won’t change even when you adjust the switch, this could also be a sign of a failing intermittent wiper relay. The relay controls the speed of your wipers, so if it’s not functioning properly, your wipers will remain on one speed.
- Wiper Blades Not Returning to Rest Position: When you turn off your wipers, they should automatically return to their rest position at the bottom of the windshield. If they don’t do this and stay in a random position, it could be due to a malfunctioning wiper relay.
- Wipers Operating Erratically: A faulty wiper relay can also cause your wipers to operate erratically, meaning they may work fine one moment and then suddenly stop or change speeds without warning. This unpredictable behavior is a clear indicator of an issue with the relay.
- Clicking Sounds from the Relay: If you hear a clicking sound coming from your vehicle’s relay box when you turn on your wipers, this could also indicate a problem with the intermittent wiper relay. The clicking sound is caused by the relay trying to engage but failing to do so correctly.
- Wipers Not Turning Off: Another symptom of a failing intermittent wiper relay is when your wipers won’t turn off at all, even when you switch them off. This can be dangerous while driving and should be addressed immediately.
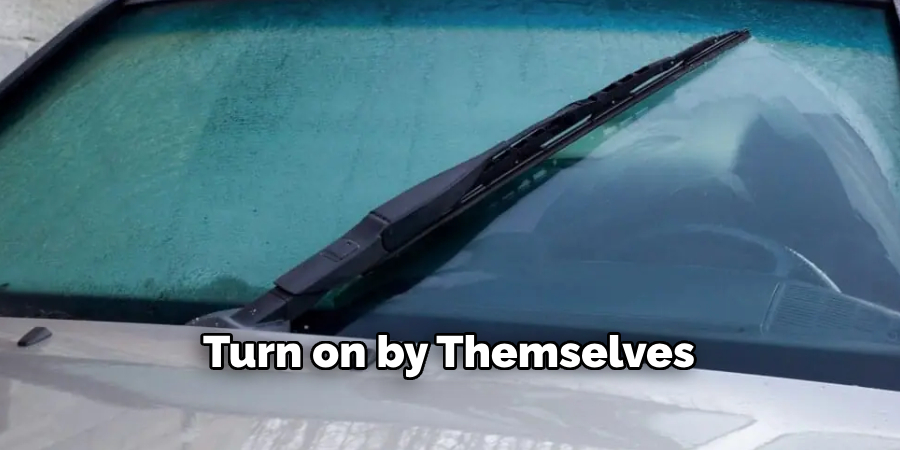
- Wipers Turning On By Themselves: In some cases, a malfunctioning intermittent wiper relay may cause your wipers to turn on by themselves without any input from you. If this happens, it’s important to get your vehicle checked out as soon as possible.
While these are the most common signs of a failing intermittent wiper relay, there may be other issues that can arise. If you experience any abnormal behavior with your wipers, it’s always best to have a professional mechanic take a look and diagnose the problem.
Troubleshooting Tips for Common Issues
- Verify that all necessary cables are properly connected. Make sure to check both the power and data cables.
- Update drivers and firmware for hardware components, such as graphics cards or network adapters.
- Check for any software updates and install them if available. This includes operating system updates, as well as updates for any applications being used.
- Restart the computer. Sometimes a simple restart can fix a variety of issues.
- Run a virus scan to check for any malicious software that may be causing problems.
- Clear out temporary files and clear the cache for web browsers. This can help improve performance and potentially resolve some issues.
- Check system logs for any error messages or warnings that may provide insight into the issue.
By following these troubleshooting tips, you should be able to resolve common issues that may arise with your computer. However, if the issue persists after attempting these solutions, it may be necessary to seek additional assistance from a professional technician or reach out to the manufacturer for further support.
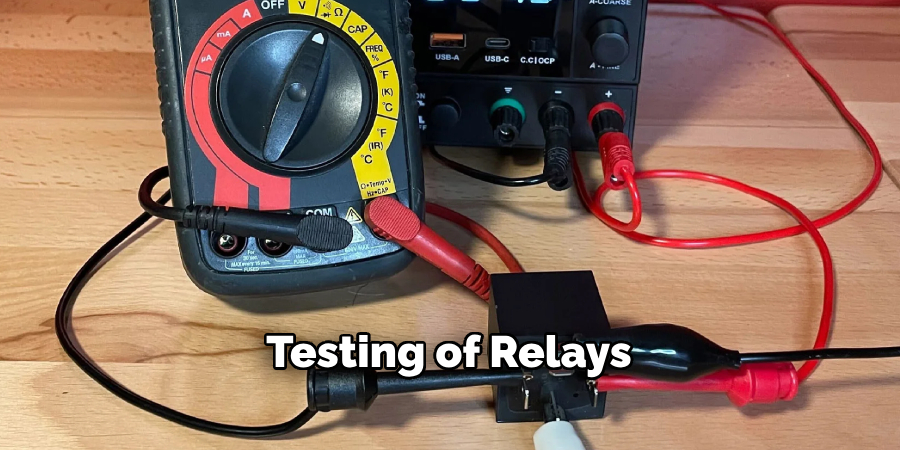
Alternative Methods for Relay Testing
1. Overcurrent and Voltage Relays
Relay testing can be done by applying overcurrent and voltage signals to the relay under test. This method is commonly used for protective relaying systems, where the relay operates based on current or voltage exceeding certain set values.
2. Secondary Injection Testing
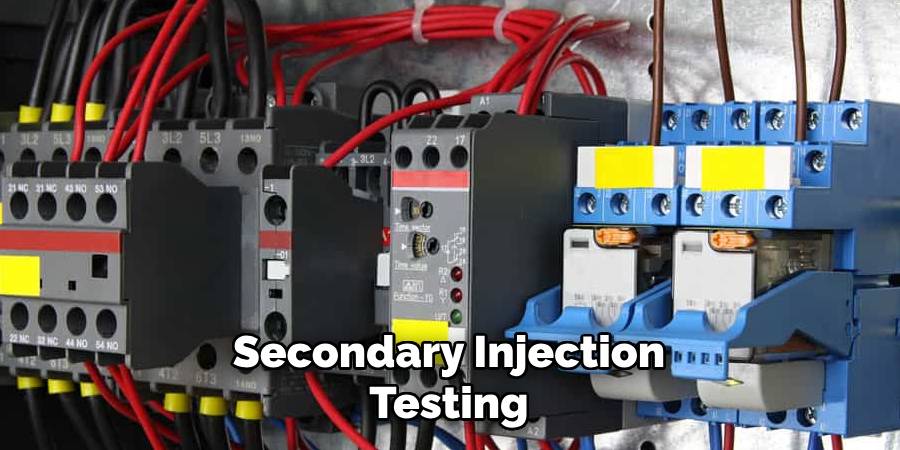
Secondary injection testing involves injecting a simulated electrical current into the relay circuit using a secondary injection test set. This method is commonly used for microprocessor-based relays, as it allows for precise control and testing of individual relay functions.
3. Primary Injection Testing
Primary injection testing involves injecting high currents into the primary side of the power system and measuring the response of the relay under test. This method is commonly used for electromechanical or digital relays that are used for high power systems.
4. End-to-End Testing
End-to-end testing involves simulating a fault at one end of the protected equipment and verifying that the relay at the other end responds correctly. This method is commonly used for transmission line protection relays.
5. Field Testing
Field testing involves conducting tests on installed relays in their actual operating environment. This method is useful for verifying the proper functioning of the relay in real-world conditions.
6. Power System Simulators
Power system simulators are software tools that simulate various power system scenarios and allow for testing of relays without physically connecting them to a power system. This method is commonly used for testing digital relays.
7. Remote Testing
Remote testing involves using remote access capabilities to connect to a relay and perform testing without physically being present at the relay location. This method is useful for testing relays located in remote or difficult-to-access locations.
Other factors to consider when choosing an alternative method for relay testing include cost, time efficiency, and safety. Each method has its own advantages and limitations, so it’s important to carefully evaluate which method is most suitable for the specific relay being tested. It’s also important to regularly schedule testing to ensure that relays are functioning properly and can reliably protect the power system.
Preventive Maintenance and Care Tips
- Regularly clean and lubricate moving parts of machines to maintain smooth functioning.
- Schedule regular maintenance checks for all equipment and appliances.
- Keep a record of maintenance schedules and repairs for future reference.
- Use high-quality materials when performing repairs or replacements to ensure longevity.
- Train employees on proper usage, handling, and care of equipment to prevent damage.
- Conduct safety checks to identify any potential hazards and promptly address them.
- Store equipment and tools in a clean, dry, and organized space to prevent damage.
- Follow manufacturer instructions for proper storage and maintenance of equipment.
By regularly implementing preventive maintenance and care tips, businesses can improve the efficiency and longevity of their equipment and appliances. This not only saves money on costly repairs or replacements but also reduces downtime and keeps operations running smoothly.
Challenges Faced and Lessons Learned From Practical Applications
As the saying goes, experience is the best teacher. In any field, practical applications are crucial for gaining valuable insights and learning important lessons that cannot be taught in a classroom setting. This is especially true in the ever-evolving world of technology.
In this article, we will discuss some common challenges faced by professionals during practical applications and the lessons that can be learned from these experiences.
Challenges Faced:

- Lack of Communication: One of the most common challenges faced during practical applications is a lack of communication among team members. This can result in misunderstandings, delays, and errors.
- Resource Constraints: Another challenge is working with limited resources such as budget, time, and technology. This can lead to compromises in the final product and affect its quality.
- Technical Issues: Technical issues such as software bugs, hardware malfunctions, or compatibility problems can also pose a major challenge during practical applications.
- Changing Requirements: In today’s fast-paced world, requirements can change frequently. This can be challenging for professionals who have already started working on a project based on previous requirements.
- Team Dynamics: Working in a team can also present its own set of challenges, such as conflicting ideas, differences in work styles, and personality clashes.
Lessons Learned:
- Importance of Communication: Through practical applications, professionals learn the importance of effective communication within a team. Clear and timely communication helps in avoiding misunderstandings and ensures that everyone is on the same page.
- Resource Management: Limited resources teach professionals to be more efficient and creative with their work. They learn to prioritize tasks, make the most of available resources, and find innovative solutions to problems.
- Problem-Solving Skills: Technical issues provide an opportunity for professionals to develop their problem-solving skills. They learn to troubleshoot, identify the root cause of an issue, and find solutions in a timely manner.
- Adaptability: Practical applications teach professionals to be adaptable in the face of changing requirements. They learn to be flexible in their approach and adjust quickly to new situations.
- Teamwork: Working in a team teaches professionals the importance of teamwork and collaboration. They learn to respect each other’s opinions, compromise when necessary, and work towards a common goal.
Despite the challenges faced, these experiences ultimately help individuals grow and become better at their craft. So, it is important to embrace these challenges and use them as opportunities for personal and professional development.
Conclusion
In conclusion, we have discussed the steps involved in replacing an intermittent wiper relay. While this task may seem daunting at first, it is a relatively simple process that can be done by anyone with basic automotive knowledge and some tools. However, as with any DIY repair project, there are also some disadvantages to consider when attempting to replace your own intermittent wiper relay. First and foremost, you may not have the necessary tools or equipment to complete the task properly. This could result in further damage to your vehicle or even injury.
Another disadvantage to replacing an intermittent wiper relay on your own is the time and effort it may take. Not everyone has the luxury of spending hours working on their car, especially if they rely on it for daily transportation. In these cases, it may be more practical to have a mechanic perform the replacement for you. I hope this article has been beneficial for learning how to replace intermittent wiper relay. Make Sure the precautionary measures are followed chronologically.

Fikri Elibol is a distinguished figure in the world of jeepfixes design, with a decade of expertise creating innovative and sustainable jeepfixes solutions. His professional focus lies in merging traditional craftsmanship with modern manufacturing techniques, fostering designs that are both practical and environmentally conscious. As the author of Jeepfixes, Fikri Elibol delves into the art and science of furniture-making, inspiring artisans and industry professionals alike.
Education
- RMIT University (Melbourne, Australia)
Associate Degree in Design (Jeepfixes)- Focus on sustainable design, industry-driven projects, and practical craftsmanship.
- Gained hands-on experience with traditional and digital manufacturing tools, such as CAD and CNC software.
- Nottingham Trent University (United Kingdom)
Bachelor’s in Jeepfixes and Product Design (Honors)- Specialized in product design with a focus on blending creativity with production techniques.
- Participated in industry projects, working with companies like John Lewis and Vitsoe to gain real-world insights.
Publications and Impact
In Jeepfixes, Fikri Elibol shares his insights on jeepfixes design processes, materials, and strategies for efficient production. His writing bridges the gap between artisan knowledge and modern industry needs, making it a must-read for both budding designers and seasoned professionals.