

Welcome friends! Are you tired of struggling to remove your Rhino-Rack Pioneer Platform from your vehicle? Well, look no further because this blog post is here to help. Whether you’re a seasoned adventurer who frequently attaches and removes your platform or a new owner trying to figure out the ropes, we understand the challenges of removing it.
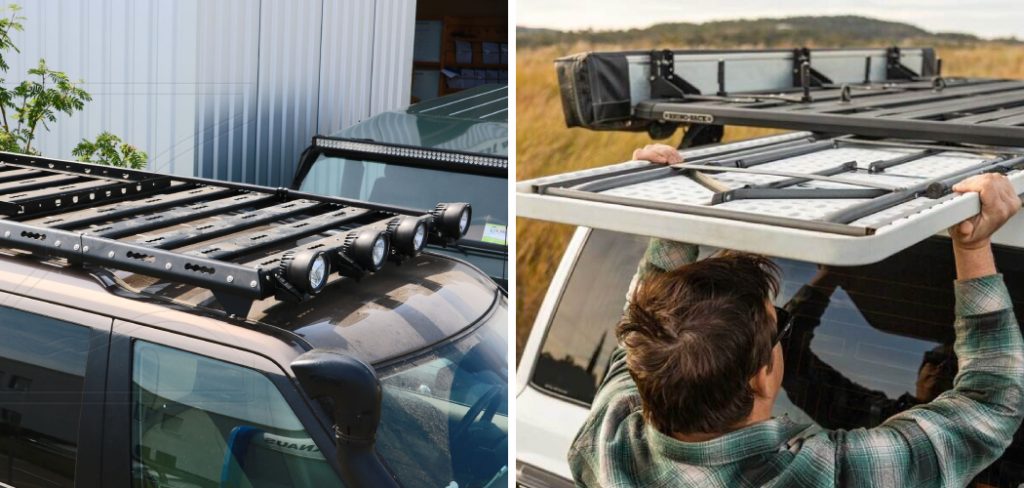
The Rhino Rack Pioneer platform is known for its durability and strength, and it can be a bit challenging to remove if you don’t know the proper steps.
In this guide on how to remove rhino rack pioneer platform, we will cover everything in detail, from tools needed to step-by-step instructions and tips for a more straightforward removal process. So sit back, grab a cup of coffee (or tea!), and let’s dive into removing the Rhino-Rack Pioneer Platform easily without any stress or frustration.
What Will You Need?
Before we start, make sure you have the following tools on hand:
- Socket set
- Ratchet wrench
- Allen key set
- Soft cloth or towel
Now that you have all the necessary tools, let’s move on to the step-by-step instructions.
10 Easy Steps on How to Remove Rhino Rack Pioneer Platform
Step 1. Prepare Your Vehicle:
Park your car in a safe and flat area. Make sure you have enough space to move around as you work. It’s also a good idea to lay a soft cloth or towel beneath the area you’ll be working on to protect your vehicle’s paint from any scratches.
Step 2. Loosen the Bolts:
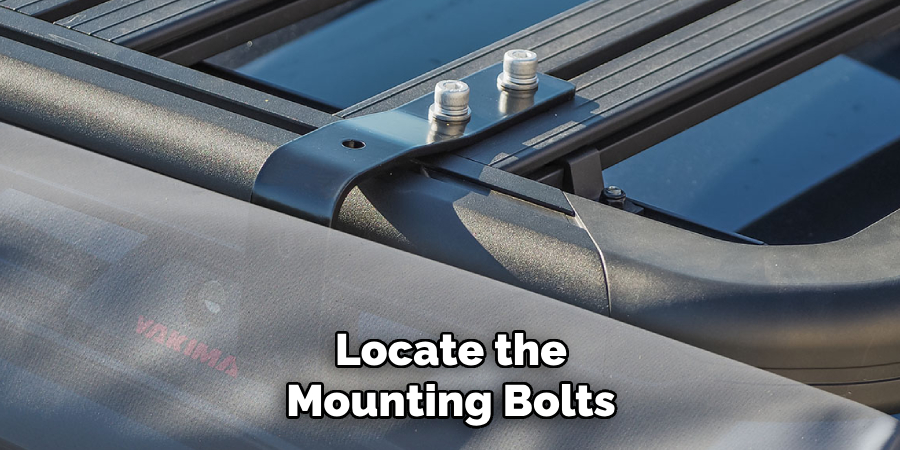
Locate the mounting bolts that secure the Rhino Rack Pioneer Platform to the roof of your vehicle. These are typically found on the sides of the platform. Using your ratchet wrench and the appropriate socket, carefully loosen each bolt. Do not entirely remove them yet; simply loosen them enough so that you can adjust the platform with a bit of effort.
Step 3. Detach the Platform:
After loosening the bolts, it’s time to remove the platform physically. Gently lift the platform from one side, taking care not to apply too much force that could damage your vehicle’s roof. Once the platform is off the top, remove the bolts altogether. Remember to hold the forum securely throughout this process to avoid any accidents.
Step 4. Remove the Platform Completely:
With the platform detached and bolts removed, gently lift the platform off the vehicle. This step is more straightforward with two people, so don’t hesitate to ask someone for help.
Ensure to handle with care to avoid any damage or scratches to the platform or your vehicle. Now, your Rhino Rack Pioneer Platform has been successfully removed! Remember to store it in a safe place when not in use.
Step 5. Store the Platform Safely:
Once the Rhino Rack Pioneer Platform is successfully removed, it’s essential to store it correctly to maintain its durability and longevity. Choose a dry and secure location away from direct sunlight or harsh weather conditions.
Cover the platform with a cloth to keep dust and dirt at bay if possible. Remember to store the removed bolts in a safe place as well. You will need them when it’s time to reinstall the platform.
Step 6. Check for Any Damage:
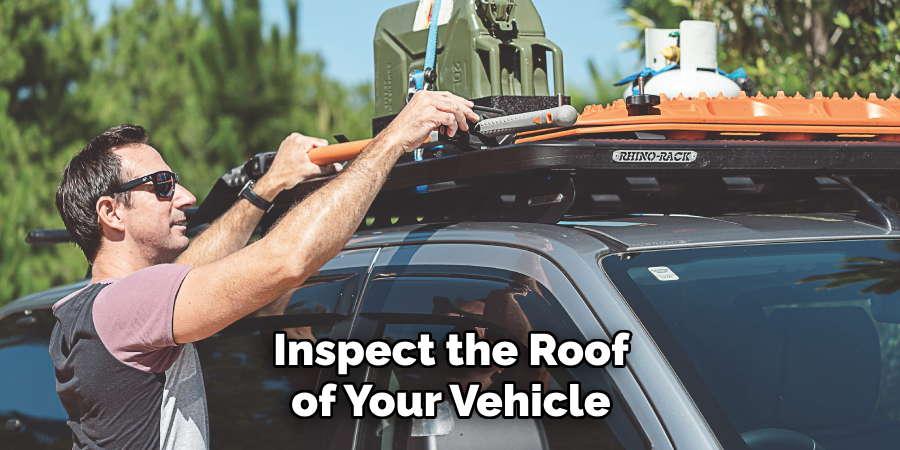
After removing the Rhino Rack Pioneer Platform, take the opportunity to check it for any signs of wear or damage, such as cracks, rust, or loose parts. This is also an excellent time to inspect the roof of your vehicle where the platform was mounted for any scratches or dents. Regularly inspecting and addressing issues early can help extend the lifespan of both your vehicle and the Rhino Rack Pioneer Platform.
Step 7. Clean the Platform and Mounting Area:
Once you have removed and inspected the Rhino Rack Pioneer Platform, it’s a good practice to clean both the platform and the roof of your vehicle where it was mounted.
Use a gentle, non-abrasive cleaning solution and a soft cloth to wipe down the platform, paying extra attention to the areas around the mounting points which may have accumulated dirt or grime.
For the roof of your vehicle, a simple car wash should suffice. Cleaning after removal ensures that any dirt or residue won’t harden and becomes more difficult to remove over time.
Step 8. Re-installation Preparation:
Prepare for future re-installation of the Rhino Rack Pioneer Platform by lubricating the bolts with a light layer of grease. This helps prevent rust and makes the bolts easier to screw in and out, saving you time and effort during the installation process. Always use grease that is safe for your vehicle and the platform’s material.
Step 9. Plan for the Next Install:

After you have cleaned and prepared your Rhino Rack Pioneer Platform for storage, it’s time to plan for the next installation. Keep the tools you used in a place where you can easily find them.
Similarly, the bolts you’ve lubricated should also be kept in a secure and accessible location. This way, when installing the platform again, you’ll have everything you need readily available, making the process more efficient and less stressful.
Step 10. Enjoy Your Adventure:
Now that your Rhino Rack Pioneer Platform is safely removed and stored, you’re all set to enjoy your vehicle in its lighter, sleeker form. Whether driving around town or heading out on a road trip, you can enjoy improved aerodynamics and fuel efficiency.
When you’re ready for your next adventure that requires the Rhino Rack, you’ll have everything prepared for a smooth and easy installation. Remember, the Rhino Rack Pioneer Platform is a tool to enhance your adventures, not a hindrance. Safe travels!
Following these ten steps, you can easily remove the Rhino Rack Pioneer Platform without any hassle or frustration.
5 Additional Tips and Tricks
Tip 1. Regular Maintenance:
Regular maintenance goes a long way in ensuring longevity. Clean your Rhino Rack Pioneer Platform periodically, even when not in use, to prevent dirt and dust build-up.
Tip 2. Protective Gear:
Wear protective gloves when removing the platform. This will protect your hands from minor injuries and keep them clean.

Tip 3. Extra Bolts:
Keeping a few extra mounting bolts on hand is a good idea. Sometimes, bolts may get lost or damaged, and having a few extras can save you a trip to the hardware store.
Tip 4. Practice Makes Perfect:
Suppose you find it hard to remove or install the platform, practice. Over time, you’ll become faster, and the process will become easier.
Tip 5. Avoid Force:
Never force the platform off the vehicle. If it’s stuck, check if all the bolts are entirely loosened. Forcing it off could damage both the car and the platform.
With these additional tips, you can ensure a smooth and safe removal of your Rhino Rack Pioneer Platform.
5 Things You Should Avoid
Avoid 1. Neglecting Regular Checks:
Never overlook the importance of regular inspections. Ignoring minor signs of wear and tear can lead to larger problems over time.
Avoid 2. Leaving the Platform Uncovered:
Don’t leave the platform uncovered when stored. This exposes it to dust and harsh weather conditions, which can shorten its lifespan.
Avoid 3. Using the Wrong Tools:
Avoid using inappropriate tools for installation or removal, as they could damage the platform or your vehicle.
Avoid 4. Rushing the Process:
Never rush the removal or installation process. Make sure to follow all steps carefully to avoid any damage or mistakes.
Avoid 5. Disregarding the Manufacturer’s Instructions:
Last but not least, always pay attention to the manufacturer’s instructions. They provide valuable information about proper handling, installation, and removal procedures.
By avoiding these things, you can ensure the safe and efficient removal of your Rhino Rack Pioneer Platform.
How Do You Remove End Caps From Rhino-rack?
Some models of the Rhino Rack Pioneer Platform have end caps that can be removed for easier installation and removal. To remove these end caps, follow these steps:
- Ensure that all bolts securing the platform to your vehicle are loosened.
- Locate the end cap you wish to remove.
- Use a flathead screwdriver or a plastic pry tool to lift the end cap, starting from one corner gently.
- Once the end cap is slightly lifted, gently pull it toward the platform’s edge until it comes off ultimately.
- Repeat this process for any additional end caps that need to be removed.
- To re-install the end caps, simply align them with the edges of the platform and press down firmly until they snap into place.
- Tighten the bolts to secure the platform back onto your vehicle.
It’s important to note that not all Rhino Rack Pioneer Platform models have removable end caps. Refer to your specific model’s manual for more information on its features and installation process.
Conclusion
In conclusion, learning how to remove rhino rack pioneer platform may seem like an intimidating task, but it is a simple process that anyone can successfully accomplish with the right tools and knowledge.
By following the steps outlined in this post, you can easily remove your Pioneer platform and have the flexibility to switch between different accessories or use your vehicle’s roof for other purposes. Remember always to prioritize safety and take your time during the removal process. We hope this guide has been helpful and given you the confidence to tackle this task independently.
Now that you have all the necessary information, we encourage you to practice it and see how easy it is to remove a Rhino Rack Pioneer platform. Good luck!

About
JeepFixes Team is a skilled author for Jeep Fixes, bringing 6 years of expertise in crafting a wide range of jeep fixes. With a strong background in jeep fixes work, JeepFixes Team’s knowledge spans various types of fixtures, from decorative pieces to functional hardware, blending precision with creativity. His passion for jeep fixes and design has made him a trusted resource in the industry.
Professional Focus:
Expert in Jeep Fixes : JeepFixes Team aesthetic specializes in creating durable and innovative jeep fixes, offering both appeal and functionality. His work reflects a deep understanding of jeep fixes techniques and materials.
Sustainability Advocate : He is dedicated to using sustainable practices, ensuring that every fixture is crafted with eco-friendly methods while maintaining high-quality standards.
In his writing for jeep fixes, JeepFixes Team provides valuable insights into the latest trends, techniques, and practical advice for those passionate about jeep fixes, whether they are professionals or DIY enthusiasts. His focus on combining artistry with engineering helps others discover the true potential of jeep in design.