

Removing Jeep leaf clamps is a fundamental aspect of maintaining and customizing your vehicle’s suspension system. Leaf clamps, crucial components that secure the leaf springs to the axle, require attention during repairs, upgrades, or adjustments. Whether you’re enhancing your Jeep’s off-road capabilities or replacing worn-out parts, understanding how to remove jeep leaf clamps is essential.
This process involves specific steps and considerations to ensure safety and efficiency. By dismantling the leaf clamps correctly, you can access the leaf springs for maintenance or modification, such as adding lift kits or installing aftermarket components. Whether you’re a seasoned enthusiast or a novice DIYer, mastering the removal of Jeep leaf clamps empowers you to take control of your vehicle’s performance and customization. In this guide, we’ll explore the necessary tools, techniques, and precautions to safely and effectively remove leaf clamps from your Jeep’s suspension system, allowing for seamless maintenance and upgrades.
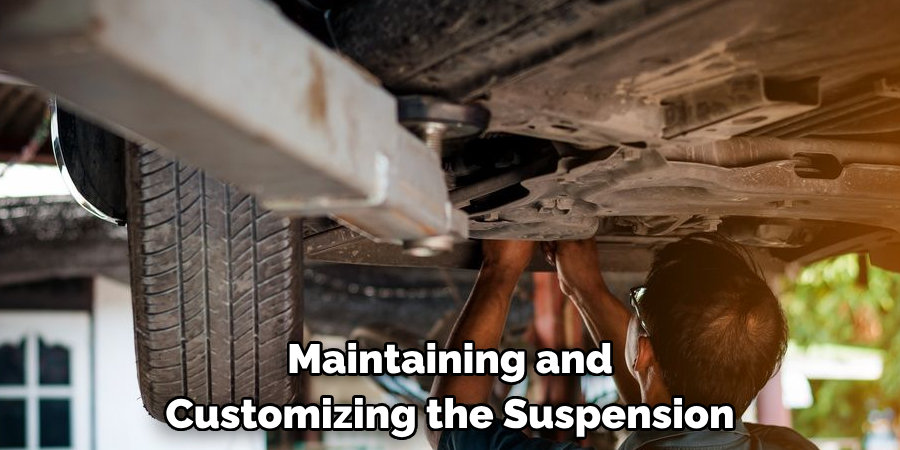
Importance of Maintaining and Customizing Jeep Suspension Systems
Maintaining and customizing the suspension system of a Jeep is more than just a matter of performance; it’s about personalizing the vehicle to fit the driver’s lifestyle and the challenges they intend to undertake. A well-maintained suspension system ensures optimal safety and comfort during off-road adventures, where unpredictability is part of the thrill.
Customization allows Jeep owners to prepare their vehicle for the specific terrain they wish to conquer, whether it’s rock crawling, mudding, or navigating through deep waters. Upgrades like lift kits can increase ground clearance and improve the overall off-road driving experience, while replacing old or worn-out components can prevent breakdowns during critical moments. By investing in the suspension system, Jeep enthusiasts not only preserve the longevity and resale value of their vehicle but also enhance their driving pleasure and performance capabilities.
Understanding Leaf Clamps
Leaf clamps are small but vital parts of a Jeep’s suspension system. They function by keeping the individual leaves of a leaf spring assembly securely bound together, helping to maintain the collective strength and form of the spring pack. These clamps manage the load and help to evenly distribute the weight of the vehicle, which is particularly crucial when navigating uneven terrain.
While they might appear inconsequential, their role in maintaining the integrity of suspension performance cannot be understated. With regular exposure to harsh conditions, they’re susceptible to wear, corrosion, and damage. Hence, a thorough understanding of their construction and the signs of potential failure is critical for every Jeep owner, ensuring preventive maintenance and timely replacements.
Types of Leaf Clamps Used in Jeep Vehicles
Leaf clamps come in various designs, each suited for specific applications within Jeep vehicles. The most common types include:
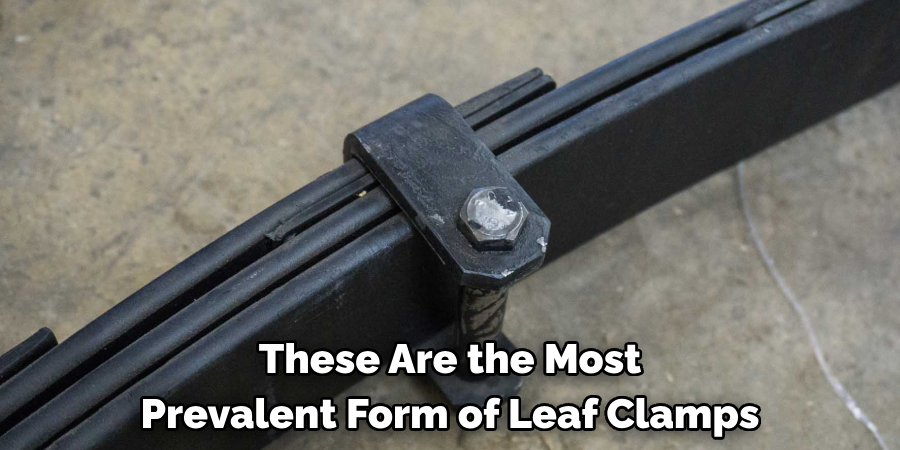
- Standard U-Bolt Clamps: These are the most prevalent form of leaf clamps and are characterized by their U-shaped bolts that encompass the axle and the leaf spring pack. They are valued for their simplicity and strength.
- Heavy-Duty Clamps: Designed for Jeeps that endure more rigorous off-road conditions, heavy-duty clamps provide extra strength and are typically made from more resilient materials.
- Adjustable Clamps: These allow for fine-tuning the stiffness and curvature of the leaf spring pack. They are ideal for drivers who frequently adjust their setup for different off-road scenarios.
- Quick-Release Clamps: For those who require fast and frequent access to their leaf springs for adjustments or repairs, quick-release clamps offer a convenient solution with mechanisms that are easier to detach without compromising the stability of the suspension system.
Each type of clamp serves a unique purpose in the suspension setup, and selecting the right type is dependent on the specific needs and expectations of the driver. It’s important to note that while some Jeeps may come with factory-installed clamps, aftermarket options can provide customized functionality and performance enhancements.
Gathering Necessary Tools and Equipment
Before you begin the removal of leaf clamps from your Jeep, it’s crucial to gather all the necessary tools and equipment to perform the task efficiently and safely. The following list is a comprehensive outline of what you will typically need:
- Socket Wrench Set: A variety of sockets to fit the nuts on the U-bolts and other fastenings.
- Torque Wrench: To ensure that, upon reassembly, all bolts are tightened to the manufacturer’s specified torque settings.
- Breaker Bar: To provide additional leverage for loosening tight bolts.
- Pliers or Vise Grips: To hold components securely and manipulate parts that are difficult to move by hand.
- Penetrating Oil: To help loosen rusted or seized bolts and nuts.
- Safety Glasses: To protect your eyes from debris and dust.
- Jack and Jack Stands: To lift and securely support the Jeep while you’re working on the suspension system.
- Wheel Chocks: To prevent the vehicle from rolling when lifted.
- Rubber Mallet or Hammer: For gently coaxing stubborn parts or for assistance in breaking loose rusted components.
Wearing appropriate safety gear such as gloves and protective eyewear is essential. Additionally, ensure that you have a clean, flat workspace with sufficient lighting to safely carry out the maintenance procedure. Having all the necessary tools on hand before you begin will save time and help prevent any interruptions during the process.
Ensuring Safety Precautions are in Place
Before attempting to remove leaf clamps from your Jeep’s suspension, it’s paramount to prioritize safety. To safeguard against potential hazards, follow these safety precautions:
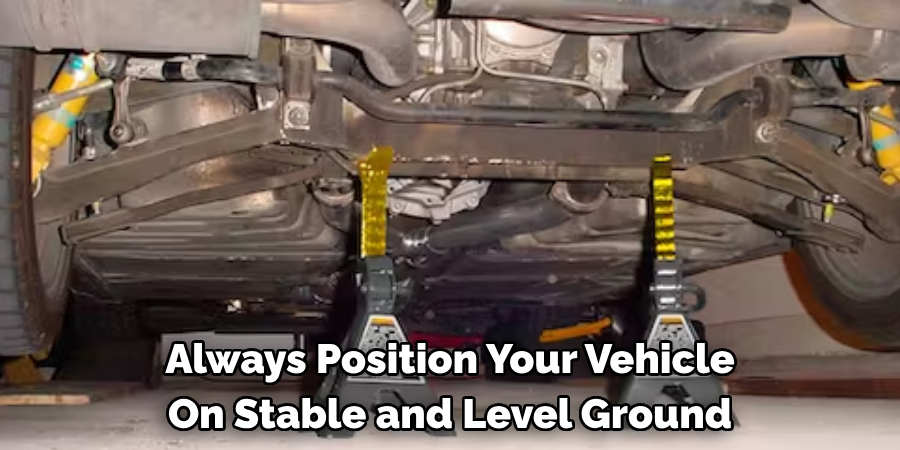
- Work on a Level Surface: Always position your vehicle on stable and level ground to prevent it from shifting or rolling while you work.
- Use Wheel Chocks: Place wheel chocks in front and behind the tires to ensure that the vehicle remains stationary.
- Employ Sturdy Jack Stands: After lifting the Jeep with a jack, place reliable jack stands under the vehicle to support its weight securely. Never rely on the jack alone to hold the vehicle up while working.
- Disconnect the Battery: To avoid any electrical shorts or accidents, disconnect the battery, especially if you’ll be working near any wiring harnesses or electronic components of the vehicle.
- Adhere to Proper Lifting Techniques: Use the correct lifting points on the Jeep to raise it and be mindful of your body’s posture when lifting or moving heavy objects to prevent injury.
- Inspect Equipment Before Use: Check all tools and equipment for damage or wear before starting the job to ensure they are safe to use.
- Be Aware of Surroundings: Keep your work area free of clutter and unnecessary items that might pose a tripping hazard.
By rigorously imposing these safety measures, you can minimize the risk of injury or damage to your Jeep while performing suspension maintenance and modifications.
10 Steps How To Remove Jeep Leaf Clamps
1. Gather Necessary Tools and Materials:
Before beginning the removal process, gather all the necessary tools and materials. This includes a socket wrench set, penetrating oil, jack stands, safety gloves, and safety goggles. It is important to have all the tools and materials on hand before starting the process to avoid any delays or accidents. However, if you do not have a socket wrench set, it can typically be rented or borrowed from a local auto parts store. To make the process even smoother, consider purchasing a repair manual for your specific vehicle model. This will provide detailed instructions and diagrams to guide you through the removal process. Make sure to have all the tools and materials easily accessible before beginning.
2. Prepare the Work Area:
Park the Jeep on a flat, level surface and engage the parking brake. Ensure there is ample space around the vehicle to safely maneuver and work on the suspension system. Place jack stands under the frame to support the vehicle securely.
Before proceeding with any suspension work, it is crucial to properly prepare the work area. This will ensure that you have a safe and efficient environment to carry out the necessary tasks.
First and foremost, it is essential to park the Jeep on a flat and level surface. This will provide stability for both the vehicle and yourself while working on the suspension system. Additionally, engaging the parking brake will prevent the vehicle from accidentally rolling or moving.

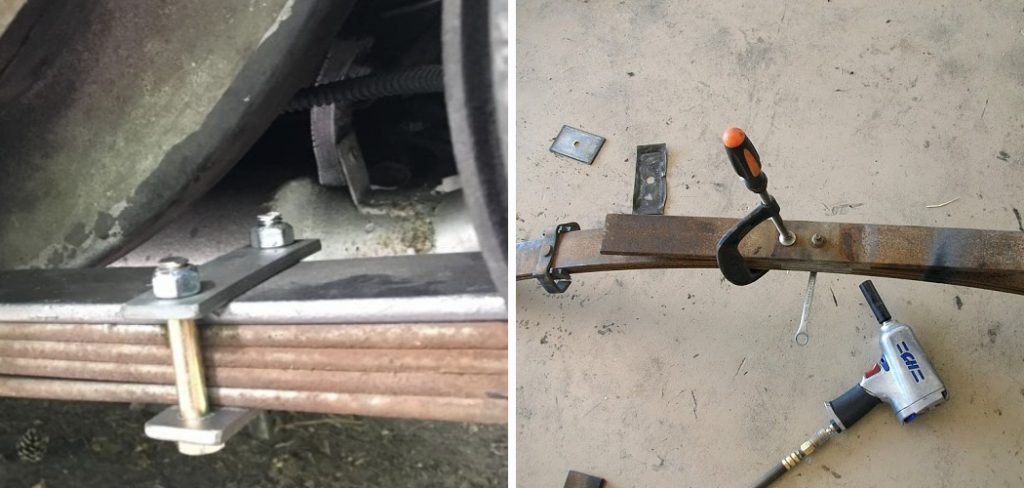
3. Identify the Leaf Clamps:
Locate the leaf clamps on the Jeep’s suspension system. Leaf clamps are typically found securing the leaf springs to the axle. They may vary in design and location depending on the Jeep model and suspension setup. Look for metal brackets or bands that wrap around the leaf springs and are bolted to the axle.
Leaf clamps play an important role in keeping the leaf springs in place and preventing excessive movement while driving. They also help distribute weight evenly across the suspension system, ensuring a smooth ride.
Some common types of leaf clamps include U-bolt style clamps, saddle-style clamps, and T-bolt clamps. Each type has its own advantages and may be used in different suspension setups.
4. Spray Penetrating Oil:
Spray penetrating oil generously on the bolts and nuts securing the leaf clamps. Allow the penetrating oil to penetrate and loosen any rust or corrosion, making it easier to remove the fasteners. Use a wrench or socket set to loosen and remove the bolts and nuts.
Spray penetrating oil is a must-have for any DIY mechanic or home repair enthusiast. This versatile lubricant not only helps with loosening stubborn fasteners, but it also protects against future rust and corrosion.
When working on any project that involves metal parts, chances are you will encounter stuck bolts or nuts at some point. This can be frustrating and time-consuming, but with spray penetrating oil, the task becomes much easier.

5. Loosen the Bolts/Nuts:
Use a socket wrench set to loosen the bolts and nuts that secure the leaf clamps to the axle and leaf springs. Start with the appropriate size socket and apply steady pressure to loosen the fasteners. If the bolts are heavily rusted or corroded, apply additional penetrating oil and allow it to work its way into the threads. Use a breaker bar or an impact wrench for more stubborn bolts.
Once the fasteners are loosened, remove them completely and set them aside in a safe place. Be sure to keep track of which bolt goes where, as some may differ in size or length. Once all of the bolts are removed, carefully lower the leaf clamps from the axle and leaf springs.
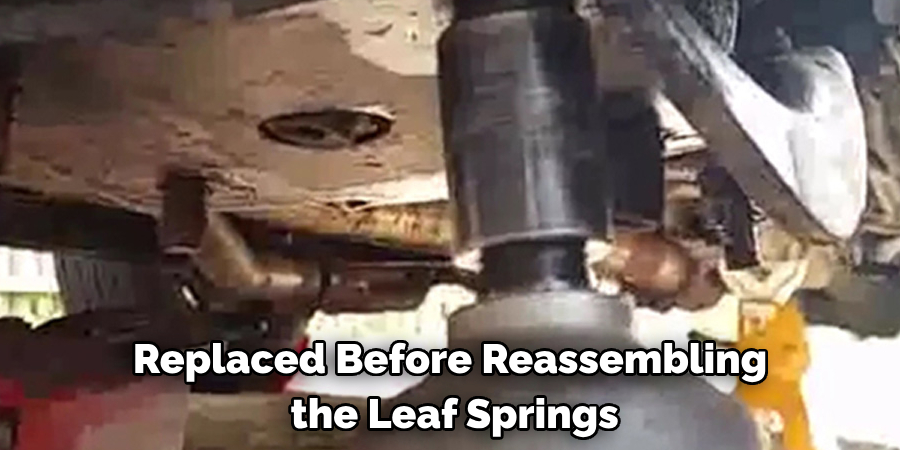
6. Support the Leaf Springs:
Before completely removing the bolts and nuts, support the leaf springs to prevent them from falling when the clamps are removed. Use a jack or additional jack stands to support the leaf springs while removing the leaf clamps. This will also help in making the reinstallation process easier and more efficient.
It is important to note that leaf springs are a crucial part of your vehicle’s suspension system. They provide support and stability to the vehicle, especially when carrying heavy loads or driving over rough terrains. Therefore, it is essential to take proper care of them for smooth and safe driving experience.
One way to support the leaf springs is by regularly inspecting them for any signs of damage or wear. If you notice any cracks, rust, or deformation in the springs, it is important to get them replaced immediately. Ignoring such issues can lead to further damage and may even result in a broken spring while driving.
7. Remove the Bolts/Nuts:
Once the bolts and nuts are sufficiently loosened, carefully remove them from the leaf clamps using the socket wrench set. Keep track of the hardware to ensure it is not lost or misplaced during the removal process. Once all bolts and nuts are removed, the leaf springs should be free from the vehicle chassis.
After removing the bolts and nuts, it is important to inspect them for any signs of wear or damage. If any bolts or nuts appear worn or damaged, they should be replaced before reassembling the leaf springs onto the vehicle. It is crucial to use high-quality replacement hardware to ensure the safe operation of the vehicle.
In addition to inspecting the bolts and nuts, it is also recommended to clean them before reusing or replacing them. Use a wire brush or cleaning solution to remove any dirt or rust that may have accumulated on the hardware. This will help ensure a proper fit and prevent any potential issues with the leaf springs in the future.

8. Disassemble the Leaf Clamps:
With the bolts and nuts removed, disassemble the leaf clamps from the leaf springs and axle. Depending on the design of the clamps, this may involve sliding them off the leaf springs or separating them from the axle mounting points. These clamps are responsible for holding the leaf springs in place and should be carefully removed to avoid damaging them. However, if the leaf clamps are rusted or damaged, they may need to be replaced.
If the leaf clamps are still in good condition, it is recommended to clean them with a wire brush and rust remover. This will help prevent further corrosion and ensure they can properly secure the leaf springs once reassembled.
9. Inspect for Damage or Wear:
Take this opportunity to inspect the leaf clamps for any signs of damage, wear, or deformation. Check for cracks, bends, or excessive corrosion that may compromise the structural integrity of the clamps. If any issues are found, it is important to replace the damaged clamps before using the ladder.
It is also essential to check for wear on the locking mechanisms of your ladder. These are crucial components that keep the ladder securely in place while in use. Look for any signs of rust or corrosion that may cause them to malfunction. Make sure they are still functioning properly and are free from any debris or obstructions.
Another area to inspect is the steps or rungs of your ladder. Look for any bent, cracked, or missing steps that may make the ladder unsafe to use. If you notice any issues with the steps, it is important to replace them as soon as possible.
10. Clean and Organize:
Once the leaf clamps have been removed, clean the surrounding area of any debris, dirt, or rust residue. Organize the removed hardware and components for inspection, replacement, or reinstallation as needed.
It is important to clean the area around the leaf clamps before proceeding with any further steps. This not only ensures a better working environment but also prevents any potential damage to the surrounding components. Use a dry cloth or brush to remove any debris, dirt, or rust residue from the surface.
Conclusion
In conclusion, mastering the process of removing Jeep leaf clamps is essential for maintaining and customizing your vehicle’s suspension system. By following the comprehensive ten-step guide on how to remove jeep leaf clamps, Jeep owners can confidently tackle this task with precision and efficiency.
From gathering the necessary tools and materials to carefully inspecting for damage or wear, each step plays a crucial role in ensuring a successful removal process. Attention to detail, proper technique, and adherence to safety protocols are paramount throughout the procedure to prevent accidents and achieve optimal results.