

Regular oil changes are vital for maintaining engine health, and the process often involves removing the oil pan to access and replace old oil.
However, mechanics and DIY enthusiasts alike may encounter the challenge of how to remove a stuck oil pan, which can be a stubborn obstacle due to corrosion, over-tightened bolts, or hardened sealant.
This article aims to provide comprehensive guidance on this task, addressing both common and unique issues encountered during removal. Our target audience ranges from beginner to advanced mechanical minds seeking to expand their automotive repair skills, specifically focusing on the critical step of dealing with a stuck oil pan.
Preparation and Safety
Before commencing the task of removing a stuck oil pan, gathering the correct tools and equipment is essential. This typically includes a set of sockets and wrenches to fit your vehicle’s specific bolt sizes, a rubber mallet, a drain pan, a gasket scraper or solvent for sealant removal, and potentially a torch or penetrating oil for seized bolts. Depending on whether your oil pan is sealed with a gasket or RTV (Room Temperature Vulcanizing silicone), you may need additional specialized tools such as a pan separator kit.
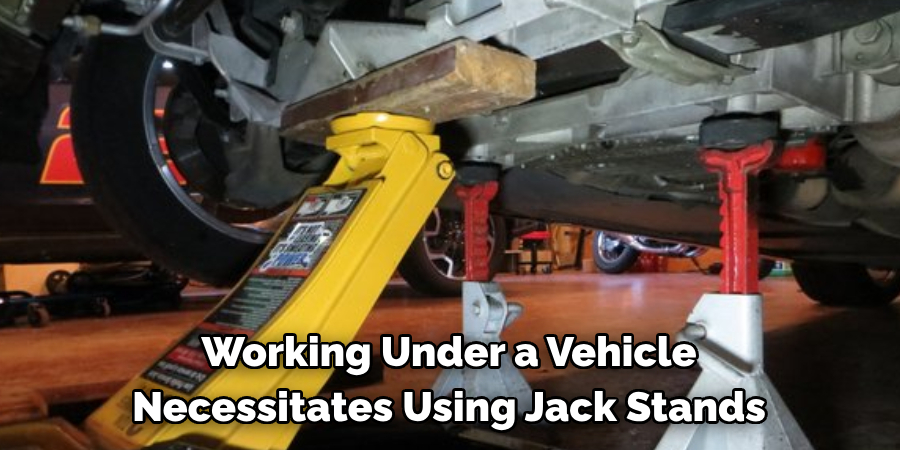
Safety cannot be overstressed when performing auto repairs. Ensure the engine is cool to the touch to avoid burns from hot oil. Working under a vehicle necessitates using jack stands to securely lift and support the car — never rely solely on a jack. Wear appropriate protective gear, including safety glasses, gloves, and closed-toe shoes. It is also advisable to keep a fire extinguisher nearby in case of emergencies.
Before tackling the removal, consult your vehicle’s repair manual for specific instructions. The manual will provide the exact bolt-breaking sequence, torque specifications, and other critical information unique to your car model. This promotes safety and increases the likelihood of a successful oil pan removal.
Assessing the Situation
Before embarking on how to remove a stuck oil pan, it is crucial to accurately assess the situation. Begin by identifying the type of sealant used, which largely influences the removal process; the two primary types are gasket and RTV silicone sealant. A gasket is a preformed shape, often made of rubber or cork, that sits between the oil pan and the engine block. On the other hand, RTV is a liquid silicone that hardens at room temperature to create a seal.
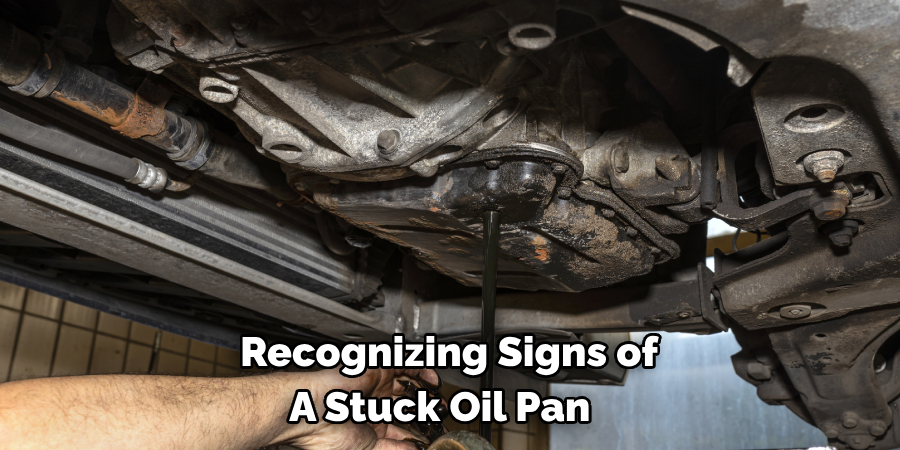
Recognizing signs of a stuck oil pan is your next step. These may include visible leaking, particularly in aged vehicles where the sealant has degraded, or encountering significant resistance when attempting to loosen the bolts or pry the pan. This difficulty is generally due to over-tightening, corrosion, or the hardening of the sealant over time, which acts as an adhesive.
Additionally, locate any obstructions that may hinder the removal of the oil pan. Components such as brackets, exhaust parts, or transmission bell housing can impede access. Carefully remove these components, storing the bolts and small parts separately for an organized reassembly.
An often overlooked but valuable practice is to take pictures or videos of the oil pan and surrounding areas before disassembly. These visuals serve as a helpful guide during reassembly, helping to ensure everything is returned to its original place and orientation. By concluding the assessment phase with thorough documentation, you set the stage for a smoother and more efficient oil pan replacement process.
How to Remove a Stuck Oil Pan: A Guide for DIYers and Professionals
1. Loosening the Oil Pan Bolts
One of the most significant issues when disassembling an engine for service or repair is removing the oil pan when its bolts are stuck. To proceed in the most efficient manner, proper socket or wrench selection is mandatory. The first step is identifying the bolt type and size, ensuring that your tools fit perfectly to prevent the rounding off of bolt heads. A snug fit is essential for proper leverage and force distribution during removal.
Next, adhere to the proper breaking sequence to avoid warping the oil pan. This is typically done in an incremental, cross-pattern method as specified in the vehicle’s repair manual. Each bolt should be gradually loosened a bit at a time to spread the release of tension evenly across the pan’s surface.
When faced with seized or rusted bolts, patience is key. Apply a quality penetrating oil generously to the bolts, and give it the requisite time to work. If the bolts remain unyielding, gentle application of heat may be necessary. A propane torch directed at the bolt can expand the metal and help break the bond—however, one must use this method with extreme caution to prevent damage to the pan or other engine components.
Finally, if a bolt head is stripped and standard tools can no longer grasp it, it’s time to resort to bolt extractors. These tools are designed to dig into the screw’s metal and allow for removal. If the bolt remains stuck, or the situation results in bolt breakage, a more complex and advanced technique of drilling and re-tapping may be employed. This requires a steady hand and exact precision to ensure the oil pan or the engine block itself does not end up with additional damage that could exacerbate the situation. After drilling the bolt out, a tap carves new threads to accept a new bolt, effectively restoring the connection between the oil pan and engine block.
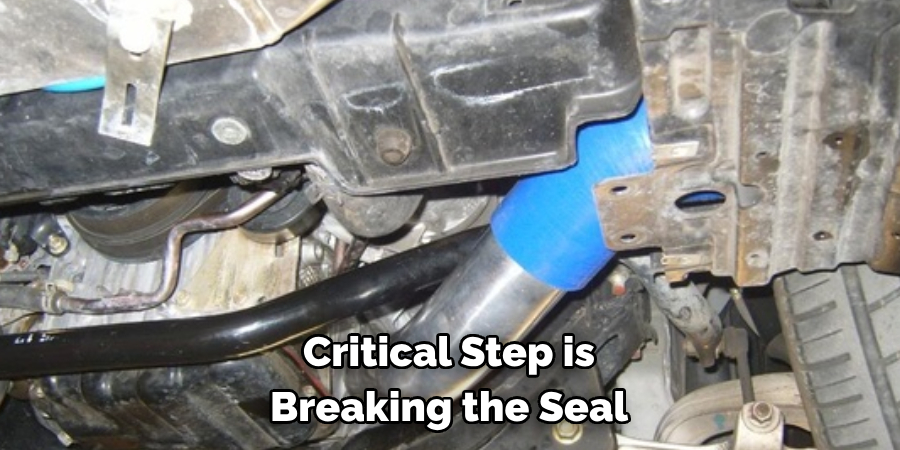
2. Breaking the Seal
After loosening the bolts, the next critical step is breaking the seal between the oil pan and the engine block. For those with a gasket, carefully slide a gasket scraper between the pan and the block. Work around the edge, prying up gently to avoid bending or damaging the metal. In some cases, gasket solvent may aid in dissolving any adhesive or seal remains, simplifying the detachment process.
When dealing with RTV silicone sealant, specialized tools such as a pan separator kit can come in handy, allowing for a calculated and safe separation of the pan from the block. Begin by carefully inserting the tools and prying with minimal force to safeguard against any damage; RTV can be particularly tenacious.
Regardless of the sealant type, caution is of utmost importance — excessive force could lead to the warping or cracking of the oil pan or damage to the engine block, leading to further complications. Patience and steady, even pressure around the seal area is crucial.
Following the separation, thoroughly cleaning the mating surfaces is essential to ensure a perfect seal upon reassembly. Use a solvent designed for the task and non-abrasive tools to avoid scratches that could cause leaks. Ensuring that every trace of the old gasket or RTV is removed reduces the likelihood of future oil leaks. The goal is to return to a smooth, clean surface that will allow the new gasket or RTV to seal effectively, preventing oil contamination and engine damage.
3. Removing the Oil Pan
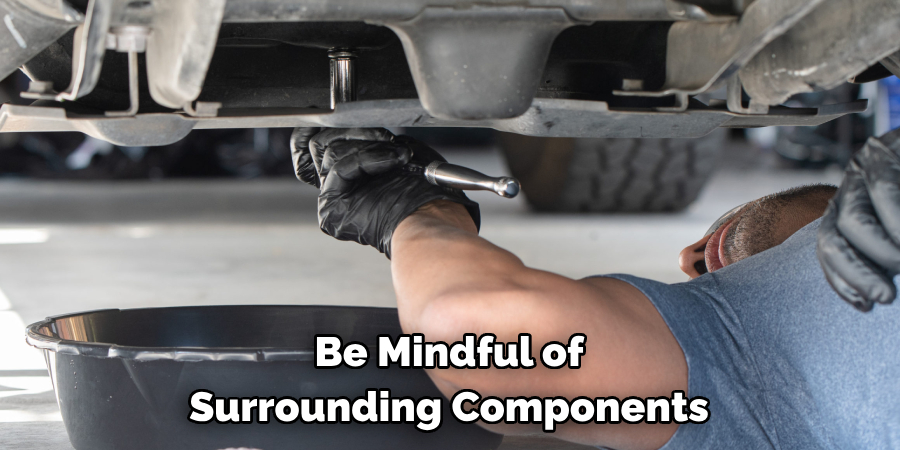
After all preliminary steps have been accomplished and the seal has been broken, the next task is safely removing the oil pan. Start by ensuring that any remaining oil is drained to minimize spills. Position a suitable container under the engine to catch any residual oil as the pan is detached.
Careful manipulation of the oil pan is crucial as it is maneuvered out of position. Be mindful of surrounding components such as the exhaust, transmission, and engine mounts to prevent any accidental damage. If the seal exhibits resistance despite removing all bolts, a gentle approach using pry bars or levers may be necessary to break the seal. Employ these tools meticulously to maintain the integrity of the engine block and oil pan.
Moreover, remember to disconnect any sensors, wiring, or other fittings attached to the oil pan. Labeling these connections before removal will streamline the reassembly process, ensuring everything is correctly reconnected.
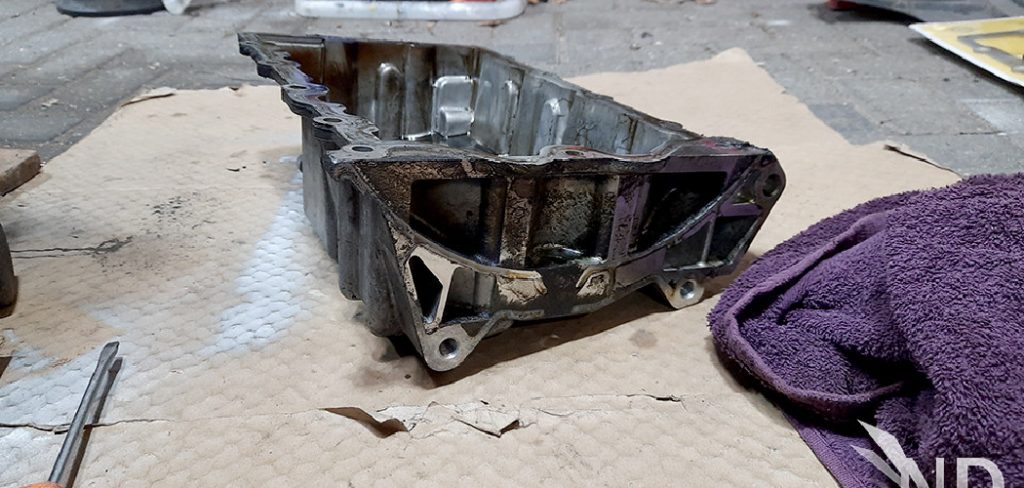
Once the oil pan is free, place it in a designated container to catch any dripping oil. Take this opportunity to inspect the pan for signs of wear or damage, such as cracks or warping, that could indicate the need for further repairs or replacement.
In summary, removing the oil pan is a task that demands attention to detail and a cautious hand. From ensuring all oil is drained to sensitive disconnection and handling of the pan, each action should be performed to preserve the vehicle’s components and the cleanliness of the work area.
4. Cleaning the Oil Pan and Engine Block
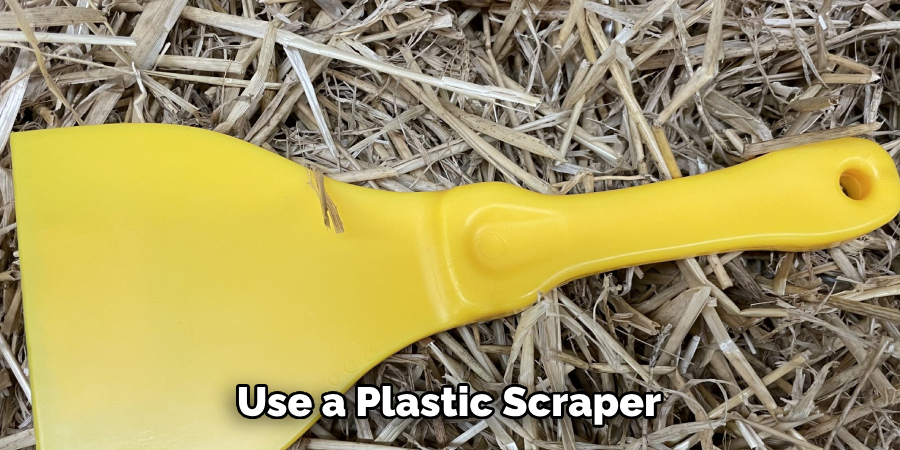
Before reassembling the oil pan, removing all traces of old gasket material and sealant residue is crucial. Use a plastic scraper to prevent scoring the metal surfaces, and consider an automotive gasket remover for stubborn areas. When it comes to the cleaning solvent, choose one that’s compatible with engine components and designed to break down oil and grime without causing corrosion.
With the old gasket material cleared, wipe down the oil pan and the engine block mating surface with a clean rag. Avoid using abrasive pads that could scratch the surface and potentially lead to future leaks. As you clean, inspect the oil pan for any signs of structural damage, such as cracks, dents, or warping. These flaws could compromise the integrity of the oil seal, warranting pan repair or replacement.
The engine block mating surface requires equal attention. Carefully remove any dirt, oil, or debris to ensure that it’s completely clean and flat. A reliable seal during reassembly depends on the surface’s cleanliness and condition; therefore, double-check for any remaining residue or anomalies.
Thorough cleaning is the foundation of a leak-free seal and a well-maintained engine. By following these meticulous steps, you are setting the stage for a successful installation of a new gasket or sealant application, ensuring optimal engine performance and longevity.
5. Preparing for Reassembly
With the oil pan and engine block surfaces clean and inspected, the next essential step is preparing for reassembly. Select the appropriate oil pan gasket or sealant that matches your vehicle’s specifications. Reference the vehicle manufacturer’s manual for guidance on the correct type of gasket material or whether a form-in-place gasket (RTV silicone) is recommended.
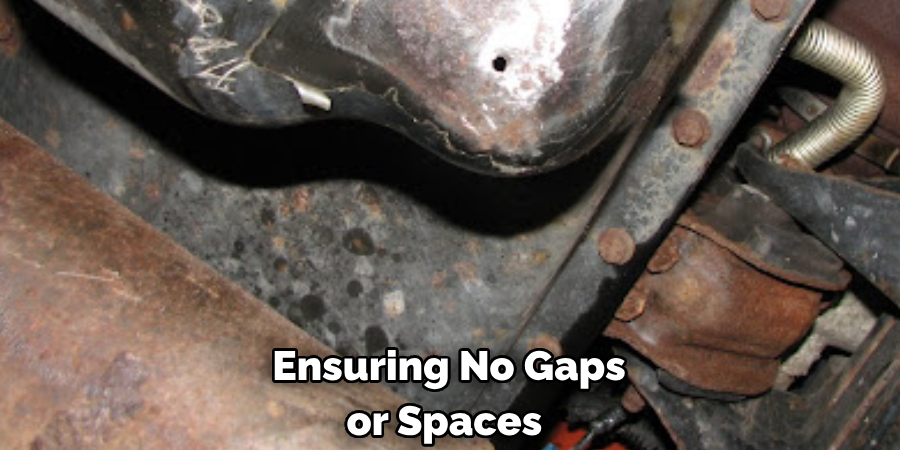
When using RTV silicone, follow the manufacturer’s instructions carefully. Typically, this involves applying a continuous bead of sealant to one of the cleaned mating surfaces, usually the oil pan. The bead of sealant should be uniform and follow the contour of the pan’s edge, ensuring no gaps or spaces are left uncovered. Avoid applying excessive sealant that could lead to overflows and potential blockage of oil passages.
If you use a traditional gasket, place it over the alignment pins or lay it on the pan or engine block to ensure a perfect fit. Do not use sealant on pre-coated gaskets unless the manufacturer specifically advises it. Any adjustments or additional applications should adhere strictly to the gasket instructions to maintain its integrity and functionality.
Proper positioning is crucial for both gaskets and sealants. Check the alignment of bolt holes and ensure that the seal is set to provide an optimal barrier against leaks. During the reassembly process, do not disrupt the gasket or sealant before it sets to avoid compromising the seal.
6. Reinstalling the Oil Pan
The reinstallation of the oil pan is as critical as its removal and cleaning. Begin by carefully lifting the pan towards the engine block, ensuring both surfaces are correctly aligned over the alignment pins or bolt holes. As you maneuver the pan, do not disturb the new gasket or sealant.
Once in place, initiate the bolting process by following the proper sequence as specified in the vehicle’s service manual. This sequence is often designed to promote even pressure distribution across the gasket or sealant, which is crucial for forming a tight seal. Install the bolts by hand initially to ensure none are cross-threaded.
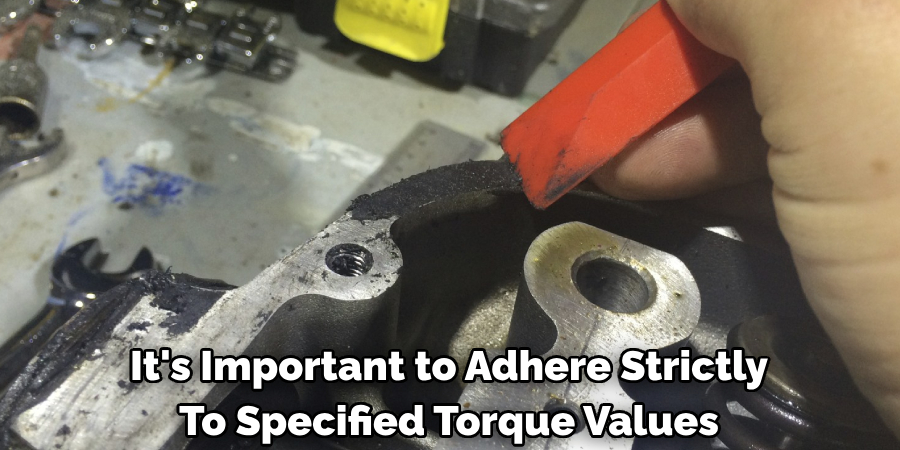
Next, tighten the bolts to the manufacturer’s specified torque settings using a torque wrench. This is usually done in stages and may require a crisscross pattern tightening to prevent warping or damage. It’s important to adhere strictly to specified torque values, as over-tightening can crush the gasket or damage the threads. At the same time, under-tightening might result in a poor seal and potential leaks.
After the bolts are torqued appropriately, reattach any sensors, wires, or fittings that were disconnected during the removal process. It is imperative to double-check these connections for accuracy to avoid any post-reassembly complications.
Finally, before filling the system with new oil, inspect for leaks by wiping the area clean and then starting the engine. Let the engine run for a few minutes, inspecting the periphery of the oil pan for any signs of oil seepage. If all connections are secure and there are no leaks, you can refill the engine with oil, confident that the oil pan has been reinstalled successfully.
7. Finishing Touches and Leak Testing
Upon successful reinstallation of the oil pan, the final stage ensures the integrity of the repair and involves several critical tasks. Add fresh engine oil, adhering to your vehicle’s recommended capacity and oil type, essential to maintaining engine health. Make sure to use a funnel to avoid spilling, and check the oil level using the dipstick to confirm you’ve reached the proper quantity.
Once the new oil is in, start the engine and idle for several minutes. This process not only circulates the oil but also brings any potential leaks to the surface. During this idle time, visually inspect the area around the newly installed oil pan for signs of leakage—be methodical, checking both from above and beneath the engine. Additionally, the quiet purr of the engine should be uninterrupted by any unusual noises that might indicate loose components or other issues.
If you detect minor seepage, it may be necessary to retire any loose bolts. This task should be done meticulously; a torque wrench should be used to fine-tune bolt tightness to the manufacturer’s recommended settings. Avoid over-tightening, as this could damage the gasket or the pan itself. After the final checks and adjustments, your vehicle is now ready for regular operation with a freshly sealed and secure oil pan.
That’s it! You’ve now learned how to remove a stuck oil pan, clean it thoroughly, and prepare for reassembly with a new gasket or sealant. By following these steps carefully, you can ensure the longevity of your engine’s performance and avoid potential oil leaks that could lead to costly repairs. Remember always to refer to your vehicle’s manual for specific instructions and recommended torque values before attempting any maintenance tasks.
Additional Notes and Maintenance Tips
The selection of high-quality gaskets and sealants can significantly influence the longevity and reliability of engine repairs. Opting for premium materials ensures a better seal, reducing the likelihood of premature failures and leaks. Similarly, adherence to manufacturer-provided torque specifications cannot be overstated. Incorrect torque can lead to overtightening, which may warp the oil pan, crush the gasket, or cause thread damage, while insufficient torque can result in leaks.
Environmentally responsible disposal of used oil and filters is imperative. Check with local regulations on properly recycling or disposing of these materials to ensure they do not harm the environment. Post-repair, monitoring oil levels and inspecting for leaks periodically is advisable. Such diligence will help in the early detection of issues and contribute to the optimal performance and maintenance of the vehicle’s engine.
Conclusion
In conclusion, meticulously following the steps outlined in this guide, including the specifics of “how to remove a stuck oil pan,” ensures an oil pan’s successful removal and reinstallation. It’s paramount to prioritize safety precautions and proper techniques throughout the process. For complex repairs, professional assistance remains a recommended option.