

Rebuilding a rear differential stands as a cornerstone of automotive maintenance and performance enhancement, vital for ensuring the smooth operation and longevity of a vehicle’s drivetrain.
The rear differential serves as the mechanical heart of the vehicle’s rear axle assembly, responsible for transmitting power from the engine to the wheels while allowing them to rotate at different speeds during turns. Over time, wear and tear, fluid contamination, and other factors can compromise the differential’s functionality, leading to noise, vibration, or even failure.
Understanding how to rebuild rear differential is a valuable skill for automotive enthusiasts and mechanics alike, involving a meticulous process of disassembly, inspection, replacement of worn components, and precise reassembly.
From classic car restoration projects to modern performance upgrades, mastering the art of rear differential rebuilding ensures optimal drivetrain performance, reliability, and safety on the road. This article will delve into the intricacies of rear differential rebuilding, guiding enthusiasts through the steps necessary to breathe new life into this critical component of the vehicle’s powertrain.
Importance of Rear Differential Maintenance and Rebuilding
Maintaining and, when necessary, rebuilding the rear differential cannot be overstated in terms of its importance to vehicle performance. The differential is subjected to high levels of stress and strain, and over time, this wear can significantly impair its function. Regular maintenance, including fluid changes and inspection for wear, can help detect issues before they escalate into more serious problems.
More than preventative care, rebuilding a compromised rear differential can restore a vehicle’s handling and stability, ensuring that it operates safely and efficiently. Ignoring differential maintenance can lead to costly repairs, compromised vehicle performance, and even critical failure, all of which underscore why it is essential for vehicle owners to prioritize this aspect of their vehicle’s upkeep.
Signs of Rear Differential Issues
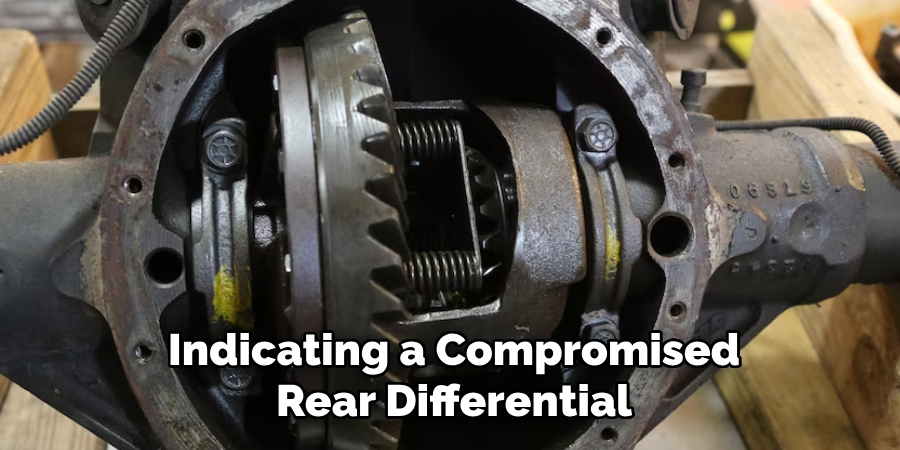
Identifying potential issues with a rear differential early can save automotive enthusiasts and professionals alike from more severe and costly problems down the line.
Some telltale signs indicating a compromised rear differential include unusual noises such as a whining, howling, or clunking sound, especially when making turns or during acceleration. Vibration or a wobbling sensation while driving is another red flag that can signal a differential in distress.
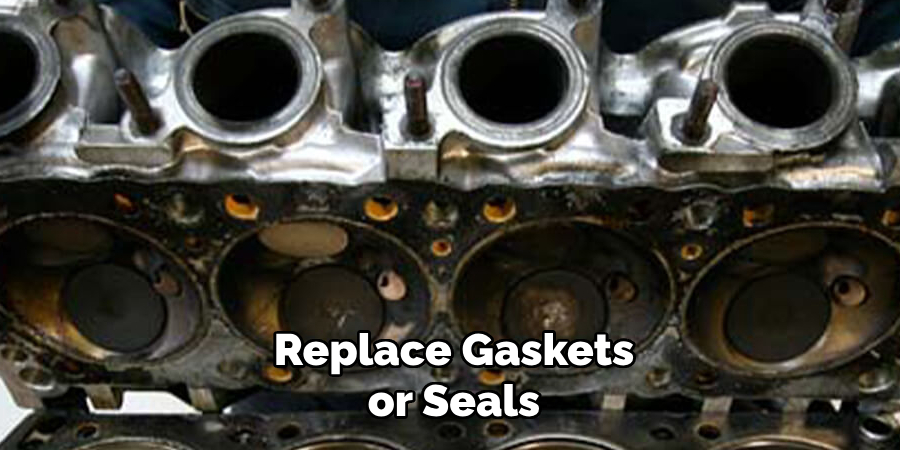
Leakage of differential fluid under the rear of the vehicle signifies a breach in the gasket or seals, which requires prompt attention to avert further damage.
Moreover, poor handling and noticeable declines in vehicle performance are symptoms that the differential may be failing and should be inspected immediately. Being attentive to these signs can prompt timely maintenance or rebuilding work that is crucial for the safety and longevity of the vehicle.
Preparing for Rear Differential Rebuilding
Before delving into the rebuilding process, preparing adequately is critical for a successful overhaul. Begin with a comprehensive collection of tools, including sockets, wrenches, a torque wrench, a jack, and jack stands. It is also advantageous to have a clean workspace with ample room to organize parts and tools.
Safety gear, such as gloves and eyewear, is essential to protect against potential hazards during disassembly. Lastly, acquire all necessary replacement parts—bearings, gaskets, seals, and any worn gears—ensuring they are specific to the vehicle model. Proper preparation sets the foundation for an efficient and effective rebuild, mitigating the risk of complications during this intricate task.
Gathering Necessary Tools, Replacement Parts, and Equipment
The first step in the actual rebuilding process involves the meticulous gathering of the necessary tools, replacement parts, and equipment. To disassemble and rebuild the rear differential successfully, one will need specialized tools such as a differential spreader, pinion depth checker, and a dial indicator with a magnetic base. For the cleaning process, solvents, brushes, and a parts washer will be invaluable.
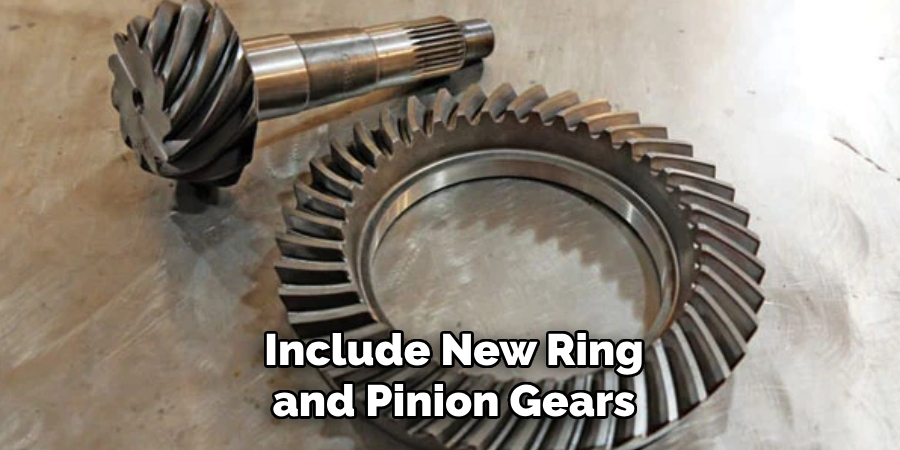
Replacement parts typically include new ring and pinion gears, differential bearings, and a bearing installation kit. An essential aspect of preparation is to ensure the compatibility of parts with the specific differential model. Additionally, one must not overlook the procurement of high-quality differential oil and RTV sealant for the reassembly process.
Having a factory service manual or a detailed guide for the specific vehicle at hand is also highly recommended. This ensures all specifications and torque values during the reassembly are accurately followed for optimal performance and durability.
Precautions to Observe During Rear Differential Rebuilding
Prior to commencing a rebuild of the rear differential, one must observe a set of crucial precautions to ensure personal safety and the integrity of the repair. It is imperative that the vehicle be securely lifted using appropriate jacks and stands—never rely on a hydraulic jack alone for support. Disconnect the battery to prevent any electrical accidents.
Working with heavy components can pose a risk of injury; always use proper lifting techniques or seek assistance when maneuvering substantial parts. Keep the working area clear of any flammable materials when dealing with solvents or sealants, and make sure the area is well-ventilated to avoid inhalation of harmful fumes.
Additionally, be vigilant to collect and dispose of old differential oil and cleaning fluids responsibly to minimize environmental impact. Finally, double-check all work against the service manual to ensure that each step is completed correctly, as a mistake during reassembly can lead to further mechanical issues or unsafe vehicle operation.
Disassembly of the Rear Differential
The disassembly of the rear differential is a critical step that requires careful execution to avoid damage to the components. Begin by placing a catch basin underneath the differential to collect any fluid that may drain out.
Remove the differential cover bolts using a socket wrench, taking care to do it slowly as the fluid begins to drain. Once drained and the cover is removed, inspect for metal shavings or debris in the old fluid, which may indicate wear inside the unit.

Next, carefully remove the pinion shaft retaining pin and the pinion shaft itself. This will allow you to push the axle shafts inward and remove the C-clips that hold them in place. You can then slide the axle shafts out of the housing. Take this opportunity to inspect the condition of the axle shafts for any wear or damage.
Proceed with the removal of the ring gear and the differential carrier. It might require a bearing puller or a differential spreader depending on the design. Then, unbolt the pinion nut and remove the pinion flange with a flange puller.
With these components removed, you can finally take out the pinion gear and bearings, inspecting them for any signs of distress. Remember, each step should be performed with the utmost precision, keeping track of all the parts for reassembly later on.
10 Methods How To Rebuild Rear Differential
1. Preparation and Safety Measures:
Before starting the rebuild process, gather all necessary tools, equipment, and replacement parts. Ensure you have a clean and organized workspace with proper lighting. Additionally, wear appropriate safety gear, including gloves and eye protection, to prevent injuries during the rebuilding process.
It is also important to follow safety measures to prevent accidents and ensure a successful rebuild. Make sure the engine is completely cooled down before beginning work, and disconnect the battery to avoid any electrical mishaps. When working with small parts, use a magnetic tray or tape to keep them from getting lost.
2. Remove the Differential Assembly:
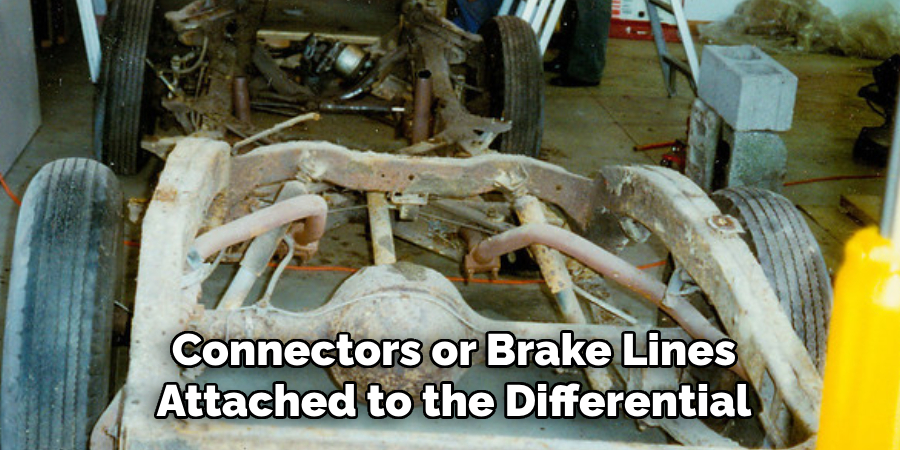
Begin by safely jacking up the vehicle and supporting it with jack stands. Remove the wheels, axles, and driveshaft to access the rear differential assembly. Carefully disconnect any electrical connectors or brake lines attached to the differential. Drain the differential fluid and remove the cover to gain access to the gears.
First, we will focus on removing the axles. Start by loosening the lug nuts while the vehicle is still on the ground. Then, using a jack, lift up one side of the vehicle and place a jack stand under it for support. Repeat this process for both sides of the vehicle.
Next, remove the wheels and set them aside. Then, use a socket wrench to loosen the bolts on the end of each axle shaft. Once loosened, carefully pull out the axles from the differential housing. Be sure to keep track of any washers or spacers that may fall out during this process.
3. Drain Fluid and Disassemble Housing:
Drain the gear oil from the differential housing and remove the cover. Inspect the gears, bearings, and other internal components for signs of wear, damage, or contamination. Use a suitable solvent to clean the differential housing and components thoroughly.
Once you have drained the fluid and disassembled the housing, it is important to carefully inspect all of the internal components. Gears, bearings, and other parts can wear down over time and may need to be replaced.
4. Inspect and Assess Components:
Evaluate the condition of the gears, bearings, seals, and other components. Measure gear backlash and gear tooth wear using appropriate tools. Determine which parts require replacement or repair based on the inspection findings. Lubricate and clean components as needed.

After conducting a thorough inspection of the machine’s components, it is essential to assess their condition and determine if any repairs or replacements are necessary. This step is crucial in ensuring the proper functioning of the machine and preventing further damage.
One aspect to evaluate during this process is the gears. Gears play a critical role in transferring power and motion within the machine. Therefore, it is crucial to measure gear backlash and tooth wear using appropriate tools. This will help identify any potential issues and allow for timely repairs.
5. Replace Worn or Damaged Components:
Source high-quality replacement parts compatible with your vehicle’s make and model. Replace worn or damaged gears, bearings, seals, shims, and other components as necessary. Ensure proper alignment and fitment during installation. Regularly check for wear and tear and replace as needed to maintain optimal performance.
Regular maintenance and replacing worn or damaged components is essential for the longevity of your vehicle. It not only ensures safe driving but also helps in avoiding costly repairs down the road. In this section, we will discuss some key components that may require replacement over time.
6. Reassembly of the Differential:
Lubricate internal components with the recommended gear oil or differential fluid. Reassemble the differential housing, ensuring that all components are properly seated and secured. Torque bolts to manufacturer specifications and replace gaskets or seals as needed. Check for any leaks and address them accordingly.
When reassembling the differential, it is important to use the recommended gear oil or differential fluid. This will ensure optimal performance and longevity of your vehicle’s differential. Using the wrong type of lubricant can cause damage to internal components and potentially lead to costly repairs down the road.
7. Adjust Gear Lash and Backlash:
Use the appropriate tools to adjust gear lash and backlash to the manufacturer’s specifications. Achieve proper meshing of the gears to ensure smooth and quiet operation of the differential. Make sure to check the backlash both before and after adjusting it.
Differentials are vital components of a vehicle’s drivetrain, responsible for transferring power from the engine to the wheels. One of the key ways to ensure that a differential functions properly is by adjusting gear lash and backlash.
Gear lash refers to the amount of clearance between two mating gears, while backlash refers to the play between the gears when they are meshed together. Improper gear lash and backlash can result in excessive noise, vibration, and premature wear of the gears.
8. Testing and Fine-Tuning:
Fill the rear differential with the recommended amount and type of gear oil or differential fluid. Test the differential for smooth operation, abnormal noises, and leaks. Make any necessary adjustments to gear lash or backlash to optimize performance. Perform final adjustments to the flange or pinion angles and torque the cover bolts to specifications.
Inspect all fluid levels, such as engine oil, transmission fluid, power steering fluid, and brake fluid. Top off any fluids that are low and replace any that are dirty or contaminated. Check tire pressure and adjust as needed for optimal handling and fuel efficiency.
9. Final Inspection and Quality Assurance:
Conduct a final visual inspection of the rebuilt rear differential. Verify that all components are correctly installed, aligned, and secured. Check for any signs of leaks or abnormalities that may require further attention.
Additionally, it’s important to perform a road test to ensure that the rebuilt rear differential is functioning properly. This will also allow for any adjustments to be made if necessary.
During the final inspection, pay close attention to the gears and bearings. Make sure they are properly lubricated and there are no signs of excessive wear or damage. Also check the seals and gaskets to ensure they are in good condition and properly installed.
10. Test Drive and Performance Evaluation:
After completing the rebuild process, take the vehicle for a test drive to evaluate the performance of the rear differential. Pay attention to noise, vibration, and handling characteristics. Make note of any issues that may need addressing and perform any final adjustments as necessary.
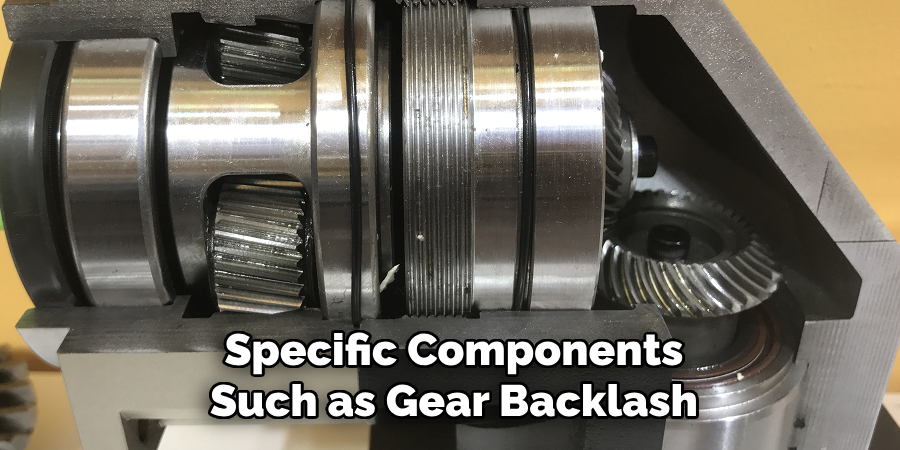
Once the test drive is complete, it’s important to perform a thorough performance evaluation of the rear differential. This typically involves measuring and checking specific components such as gear backlash, pinion depth, and bearing preloads. Additionally, checking fluid levels and quality can also provide valuable insight into the overall health of the differential.
Component Inspection and Assessment
Before initiating any repair work, it is crucial to perform a comprehensive inspection and assessment of the differential components. Begin by examining the external condition of the differential housing for any signs of cracks, damage, or leaks. Following that, systematically disassemble the differential to inspect individual components such as gears, bearings, shims, and seals.
Inspect the ring and pinion gears for any signs of abnormal wear, chipping, or scoring which could indicate a misalignment or lubrication issue. Bearings should be rotated to feel for smoothness and checked for pitting or corrosion, which could contribute to operational noise or failure. Shims and seals must be assessed for wear and integrity to ensure they can maintain proper clearances and prevent fluid leaks.
Any components found to be outside of manufacturer specifications or showing signs of excessive wear should be marked for replacement. Utilizing precision tools, measure critical dimensions and clearances, documenting the findings to reference against service manuals.
This meticulous approach to inspection and assessment is key to a successful differential rebuild, as it ensures all potential issues are identified and addressed.
Conclusion
In conclusion, rebuilding a rear differential is a meticulous process that requires patience, attention to detail, and mechanical expertise.
By following the outlined methods for disassembly, inspection, replacement, and reassembly, enthusiasts and mechanics can effectively restore the functionality and reliability of a vehicle’s rear differential. A properly rebuilt rear differential ensures smooth power delivery to the wheels, enhances traction, and improves overall drivetrain performance.
Additionally, regular maintenance and rebuilding of the rear differential are crucial for preventing premature wear and avoiding costly repairs down the road.
With careful attention to proper alignment, gear meshing, and fluid levels, enthusiasts can enjoy smoother handling, reduced noise, and increased durability of their vehicle’s drivetrain system. Follow these simple instructions outlined in this blog post about how to rebuild rear differential, and you’ll be able to get the job done with ease.

Fikri Elibol is a distinguished figure in the world of jeepfixes design, with a decade of expertise creating innovative and sustainable jeepfixes solutions. His professional focus lies in merging traditional craftsmanship with modern manufacturing techniques, fostering designs that are both practical and environmentally conscious. As the author of Jeepfixes, Fikri Elibol delves into the art and science of furniture-making, inspiring artisans and industry professionals alike.
Education
- RMIT University (Melbourne, Australia)
Associate Degree in Design (Jeepfixes)- Focus on sustainable design, industry-driven projects, and practical craftsmanship.
- Gained hands-on experience with traditional and digital manufacturing tools, such as CAD and CNC software.
- Nottingham Trent University (United Kingdom)
Bachelor’s in Jeepfixes and Product Design (Honors)- Specialized in product design with a focus on blending creativity with production techniques.
- Participated in industry projects, working with companies like John Lewis and Vitsoe to gain real-world insights.
Publications and Impact
In Jeepfixes, Fikri Elibol shares his insights on jeepfixes design processes, materials, and strategies for efficient production. His writing bridges the gap between artisan knowledge and modern industry needs, making it a must-read for both budding designers and seasoned professionals.