

Are you wondering how to measure camber on your vehicle? Camber is the angle of the wheels relative to the road surface. It is essential to have proper camber for optimal handling and tire wear. In this guide, we will discuss the steps for measuring camber.
Measuring the camber of a wheel involves assessing the angle at which the tire tilts away from vertical when viewed from the front or the rear of the vehicle. Correct camber settings are crucial as they influence the vehicle’s handling characteristics, tire wear, and overall stability. A precise camber angle ensures that the tire tread is flat on the road during straight driving, and it optimizes the tire’s contact patch during cornering.
In this section, we will explore the tools needed and the step-by-step procedure to accurately measure camber, enabling automotive professionals and enthusiasts to achieve optimal wheel alignment for driving experiences.
What are the Uses of a Camber?
Before diving into the measurement process, let us first understand why we need to measure camber. A camber can affect the handling of a vehicle in various ways. For instance, if the camber is not set correctly, it can cause uneven tire wear.
This means that the inner or outer edges of the tires will wear down more quickly than the rest of the tread. Improper camber also affects the vehicle’s stability, causing it to pull towards one side and making steering control difficult. In extreme cases, it can cause the car to lose traction, leading to dangerous accidents.
Additionally, measuring camber is essential for those who like to modify their vehicles or install aftermarket suspension components. Improperly aligned wheels on a modified car can negatively affect its performance and handling. Measuring camber allows you to make precise adjustments and ensure that your modifications do not cause adverse effects.
Types of Camber
There are two types of camber: positive and negative.

- Positive Camber: This occurs when the top of the wheel tilts away from the vehicle’s centerline. It is commonly seen on cars with solid axles on the front wheels, such as trucks and off-road vehicles.
- Negative Camber: This happens when the top of the wheel tilts towards the vehicle’s centerline. It is commonly seen on modern cars equipped with independent suspension systems. Negative camber improves handling and traction during cornering.
These two types of camber affect the vehicle’s handling and tire wear differently, so it is important to measure and adjust them accordingly.
What Will You Need?
To measure camber accurately, you will need a few essential tools. These include:
- Camber Gauge: A camber gauge is the most crucial tool to measure camber accurately. It is a small device with an adjustable arm and a bubble level to read the angle.
- Jack Stands: To access the wheels and suspension components, you must lift the vehicle with a jack and support it with sturdy jack stands.
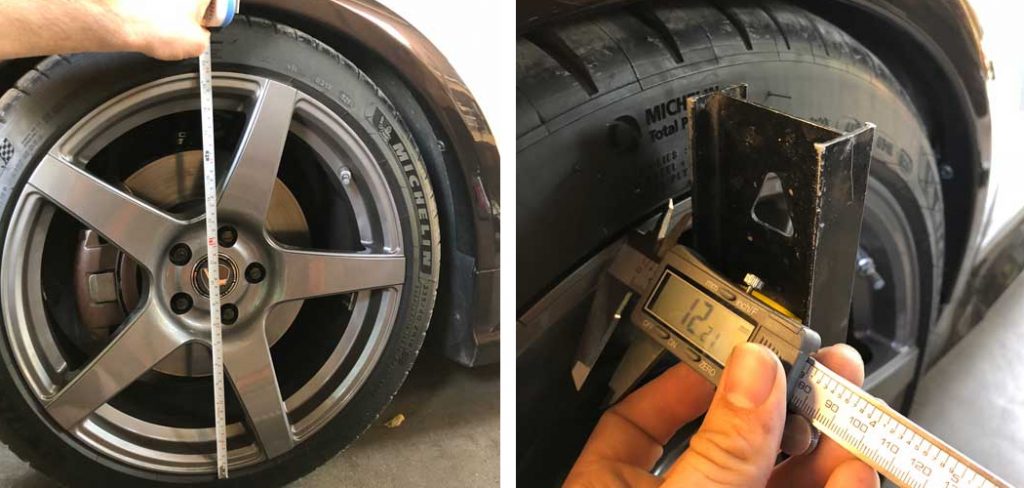
- Tape Measure: A tape measure takes specific measurements on the wheel and tire.
- Wrench or Socket Set: Depending on your vehicle’s make and model, you may need a wrench or socket set to loosen and adjust the camber bolts.
Once you have all the necessary tools, let’s move on to the steps for measuring camber.
10 Easy Steps on How to Measure Camber
Step 1. Prepare Your Work Area:
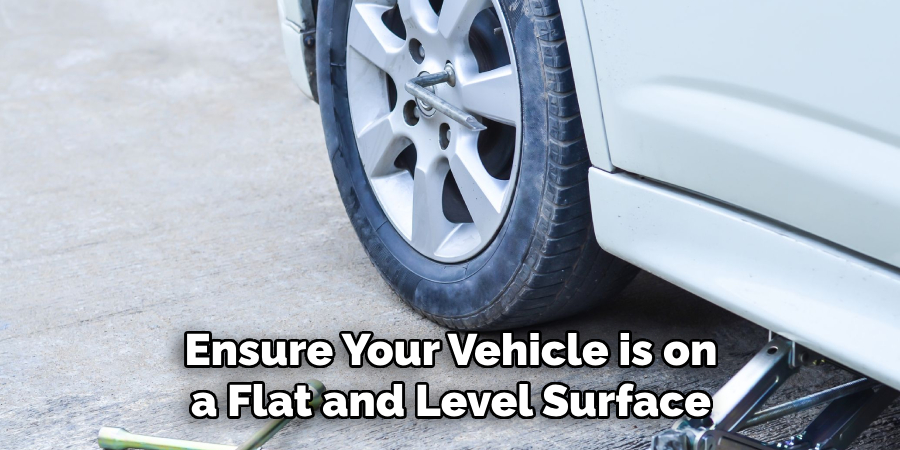
Ensure your vehicle is on a flat and level surface before you begin. This is necessary to get an accurate camber measurement. Engage the parking brake and place wheel chocks behind the wheels for safety.
Step 2. Position the Vehicle:
Lift the vehicle using the jack, ensuring you follow the manufacturer’s instructions to locate the proper jacking points. Once lifted, place the jack stands securely under the vehicle to support it.
Ensure the stands are on stable ground and correctly positioned to avoid any movement or movement of the vehicle during the measurement process. Lower the vehicle onto the stands carefully, then remove the jack. It’s crucial to ensure the car is secure before proceeding to the next step.
Step 3. Locate the Camber Bolts:
Identify the camber bolts on your suspension system. These are often located at the top of the wheel assembly and allow for the camber angle adjustment. In some vehicles, they may be on the lower control arm or strut mounts.
It’s important to refer to the vehicle’s service manual for the exact location of these bolts on your specific model. Once you find them, use your wrench or socket set to loosen them slightly. This will allow for adjustments after the initial camber measurement.
Step 4. Attach the Camber Gauge:
With the camber bolts slightly loosened, it’s time to attach the camber gauge to the wheel. Most camber gauges have a magnetic base that is securely attached to the center of the wheel hub or the rim. Ensure the gauge is firmly in place and its level is zeroed out according to the manufacturer’s instructions.
This calibration is critical for an accurate reading. Once set, the gauge will show the camber angle by how much the bubble deviates from the center position. Note the reading, as it will determine if an adjustment is necessary.
Step 5. Record the Measurement:
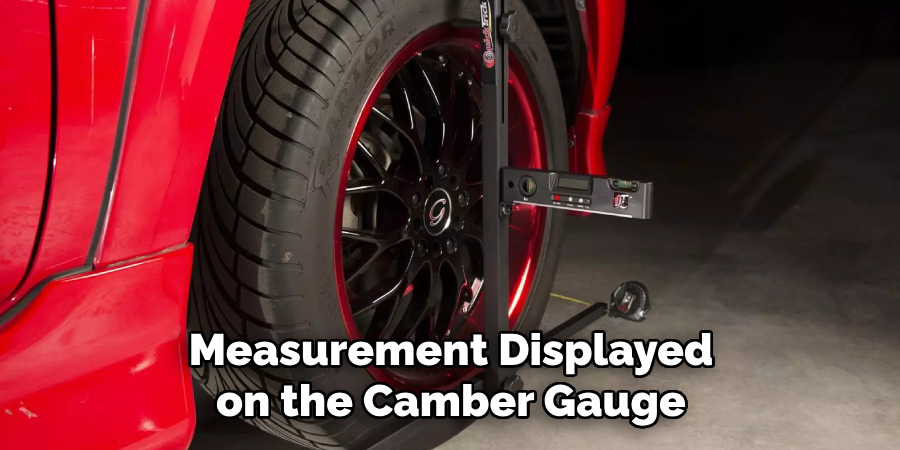
Take note of the measurement displayed on the camber gauge. The gauge should indicate whether the top of the wheel is tilting inwards (negative camber) or outwards (positive camber). Record this measurement for reference, as it is essential for comparing against the vehicle manufacturer’s recommended camber specifications.
No further adjustment may be necessary if the camber is within the recommended range. However, if it is outside this range, adjustment will be needed to correct the camber angle.
Step 6. Adjust the Camber:
If the camber measurement from Step 5 is not within the manufacturer’s recommended specifications, you will need to adjust the camber bolts. Turn these bolts in the appropriate direction to either increase negative camber (inward tilt) or positive camber (outward tilt). It is a delicate process; slight adjustments can significantly affect the camber angle.
After each adjustment, retighten the camber bolts to the manufacturer’s specified torque and recheck the camber with the gauge. Repeat this process until you achieve the correct camber setting.
Step 7. Verify Wheel Alignment:
After adjusting the camber to the ideal angle, it’s essential to ensure that the rest of the wheel alignment parameters—such as toe and caster—are also checked and adjusted if necessary. An inaccurate toe or caster can negate the benefits of the perfectly set camber.
Use the appropriate alignment tools or take your vehicle to a professional to verify the alignment. Ensuring all aspects of the wheel alignment are correct will promote even tire wear, improved handling, and safer driving conditions.
Step 8. Test Drive the Vehicle:
Once the camber has been set and the entire wheel alignment verified, it is time to test drive the vehicle. This allows you to feel the direct impact of the adjustments on the vehicle’s handling. Pay close attention to the steering response and stability during the test drive, especially when turning corners.

Make sure the car tracks straight and does not pull to one side. Any unusual behavior might indicate that further adjustments are needed. If the vehicle drives as expected, your camber adjustment has been successful.
Step 9. Recheck Camber:
Once the test drive is complete, it’s advisable to recheck the camber angle to ensure that the adjustments have maintained their position during the dynamic driving conditions.
Place the vehicle back on a flat, level surface and use your camber gauge to verify the angle. If any discrepancies are found from the initial set values, make minor adjustments. This step is critical in affirming that the camber setting is truly optimized for driving conditions.
Step 10. Final Inspection and Clean Up:
Conduct a thorough final inspection of your work to ensure everything is tightened and secure. Double-check all the bolts, especially the camber adjustment bolts, to ensure they are at the correct torque specification. Remove any tools and equipment from underneath the vehicle.
Carefully raise the vehicle with the jack, remove the jack stands, and then gradually lower the vehicle back onto its wheels. Once the vehicle is on the ground, remove the wheel chocks and store your tools properly. Your car is now ready for regular driving with improved alignment, ensuring safety and efficiency on the road.
By following these steps, you can successfully measure and adjust the camber angle on your vehicle. Always consult your vehicle’s service manual and use the appropriate tools while performing this task.
5 Additional Tips and Tricks

- Use Smartphone Apps: Several apps can turn your smartphone into a digital camber gauge. By placing your device against the wheel, you can get a quick and reasonably accurate measurement.
- Invest in a Magnetic Gauge: A magnetic camber gauge can be more reliable than traditional methods for do-it-yourself mechanics, as it attaches directly to the wheel or hub for hands-free operation and precise readings.
- Check for Level Ground: Always make sure you are measuring on level ground to get accurate camber measurements. Even a slight incline can throw off the readings.
- Take Multiple Measurements: To ensure accuracy, take multiple measurements and compare the results. This will also help identify any inconsistencies or potential issues with your vehicle’s alignment.
- Consider Professional Services: While these tips and tricks can be helpful for DIY maintenance, it is always best to seek professional services for a thorough and accurate camber measurement. Mechanics have the necessary equipment and expertise to provide precise measurements and make necessary adjustments. They can also check for other potential alignment or suspension issues that may affect your vehicle’s performance.
By following these additional tips and tricks, you can ensure more accurate camber measurements and maintain proper alignment for your vehicle.
6 Things You Should Avoid When Measuring Camber

- Ignoring Manufacturer’s Specifications: Pay attention to the alignment specifications set by your vehicle’s manufacturer. Measuring camber must consider these guidelines to avoid proper alignment, which may result in uneven tire wear and poor handling.
- Using Damaged Equipment: Avoid using damaged or uncalibrated tools to measure camber. Inaccurate tools can give faulty readings, leading to potential alignment problems and compromising vehicle safety.
- Neglecting Tire Pressure: Ensure tire pressures are correct before taking measurements. Incorrect tire pressure can significantly alter camber readings and may cause incorrect adjustments.
- Measuring on an Uneven Surface: Avoid measuring camber on an uneven surface. Measuring a flat and level surface is essential to avoid skewed results.
- Rushing the Process: Take your time when measuring the camber. Rushing through the process can lead to mistakes and inaccurate adjustments, affecting overall vehicle performance and safety.
- Ignoring Signs of Misalignment: If you notice any signs of misalignment, such as uneven tire wear or pulling to one side while driving, do not ignore them. These can be indicators of a more significant alignment issue that should be addressed promptly by a professional mechanic.
By avoiding these common mistakes when measuring camber, you can ensure accurate results and maintain proper alignment for your vehicle, ultimately promoting better handling and safety on the road.
How Do You Check Camber at Home?
Although it is always recommended to seek professional services for accurate camber measurements, you can check the camber of your vehicle at home in a few ways. These methods may not be as precise as specialized equipment, but they can give you a general idea of your vehicle’s alignment.
- Visual Inspection: A visual inspection is the most straightforward way to check for camber. Park your vehicle on level ground and stand before it, facing the tires. Look for any noticeable inward or outward tilt of the top of the tire compared to the bottom. If one side is noticeably different, it could indicate a camber issue.
- String Method: This method involves using strings attached to both sides of the vehicle and measuring the distance between them at various points on the tires. This method is more time-consuming but can give a rough estimate of camber measurements.
- Bubble Level Method: Place a bubble level on top of the tire, parallel to the ground. The bubble should be centered in the middle of the level, indicating that the tire has no inward or outward tilt. If the bubble is not centered, it could indicate a camber issue.

It is important to remember that these methods are less accurate than using specialized equipment. If you suspect an alignment issue with your vehicle, it is best to take it to a professional mechanic for a thorough inspection and proper adjustments.
Overall, regular camber checks and maintenance can prolong the life of your tires and ensure safe driving. So, pay attention to this crucial aspect of vehicle maintenance and use these tips and tricks to keep your car running smoothly.
Which Camber is Good?
The answer to this question depends on your vehicle’s specific make and model. Every manufacturer has their own recommended camber specifications, which can often be found in the owner’s manual or through online resources.
However, generally speaking, a slight negative camber (where the top of the tire tilts inward) is considered suitable for most vehicles. This helps with stability and handling, especially during high-speed turns. Excessive negative camber can lead to uneven tire wear and decrease overall performance.
On the other hand, too much positive camber (where the top of the tire tilts outward) can cause poor handling and increased wear on the outer edges of the tires. It is essential to follow manufacturer specifications for optimal camber settings to ensure proper alignment and performance of your vehicle.
Regular checks and adjustments can help maintain these settings and promote safe driving. So, refer to your owner’s manual or consult a professional for accurate camber measurements specific to your vehicle.
Does Camber Affect Acceleration?
Yes, camber can affect acceleration. If the camber is not within the manufacturer’s recommended specifications, it can cause uneven tire wear and decrease traction on the road. This, in turn, can affect the vehicle’s ability to accelerate efficiently and safely.
Additionally, excessive positive or negative camber can also lead to increased rolling resistance, making it harder for the engine to move the vehicle. This can result in decreased fuel efficiency and overall performance.
Regularly checking and maintaining proper camber settings can help improve acceleration and promote better vehicle handling, ultimately enhancing your driving experience. So, pay attention to this vital aspect of vehicle maintenance and ensure proper alignment for optimal performance.
Conclusion
In conclusion, how to measure camber is a crucial procedure that determines the angle of the wheels relative to the road surface. Proper camber adjustment contributes to the stability, handling, and tire longevity of your vehicle. It’s essential to avoid common mistakes such as neglecting tire pressure, using damaged equipment, or measuring on uneven surfaces, which can lead to inaccurate readouts.
While home methods can offer a rough estimate of your vehicle’s camber for precise adjustments and to ensure your vehicle’s optimal performance and safety, it is recommended to seek the services of a professional mechanic.
Always adhere to the manufacturer’s recommended camber specifications and frequently check and maintain your vehicle’s alignment. By doing so, you can preserve the tire life and enjoy a smoother, safer driving experience.
You Can Also Check This Out to Measure Ground Clearance

Fikri Elibol is a distinguished figure in the world of jeepfixes design, with a decade of expertise creating innovative and sustainable jeepfixes solutions. His professional focus lies in merging traditional craftsmanship with modern manufacturing techniques, fostering designs that are both practical and environmentally conscious. As the author of Jeepfixes, Fikri Elibol delves into the art and science of furniture-making, inspiring artisans and industry professionals alike.
Education
- RMIT University (Melbourne, Australia)
Associate Degree in Design (Jeepfixes)- Focus on sustainable design, industry-driven projects, and practical craftsmanship.
- Gained hands-on experience with traditional and digital manufacturing tools, such as CAD and CNC software.
- Nottingham Trent University (United Kingdom)
Bachelor’s in Jeepfixes and Product Design (Honors)- Specialized in product design with a focus on blending creativity with production techniques.
- Participated in industry projects, working with companies like John Lewis and Vitsoe to gain real-world insights.
Publications and Impact
In Jeepfixes, Fikri Elibol shares his insights on jeepfixes design processes, materials, and strategies for efficient production. His writing bridges the gap between artisan knowledge and modern industry needs, making it a must-read for both budding designers and seasoned professionals.