
Measuring brake line size accurately is a fundamental aspect of maintaining and repairing a vehicle’s braking system. Whether replacing worn-out brake lines or upgrading to performance components, understanding how to measure brake line size ensures compatibility and safety. The brake lines, responsible for transmitting hydraulic pressure from the master cylinder to the brake calipers or wheel cylinders, come in various diameters and lengths to suit different vehicle makes and models.

Proper measurement not only facilitates seamless replacements but also minimizes the risk of leaks or brake system failures. In this guide, we will explore the essential steps and techniques involved in measuring brake line size effectively. From identifying the correct measuring points to selecting the appropriate tools, mastering this process empowers both DIY enthusiasts and professional mechanics to maintain optimal brake system functionality.
With precision and attention to detail, accurate measurement lays the foundation for safe and reliable braking performance on the road.
The Importance of Understanding Brake Line Size
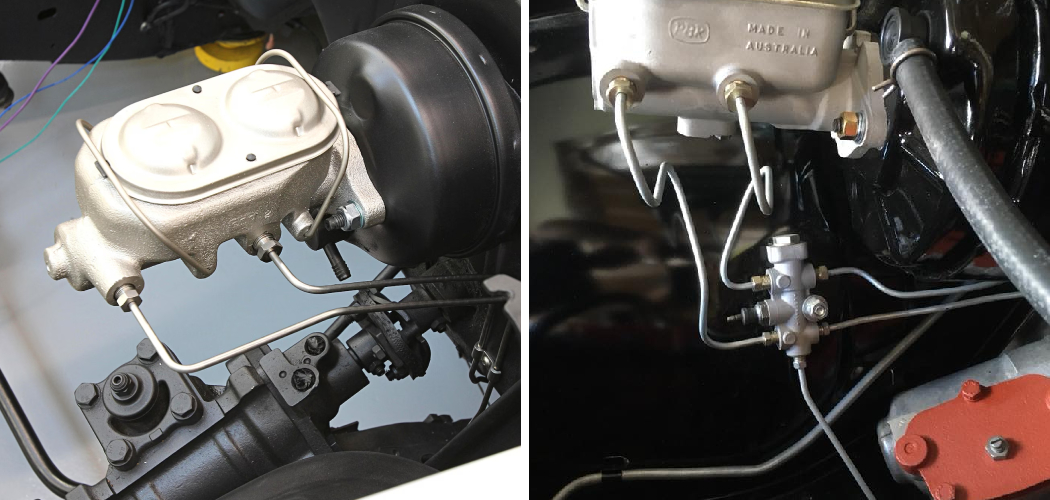
The brake lines in your vehicle are the crucial pathways for brake fluid to travel from the master cylinder to the wheel cylinders or calipers. The size of the brake line directly impacts the volume and pressure of the brake fluid, which in turn affects how quickly your car can come to a stop. Understanding and measuring the brake line size is not only beneficial when it comes to repair and maintenance but also for upgrades and custom builds.
It’s a fundamental step that cannot be skipped, as even the smallest discrepancy can lead to inefficiencies in your braking system.
Different Types of Brake Lines
Brake lines can be categorized into several types based on the material they are made of and their intended use. The most commonly used types are:
- Steel Brake Lines: These are standard on most vehicles due to their durability and resistance to corrosion. They are, however, less flexible than other types.
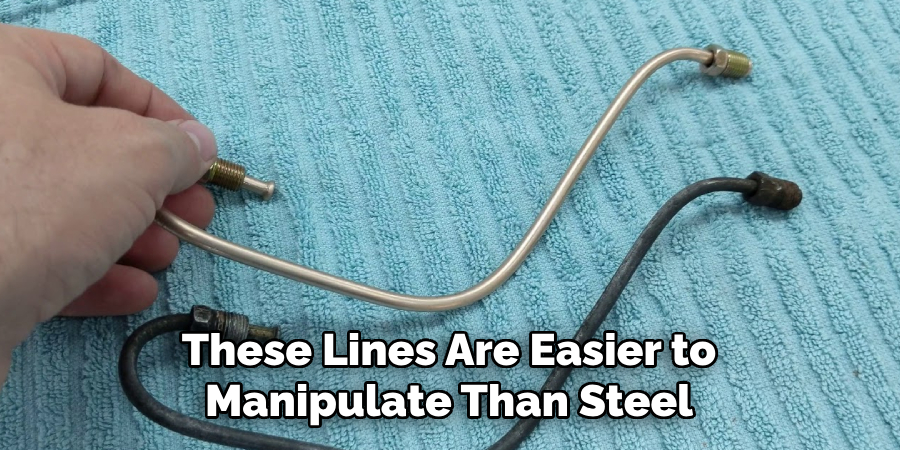
- Copper-Nickel Alloy Brake Lines: Known for their flexibility and resistance to corrosion, these lines are easier to manipulate than steel, making them suitable for custom brake systems.
- Stainless Steel Braided Brake Lines: With a Teflon inner tube protected by a stainless steel braided mesh, these lines are utilized for performance applications. They provide a firmer pedal feel and can handle higher pressures.
Each type of brake line carries unique properties that can influence a vehicle’s braking performance. Choosing the right type depends on the vehicle’s requirements, the driving conditions it will be subjected to, and personal preferences for performance upgrades.
What is Brake Line Size?
Before diving into the measurement process, it’s important to understand what we mean by “brake line size.” The term refers to the outside diameter of the brake line tubing. This could be 3/16”, 1/4″, or any other diameter, depending on your vehicle and its specific components. The most common types of brake lines are made from steel, copper, or sometimes even rubber for flexible applications, such as those used in modern ABS systems.
Tools and Materials Needed
To accurately measure your brake line, you’ll need the following tools:
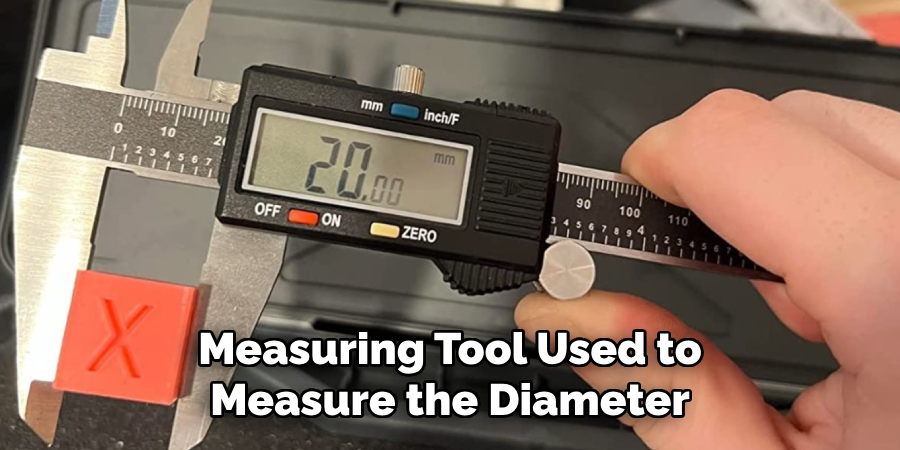
- Calipers: A measuring tool used to measure the diameter.
- Tubing Cutter: For neatly cutting the brake line with precision, a necessary step if you’re replacing or modifying it.
- Flaring Tool: If you’re working with an existing line and need to create flares for fittings, a reliable flaring tool is essential.
- Line Wrench: To securely grip the brake line fitting without rounding off the edges.
- Tape Measure: A less precise but useful tool for approximating longer sections of the brake line.
Having these tools on hand will not only make the process smoother but will also empower you to confidently navigate your brake system’s intricate details.
Understanding Thread Sizes and Fittings
Beyond the diameter of the brake lines themselves, it’s essential to comprehend the size and types of the threaded fittings that attach the lines to the braking components. These fittings are critical for forming a tight and leak-proof seal to ensure that the brake fluid’s hydraulic pressure is maintained.
The thread sizes must match the corresponding ports on the master cylinder, caliper, or wheel cylinder. Typical thread sizes found in brake line fittings include 3/8-24, 7/16-24, and 1/2-20 for American vehicles, and M10x1.0, M12x1.0, or M14x1.5 for European and Asian vehicles.
Incorrect thread pairing can strip the fitting or component ports, leading to dangerous leaks and brake failure. Utilize a thread gauge to identify thread pitches accurately and confirm that the fittings match the threads on the vehicle’s components. An understanding of both the thread pitch (the distance between threads) and the thread diameter is essential when selecting brake line fittings for any brake system maintenance or upgrade project.
10 Steps How to Measure Brake Line Size
Brake lines are crucial elements of a vehicle’s braking system, and understanding how to measure them correctly is vital for safe vehicle operation. Whether you’re a DIY enthusiast or a mechanic, it’s a fundamental skill. Below are the essential steps to accurately measure brake line size.
1. Identify the Type of Brake Line
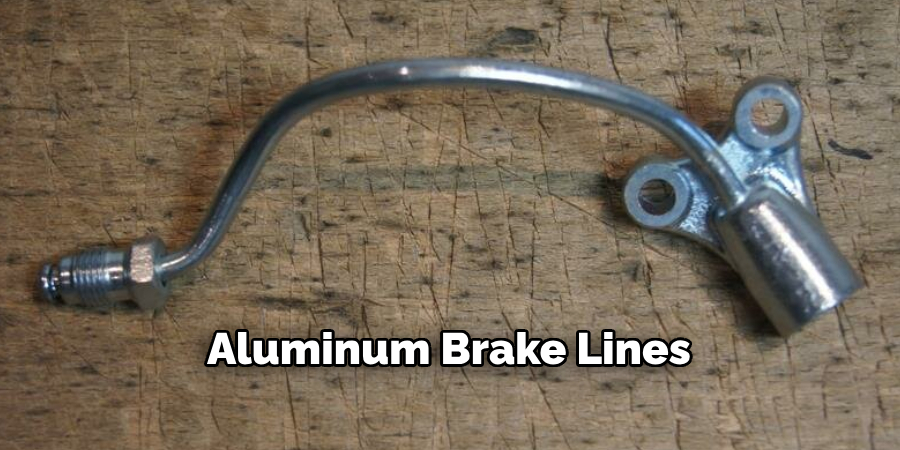
Determine if you have steel, brass, or aluminum brake lines. The type can influence the bending capabilities and overall durability, so it is crucial to know what material you are working with. Steel and brass are the most common types of brake lines, while aluminum is used in high-performance vehicles. Although rarely used, rubber brake lines also exist.
2. Determine the Line’s Diameter
First, identify the brake line’s SAE or metric size. This can be done by measuring the outer diameter (OD) using a Vernier caliper; it’s typically 3/16-inch for most modern brake lines. If it’s not 3/16-inch, measure the OD and convert it to millimeters if necessary.
Once you have determined the size of your brake line, you can then determine its diameter. To do this, you will need a tube bender or pipe cutter, which can be found at most hardware or automotive supply stores.
3. Measuring the Flares
To determine whether your brake line has inverted (double) flares or bubble flares, measure the distance across the flared end of the line. Inverted flares will have a more pronounced shape.
You can also use a brake flare gauge to accurately measure the type of flare on your brake line. These gauges come in various sizes to match the different types of flares.
4. Identify the Length You Need
Brake lines are often replaced due to corrosion or wear. Measure the length of the brake line you need by running a measuring tape along the existing line from one end to the other. Make sure to measure the entire length, including any bends or curves.
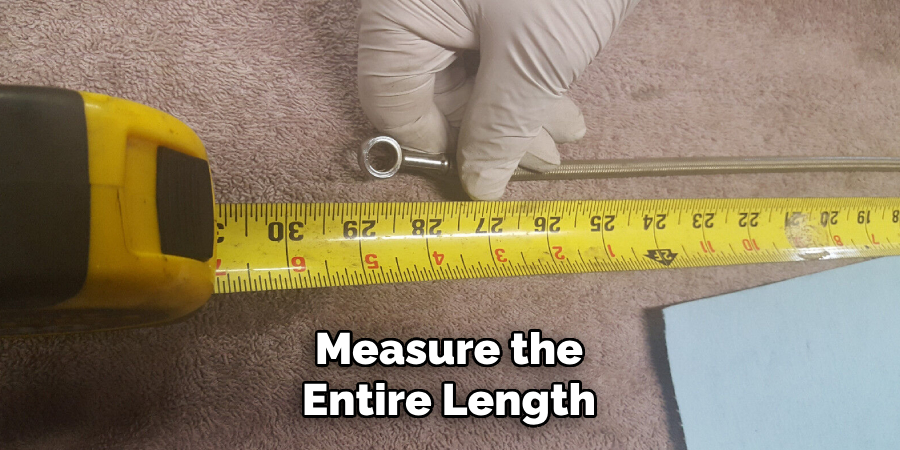
If you are replacing a brake line that runs from the master cylinder to the wheels, measure the distance between these two points. This will ensure that you purchase a brake line of the correct length.
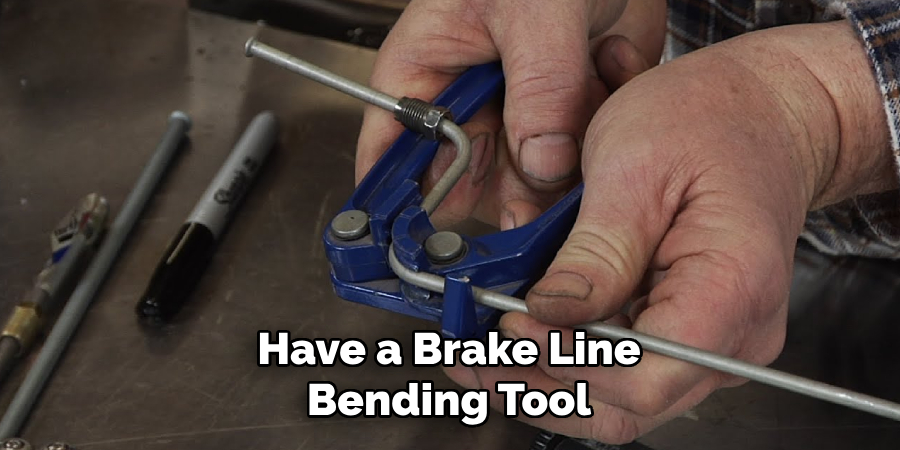
5. Bend to Your Needs
When replacing a brake line, you will likely need to replicate bends. To ensure a perfect bend, make a card template of the existing brake line’s shape and use it as a guide to bend the new line. Additionally, you can use a tubing bender to create the exact shape needed.
Another useful technique is to use a double-flaring tool. This will assist in creating new flares on the brake line’s ends for connections. Before using this tool, make sure that the brake line is clean and free of debris. The double-flaring tool requires some skill to operate properly, so it’s essential to practice before using it on the actual brake line.
6. Measure the Thread Size
Use a thread pitch gauge to measure the line’s male and female end threads. This will help you get the right fittings for your new brake line.
To measure the thread size on your brake line, you will need a thread pitch gauge. This is a small tool that allows you to determine the number of threads per inch on a screw or bolt.
First, locate the male and female end of your brake line. The male end will have external threads while the female end will have internal threads. Place your thread pitch gauge on the male end and rotate it until it fits snugly against the threads. Then, check the measurement on the gauge to determine the thread size.
7. Round Up Your Tools
Ensure you have the correct tools, including a pipe bender, flaring tool, deburring tool, and tubing cutter, which will make the brake line replacement much more manageable. It is also advisable to have a brake line bending tool, which allows you to bend tubes into sharp angles with precision.
To diagnose the source of your braking problems, you may need some specialized tools such as a pressure gauge. This device measures the amount of hydraulic pressure in the system and can help determine if there are any leaks or blockages. A brake fluid tester is also a useful tool to have, as it can quickly and accurately measure the moisture content in your brake fluid.
8. Prepare Your Work Environment
Brake lines often require working in cramped spaces. Ensure the vehicle is properly supported and that you have room to maneuver underneath.
Before starting to replace brake lines, gather all the necessary tools and materials. This includes new brake lines, flare fittings, line wrenches, tubing cutter or hacksaw, and a tubing bender if needed. Other helpful tools may include pliers, vise grips, socket set, and a brake bleeding kit.
It is also important to have a clean work area free of debris and any potential hazards. Make sure to wear appropriate safety gear, such as gloves and eye protection.
9. Double-Check Your Work
Before installation, always double-check that fittings and flares are correct and line lengths are accurate. Safety is paramount, and mistakes can be extremely dangerous with brake systems. Once you have double-checked all the connections and fittings, pump the brake pedal a few times to ensure everything is tight and there are no leaks.
It’s also important to continue checking your work after installation. Over time, vibrations from driving can cause fittings and connections to loosen or wear down. Regularly inspecting your brake system and addressing any issues immediately can prevent accidents and costly repairs in the future.
10. Test Tightness with Care
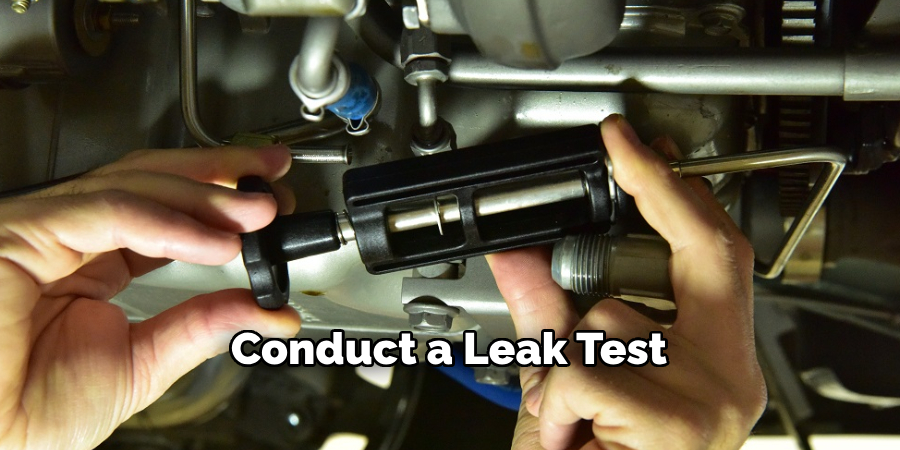
When installing the new brake line, first hand-thread the fittings to avoid cross-threading. Upon completion, bleed the brakes and conduct a leak test with soapy water to ensure airtight connections. Tighten fittings to the recommended torque, but be careful not to over-tighten as this can cause damage. However, it’s important to note that if you experience brake pedal sponginess or fluid leaks, you should immediately recheck all fittings and connections.
By accurately measuring your brake line size, you’re taking the first step towards maintaining a critical part of your vehicle’s safety system. Remember that precision and patience in this process not only ensure the efficacy of your brakes but also your personal safety.
Applications and Compatibility
When selecting new brake lines for your vehicle, it’s essential to consider the specific applications and compatibility with your car or truck model. Brake lines must be compatible with the brake fluid used in your system, as certain materials may degrade or react negatively with different types of fluids. Also, take into account the vehicle’s year, make, and model to ensure the lines meet the OEM specifications.
Aftermarket upgrades such as ABS systems or custom modifications can also affect the type of brake line necessary, so consult with a professional or the manufacturer if your vehicle has non-standard equipment. Proper application and compatibility are key to maintaining optimal braking performance and vehicle safety.
Common Brake Line Sizes and Applications
The most common brake line sizes are 3/16” and 1/4″, with 1/4″ typically reserved for higher flow applications or custom and performance vehicles. For everyday cars and light trucks, 3/16” brake lines are most common. Larger vehicles, such as heavy trucks or performance cars, might have 1/4” or even larger brake lines to accommodate the increased fluid volume needed for their braking systems.
It’s crucial to correctly identify the size and type of brake line necessary for your vehicle. Mismatched or incorrect brake lines can affect the overall performance of your brakes, leading to potential safety hazards. If you are unsure about which brake line size is compatible with your vehicle, consult a professional mechanic or refer to the manufacturer’s specifications guide. Remember that accuracy in measurements and
Ensuring Compatibility with Your Brake System
When performing any work on brake lines, it’s crucial to ensure absolute compatibility with your vehicle’s brake system. Using brake lines that are not designed for your specific brake system can result in inadequate brake pressure, increased wear, or even system failure.
Always check that the brake line material—whether it’s steel, copper-nickel, or another alloy—is suited for use with the type of brake fluid in your system, be it DOT 3, DOT 4, or DOT 5. The inner diameter of the brake line must also match the specifications of your vehicle’s factory settings to maintain the correct hydraulic pressure. Compatibility extends to the fittings and flares as well; they should match the threading and size required for your vehicle’s brake system components.
Always refer to the vehicle’s service manual or consult with a professional mechanic to verify the correct specifications before purchasing and installing new brake lines.
Tips and Troubleshooting
To ensure your measurements are as precise as possible, here are some helpful tips:
- Always triple-check your measurements for consistency.
- If you’re struggling to measure a line with flares, consider cutting the flare off temporarily to get a straight measurement. Just be sure to add the flare’s length back into your final count.
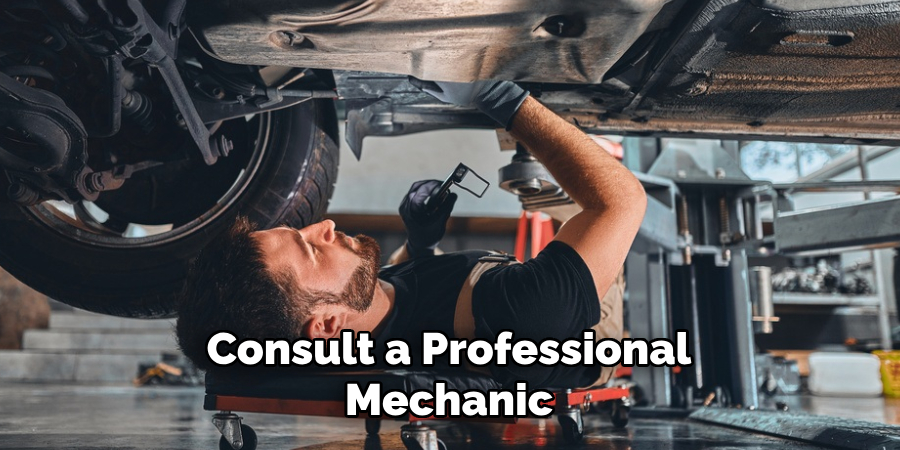
- If you’re not confident in making accurate measurements, consult with a professional to avoid potential braking system issues. Brakes are a safety-critical system, and accuracy is pertinent.
Conclusion
In conclusion, mastering the art of measuring brake line size is essential for anyone involved in vehicle maintenance and repair. By understanding the intricacies of brake line sizing, individuals can ensure the proper functioning and safety of their vehicle’s braking system. Through careful measurement techniques and attention to detail, one can confidently select replacement or upgrade components that seamlessly integrate with the existing brake system.
Additionally, accurate measurement reduces the risk of leaks, malfunctions, and potential safety hazards on the road. Whether you’re a seasoned mechanic or a DIY enthusiast, investing time in learning how to measure brake line size pays off in enhanced vehicle performance and reliability. Remember, precision and thoroughness are key when undertaking any brake system-related task, ensuring optimal functionality and peace of mind for drivers and passengers alike.

About
JeepFixes Team is a skilled author for Jeep Fixes, bringing 6 years of expertise in crafting a wide range of jeep fixes. With a strong background in jeep fixes work, JeepFixes Team’s knowledge spans various types of fixtures, from decorative pieces to functional hardware, blending precision with creativity. His passion for jeep fixes and design has made him a trusted resource in the industry.
Professional Focus:
Expert in Jeep Fixes : JeepFixes Team aesthetic specializes in creating durable and innovative jeep fixes, offering both appeal and functionality. His work reflects a deep understanding of jeep fixes techniques and materials.
Sustainability Advocate : He is dedicated to using sustainable practices, ensuring that every fixture is crafted with eco-friendly methods while maintaining high-quality standards.
In his writing for jeep fixes, JeepFixes Team provides valuable insights into the latest trends, techniques, and practical advice for those passionate about jeep fixes, whether they are professionals or DIY enthusiasts. His focus on combining artistry with engineering helps others discover the true potential of jeep in design.