

A leak down tester is an invaluable diagnostic tool for any individual involved in automotive maintenance, allowing both novices and experienced mechanics to assess engine integrity.
The purpose of a leak down tester is to pinpoint issues within an engine’s cylinders by pressurizing them and measuring how much air is being lost. The benefits of such testing are multifold; it can save time and money by accurately diagnosing engine problems related to compression loss without disassembling the engine completely.
This article is designed for automotive enthusiasts, DIY mechanics, and professionals who are looking to learn how to make leak down tester tailored to their specific needs and skill levels. Prioritizing safety cannot be overstressed – compressing compressed air systems demands careful handling and protective gear to prevent injuries.
Across two comprehensive parts, you will be introduced to various design approaches, from straightforward DIY builds to more sophisticated versions, offering insights into the complexity, affordability, and precision of each. By following this guide, readers will create their leakage detector and master its application in evaluating and maintaining engine health.
Understanding Leak Down Testing Principles
Leak down testing is a non-invasive method used to assess the health of an engine’s cylinders by detecting leaks. This testing involves sealing a cylinder and introducing a set amount of compressed air into it.
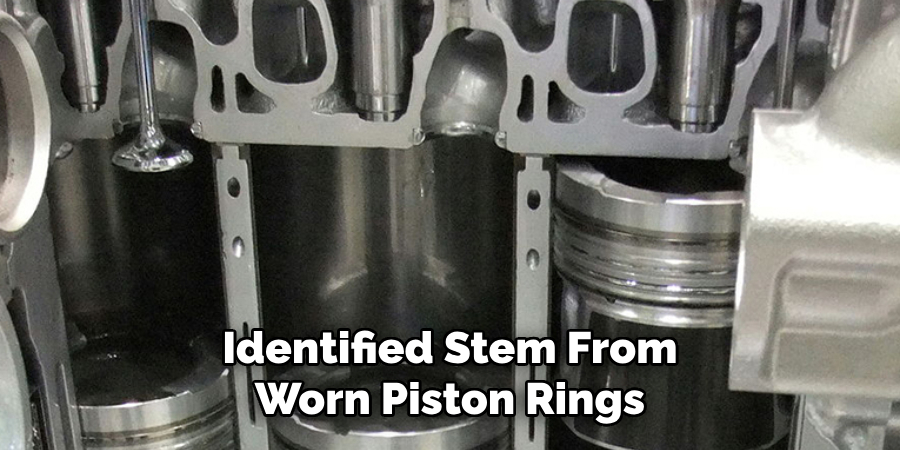
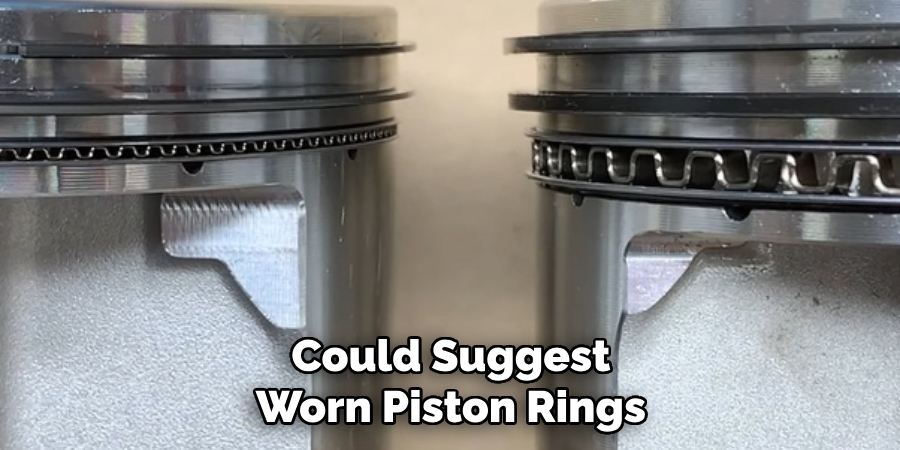
Mechanics then measure the rate at which this air escapes or ‘leaks down’ through imperfections or wear in the engine components. The core types of leakage that can be identified stem from worn piston rings, valve issues, or a compromised head gasket — each leading to a varying degree of compression loss.
With piston rings, leak down can indicate wear and tear that prevents them from forming a perfect seal. Valve leakage might occur from improper seating or damage, leading to compression loss through the intake or exhaust path.
Lastly, a leaking head gasket usually points to a breach between the cylinder and the coolant or oil passages, potentially causing cross-contamination. The percentage of leak down observed offers a quantitative measure of these issues, with higher percentages raising flags for engine health.
An engine in good condition demonstrates minimal leakage, indicating that internal components maintain a tight seal and operate within designed specifications. Understanding the implication of each leak down percentage is crucial to diagnosing and addressing your engine’s operational issues.
Choosing Your Build Approach
When deciding to construct your own leak down tester, you have several build approaches to consider based on your mechanical proficiency, budgetary constraints, and required precision in testing. Each approach possesses unique advantages and caveats, and below, we delineate three primary methods.
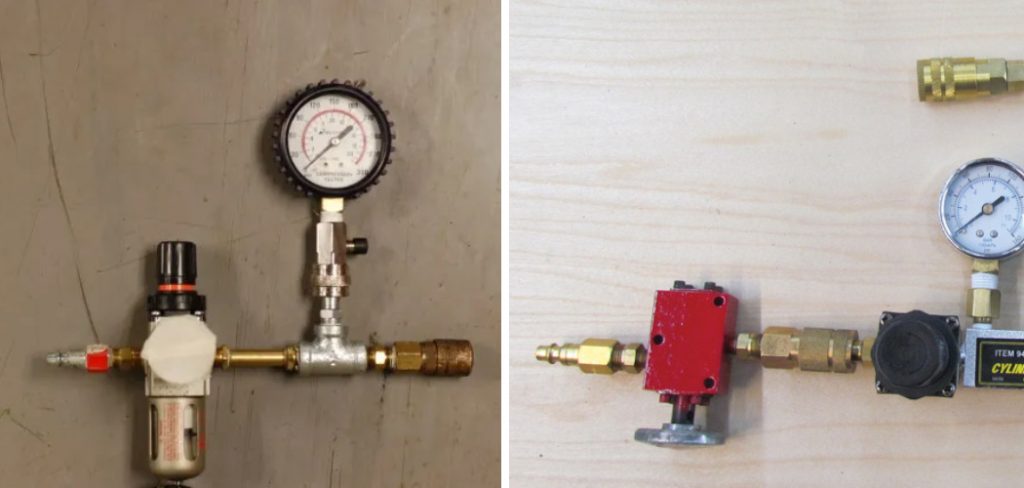
Simple DIY Version
The simplest way to assemble a leak down tester involves using components that are commonly available in hardware stores. This approach might include using a bicycle pump as an air source, plumbing fittings for connections, and a modified tire pressure gauge to read pressure differences. While this configuration is cost-effective and great for those attempting their first build, its accuracy is limited compared to professional-grade tools.
Intermediate Version
An intermediate build advances a step further by incorporating more specialized fittings and more precise gauges than those found in the simple DIY method. Instruments like a higher-quality regulator and a more sensitive pressure gauge can be sourced from automotive or industrial suppliers.
This middle-ground approach strikes a balance, offering better accuracy without the high expense of top-end equipment, though it may require additional investment in tools for assembly.
Advanced Version
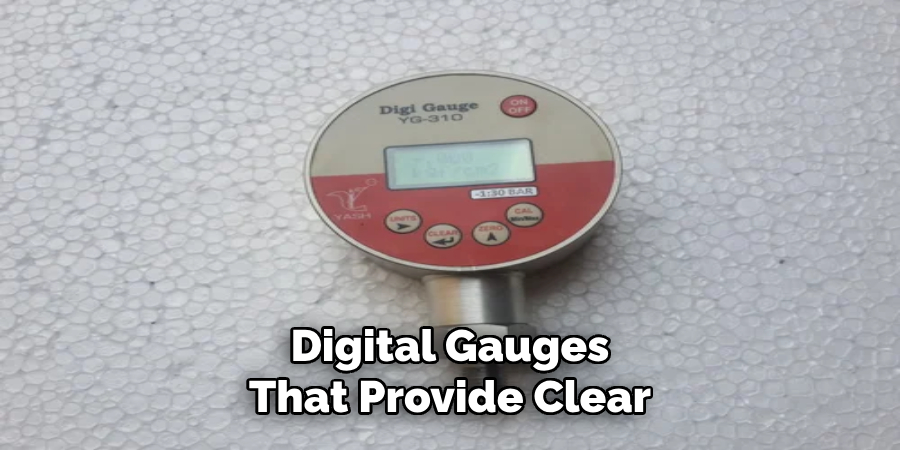
For the ultimate in accuracy and functionality, an advanced build will include specialty components such as precision machined adaptors and digital gauges that provide clear, detailed readouts.
Utilizing high-end materials like braided hoses and quick-connect couplings can significantly improve the longevity and performance of the tester. This approach, however, will incur a higher cost and typically demand advanced mechanical capabilities to assemble and calibrate the device correctly.
Gathering Tools and Materials
Constructing a leak down tester requires gathering an essential toolkit alongside specific components tailored to your chosen build approach. Below is a list of items you’ll need:
- Basic Tools: A set of wrenches, a variety of screwdrivers, and a reliable drill are indispensable. These can typically be found in a home mechanic’s toolkit or can be purchased for around $20-$100, depending on quality.
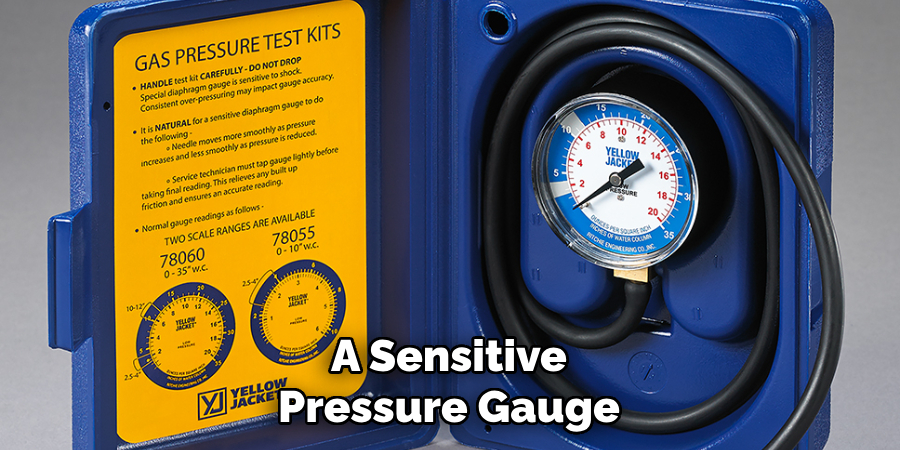
- Pressure Gauge: An essential instrument in leak down testing, a good quality pressure gauge will cost between $15-$50. Even a modified tire pressure gauge can work for those constructing the Simple DIY Version.
- Air Regulator: This device allows you to control the input pressure for the test. Prices vary from $25 for basic models to $100 or more for precision regulators suitable for the Advanced Version.
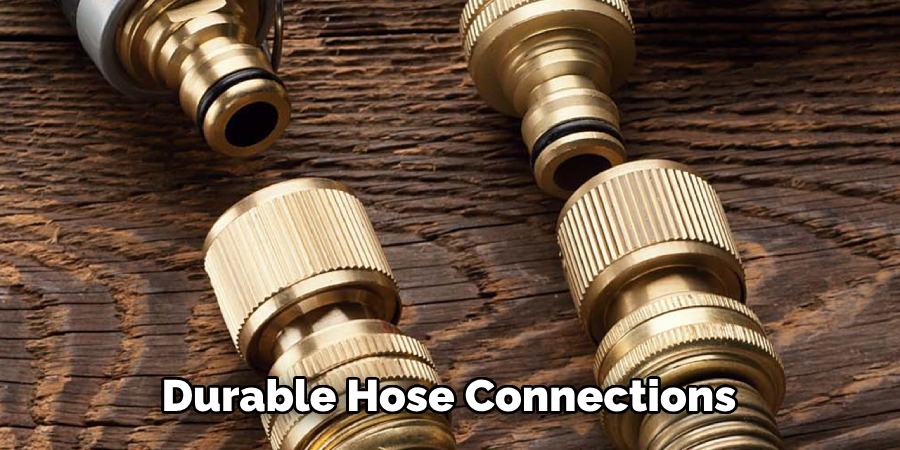
- Hose Connections: For connecting the air source, cylinder, and gauges, durable hose connections are required, costing around $10-$30. High-end braided hoses for the Advanced Version may run up to $50.
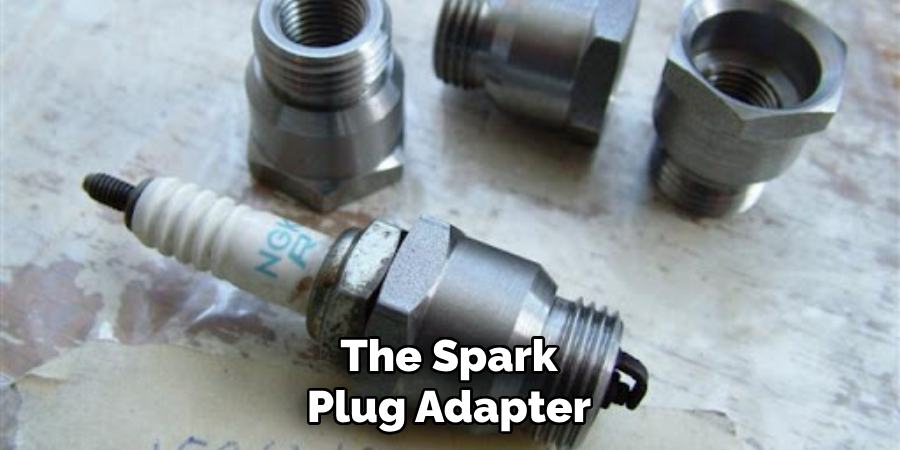
- Spark Plug Adapters and Fittings: These are critical for the leak down tester’s interface with the engine, with costs ranging from $5 to $20 depending on whether standard fittings are used or specialized ones are required for the Advanced Version.
- Valves: Quality valves ensure accurate air flow control and range from $10 to $40. Quick-connect couplings can be considered for ease of use in the Advanced Version.
- Optional Items:
- Flow Meter: For those seeking exact measurements, a flow meter can be added, with a cost upwards of $100.
- Dead Center Indicator: This specialized tool is not essential but can assist in precision testing for about $20-$70.
- Specialized Tools: Additional tools may facilitate custom builds, particularly in the Advanced Version.
Alternative and salvaged materials could reduce costs for budget builds or those just starting, such as using old air compressor hose fittings or acquiring used tools from garage sales or online marketplaces. It is, however, important not to compromise on the accuracy and safety of the equipment in trying to cut costs.
Safety Precautions and Considerations
Prioritizing safety throughout the build and testing process of a leak down tester cannot be overstressed. Compressed air poses a significant risk due to the high potential energy that can cause tools or hose connectors to become dangerous projectiles if not properly secured. Additionally, the handling of sharp tools during construction can lead to severe cuts or puncture wounds if due care is not taken.
It is also essential to refrain from conducting leak down tests on hot engine components to avoid burns. Adequate eye protection is a must to shield against any sudden release of compressed air or debris dislodged during the testing. Ensure all connections are secure before initiating the test to prevent leaks or blowouts.
Lastly, if there’s any uncertainty about the assembly or the testing process’s safety, you should not hesitate to consult with a professional. There is no substitute for the invaluable insight and guidance that an experienced mechanic can provide to ensure the leak down tester is built and operated with the utmost caution. These safety measures will minimize the risk of injury and protect the integrity of the equipment and the engine being tested.
How to Make Leak Down Tester A Comprehensive Guide
Building a leak down tester can be a rewarding DIY project, enhancing your understanding of engine health and performance. As we proceed, we’ll focus on constructing the Intermediate Version of the tester based on the background provided. This build reconciles quality and cost, a good choice for seasoned DIYers. Here is a comprehensive guide to each step of the assembly:
1. Component Selection
Begin by selecting a higher-quality regulator and a sensitive pressure gauge. Consider those designed for industrial use, as they offer better precision than automotive variants. The regulator should be capable of delivering consistent pressure, while the gauge should be clear and accurate for easy readings.
2. Connection Methods
Identify and procure adapters and hose connections compatible with your specific engine’s spark plug thread size. Opt for durable materials, and ensure quick-connect couplings for ease of use if your budget allows for them. Assemble the hose, ensuring it is firmly attached to both the regulator on one end and the spark plug adapter on the other.
3. Safety Checks
Before you start, confirm that all connections are tight to prevent leaks. Use Teflon tape on threaded connections to establish a secure seal. Always wear safety goggles while performing the assembly to protect your eyes from sudden air release.
4. Assembling the Regulator and Gauge
Mount the pressure gauge onto the regulator using proper fittings. This connection should not permit any air leakage. Consider applying a thread-locking compound to the fittings once their position has been confirmed and tested.
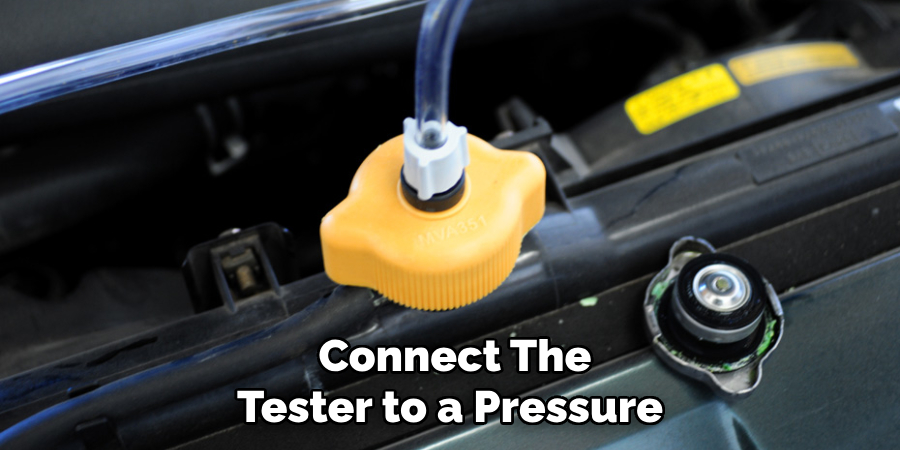
5. Connecting to the Air Source
The hose that was set up previously is now ready to connect to an air compressor. Ensure the shut-off valve is closed before connection to prevent air from escaping when the air compressor is turned on.
6. Final Assembly
Assemble all components on a clear, flat surface. Double-check the direction of flow on the regulator to ensure it aligns with the flow from the compressor to the spark plug adapter.
7. Testing Functionality
Before using the tester on an engine, perform a dry run. Adjust the regulator to the desired pressure and check if the gauge reads accurately. Listen for any air leaks and check all connections again if needed.
Assembly Tips:
- Always use hand tools to avoid over-tightening and potentially damaging the components.
- While connecting hoses, ensure they do not kink or bend sharply, as this can restrict airflow.
- Label each part during assembly to avoid confusion during use, especially if multiple engine adapters are on hand.
Troubleshooting:
- If a leak occurs, disassemble the affected connection and inspect for damage. Replace fittings or seals if necessary and reassemble.
- Should the gauge not read properly, check to ensure it is not damaged and that it is correctly mounted to the regulator.
Remember to align your assembly process closely with the specific instructions tailored to your chosen approach. While the variability of the Intermediate Version allows for some customization, it is important not to deviate significantly from the core design to maintain the unit’s integrity and performance.
Calibrating Your Leak Down Tester
Calibration is a fundamental step to ensure your leak down tester provides precise pressure readings, as accuracy is paramount in diagnosing engine health. For a basic home calibration, connect the tester to a pressure source with a known, stable reading—such as a well-maintained air compressor or a calibration pump—and adjust your tester to match the known value.
While this method improves accuracy, professional calibration is recommended for best results, especially before the first use and periodically thereafter. Skipping calibration can result in faulty readings and misdiagnosis, potentially leading to unnecessary repairs or overlooked engine issues.
That’s it! You’ve now learned how to make leak down tester, and you’re ready to start using it. Remember to always follow safety precautions during assembly and operation, and regularly calibrate your tester for optimal performance. With this essential tool in hand, you can confidently diagnose engine problems and maintain peak performance for years to come.
Preparing the Engine for Testing
Preparing an engine for a leak down test involves several crucial steps to ensure that the test is conducted safely and precisely. Begin by disabling the ignition system to prevent the engine from starting during the test.
Next, remove all spark plugs from the engine to allow the tester to be inserted into the cylinder. It is vital to bring the cylinder to be tested to the Top Dead Center (TDC) on the compression stroke; this is where both the intake and exhaust valves are closed, ensuring accurate measurement of air leakage.
Ensure that all moving parts, such as fans or belts, are secured or removed to avoid injury or interference with the testing equipment. Warming the engine to a slight operating temperature before testing can also be beneficial, as metals expand slightly under heat, potentially providing more accurate results. However, adequate time should be given for the engine to cool down so it’s safe to touch and work on.
Above all, safety should be the top priority. Double-check all connections for tightness to prevent any hazardous leaks. Wearing safety goggles and gloves will protect your eyes and hands during the process. With these steps followed, the engine will be properly prepped and ready for an effective leak down test.
Performing the Leak Down Test
Conducting the leak down test is a systematic process that requires attention to detail to accurately assess the condition of each cylinder. Begin by firmly attaching the spark plug adapter of the leak down tester to the cylinder you are testing. Ensure the connection is secure to prevent inaccurate readings due to air leakage.
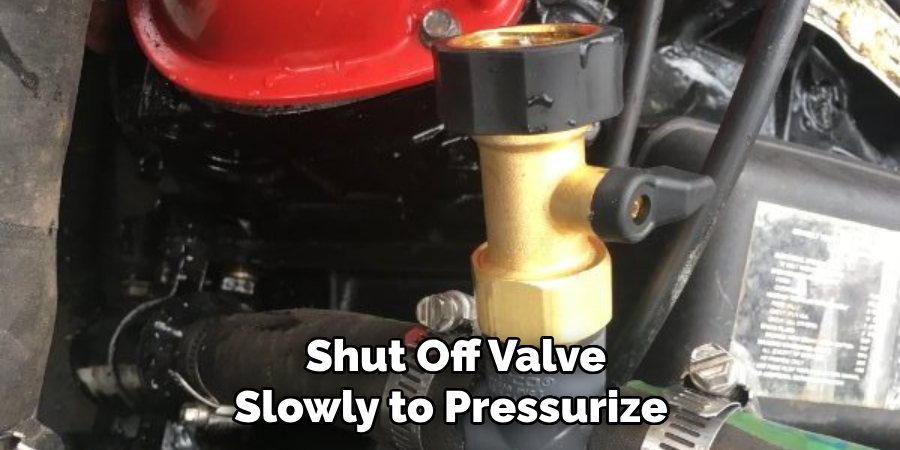
Next, set the air compressor to the specified pressure level recommended by the engine manufacturer or the leak down tester manual. With the compressor activated, open the shut-off valve slowly to pressurize the cylinder. The gauge on the tester will indicate the pressure level within the cylinder – this is your initial reading.
Allow the system to stabilize for a few moments, then record the leak down percentage, which shows the rate at which the cylinder loses pressure. Typically, this is done by comparing the pressure reading from the regulator with the pressure indicated inside the cylinder. Observe the gauges for any changes over time intervals of 30 seconds to a minute, keeping consistent intervals for each cylinder tested.
During this process, listen carefully to the sound of escaping air. It can signal leaks through the intake valves, exhaust valves, head gaskets, or piston rings. Each location will have a distinct sound, from hissing to whistling, and determining the leakage point is critical for diagnosis.
Repeat the procedure for all cylinders, recording the data clearly and meticulously. You may find variations between cylinders; slight differences are normal, but significant disparities can indicate engine issues.
For engines with specific testing procedures, such as those with variable valve timing or atypical cylinder arrangements, refer to the manufacturer’s service manual to ensure the correct process is followed. A precise and reliable read on each cylinder’s health can only be achieved by adhering to these tailored instructions.
Interpreting the Results
Interpreting the results from a leak down test requires a nuanced understanding of engine specifications and the significance of leakage percentages. Different engines will have their own acceptable ranges for cylinder leak down—typically, a healthy engine should exhibit less than 20% leakage. Lower percentages generally indicate an engine in good condition, while higher figures may signal wear or damage.
As you assess cylinder health, observe the leak rate over time. A rapid pressure loss could suggest worn piston rings, while air heard hissing at the intake or exhaust might indicate leaky valves. A bubbling sound from the coolant system often indicates a compromised head gasket. Each symptom helps pinpoint specific issues within the engine.
However, avoid jumping to conclusions without thorough evaluation. Compare your readings against the manufacturer’s engine specifications to calibrate your expectations. Consult a professional mechanic if significant leakage is detected, especially if it’s inconsistent across cylinders. A seasoned technician will conduct a detailed inspection, corroborate diagnosis with additional tests, and perform necessary repairs, ensuring your engine’s longevity and performance.
Disassembly and Storage
After completing the leak-down test, proper disassembly and storage of the tester are pivotal to maintaining its precision. Begin by releasing any residual pressure and carefully disconnecting all components.
Wipe each part with a clean, dry cloth to remove any debris or oil. Place sensitive gauges and adapters in cushioned cases to prevent damage from shocks or environmental factors. Store hoses neatly coiled and secured to avoid kinks that could impair their functionality. Finally, keep the tester in a cool, dry place away from direct sunlight and dust to ensure its reliability for future diagnostics.
Conclusion and Final Notes
In conclusion, the steps outlined detail how to make leak down tester an invaluable tool for assessing engine health. It is essential to prioritize meticulous setup, accurate measurements, and thorough analysis for reliable diagnostics.
Encouraging responsible use of the tester will extend its life and ensure the operator’s safety. In cases of complex engine issues, seeking professional expertise is imperative. Always remember safety first: adherence to proper procedures cannot be overstated. This knowledge empowers enthusiasts and professionals alike to maintain engine performance at its peak.

About
JeepFixes Team is a skilled author for Jeep Fixes, bringing 6 years of expertise in crafting a wide range of jeep fixes. With a strong background in jeep fixes work, JeepFixes Team’s knowledge spans various types of fixtures, from decorative pieces to functional hardware, blending precision with creativity. His passion for jeep fixes and design has made him a trusted resource in the industry.
Professional Focus:
Expert in Jeep Fixes : JeepFixes Team aesthetic specializes in creating durable and innovative jeep fixes, offering both appeal and functionality. His work reflects a deep understanding of jeep fixes techniques and materials.
Sustainability Advocate : He is dedicated to using sustainable practices, ensuring that every fixture is crafted with eco-friendly methods while maintaining high-quality standards.
In his writing for jeep fixes, JeepFixes Team provides valuable insights into the latest trends, techniques, and practical advice for those passionate about jeep fixes, whether they are professionals or DIY enthusiasts. His focus on combining artistry with engineering helps others discover the true potential of jeep in design.