

Are you trying to start an engine that has been sitting for a while? If so, it’s important to properly lubricate the engine before attempting to start it.
Engines that have been sitting idle for extended periods face the challenge of dry internal components, which can lead to wear and damage when the engine is started without proper preparation. Lubricating an inactive engine is crucial in preserving its life and functionality.
This guide will introduce the essential steps of how to lubricate an engine that has been sitting, ensuring that when it roars to life, it does so smoothly and without causing unnecessary damage to its components. Whether it’s a cherished classic car, a seasonal lawnmower, or a seldom-used backup generator, re-lubrication principles will help protect your investment and extend the usable life of your engine.
Why is Proper Lubrication Important?
Before we get into the steps of how to lubricate an engine, let’s first understand why it’s so crucial. Engines use lubricants, such as oil, to reduce friction between moving parts. When an engine sits idle for a while, the oil can settle and may not reach all the necessary areas of the engine that require lubrication. This lack of lubrication can lead to wear and tear when attempting to start the engine.
Additionally, during the period of inactivity, moisture and contaminants may accumulate inside the engine, further compromising its lubrication system. This is why proper lubrication is essential before starting an engine that has been sitting.
Proper lubrication helps reduce friction, wear and tear, and potential damage to the engine’s components. It also helps ensure that all parts are adequately protected, promoting smoother functioning and a longer lifespan for your engine.
Necessary Tools and Materials
Before you begin, make sure you have the following tools and materials on hand:
- Fresh Oil: Always use your engine’s recommended type and grade.
- Oil Filter: If possible, replace the oil filter before re-lubrication.
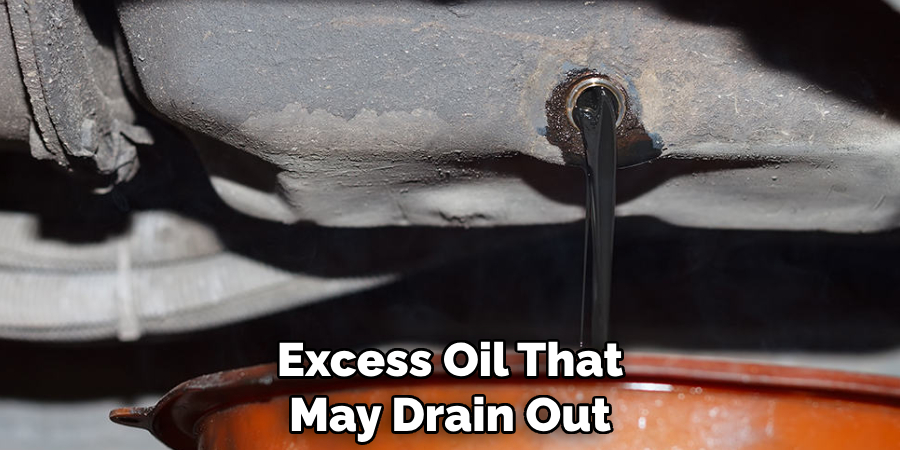
- Oil Pan: To catch any excess oil that may drain out during the process.
- Funnel: For efficient and clean pouring of new oil into the engine.
- Cleaning Supplies: This includes rags or paper towels for wiping any spills and a degreaser to clean the engine if needed.
- Safety Gear: Using gloves and safety glasses when working with an engine is always a good idea.
You’re ready to begin once you have all the necessary tools and materials. Let’s dive into the steps of lubricating an engine that has been sitting.
10 Easy Steps on How to Lubricate an Engine That Has Been Sitting
Step 1: Prepare the Engine
Before starting any work on the engine, make sure it is cool to the touch. This will help prevent any injuries from hot components or oil. Once the engine is cool, carefully clean the area around the oil cap and drain plug. This helps avoid any debris entering the engine during the lubrication process.
Step 2: Drain the Old Oil
Locate the oil drain plug at the bottom of the engine and place the oil pan underneath it. Carefully remove the drain plug using the appropriate wrench, allowing the old oil to flow out completely. Be patient during this process, as all the old oil may take some time to drain. Remember to dispose of the old oil properly, according to your local regulations. Once the oil has been completely drained, replace and securely tighten the drain plug.
Step 3: Remove and Replace the Oil Filter
Next, you’ll need to remove the old oil filter. Position your oil pan underneath the filter if any residual oil spills out during removal. Turn the filter counterclockwise using an oil filter wrench until it comes loose. Once removed, compare it with the new filter to ensure they match in size and thread type.
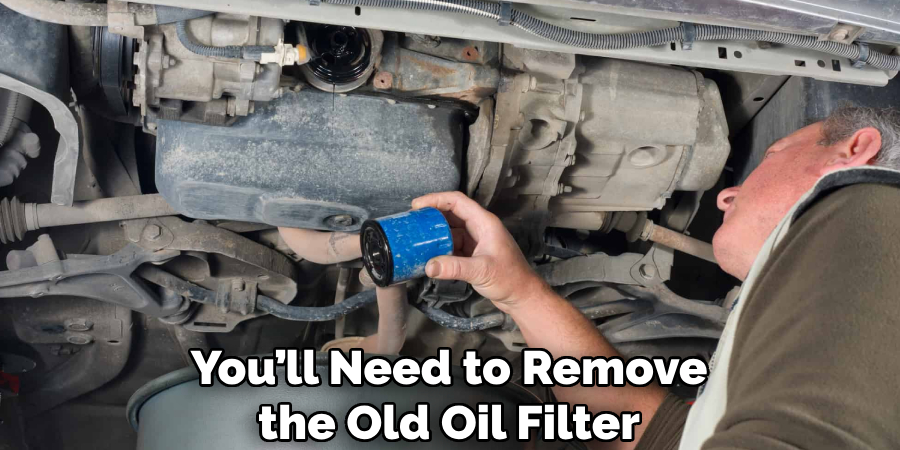
Before installing the new oil filter, apply a small amount of fresh oil to the rubber gasket on the top of the filter. This helps create a proper seal and prevents leaks. Screw the new filter into place by hand, and then gently tighten it with the wrench. Do not overtighten, as this could damage the gasket or make the filter difficult to remove in the future.
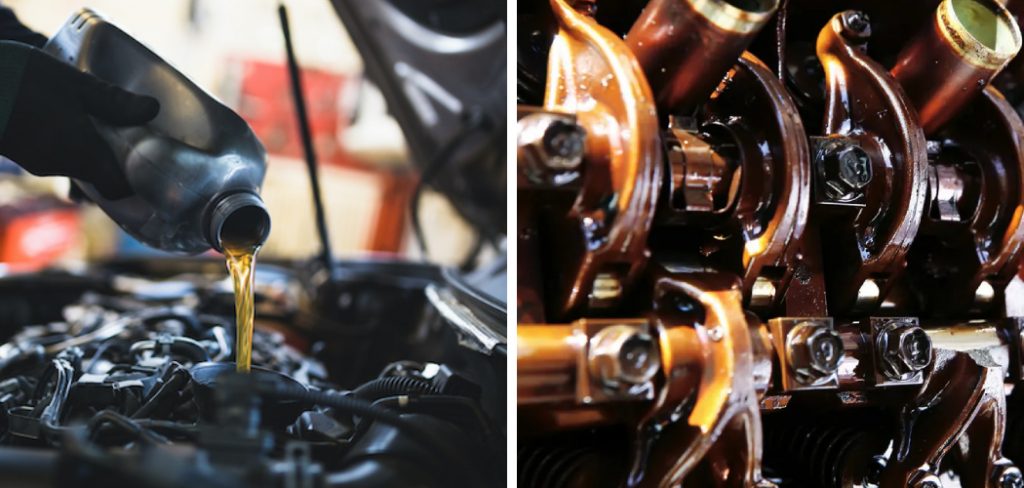
Step 4: Add Fresh Oil
After the old oil has been drained and the oil filter replaced, it’s time to add fresh oil to the engine. Open the oil fill cap on the top of the engine, and place your funnel in the opening to ensure a clean pour. Refer to your engine’s manual for the correct type and amount of oil required. Slowly pour the fresh oil into the funnel, allowing it time to settle into the engine. Keep an eye on the oil level using the dipstick, adding oil gradually until the level reaches the full mark. Once you’ve added the appropriate amount of oil, securely replace the oil fill cap.
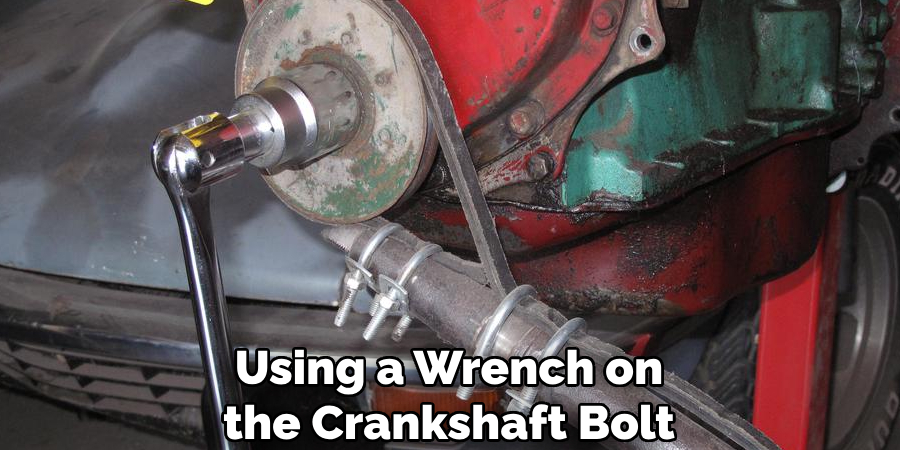
Step 5: Manually Turn the Engine
It’s beneficial to manually turn the crankshaft before attempting to start the engine with the starter. This can be done by using a wrench on the crankshaft bolt at the front of the engine. Turn the crankshaft clockwise slowly for a few rotations. This manual turning helps distribute the new oil throughout the engine, ensuring all moving parts are well-lubricated.
Additionally, it allows you to feel for any abnormal resistance that could indicate issues within the engine, allowing them to be addressed before starting the engine. Proceed carefully and ensure you’re not forcing the engine to turn if it feels seized.
Step 6: Check for Leaks
With the new oil and oil filter in place, checking for any potential leaks is important. Start by visually inspecting the area around the oil filter and drain plug. Ensure the filter and plug are properly tightened and there are no signs of oil seepage. If you detect any leaks, address them immediately by further tightening or reseating the oil filter or drain plug. Ensuring a leak-free engine protects the environment and prevents potential damage and loss of oil that could adversely affect the engine’s performance.
Step 7: Prime the Oil System
After ensuring there are no leaks and before starting the engine, it’s crucial to prime the oil system. This process helps circulate oil throughout the engine, especially to the top parts that gravity alone can’t reach. To prime the oil system, you can use a special priming tool attached to a drill, or depending on the engine, you might be able to do this by simply turning the ignition key to the on position without starting the engine. This activates the oil pump, circulating oil without the engine running. Remember to recheck the oil level after this process, as it may have decreased slightly once the oil has been distributed throughout the engine.
Step 8: Start the Engine
Now that the engine has been manually turned, checked for leaks, and the oil system primed, it’s time to start the engine. Ensure that the area is safe and there are no obstructions near the engine. Start the engine and allow it to idle for a few minutes. Listen closely to the engine during this time; it should run smoothly without any unusual noises.

This initial idle period is vital for the new oil to circulate fully throughout the engine, reaching all necessary components to provide proper lubrication. Monitor the oil pressure gauge or light to ensure that oil pressure is within the acceptable range, indicating that the oil is circulating correctly.
Step 9: Inspect and Listen for Any Abnormalities
After the engine has been started and idled for a few minutes, carefully inspect and listen for any unusual sounds or vibrations that could indicate problems. Pay special attention to the sound of the engine, as knocking, rattling, or any irregular noises could indicate inadequate lubrication or mechanical issues that need further investigation. Additionally, visually check for any signs of leaks or smoke that could suggest a problem. If the engine operates smoothly and quietly without any signs of distress, it’s a good indication that the lubrication process has been successful.
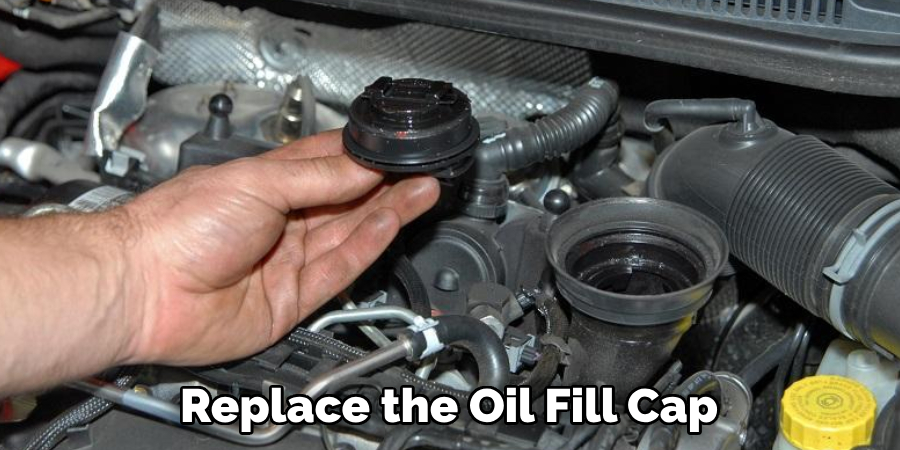
Step 10: Replace the Oil Fill Cap and Clean Up
After ensuring the engine runs smoothly without any signs of leaks or abnormalities, replace the oil fill cap if you haven’t already. It’s crucial to ensure the cap is secured properly to prevent any oil from escaping and maintain the correct pressure within the engine. Then, clean up any tools, spills, or debris from the oil change process.
Dispose of the used oil and oil filter responsibly by taking them to a recycling center or an auto shop that accepts these items. Proper disposal is not only environmentally responsible but often required by law. Lastly, record the date and mileage of the oil change for your records; this will help you keep track of when the next oil change is due, ensuring your engine remains in optimal condition.
By following these steps, you can change your car’s engine oil and keep it running smoothly for miles. Remember to always refer to your vehicle’s manual for any specific instructions or requirements and follow all safety precautions when working with a vehicle’s engine.
5 Additional Tips and Tricks
- Pre-lubrication Inspection: Before adding any lubricant, conduct a thorough inspection of the engine for any signs of rust, corrosion, or debris. This will prevent potential damage during the lubrication process.
- Use of a Fogging Oil: For engines that have been idle for an extended period, applying fogging oil to the cylinders can help protect the internal surfaces from rust and corrosion, ensuring a smoother startup.
- Manually Rotate the Engine: Before starting the engine, manually rotate the crankshaft with a wrench. This helps distribute the lubricant evenly across internal components, reducing the risk of damage on initial startup.
- Replace Old Oil: Drain out any old or contaminated oil and replace it with fresh, high-quality engine oil. Old oil may contain impurities that could harm the engine upon restart.
- Warm Up the Lubricants: Gently warm the lubricants before application. Warm oil flows more easily, allowing for better coverage and protection of internal engine components.
With these additional tips and tricks, you can ensure proper lubrication and protection for your engine, promoting its longevity and optimal performance. Remember to always refer to the manufacturer’s guidelines and recommendations for specific instructions on your engine model.
5 Things You Should Avoid
- Skipping the Cleaner: Never bypass the step of cleaning the engine before lubrication. Dirt and grime can mix with new oil, creating abrasives that damage internal parts.
- Using Expired Lubricants: Ensure that your oil or lubricant is not beyond its service life. Expired lubricants can lose effectiveness and might not provide your engine’s protection.
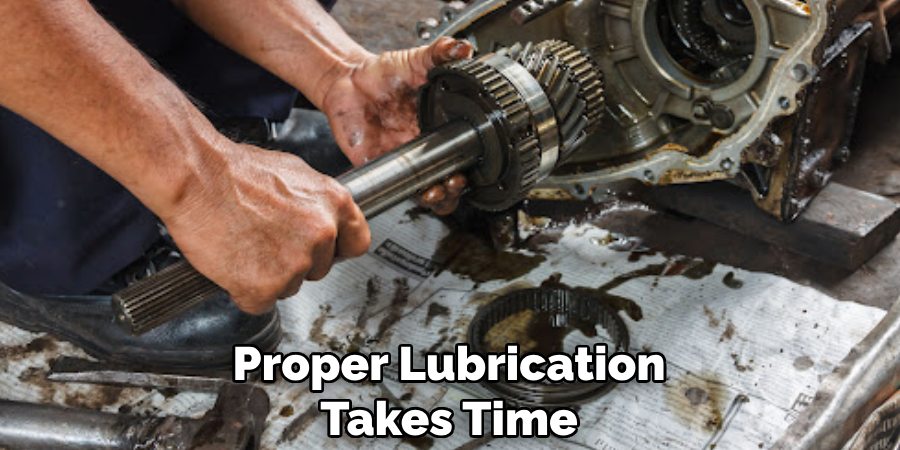
- Rushing the Process: Avoid hastening the lubrication process. Proper lubrication takes time, especially for an engine that has been sitting idle. Rushing could lead to uneven lubrication and potential engine damage.
- Ignoring Manufacturer’s Recommendations: Always adhere to the lubricant type and specifications recommended by the engine’s manufacturer. Using the wrong type of lubricant can cause more harm than good.
- Overlooking Filter Replacement: Do not just focus on the lubricant; remember to replace the oil filter too. A dirty filter can contaminate new oil quickly, negating the benefits of lubrication.
By avoiding these mistakes, you can ensure that your engine receives the best possible care and runs smoothly for years to come. As always, consult a professional mechanic if you have any doubts or concerns about lubricating your engine.
What are the Signs that Your Engine Needs to be Lubricated?
- Loud and Unusual Noises: If you hear grinding, knocking, or squealing noises from your engine, it could be a sign that the internal components are not adequately lubricated.
- Increased Friction: A properly lubricated engine should run smoothly without any resistance. If you feel increased friction or resistance when operating your engine, it could indicate inadequate lubrication.
- Overheating: Lack of proper lubrication can cause excessive heat buildup in the engine, leading to overheating and potential damage to internal components.
- Oil Leaks: If you notice oil leaks under your vehicle, it could indicate that the engine is not properly lubricated. This can be caused by old or contaminated oil that no longer provides adequate protection.
- Difficult Engine Startup: If your engine is struggling to start, it could be a sign of poor lubrication. The internal components need proper lubrication to function smoothly and efficiently during startup.
If you experience any of these signs, it is essential to address the issue immediately and properly lubricate your engine to avoid further damage.
What Can I Spray in the Cylinders That Have Been Sitting?
One product that is commonly used on engines that have been sitting for a while is fogging oil. This type of spray contains rust inhibitors and lubricants that help protect the internal surfaces of the engine from corrosion and damage. It can also be beneficial to use a penetrating oil, such as WD-40, to loosen up any stuck or rusted components before attempting to start the engine.
However, it is important to read the instructions and precautions on these products carefully before use, as using too much or inappropriately can cause harm to the engine. As always, following the manufacturer’s recommendations and consulting with a professional mechanic is key to properly caring for your engine.
Overall, taking the time and care to properly lubricate an engine that has been sitting can greatly benefit its performance and longevity.
Can Fog Oil Damage an Engine?
While fogging oil can be extremely beneficial for protecting an engine that has been sitting, using too much or improperly can cause damage. It is important to carefully follow the instructions and only use the recommended amount of fogging oil for your specific engine model. Using too much can lead to a buildup of carbon deposits in the cylinders, affecting engine performance.
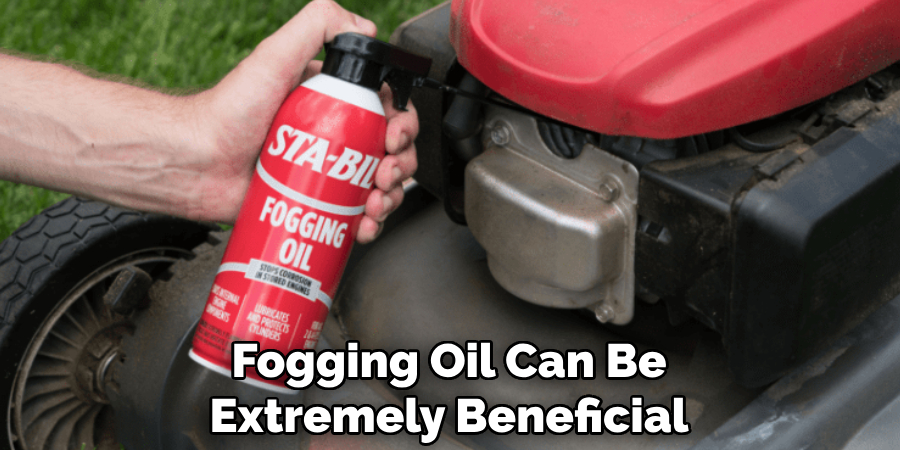
Additionally, it is essential to use fogging oil specifically designed for engines, as other types of lubricants or oils may not be suitable and could potentially harm the engine. Always consult with a professional mechanic if you have any concerns or questions about using fogging oil on your engine.
In conclusion, when used correctly and in appropriate amounts, fogging oil can be a beneficial tool in properly lubricating an engine that has been sitting. However, taking precautions and following recommended guidelines is important to avoid potential damage.
Conclusion
In wrapping up the essential guide on how to lubricate an engine that has been sitting, it’s clear that the process requires thoroughness, patience, and adherence to best practices. From ensuring the engine is clean before starting the lubrication process to selecting the appropriate lubricants and following manufacturer recommendations, each step is crucial for the successful reinvigoration of an idle engine. Avoiding common pitfalls such as rushing the procedure, neglecting the replacement of oil filters, or using expired lubricants will further safeguard the engine from potential damage.
While challenges like addressing loud noises, friction, or even oil leaks may arise, recognizing these signs early and responding promptly can prevent more severe complications. When applied correctly, fogging oil offers an additional layer of protection, especially for engines that have been dormant for extended periods.
By following these guidelines and approaching the task carefully, vehicle owners can ensure their engines remain in optimal condition, ready to perform reliably when called upon. Ultimately, the key to a healthy engine lies in regular maintenance and the vigilant observation of lubrication needs, ensuring a smooth and efficient operation for years to come.

About
JeepFixes Team is a skilled author for Jeep Fixes, bringing 6 years of expertise in crafting a wide range of jeep fixes. With a strong background in jeep fixes work, JeepFixes Team’s knowledge spans various types of fixtures, from decorative pieces to functional hardware, blending precision with creativity. His passion for jeep fixes and design has made him a trusted resource in the industry.
Professional Focus:
Expert in Jeep Fixes : JeepFixes Team aesthetic specializes in creating durable and innovative jeep fixes, offering both appeal and functionality. His work reflects a deep understanding of jeep fixes techniques and materials.
Sustainability Advocate : He is dedicated to using sustainable practices, ensuring that every fixture is crafted with eco-friendly methods while maintaining high-quality standards.
In his writing for jeep fixes, JeepFixes Team provides valuable insights into the latest trends, techniques, and practical advice for those passionate about jeep fixes, whether they are professionals or DIY enthusiasts. His focus on combining artistry with engineering helps others discover the true potential of jeep in design.