

Are you experiencing transmission issues and need to replace your dipstick tube? Don’t worry. It’s a relatively simple process that you can do yourself. In this guide, we will walk you through the steps on How to Install Transmission Dipstick Tube.
Installing a transmission dipstick tube is vital for maintaining your vehicle’s transmission system. The dipstick tube allows you to check the fluid level and ensures that the transmission fluid can be filled or adjusted without disassembling the transmission.
This guide will walk you through the straightforward steps of the installation process, detailing the tools required and the safety precautions to take, ensuring a hassle-free update to your vehicle’s transmission system. Whether you’re a seasoned mechanic or a determined DIY enthusiast, following these instructions will help to enable accurate monitoring of your transmission fluid.
What is the Function of the Dipstick Tube?
The dipstick tube is a long, narrow metal or plastic pipe that extends from the transmission case to the engine compartment. Its primary function is to hold the transmission dipstick in place and provide a pathway for checking and adding transmission fluid. The dipstick tube also acts as a seal, preventing dirt and debris from entering the transmission system.
Additionally, the dipstick tube helps to regulate the temperature of the transmission fluid, providing a more accurate reading of its level. It also allows easy access when draining or refilling transmission fluid during routine maintenance.
What Will You Need?
Before we jump into the installation process, let’s ensure you have all the necessary tools and materials on hand. Here is a list of items you will need:
- Replacement transmission dipstick tube
- Pliers or wrench
- Safety glasses
- Gloves
- Disposable rags or paper towels for spills
Once you have all the items ready, we can move on to the installation steps.
10 Easy Steps on How to Install Transmission Dipstick Tube
Step 1: Locate the Dipstick Tube
The first step is to locate the dipstick tube in your vehicle. It is usually located towards the back of the engine and has a bright yellow handle for easy identification. If you need help finding it, consult your vehicle’s manual for its exact location.
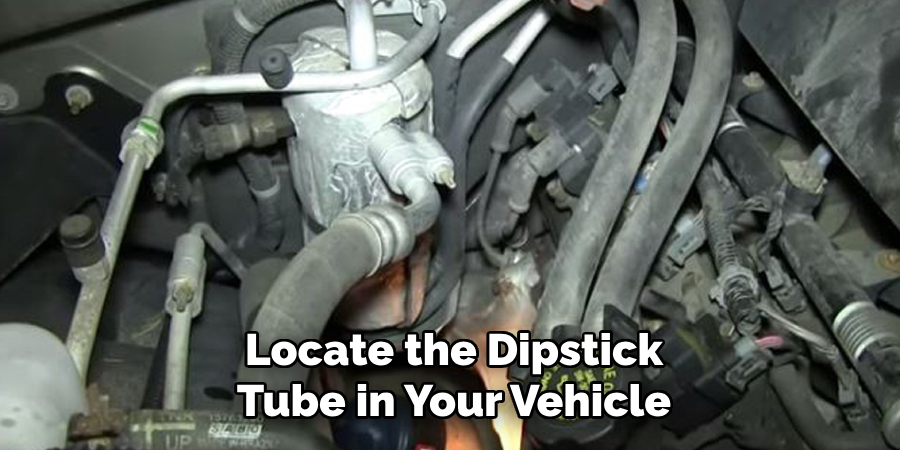
This handle is directly attached to the dipstick tube, which you will be replacing. Make sure your vehicle is on a flat surface and the engine is excellent before you proceed to the next steps.
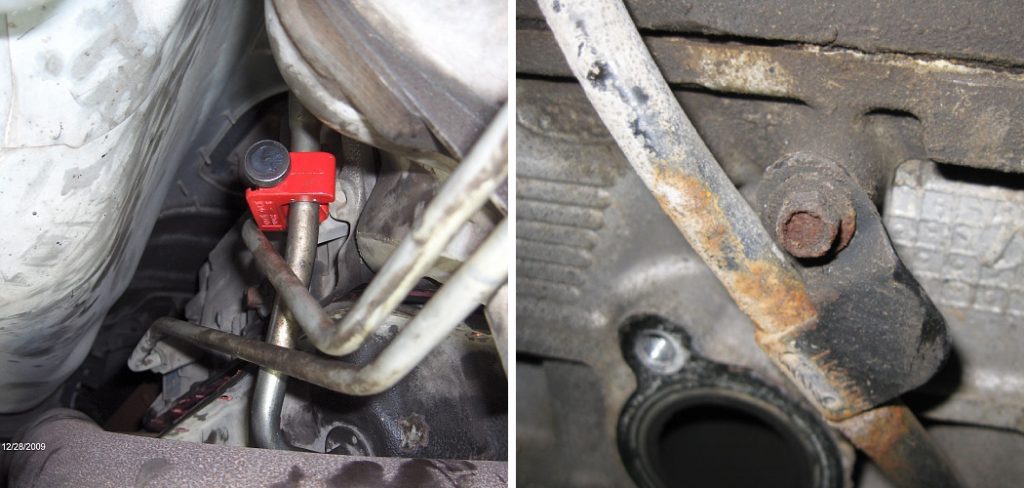
Step 2: Remove the Old Dipstick Tube
With the dipstick tube located, put on your safety glasses and gloves to protect yourself from any potential spills or debris. Use the pliers or wrench to carefully loosen any bolts or clamps that are holding the dipstick tube in place.
Once these are removed, you can gently pull the tube out from its seated position. It’s a good practice to have a disposable rag or paper towel ready to catch any fluid that may drip from the open tube. Dispose of the old tube according to local regulations.
Step 3: Prepare the New Dipstick Tube
Before installing the new dipstick tube, inspect it for any defects or damage to ensure it’s in perfect condition. The tube must fit correctly to avoid any future leaks or measurement inaccuracies.
Clean the area around the insertion point on the transmission to remove debris that could contaminate your transmission fluid. Apply a small amount of transmission fluid to the O-ring on the new tube for lubrication, which helps slide it into place more easily.
Step 4: Insert the New Dipstick Tube
Carefully align the new dipstick tube with the hole from which the old one was removed. Once aligned, slowly insert the tube into the transmission, making sure not to force it. If it does not slide in easily, gently rotate it to find the right angle for insertion. Once in place, secure any bolts or clamps that came with the new tube. It’s essential to avoid overtightening these fasteners as they may damage the tube or the surrounding components.
Step 5: Verify the Installation
After the new dipstick tube is secured, it’s crucial to double-check that it is correctly installed. Ensure that the tube is seated firmly without any movement and that the O-ring is fully seated to prevent leaks.
Ensure the bolts and clamps are tight enough to hold the tube in place but not so tight that they compromise the tube’s integrity. It’s also a good time to wipe away any fluid or debris that may have accumulated around the work area during the installation.

Step 6: Check Transmission Fluid Level
Now that the new dipstick tube is installed, it’s time to check the transmission fluid level. Insert the dipstick into the tube, then remove it to observe the fluid level against the marked indicators. If the fluid level is low, add the specified type of transmission fluid for your vehicle until it reaches the required level. Always pour the fluid slowly to avoid overfilling, and check the level periodically as you add more fluid.
Step 7: Clean Up and Inspect for Leaks
Once the transmission fluid level is correct, replace the dipstick and ensure it is fully seated. Clean any spills from the surrounding area and the vehicle itself with disposable rags or paper towels. With everything in its place, start your vehicle and let it run for a few minutes. This will allow the transmission fluid to circulate and allow you to inspect the installation for any signs of leakage.
Check around the base of the dipstick tube and the transmission for any fluid that may indicate a leak. If you spot a leak, turn off the engine immediately, allow it to cool, and reassess the tube’s installation and the tightness of the bolts and clamps.
Step 8: Road Test Your Vehicle
After ensuring there are no leaks, take your vehicle for a short test drive to allow the transmission to shift through all the gears. This will help spread the fluid evenly within the transmission system and, importantly, allow you to identify any unusual noises or behaviors early on. Pay close attention to the responsiveness of your transmission during shifting. The installation can be successful if everything is functioning normally.

Step 9: Monitor Transmission Performance
In the days following the installation, keep a close eye on your vehicle’s transmission performance. Notice if any shifts in gear are smoother or if any unusual sounds appear. Regularly check the transmission fluid level to ensure that it remains at the proper level and that there are no signs of leaking.
Monitoring your vehicle’s performance is a crucial final step in the process, as it consolidates the success of your installation and addresses any issues before they become significant problems.
Step 10: Schedule Routine Maintenance Checks
Finalize your installation by scheduling routine maintenance checks to ensure the long-term health of your vehicle’s transmission system. Regular professional inspections can identify any potential issues before they escalate into costly repairs. Keep a record of any maintenance performed and stay aware of the recommended service intervals for your vehicle’s transmission. By taking proactive measures, you extend the life of your vehicle and maintain its performance to the highest standard.
Following these ten simple steps, you can safely and effectively replace your vehicle’s dipstick tube.
5 Additional Tips and Tricks
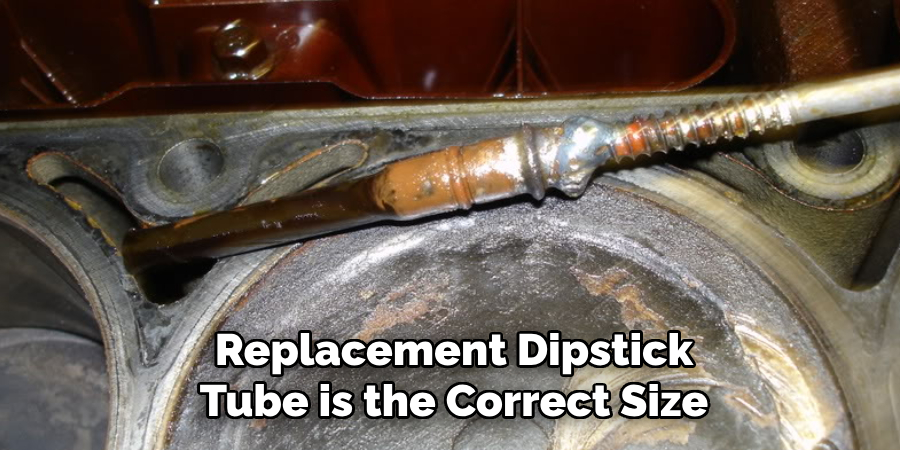
- Ensure a Proper Fit: Double-check that the replacement dipstick tube is the correct size and model for your vehicle. A proper fit can lead to accurate fluid level readings and potential leakage.
- Lubricate O-rings: Lightly lubricate the O-rings or any seals with transmission fluid before installing the tube. This helps to ensure a snug fit and prevents rubber from drying out and cracking.
- Avoid Cross-threading: When screwing the tube into place, be gentle to avoid cross-threading, which can damage the threads and lead to a poor seal.
- Use the Right Tools: Employ a set of proper tools for the installation process. Typically, you would need a set of sockets and an extension to reach the bolt that secures the tube.
- Check for Leaks: After installation, let the vehicle run for a few minutes, then check around the tube for any signs of leaks. It’s easier to address issues now rather than after everything is back in place.
With these additional tips and tricks, you can ensure a smooth and successful installation of your transmission dipstick tube.
5 Things You Should Avoid
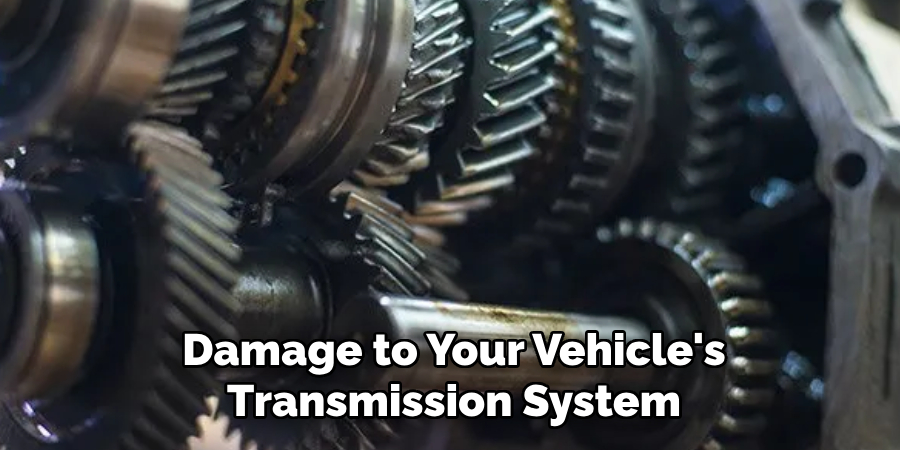
- Neglecting Vehicle Specifications: Ignoring your vehicle’s specific requirements can lead to using incompatible parts, resulting in potential damage to the transmission system.
- Forcing Parts into Position: Applying excessive force when fitting the dipstick tube could warp or break the new tube or, worse, cause damage to the transmission housing itself.
- Skipping a Pre-Installation Check: Failure to inspect the new dipstick tube for defects or obstructions before installation could cause complications and prevent accurate fluid level readings.
- Overlooking the Sealing Surface: Not cleaning the area where the dipstick tube enters the transmission can cause debris to compromise the seal, leading to leaks and contamination.
- Rushing the Process: Hasty installation without carefully following each step increases the risk of mistakes and might necessitate costly repairs or even a do-over of the installation process.
- Ignoring Manufacturer’s Instructions: Each manufacturer may have specific instructions and recommendations for installing a transmission dipstick tube. Ignoring these can lead to incorrect installation and potential damage to your vehicle’s transmission system.
By avoiding these common mistakes, you can ensure a successful and hassle-free installation of your transmission dipstick tube.
Some Frequently Asked Questions
1. How Can You Pour Transmission Fluid Down the Dipstick Tube?
Pouring transmission fluid through the dipstick tube is a meticulous process that should be done carefully to prevent overfilling and potential damage to the transmission system. Start by locating the dipstick tube, which is usually marked and typically found near the engine. With the vehicle on level ground and the engine off but warm, remove the dipstick and insert a funnel into the tube.
Pour the recommended type of transmission fluid slowly, in small increments, checking the level frequently with the dipstick to ensure the proper fill level is achieved. It is essential to pour gradually and give the fluid enough time to work down into the transmission; this prevents air pockets and ensures accurate measurement. After each incremental addition, fully reinsert the dipstick and remove it to check the fluid level.
Continue this process until the fluid reaches the “Full” mark on the dipstick. Remember, it’s always better to underfill slightly and add more fluid as needed than to overfill and have to remove excess fluid, which can be a more challenging task.
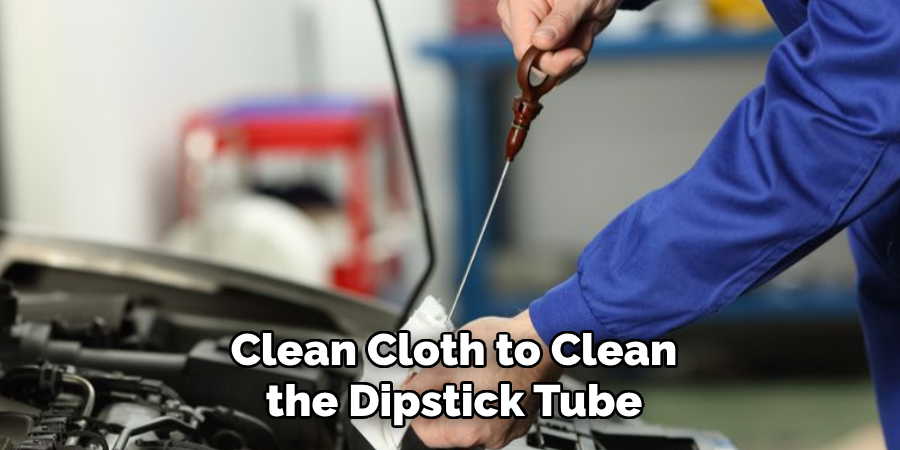
2. How Do You Clean a Dipstick Tube?
Cleaning a dipstick tube is an essential step in the installation process, as it ensures a proper seal and prevents potential leaks. First, remove any dirt or debris around the area using a clean cloth to clean the dipstick tube. Then, use a degreaser or transmission fluid to thoroughly clean the tube’s interior.
If there are any signs of build-up or rust, use a small brush or cloth to remove it gently. Finally, wipe down the inside of the tube with a clean cloth and let it air dry before installing the new dipstick tube. This process removes any contaminants that could affect the seal and ensures accurate fluid level readings.
3. What Can Cause Transmission Fluid Leaks?
Transmission fluid leaks can be caused by various issues that affect the integrity and functionality of your vehicle’s transmission system. Common causes include seal and gasket failures due to wear and tear or improper installation. These components are crucial for maintaining the sealed environment of transmission, and any compromise can lead to leaks.
Hoses and lines that transport transmission fluid can also develop leaks if they become brittle or cracked or if their connecting clamps become loose. Furthermore, the transmission pan, often exposed to road debris, can suffer from physical damage or corrosion, enabling fluid to escape.
Another potential leak source is the torque converter, which plays an essential role in power transmission; a crack or fault in this component can result in fluid loss. Regular wear and aging, as well as the impact of contaminants within the transmission fluid, can degrade internal components and lead to leakage.
Moreover, an overfilled transmission or incorrect fluid type can increase pressure within the system, causing fluid to force its way out through seals or vent tubes. It is imperative to diagnose and address transmission fluid leaks promptly to prevent further damage to the transmission and keep the vehicle operating efficiently.
4. What if the Dipstick is Dry?
Suppose you discover the dipstick is dry after inserting it into the transmission tube. In that case, it’s an indication that the transmission fluid level is significantly low, or possibly, there is no fluid at all within the system.
This situation is critical as transmission fluid is fundamental for lubrication, cooling, and proper operation of the transmission components. Driving a vehicle with insufficient transmission fluid can lead to overheating, increased friction among parts, and, ultimately, severe transmission damage.
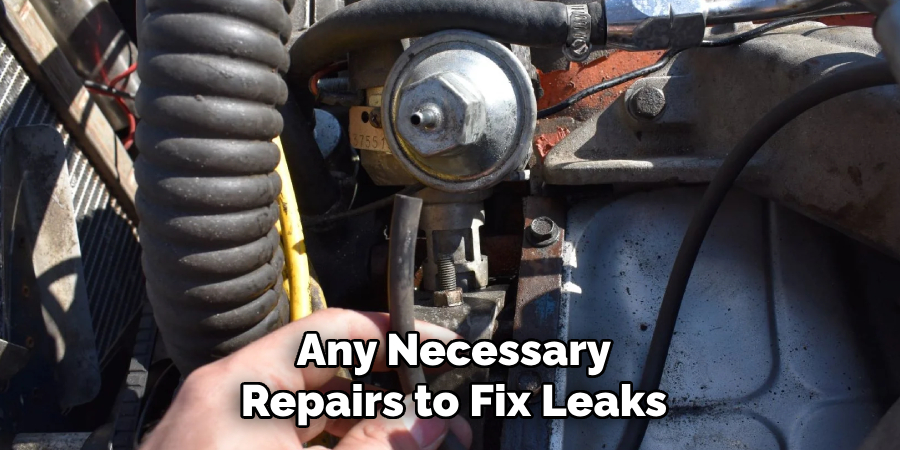
To address a dry dipstick, you should first verify whether there are any leaks as the cause of the low fluid level. After any necessary repairs to fix leaks, proceed to slowly add the manufacturer-recommended transmission fluid through the dipstick tube, following the steps outlined in previous sections for checking and adding fluid.
Once the fluid reaches the “Full” mark on the dipstick with the engine on and at operating temperature, check for proper shifting and operation. It’s advisable to monitor the level over the next few days to ensure no further drops in fluid level could indicate unresolved issues.
5. Why is Your Dipstick So Hot?
The dipstick can become hot during the normal operation of the vehicle, predominantly if it has been driven for an extended period or under heavy load. This is because the transmission fluid itself can reach high temperatures while performing its essential functions within the transmission system.
However, if you notice that the dipstick is excessively hot to touch, this may indicate a problem with the cooling system of the transmission. The cooling system circulates fluid through a radiator to dissipate heat, and failure or blockages in this process can cause the fluid to overheat, leading to potential damage to the transmission.
It is crucial to address any issues with the cooling system immediately, as overheating of the transmission can result in costly repairs or even complete transmission failure.
Conclusion
In conclusion, how to install transmission dipstick tube is a task that, while straightforward, requires attention to detail and adherence to best practices. Ensuring the cleanliness of the dipstick tube and the surrounding area is critical to maintaining the integrity of the transmission fluid system. Causal filling, using the correct type of fluid, and carefully monitoring levels with a warmed engine will help avoid overfilling and underfilling alike.
Awareness of common causes for transmission leaks and understanding the signals of potential issues, such as a dry or hot dipstick, are essential for maintaining any vehicle’s transmission system.
By following the outlined procedures, one can achieve a secure and functional transmission dipstick tube installation, contributing to the overall health and longevity of your vehicle’s transmission.

About
JeepFixes Team is a skilled author for Jeep Fixes, bringing 6 years of expertise in crafting a wide range of jeep fixes. With a strong background in jeep fixes work, JeepFixes Team’s knowledge spans various types of fixtures, from decorative pieces to functional hardware, blending precision with creativity. His passion for jeep fixes and design has made him a trusted resource in the industry.
Professional Focus:
Expert in Jeep Fixes : JeepFixes Team aesthetic specializes in creating durable and innovative jeep fixes, offering both appeal and functionality. His work reflects a deep understanding of jeep fixes techniques and materials.
Sustainability Advocate : He is dedicated to using sustainable practices, ensuring that every fixture is crafted with eco-friendly methods while maintaining high-quality standards.
In his writing for jeep fixes, JeepFixes Team provides valuable insights into the latest trends, techniques, and practical advice for those passionate about jeep fixes, whether they are professionals or DIY enthusiasts. His focus on combining artistry with engineering helps others discover the true potential of jeep in design.