

Installing a flywheel on your vehicle can seem like an intimidating task if you’ve never done it before. Whether you’re replacing a worn-out flywheel or upgrading to a performance flywheel, taking on this job yourself can save you significant money over paying a mechanic.
While the process may seem complex, by taking it step-by-step and using the right tools and safety precautions, even a DIY novice can install a flywheel with confidence.
In this guide, I’ll walk you through the entire process of how to install a flywheel, from removing your old flywheel to installing and torquing down the new one. I’ll also provide some tips for inspecting flywheel components, choosing the right replacement flywheel for your needs, and preventing costly mistakes. By the end, you’ll feel equipped to handle a flywheel installation yourself next time your vehicle needs one. Let’s get started!
Tool and Materials You Will Need to Install a Flywheel
- Socket set with extensions and a ratchet
- Torque wrench
- Flywheel holding tool (optional)
- Pry bar
- Screwdriver
- Brake cleaner
- Thread locker
- Grease or anti-seize lubricant
Step-by-step Guidelines on How to Install a Flywheel
Step 1: Prepare for Installation
Before you begin installing your new flywheel, make sure you have all the necessary tools and materials on hand. It’s also a good idea to clean the work area and have any replacement parts ready in case you encounter any issues with your old flywheel. Preparing ahead of time will save you from having to stop mid-way through the installation and run to the store for missing items.
Step 2: Remove the Transmission
To reach the flywheel, you’ll need to remove the transmission. This can be a complex step, so if you’re not comfortable with it, it’s best to seek professional help. But if you’re up for the challenge, start by disconnecting the battery and draining the transmission fluid.

Then, loosening and removing all bolts attaching the transmission to the engine. Finally, carefully lower the transmission and move it out of your way.
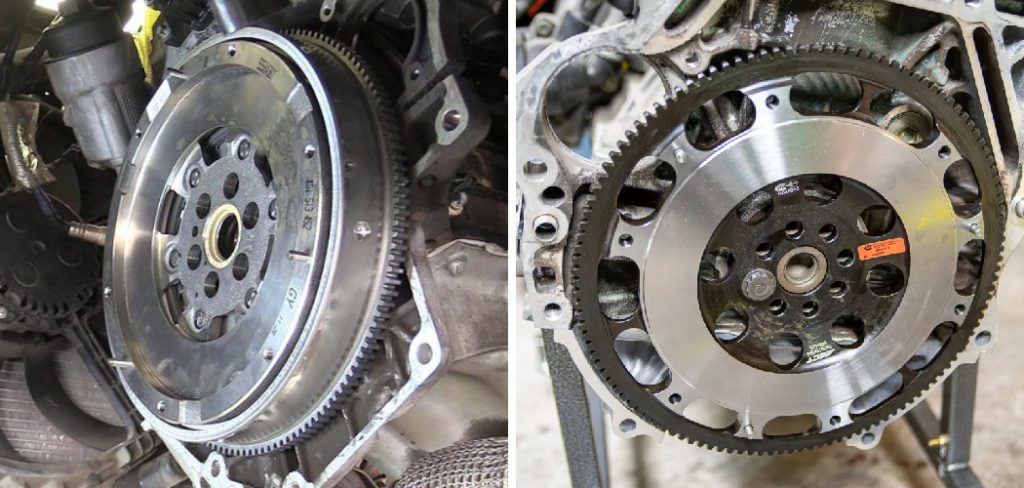
Step 3: Remove Old Flywheel
The flywheel is usually located behind the clutch assembly. Start by removing any dust or debris from the area using a brake cleaner. Then, use a pry bar to remove the dust cover and expose the flywheel.
Loosen and remove all bolts attaching the flywheel to the engine, making sure to keep track of their location for reassembly. Make sure to also remove any spacers or dowel pins.
Step 4: Inspect for Damage
With the old flywheel removed, now is a good time to inspect it for any damage. Check for cracks, warping, or wear on the surface of the flywheel. If you notice any issues, it’s best to replace the entire flywheel assembly rather than try to repair it. Also, inspect the transmission input shaft for any damage that may have caused issues with the old flywheel.
Step 5: Prep and Install New Flywheel
Before installing the new flywheel, clean the area once again using a brake cleaner. Then, apply a small amount of thread locker to each bolt before screwing them into place on the new flywheel. Make sure to also apply a thin layer of grease or anti-seize lubricant on the transmission input shaft to prevent corrosion. Once everything is prepped, carefully place the new flywheel in position and hand-tighten each bolt.
Step 6: Torque Down Bolts
Using a torque wrench, tighten each bolt in a star pattern, gradually increasing the torque to the manufacturer’s specifications. This will ensure even pressure distribution and prevent warping of the flywheel. Double-check all bolts to make sure they’re tightened properly. This is also a good time to reinspect the flywheel for any issues.
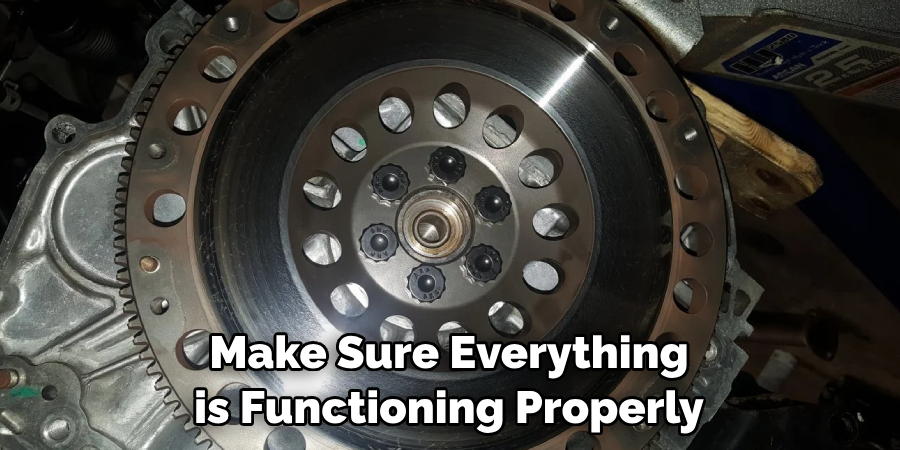
Step 7: Reinstall Transmission
With the new flywheel in place, it’s time to put everything back together. Carefully lift the transmission and guide it into position, making sure all bolts and connections are securely attached. Refill the transmission fluid and reconnect the battery. Start the vehicle to make sure everything is functioning properly before taking it for a test drive. Make sure to also check for any leaks and address them if necessary.
Following these seven steps will result in a successful flywheel installation. As you can see, with the right tools and knowledge, installing a flywheel is not as daunting as it may seem. Just remember to take your time and double-check all connections and torque settings for a safe and reliable installation. Now that you know how to install a flywheel, you can confidently tackle this task on your own and save money in the process. Happy driving!
Additional Tips and Tricks to Install a Flywheel
- If you’re upgrading to a performance flywheel, make sure to also upgrade your clutch and pressure plate for optimal performance.
- When purchasing a new flywheel, make sure to choose one that is compatible with your vehicle’s make, model, and engine size.
- If you encounter any issues during the installation process, don’t hesitate to seek professional help to avoid costly mistakes.
- Remember to always follow safety precautions and use the appropriate tools when working on your vehicle.
- Regular maintenance and inspection of your flywheel can prevent costly repairs or replacements in the future.
- Consult your vehicle’s manual for specific torque settings and procedures for installing a flywheel, as they may vary depending on the make and model.
- Always use a flywheel holding tool or have a second person assist in holding the flywheel when torquing down the bolts to prevent it from rotating.
- Keep all old parts and hardware until the installation is complete and successful, in case you need to make any adjustments or refer back to them for reference.
- If you’re unsure about any step in the installation process, consult a trusted mechanic or online resources for guidance. It’s always better to be safe than sorry when it comes to working on your vehicle.
- Remember to properly dispose of any old parts and fluids according to environmental regulations in your area. Keep our planet clean and green!
Following these additional tips and tricks will help ensure a smooth and successful installation of your flywheel. Don’t be afraid to ask for assistance or do some research if you’re unsure about any aspect of the process. With practice, installing a flywheel will become second nature and you’ll have a better understanding of your vehicle’s mechanics. Happy driving!
Precautions Need to Be Followed for Installing a Flywheel

- First and foremost, make sure the vehicle is on a level surface with the parking brake engaged before starting any work.
- Always disconnect the battery to avoid any electrical shock or damage while working on your vehicle’s transmission.
- Wear appropriate protective gear, such as gloves and safety glasses, to protect yourself from any debris or fluids while working on the vehicle.
- Use caution when lifting heavy parts and make sure to properly support them to avoid injury or damage to the vehicle.
- When draining the transmission fluid, make sure to use a suitable container and dispose of it properly according to environmental regulations.
- Avoid using excessive force or prying when removing old parts to prevent damage and make the installation process smoother.
- Make sure to properly tighten all bolts and connections to avoid any issues while driving.
- Double-check all steps of the installation process before starting the vehicle, as a mistake could result in costly repairs or accidents.
Following these precautions will ensure a safe and successful installation of your flywheel. Always prioritize safety and take your time to avoid any mistakes that could result in additional expenses or harm. Remember, if at any point you’re unsure about a step or encounter an issue, seek professional help for assistance. Happy and safe driving!
Frequently Asked Questions
How Do I Know if My Flywheel Needs to Be Replaced?
Signs of a worn-out or damaged flywheel include strange noises, difficulty shifting gears, and clutch slippage. If you notice any of these issues, it’s best to have your flywheel inspected by a mechanic.
Can I Reuse My Old Flywheel?
In most cases, it’s recommended to replace the flywheel when replacing the clutch. However, if your old flywheel is in good condition and has been machined properly, it can be reused. Consult a mechanic for their professional opinion before reusing an old flywheel.
How Long Does It Take to Install a Flywheel?
The time it takes to install a flywheel can vary depending on your experience and the condition of your vehicle. On average, it can take anywhere from 2-4 hours for a professional mechanic and 6-8 hours for someone with little to no experience.
Can I Install a Flywheel Myself?
While it is possible to install a flywheel yourself, it requires a good understanding of your vehicle’s mechanics and the proper tools. It’s always recommended to seek professional help if you are unsure or inexperienced in this task. The safety of yourself and others on the road should be the top priority.

How Often Should I Replace My Flywheel?
It is recommended to replace your flywheel every time you replace your clutch, as it is subjected to similar wear and tear. Regular maintenance and inspections can also help determine the condition of your flywheel and if it needs to be replaced sooner. Consult your vehicle’s manual for specific guidelines on when to replace the flywheel. Remember, regular maintenance can prevent costly repairs in the future.
Conclusion
Now you know how to install a flywheel and the precautions that need to be followed for a successful installation. By following these steps and guidelines, you can ensure optimal performance from your vehicle’s transmission. Remember to always prioritize safety and consult professional help if needed. Regular maintenance of your flywheel will also prolong its lifespan and prevent costly repairs in the future. Happy driving!