

Dealing with an antifreeze leak is a critical aspect of maintaining your vehicle’s cooling system and preventing potential engine damage. Antifreeze, also known as coolant, plays a crucial role in regulating engine temperature and preventing overheating. Detecting and fixing antifreeze leaks promptly is essential to avoid engine overheating, coolant loss, and potential damage to vital engine components. Whether the leak is caused by a damaged hose, a faulty radiator, or a failing gasket, knowing how to fix antifreeze leak is vital for vehicle owners.
From locating the source of the leak to replacing damaged components and replenishing coolant levels, mastering the process of fixing antifreeze leaks ensures the continued reliability and performance of your vehicle’s cooling system. This article will provide valuable insights and step-by-step guidance on effectively diagnosing and repairing antifreeze leaks, empowering vehicle owners to address this common issue with confidence and efficiency.
Importance of Addressing Antifreeze Leaks Promptly
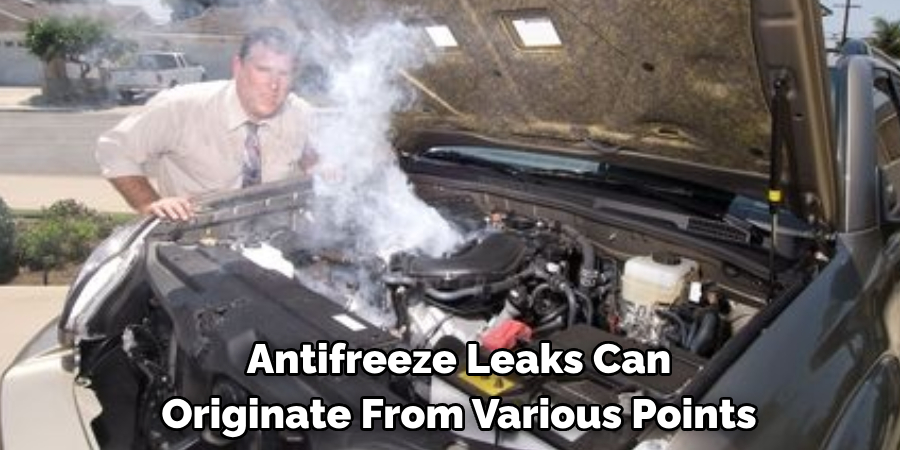
Ignoring antifreeze leaks can lead to significant engine problems, ranging from minor inconveniences to irreparable damage. Without timely intervention, a small leak can rapidly empty the cooling system of its vital coolant, leading to excessive heat buildup.
This intense heat can warp engine components, cause head gasket failures, and in severe cases, result in a complete engine breakdown. Immediate attention to antifreeze leaks prevents escalation of damage and can save the vehicle owner from costly repairs and extended downtime. Beyond engine health, antifreeze is a toxic substance and its leaks pose environmental hazards, further emphasizing the urgency of repairing leaks as soon as they’re detected.
Understanding Antifreeze Leaks
Antifreeze leaks can originate from various points within the vehicle’s cooling system. Common culprits include worn out radiator hoses, damaged gaskets, a cracked radiator, or a leaky water pump. The material degradation due to age and the constant exposure to temperature fluctuations can cause these components to fail. Discoloration, swelling, or noticeable cracks on hoses are telltale signs of imminent leaks.

Additionally, corrosion of the radiator or a compromised seal can also pave the way for antifreeze to escape the closed system. Understanding the potential sources of leaks is fundamental to effective troubleshooting and ensures repairs are targeted and functional, minimizing the risk of future leaks and preserving the integrity of the engine’s cooling mechanism.
Signs and Symptoms of Antifreeze Leaks
The first step in addressing antifreeze leaks is to recognize their signs and symptoms. Vehicle owners should be vigilant for a sweet, syrupy odor, which is a distinctive scent of antifreeze. Visually, look for bright-colored liquid, typically green, orange, red, or blue, pooling beneath a parked vehicle, which is almost a sure sign of a coolant leak.
Puddles under the car should prompt immediate investigation. Moreover, the frequent need to refill engine coolant without an obvious loss of liquid may indicate a slow, hidden leak. Inside the vehicle, a malfunctioning heater or a temperature gauge consistently showing high can also signal that coolant levels are low due to a leak. To avoid engine overheating or severe damage, it’s essential to identify and address these warning signs swiftly.
10 Methods How To Fix Antifreeze Leak
1. Identify the Source of the Leak:
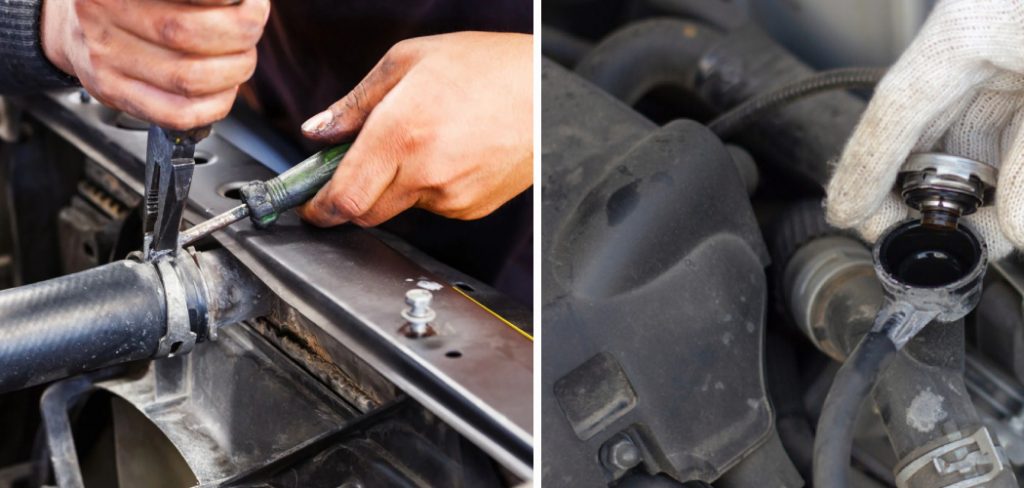
Begin by locating the source of the antifreeze leak. Inspect the engine bay, radiator, hoses, water pump, heater core, and connections for signs of coolant leakage. Look for wet spots, puddles, or residue that indicate a leak.
If the source of the leak is not apparent, you can perform a pressure test on the cooling system. This test will pressurize the system and help you locate any potential leaks that may not be visible to the naked eye. You can purchase a cooling system pressure tester at most auto parts stores or borrow one from a friend.
2. Inspect and Replace Damaged Hoses:
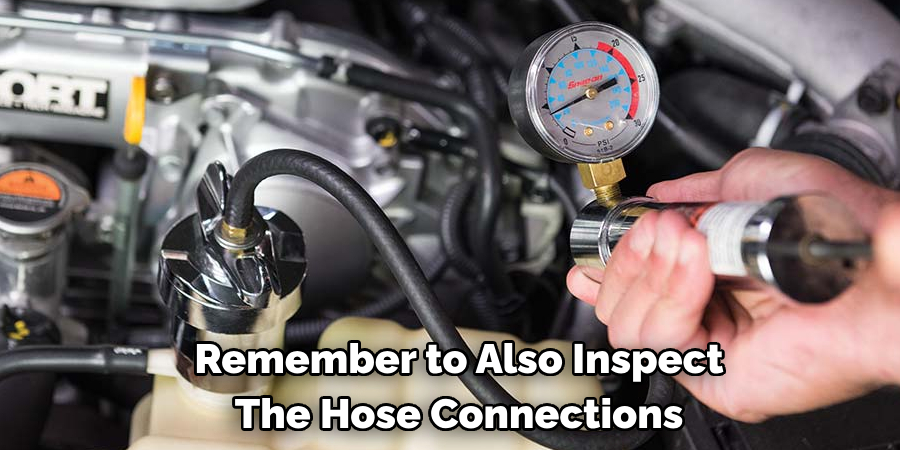
Check all coolant hoses for cracks, bulges, or other signs of damage. Replace any hoses that show signs of wear or deterioration. Use hose clamps to secure the new hoses in place. Remember to also inspect the hose connections and replace any damaged fittings.
Hoses play a crucial role in the cooling system of your vehicle. They are responsible for circulating coolant, which is essential for maintaining an optimal operating temperature for your engine. However, due to their constant exposure to heat, pressure, and other elements, hoses can become damaged over time. It is important to regularly inspect and replace damaged hoses to ensure the proper functioning of your vehicle’s cooling system.
3. Patch or Replace a Leaking Radiator:
If the radiator is leaking, assess the extent of the damage. Small leaks can often be patched using a radiator repair kit. For larger leaks or corroded radiators, replacement may be necessary. Install a new radiator and ensure all connections are secure. Additionally, check the coolant levels and top up if needed. Regularly inspect the radiator for any signs of leaks or damage.
It is also important to consider regular maintenance for your radiator to prevent future leaks. This includes checking and replacing any worn out hoses or clamps, flushing the cooling system, and using a high-quality antifreeze/coolant mix. It is recommended to follow the manufacturer’s guidelines for maintenance and use of specific products.
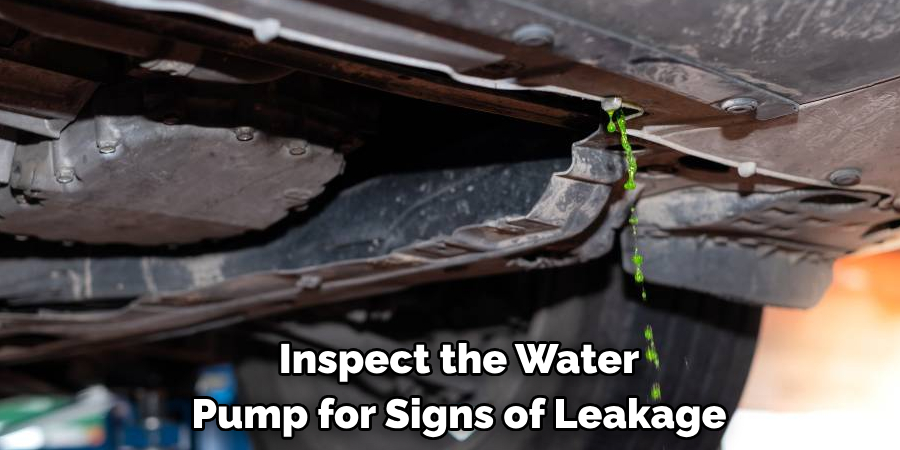
4. Address Leaking Water Pump:
Inspect the water pump for signs of leakage around the pump housing or gasket. If the water pump is leaking, replace it with a new one. Make sure to properly torque the bolts and install a new gasket to prevent future leaks. Additionally, check the coolant level and top off if needed. However, if the water pump is not leaking, there may be other underlying issues causing the leak.
5. Fix a Leaking Radiator Cap:
Check the radiator cap for signs of wear or damage to the rubber seal. Replace the radiator cap if it’s not sealing properly. A faulty radiator cap can cause coolant to leak under pressure. If the cap is in good condition, check the pressure relief valve for debris or corrosion. Clean it out with compressed air and replace the cap.
Always make sure to use a high-quality radiator cap to prevent future leaks. It’s also important to regularly inspect and maintain your vehicle’s cooling system to prevent any potential issues.
If you notice that the radiator cap is consistently leaking, it could be a sign of a larger problem such as a cracked radiator or a damaged head gasket. In these cases, it’s best to take your vehicle to a mechanic for further diagnosis and repair.
6. Repair a Leaking Heater Core:
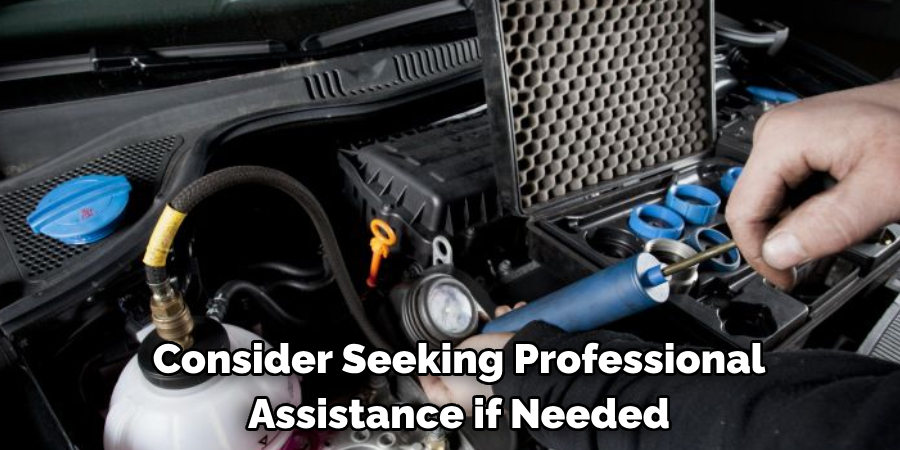
If you notice coolant leaking into the passenger compartment or a sweet smell inside the vehicle, the heater core may be leaking. Replacing the heater core can be a complex and time-consuming task, so consider seeking professional assistance if needed. However, if you are confident in your mechanical abilities, follow these steps to replace a leaking heater core. Additionally, make sure to have the correct tools and replacement parts before starting the repair process.
7. Use Sealants for Minor Leaks:
For small leaks in hoses or fittings, consider using a high-quality coolant sealant. These sealants can temporarily patch minor leaks and prevent coolant loss until more permanent repairs can be made. They are typically added directly to the radiator or overflow tank and will circulate through the cooling system, sealing any small leaks they come in contact with.
While coolant sealants can be effective for minor leaks, it is important to note that they should only be used as a temporary solution. If you continue to experience coolant leaks after using a sealant, it is likely that there is a larger issue with your cooling system that needs to be addressed. It is always best to have a professional mechanic diagnose and repair any persistent leaks.
8. Tighten Hose Clamps and Connections:
Inspect all hose connections, clamps, and fittings in the cooling system. Tighten any loose hose clamps or connections to ensure a secure seal. Use a torque wrench to tighten bolts to the manufacturer’s specifications. Replace any damaged or worn hoses, clamps, or fittings.
After inspecting the cooling system for any potential issues, it is important to also check and tighten all hose clamps and connections. Over time, these components can become loose and affect the efficiency of the cooling system. Loose connections can also lead to leaks, which can cause further damage to the engine.
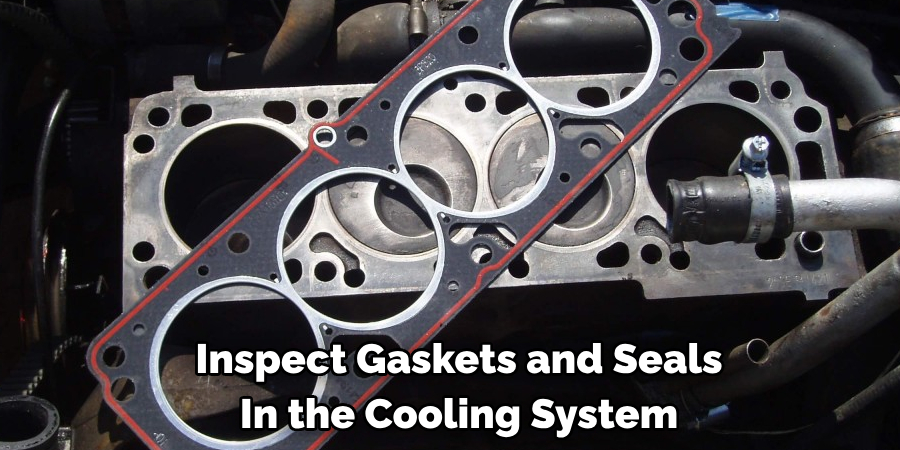
9. Check and Replace Gaskets:
Inspect gaskets and seals in the cooling system for signs of wear or deterioration. Replace any gaskets or seals that show signs of leakage or damage. Ensure proper alignment and seating during installation to prevent future leaks. It is also important to use the correct type of gasket for the specific application.
Gaskets and seals play a crucial role in the functioning of a vehicle’s cooling system. They are responsible for creating a seal between two mating surfaces, preventing any fluids or gases from leaking out. Over time, these gaskets and seals can wear down due to heat, pressure, and other environmental factors.
10. Perform a Pressure Test:
After making repairs, perform a pressure test on the cooling system to verify that the leak has been fixed. Use a cooling system pressure tester to pressurize the system and check for leaks. If the pressure drops, inspect the system for any remaining leaks and address them accordingly. Once the pressure test is complete and there are no signs of leaks, it’s time to refill the cooling system. Though, before refilling the system, it’s important to properly dispose of any old coolant and replace it with fresh coolant.
Flushing and Refilling the Cooling System
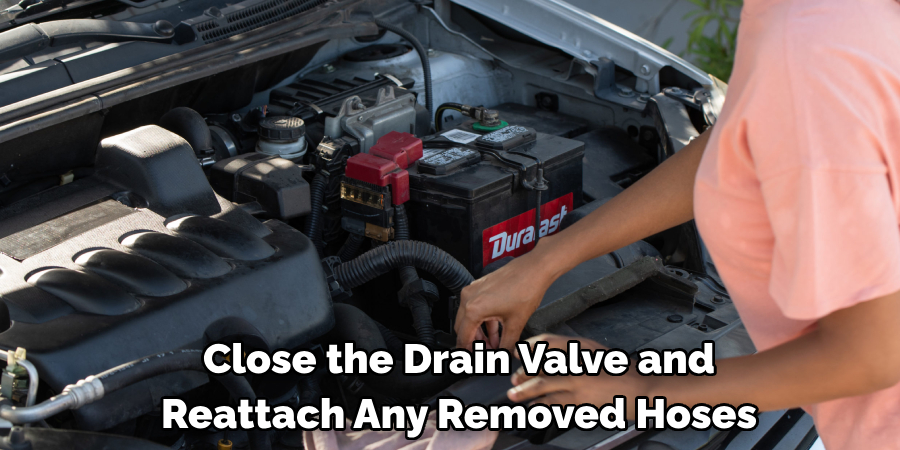
Properly flushing and refilling the cooling system is essential for maintaining optimal engine temperature and preventing corrosion. Begin by draining the old coolant from the radiator and engine block. Remove the lower radiator hose or open the drain valve to release the coolant into a suitable container for proper disposal. To thoroughly flush the system, run water through the radiator until it comes out clear.
Once flushing is complete, close the drain valve and reattach any removed hoses. Then, refill the cooling system with a mixture of high-quality antifreeze and distilled water in the ratio recommended by the vehicle’s manufacturer. It’s important to avoid using tap water as it may contain minerals that can cause scaling and corrosion. After filling, start the engine with the heater on high to allow the coolant to circulate and top off as necessary. Check for leaks and ensure the coolant level stabilizes before concluding the refilling process.
Removing Contaminants from the Cooling System
Before adding new coolant, it’s essential to flush the cooling system to remove any contaminants that can cause corrosion and reduce cooling efficiency. Start by ensuring the engine is cool to avoid injury from hot liquids. With the radiator cap off, insert a garden hose into the top of the radiator and allow the water to flow through the system, effectively flushing out rust particles, old coolant, and scale deposits. Continue this process until the water runs clear.
For a thorough cleanse, you may also use a chemical flush product designed for automotive cooling systems, following the manufacturer’s instructions carefully. After flushing, make sure to thoroughly drain the system to prevent dilution of the new coolant.
Following these steps will help keep your vehicle’s cooling system in top shape, preventing any leaks or other issues that could lead to expensive repairs. Regular maintenance and inspections of the cooling system are essential for the overall health and longevity of your vehicle. If you do experience a coolant leak or suspect an issue with your cooling system, don’t hesitate to seek professional assistance for proper diagnosis and repair.
Testing for Leak Resolution
Once all potential problems have been addressed and repairs have been made, it’s essential to ensure that the cooling system is free of leaks. To verify repair effectiveness, carry out a final leak test. Allow the vehicle to reach normal operating temperature and inspect all repaired areas under pressure. Look for any signs of coolant seepage or drips.
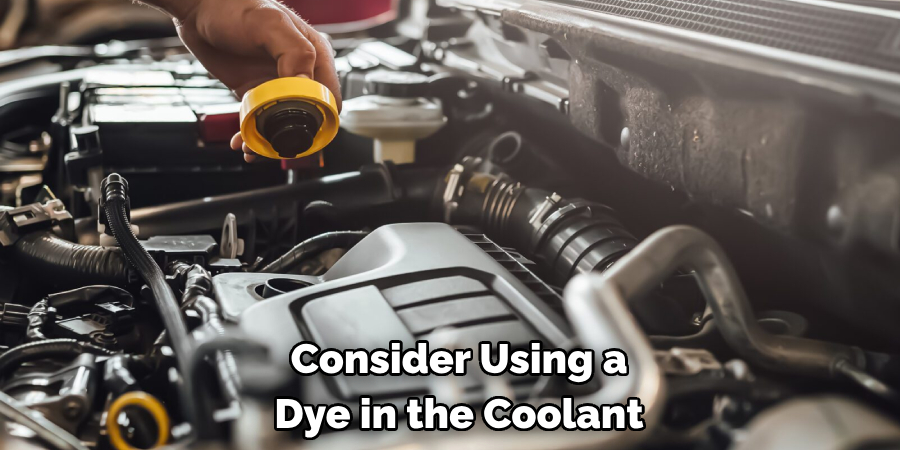
Alongside a visual inspection, consider using a dye in the coolant that’s visible under a UV light to detect any small, hard-to-find leaks. If no leaks are detected, monitor the coolant level regularly over the next several days to confirm a successful repair. Remember to check the vehicle under different conditions, such as after a long drive or after it has been parked overnight, to ensure that the system remains leak-free under varying stresses and temperatures.
Post-Repair Leak Inspection
After any repairs are completed, a meticulous inspection for leaks is crucial to ensure the integrity of the cooling system. Begin by allowing the car to idle until it reaches its normal operating temperature while observing for any signs of coolant leaks. Pay special attention to all repaired areas, including hose connections, gasket interfaces, and the radiator itself. Hand-check the tightness of clamps and ensure that hoses are free from any form of constriction or damage.
It’s equally important to examine the ground beneath the vehicle for any signs of coolant pools or drips that indicate a persistent leak. Should any new leaks come to light, it is essential to address them immediately to maintain the cooling system’s effectiveness and protect the engine from overheating.
Preventive Maintenance Tips
Regular preventive maintenance is the key to ensuring the long-term health of a vehicle’s cooling system. Begin by scheduling periodic coolant replacements according to the manufacturer’s recommendations, as old coolant can become acidic and start corroding the system. It’s also wise to inspect the radiator cap periodically; a worn cap will not maintain proper system pressure, which can lead to overheating. Always inspect belts and hoses during routine maintenance, looking for cracks, softening, or other signs of wear that could lead to failure.
Keeping the external part of the radiator clean is also essential; debris like leaves and insects can block airflow, impairing the radiator’s ability to cool the engine. When checking the coolant level, always look for signs of contamination, like oil or rust, which could indicate more significant issues within the cooling system or engine. Lastly, be mindful of your vehicle’s temperature gauge; frequent fluctuations could signify coolant issues or a failing thermostat. By adhering to these preventive measures, you can significantly reduce the risk of cooling system failures and extend the life of your engine.
Conclusion
In conclusion, addressing antifreeze leaks promptly and effectively is essential for preserving the integrity and performance of your vehicle’s cooling system. By employing the ten methods outlined on how to fix antifreeze leak, vehicle owners can identify, diagnose, and repair antifreeze leaks to prevent coolant loss and potential engine damage. Whether replacing damaged hoses, patching a leaking radiator, or addressing faulty gaskets, taking proactive measures to fix antifreeze leaks ensures the safe and efficient operation of your vehicle.
Regular inspection, maintenance, and timely repairs are critical for preventing coolant leaks and maintaining optimal cooling system performance. By prioritizing the health of your vehicle’s cooling system and addressing antifreeze leaks as soon as they arise, you can enjoy peace of mind on the road and prolong the lifespan of your vehicle’s engine. Remember, vigilance and attention to detail are key to maintaining a leak-free cooling system and ensuring reliable vehicle operation for miles to come.