
Before you dive into the task of cleaning a valve cover gasket, it’s essential to understand its purpose and importance in your vehicle’s engine. The valve cover gasket plays a crucial role in sealing the top of the engine and preventing oil leaks. Over time, gaskets can become brittle and dirty, which can lead to engine performance issues.

Proper cleaning and maintenance can extend the life of your gasket and ensure your engine runs smoothly. This guide on how to clean valve cover gasket will walk you through the steps to effectively clean a valve cover gasket, ensuring your engine maintains its integrity and performance.
What is a Valve Cover Gasket?
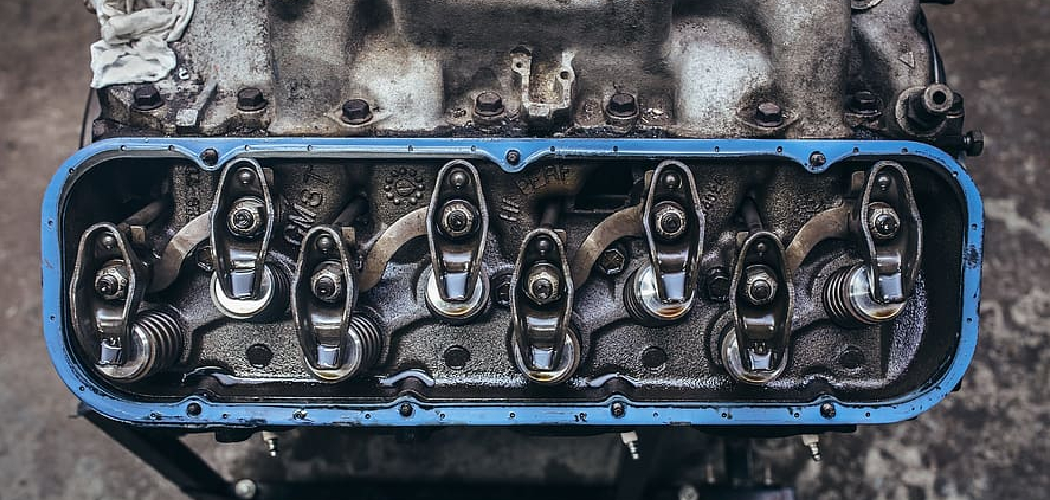
A valve cover gasket is a thin, shaped piece of rubber or cork that sits between the valve cover and the engine block. Its primary function is to prevent oil from leaking out of the engine and onto other components. The gasket also helps to keep dirt and debris from entering the engine, which can cause damage. You can find the valve cover gasket on top of your engine, usually located near the spark plugs.
Why is Cleaning a Valve Cover Gasket Important?
Cleaning a valve cover gasket is essential for maintaining your engine’s health and performance. Over time, dirt, oil, and debris can build upon the gasket, causing it to become brittle and less effective in sealing the engine.
A dirty or damaged valve cover gasket can lead to oil leaks, which can cause low oil levels and poor engine lubrication. Additionally, a faulty gasket can allow foreign particles to enter the engine and cause damage.
Supplies Needed
Before getting started, make sure you have all the necessary supplies to clean your valve cover gasket:
Intake Cleaner or Degreaser
You will need a cleaner specifically designed for engine parts, such as an intake cleaner or degreaser. These cleaners are formulated to break down dirt and oil without causing harm to the gasket.
Scrub Brush or Toothbrush
Having a small scrub brush or toothbrush on hand can help you reach smaller areas and remove stubborn debris from the gasket.
Rags or Paper Towels
You will need rags or paper towels to wipe away the cleaner and debris from the gasket.
Gasket Sealant (optional)

If you notice any small cracks or damage on the gasket, applying a gasket sealant can help patch up those areas and prevent future leaks.
10 Step-by-step Guidelines on How to Clean Valve Cover Gasket
Step 1: Prepare Your Work Area
Make sure you have a clean and well-ventilated space to work on your valve cover gasket. Laying down some newspapers or an old cloth can help protect your work surface from getting dirty. You may also want to wear gloves and safety glasses to protect your hands and eyes. The cleaning process can be messy, so it’s best to wear old clothes. It’s also a good idea to have some extra rags or paper towels on hand.
Step 2: Disconnect the Battery
Before beginning any work on your engine, it’s crucial to disconnect the battery to avoid any accidents or electrical damage. Locate the positive and negative terminals on your battery and use a wrench to loosen and remove them.
But, if you’re not comfortable doing this step, you can skip it and just be extra cautious when cleaning around electrical components. The gasket itself is not electrically connected. You can also disconnect the spark plug wires for better access to the gasket.

Step 3: Remove the Valve Cover
Using a screwdriver or socket wrench, remove the bolts or screws that secure the valve cover in place. Carefully lift off the cover and set it aside. Some gaskets may be stuck to the cover, so make sure to remove them gently using a flathead screwdriver.
It’s essential to keep track of the bolts and screws and their placement for reinstallation. You may also want to take a picture of the valve cover before removing it for easier reassembly. But, if you’re familiar with your engine’s layout, it may not be necessary. The gasket is usually a thin, black or brown material that sits on top of the engine block.
Step 4: Clean the Valve Cover
Before you can clean the gasket, you need to ensure that the valve cover is free from any dirt or debris. Use an intake cleaner or degreaser and a rag or scrub brush to remove any buildup on the cover.
Make sure to clean both the inside and outside of the cover thoroughly. Otherwise, any remaining debris may fall into the engine when you remove the gasket. It’s crucial to let the valve cover dry completely before proceeding with the next steps.
Step 5: Remove the Old Gasket

Now, it’s time to remove the old gasket from the engine block. Using a flathead screwdriver or your fingernail, gently pry off the gasket from one corner. Be careful not to damage the engine block or gasket surface. Slowly and carefully remove the gasket, making sure not to leave any pieces behind.
But, if the gasket is stuck on tightly, you can use a gasket scraper to remove it. You can also use a gasket remover solution to help loosen the gasket. The gasket might be stuck due to heat and oil exposure over time.
Step 6: Clean the Gasket Surface
Once you have removed the old gasket, it’s essential to clean the engine block’s surface thoroughly. You can use an intake cleaner or degreaser and a rag to wipe away any remaining debris. Make sure to clean all the edges, corners, and screw holes where the gasket sits.
Otherwise, the new gasket may not sit correctly and cause leaks. It’s crucial to let the engine block dry completely before proceeding. But, if you need to speed up the process, you can use compressed air or a clean rag to dry the surface.
Step 7: Clean the Valve Cover Gasket
After removing the old gasket, take some time to clean the valve cover gasket. Use an intake cleaner or degreaser and a rag or toothbrush to remove any dirt and buildup. Make sure to clean both sides of the gasket thoroughly. If you notice any cracks or damage, apply a gasket sealant and let it dry before proceeding.

You can also use a gasket sealant as a preventative measure to extend the life of your new gasket. But, make sure to read the instructions on the sealant carefully as some may require a certain drying time before installing the gasket.
Step 8: Inspect and Clean the Valve Cover
While you have the valve cover off, it’s a good idea to inspect it for any damage or wear. Look for any cracks, warping, or discoloration that may indicate the need for a replacement. If your valve cover is damaged, you can clean it as best as possible and take it to a mechanic for further evaluation.
Next, use an intake cleaner or degreaser and a rag or toothbrush to remove any buildup on the inside of the cover. Make sure to clean all corners, edges, and screw holes thoroughly. Otherwise, any remaining debris can cause issues with the gasket installation.
Step 9: Install the New Gasket
Once everything is clean and dry, it’s time to install the new gasket. Lay the gasket on top of the engine block in its designated spot. Make sure it sits correctly and lines up with all screw holes. Double-check that there are no remaining debris or gasket pieces on the surface.
Next, place the valve cover over the gasket and line up all the screw holes. It’s crucial to take your time and be gentle when installing the gasket to avoid any damage.
Step 10: Reinstall the Valve Cover
Using your hands, finger-tighten all bolts or screws before tightening them with a screwdriver or socket wrench. Make sure to tighten them in a criss-cross pattern to ensure an even fit. Avoid over-tightening, as it may cause damage to the gasket and create leaks.

Once all bolts are tightened, reattach the spark plug wires if you disconnected them earlier. Finally, reconnect the battery terminals and start your engine to make sure everything is running smoothly. Congratulations, you have successfully replaced your valve cover gasket! Remember to dispose of the old gasket properly and clean up any tools or rags used during the process.
Following these steps on how to clean valve cover gasket and regularly checking your valve cover gasket can help prevent leaks and extend the life of your engine. If you encounter any issues during the replacement process or notice any unusual symptoms with your vehicle, don’t hesitate to consult a mechanic for further assistance
Proper maintenance and care of your vehicle’s components are essential for its overall performance and longevity. Keep an eye on your valve cover gasket and follow these steps for a smooth and efficient replacement process.
Additional Tips
- It’s Recommended to Replace the Valve Cover Gasket Every 50,000 Miles or as Soon as You Notice Any Signs of Wear or Damage.
- Keep a Record of When You Last Replaced the Gasket for Future Reference.
- If Your Vehicle Has an O-ring Seal Instead of a Gasket, Follow Similar Steps but Ensure to Clean and Replace the O-ring as Well.
- In Addition to Cleaning the Valve Cover, It’s Also a Good Idea to Clean and Inspect the Pcv Valves and Hose While You Have Them Off. This Can Help Prevent Any Potential Issues With These Components in the Future.
- Always Consult Your Vehicle’s Manual for Specific Instructions and Torque Values When Replacing the Valve Cover Gasket.
- If You’re Unsure or Uncomfortable Performing This Task, It’s Always Best to Seek Professional Assistance. The Safety of Yourself and Your Vehicle is a Top Priority. Keep in Mind That There May Be Additional Steps or Procedures Involved for Certain Makes and Models of Vehicles.
- Regularly Check Your Engine Oil Level and Quality to Ensure It’s Not Contaminating the Gasket and Causing Damage.
- Taking Care of Small Maintenance Tasks Like Cleaning or Replacing a Valve Cover Gasket Can Save You Time Money, and Prevent More Significant Issues in the Future. So Don’t Neglect These Essential Maintenance Tasks.
Choosing the Right Cleaning Products and Techniques
When cleaning your valve cover gasket, it’s essential to use the right products and techniques. Avoid using harsh chemicals or abrasive tools that can cause damage to the gasket or engine components. It’s recommended to use a degreaser specifically designed for engines and gentle scrubbing tools like rags or toothbrushes.

Additionally, always make sure to read and follow the instructions on any cleaning products or sealants you use. The wrong products or techniques can do more harm than good, so take your time and be thorough with the cleaning process.
With proper care and maintenance, your valve cover gasket will continue to perform its crucial role in keeping your engine running smoothly for miles to come. So don’t overlook this small but essential component of your vehicle’s engine!
Preventive Maintenance and Best Practices
In addition to regularly checking and replacing the valve cover gasket, there are other preventive maintenance steps you can take to ensure its longevity. These include:
- Checking for Any Oil Leaks in the Engine Bay and Promptly Addressing Them.
- Regularly Changing Your Engine Oil as Recommended by Your Vehicle’s Manual.
- Keeping Your Engine Clean and Free of Debris.
- Avoiding Harsh Driving Habits That Can Put Unnecessary Strain on the Gasket and Engine Components.
- Checking for Any Unusual Noises or Vibrations While Driving, as These Can Be Signs of a Faulty Valve Cover Gasket.
- Following Recommended Maintenance Schedules for Your Vehicle’s Overall Health and Performance.
By incorporating these best practices into your routine, you can help prevent leaks and other issues with your valve cover gasket, ultimately saving you time and money in the long run.
Safety Considerations and Environmental Impact
When performing any maintenance tasks on your vehicle, it’s crucial to prioritize safety and be mindful of the environmental impact. Always wear protective gear like gloves and goggles when handling chemicals or working near the engine. Properly dispose of any old gaskets, fluids, or tools used during the process according to local regulations. Taking these precautionary measures not only protects yourself but also the environment.
By following the steps outlined in this guide and implementing preventive maintenance practices, you can ensure a safe and eco-friendly valve cover gasket replacement process. With proper care and attention, your vehicle’s engine will continue to run smoothly for miles to come. Happy driving!
Real-Life Examples and Case Studies
To further illustrate the importance of proper valve cover gasket maintenance, here are a few real-life examples and case studies:

- In 2015, a Car Owner Noticed a Strange Burning Smell Coming From Their Engine. Upon Inspection, It Was Discovered That the Valve Cover Gasket Had Failed, Causing Oil to Leak Into the Hot Engine Components. The Resulting Fire Caused Significant Damage to the Vehicle and Could Have Been Prevented With Regular Maintenance.
- A 2018 Study Found That a Faulty Valve Cover Gasket Was One of the Top Causes of Oil Leaks in Vehicles. This Issue Can Lead to Decreased Engine Performance, Increased Emissions, and Potential Engine Damage if Left Unaddressed.
- In 2020, a Car Owner Reported Experiencing Engine Misfires and Unusual Noises While Driving. After Inspection, It Was Determined That the Valve Cover Gasket Had Failed, Causing Oil to Leak Into the Spark Plug Wells. This Resulted in Damaged Spark Plugs and a Costly Repair Bill.
These examples highlight the importance of regularly checking and replacing your valve cover gasket for the safety and longevity of your vehicle. Don’t overlook this essential maintenance task, and your engine will thank you!
So, always stay on top of routine maintenance and be proactive in addressing any issues that may arise. By doing so, you can save yourself time, money, and potential safety hazards down the road.
Frequently Asked Questions
Q: How Do I Know if My Valve Cover Gasket Needs to Be Replaced?
A: You may notice oil leaks, unusual noises or vibrations while driving, and decreased engine performance as signs of a failing valve cover gasket. It’s also recommended to check the gasket regularly during routine maintenance inspections. The gasket may also need to be replaced if you’re experiencing frequent oil leaks or have a high-mileage vehicle.
Q: Can I Replace the Valve Cover Gasket Myself?
A: While it is possible to replace the valve cover gasket yourself, it’s recommended to seek professional assistance if you’re not familiar with engine maintenance. This will ensure that the task is done correctly and safely.
Q: How Often Should I Check and Replace My Valve Cover Gasket?
A: It’s recommended to check the valve cover gasket during routine maintenance inspections, typically every 30,000-60,000 miles. However, if you notice any signs of a failing gasket or have a high-mileage vehicle, it’s best to replace it as soon as possible. Refer to your vehicle’s manual for specific recommendations.
Conclusion
In conclusion, regular maintenance and cleaning of your vehicle’s valve cover gasket are imperative for optimal engine performance and longevity. By adhering to the steps provided in this guide, you can prevent potential oil leaks, avoid costly repairs, and ensure that your engine continues to operate efficiently.
Remember to follow safety protocols, consult your vehicle’s manual for specific guidance, and consider seeking professional assistance if you’re unsure about the process.
A well-maintained valve cover gasket will help keep your engine in top condition for the road ahead. Thanks for reading this article on how to clean valve cover gasket.