
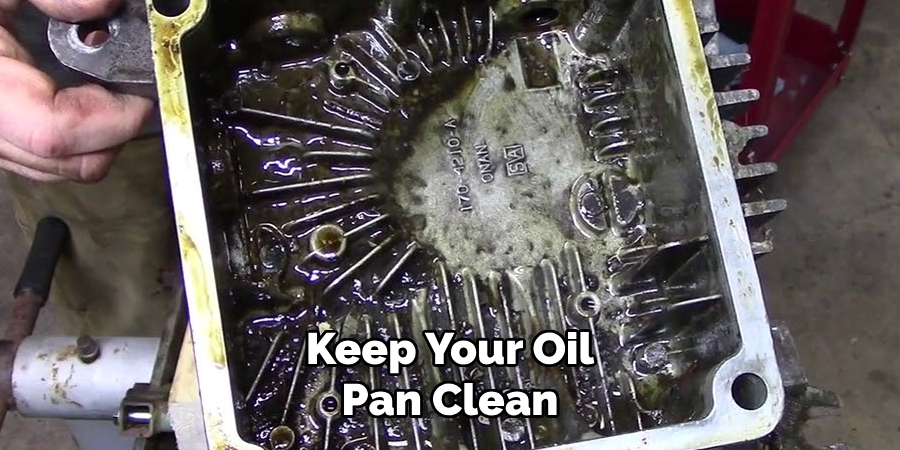
Maintaining a clean oil pan is crucial for the optimal performance and longevity of your vehicle’s engine. Over time, oil pans accumulate debris, sludge, and contaminants that can compromise engine function and lead to costly repairs if neglected.

Learning how to clean oil pan effectively ensures that your engine remains in peak condition, providing reliable performance mile after mile. From proper preparation and drainage of old oil to meticulous cleaning techniques and reinstallation procedures, each step in the process contributes to the overall health of your engine.
By following a systematic approach and utilizing appropriate tools and materials, you can remove built-up residue and ensure that your oil pan functions optimally. This article will guide you through the essential steps of cleaning your oil pan, empowering you to maintain your vehicle’s engine with confidence and efficiency.
Importance of Maintaining an Oil Pan
The oil pan is a fundamental component of your engine’s lubrication system, acting as a reservoir for the oil necessary for your engine’s smooth operation. Regular maintenance of the oil pan prevents the accumulation of harmful particles and sludge that can impair the quality of the engine oil.
This is critical because clean oil is essential to minimize friction and wear on moving parts, reduce the risk of overheating, and prolong the engine’s life. Neglecting the cleanliness of your oil pan can lead to poor engine performance, increased emissions, and the gradual degradation of engine components.
Hence, proper care and cleaning of the oil pan are paramount not just for the engine’s longevity but also for the overall safety and efficiency of your vehicle.
Understanding the Oil Pan
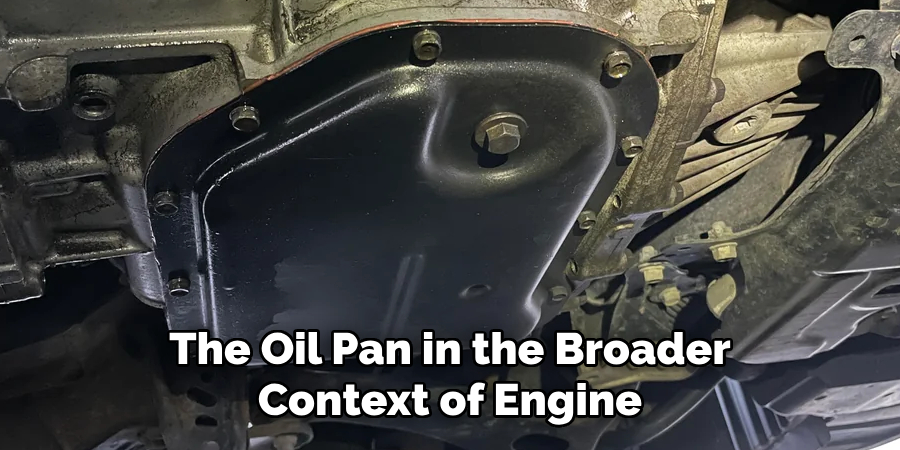
The oil pan, often located at the bottom of the engine, is more than just a storage container for engine oil. It is designed to withstand the harsh environment of the underside of a car, protecting the oil from contaminants while also cooling it as air passes over the pan’s surface.
The pan’s architecture, typically featuring a sump area, allows for the collection of oil and ensures a consistent supply to the oil pump, even during dynamic driving conditions.
It’s important to recognize the role of the oil pan in the broader context of engine health—not only does it hold oil, but it also aids in the overall regulation of engine temperature and ensures that all moving parts are effectively lubricated. An understanding of the oil pan’s function highlights the necessity of keeping it clean and in good repair.
Common Materials Used in Oil Pan Construction
The construction of an oil pan is critical to its performance and durability. Common materials used for oil pans include steel, aluminum, and composite plastics. Steel oil pans are favored for their strength and resistance to puncture. They are often used in demanding driving environments or heavy-duty applications.
Aluminum oil pans, on the other hand, are lighter in weight and provide better heat dissipation, which contributes to cooling the engine oil. Aluminum pans are typically found in performance vehicles and are also appreciated for their corrosion resistance.
Composite plastics are emerging as a modern alternative, offering significant weight savings and excellent resistance to corrosion, although they may be less durable when it comes to impact resistance. Each material presents its own set of advantages that are considered by manufacturers to meet the specific needs of different engine designs and vehicle applications.
Preparation for Cleaning
Before embarking on the task of cleaning your oil pan, preparation is key to ensuring a smooth and safe process. Start by gathering all necessary tools and materials: a wrench set, a drain pan, gloves, eye protection, a cleaning solvent, a scraper, and rags or shop towels.
Choose a well-ventilated area to work in and ensure the vehicle is securely supported by jack stands if you need to access the oil pan from underneath. Allow the engine to cool sufficiently before you begin, as the oil and engine components will be hot after running. Draining the oil is best done while the oil is still warm to facilitate easier flow, but take the necessary precautions to avoid burns or injuries.
It is also advisable to have a new oil filter and replacement oil ready for when the cleaning process is complete. By preparing effectively, you can proceed with cleaning your oil pan safely and efficiently, minimizing any potential issues and ensuring a successful outcome.

Tools and Materials Needed
Before you begin, gather the following tools and materials:
- Wrench set
- Oil drain pan
- Work gloves
- Safety glasses
- Engine degreaser
- Scrub brush
- Rag or shop towels
- Replacement oil and filter (if performing an oil change simultaneously)
- Gasket scraper or putty knife
- New oil pan gasket (if necessary)
- Torque wrench (for reassembly)
Ensuring Safety Precautions
Safety should be your top priority when cleaning your oil pan. Always wear protective gloves and safety glasses to shield yourself from potential chemical exposure and to prevent injuries.
Work in a well-ventilated environment to avoid inhaling fumes from solvents or degreasers. Be sure that the vehicle is stable and secure on jack stands before crawling underneath, and never rely on a jack alone to support the weight. Before starting the process, disconnect the battery to eliminate any risk of electrical shock or accidental engagement of electrical components.
Keep a first aid kit nearby in case of minor injuries, and know the location of a fire extinguisher should any flammable materials ignite. By taking the appropriate safety precautions, you can protect yourself and others while performing maintenance tasks on your vehicle.
Step-By-Step Guide to How to Clean Oil Pan
Please note: The specifics can vary depending on your vehicle’s make and model, so always consult your owner’s manual for detailed instructions.
1. Prepare Your Workspace:
Before you begin cleaning the oil pan, it’s essential to gather all the necessary tools and materials. You’ll need a socket set or wrenches to remove the oil pan, a drain pan to collect the old oil, safety gloves, protective eyewear, cleaning solvents or degreasers, a wire brush, rags or shop towels, and a container for storing the used oil for proper disposal or recycling.
Additionally, you may need a gasket scraper if your oil pan has an old seal that needs to be replaced.
It’s also recommended to have a sturdy work surface such as a workbench or even a sheet of plywood on top of sawhorses. This will provide a stable and comfortable area for you to work on the oil pan without having to crouch or kneel on the ground.
2. Raise the Vehicle:
To access the oil pan, you’ll need to raise the vehicle securely using a hydraulic jack and jack stands. Ensure that the vehicle is on a level surface and securely supported before proceeding.
When raising the vehicle, it’s important to find a suitable lifting point designated by the manufacturer. This will help distribute the weight evenly and prevent damage to the vehicle. You can refer to your owner’s manual for specific instructions on where to place the jack.
Once you have located the lifting point, place the hydraulic jack under it and carefully raise the vehicle until it is high enough for you to comfortably work under. Double-check that the vehicle is stable before crawling underneath.
3. Drain the Engine Oil:
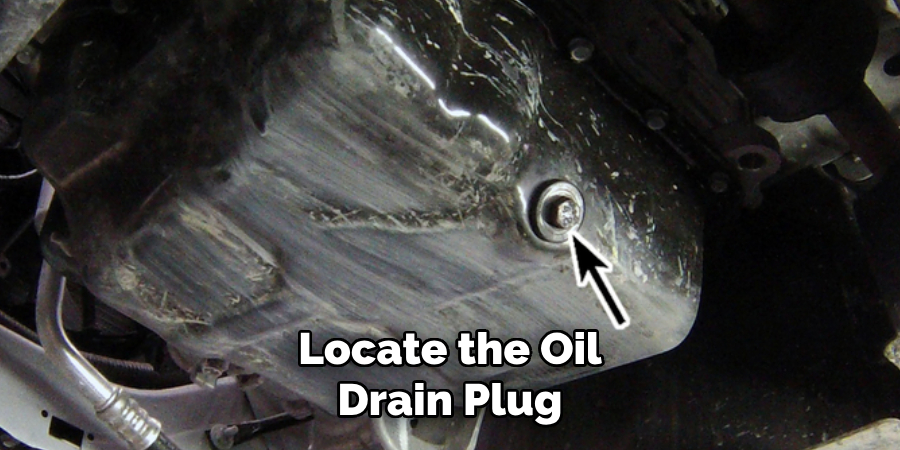
Place the drain pan beneath the oil pan and locate the oil drain plug. Use a socket or wrench to loosen the drain plug and carefully remove it. Allow the old oil to drain completely into the drain pan. Once the oil has drained, replace the drain plug and tighten it securely.
It is important to properly dispose of the old oil once it has been drained. Pouring it down a drain or onto the ground can be harmful to the environment, so it is best to take it to a local recycling center or mechanic who can dispose of it safely. Remember to also properly recycle or dispose of the empty oil container.
4. Remove the Oil Pan:
With the engine oil drained, you can now proceed to remove the oil pan. Use the appropriate socket set or wrenches to loosen and remove the bolts securing the oil pan to the engine block. Take care not to damage the oil pan or surrounding components during the removal process.
Once all bolts are removed, carefully lower the oil pan and remove it from the vehicle. However, before completely removing the oil pan, you may need to disconnect any attached components such as the oil pick-up tube or gasket.
After removing the oil pan, thoroughly clean it and remove any old gaskets or sealants. Inspect the pan for any signs of damage or wear and replace if necessary. It is also a good idea to clean the engine block surface where the oil pan is mounted, ensuring a clean and flat surface for reinstallation.
5. Clean the Exterior of the Oil Pan:
Before tackling the interior of the oil pan, it’s essential to clean the exterior surfaces thoroughly. Use a degreaser or solvent along with a wire brush to remove any accumulated grease, grime, or road debris from the exterior of the oil pan. Wipe the surface clean with a rag or shop towel.
Once the exterior of the oil pan is clean, visually inspect it for any signs of damage or corrosion. Look for any dents, cracks, or rust spots that may compromise the integrity of the oil pan. If any significant damages are found, it’s best to replace the entire oil pan rather than attempting a repair.
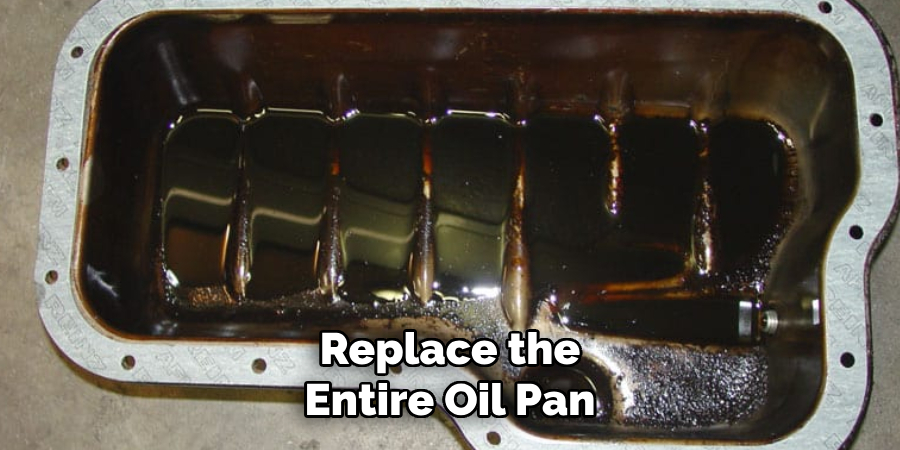
If there are only minor scratches or small areas of surface corrosion, these can be sanded off with sandpaper or a wire brush. Make sure to thoroughly clean the area once again before proceeding with any repairs or reinstallation.
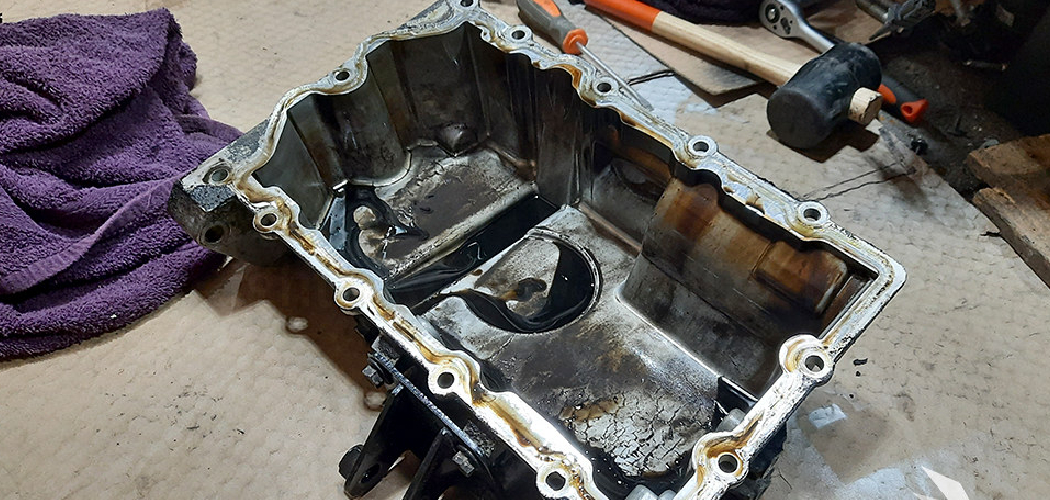
6. Inspect the Interior of the Oil Pan:
Once the exterior is clean, inspect the interior of the oil pan for any signs of sludge, debris, or contaminants. Use a flashlight to illuminate the interior and carefully examine the surfaces for buildup. Pay close attention to the bottom of the oil pan and the oil pickup tube for any obstructions. If you notice any significant buildup, it may be necessary to remove the oil pan for a more thorough cleaning or replace it altogether.
Some common signs of excessive buildup in the oil pan include thick black sludge, metal shavings, or chunks of debris. This can be caused by old or dirty oil, engine wear and tear, or internal engine issues such as a failing gasket or seal. If you do find any of these signs, it’s important to address the issue promptly as excessive buildup can lead to engine damage and poor performance.
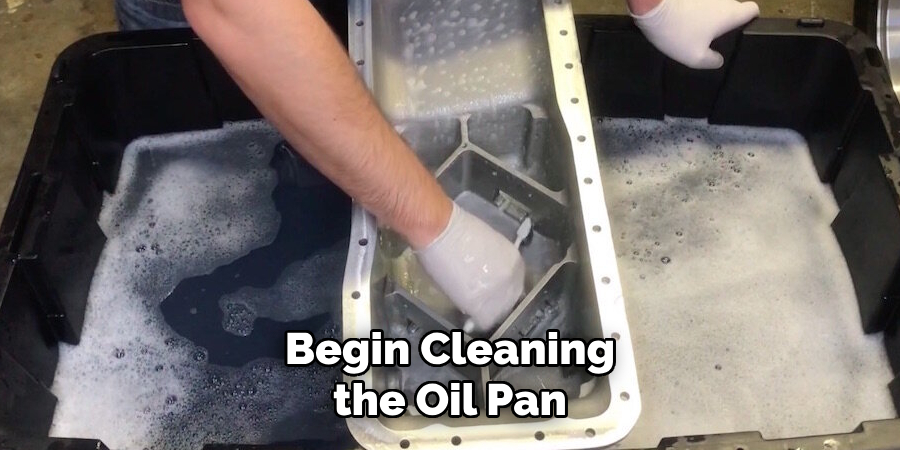
7. Clean the Interior of the Oil Pan:
To clean the interior of the oil pan, you’ll need to use a combination of cleaning solvents or degreasers and mechanical agitation. Pour a suitable solvent or degreaser into the oil pan and allow it to penetrate and loosen any stubborn buildup. Use a wire brush or scraper to carefully scrub the interior surfaces, focusing on areas with heavy deposits. You may need to repeat this process several times for optimal cleaning.
To ensure a thorough clean, you can also use compressed air to blow out any remaining debris or residue. Another option is to fill the oil pan with hot soapy water and let it soak for a few hours before scrubbing again.
Once the interior of the oil pan is clean, drain the solvent or degreaser and any remaining debris. Wipe down the interior with a clean rag or towel to remove any excess residue.
8. Rinse and Repeat:
After scrubbing the interior surfaces, rinse the oil pan thoroughly with clean water to remove any remaining solvent or degreaser residue. Repeat the cleaning process as necessary until the interior of the oil pan is free from all traces of buildup and contaminants. Though this may seem like a tedious task, it is important to ensure the longevity and efficiency of your vehicle’s engine.
It is also recommended to periodically check the oil pan for any signs of damage or corrosion. If any issues are found, it is crucial to address them immediately to prevent further damage. Regular maintenance and cleaning of the oil pan can help prolong its lifespan and prevent expensive repairs in the future.
In addition to regular cleaning, it is important to use high-quality oil and change it according to your vehicle’s recommended schedule. This will not only keep your oil pan clean, but also optimize the performance of your engine.
9. Dry the Oil Pan:
Once the oil pan is clean, allow it to air dry completely before reinstalling it onto the engine block. Ensure that all moisture has evaporated from the interior and exterior surfaces to prevent the formation of rust or corrosion.
In addition to air drying, you may also use a clean towel or rag to gently dry the surface of the oil pan. Be sure not to leave any lint or debris on the pan as this can contaminate the engine oil and cause potential damage. However, avoid using any harsh chemicals or abrasive sponges as these can also damage the oil pan’s surface.
Once dried, carefully inspect the oil pan for any leftover residue or debris. If necessary, use a degreaser and a soft brush to remove any remaining grime. Rinse the pan thoroughly with water and dry it again before proceeding with reinstallation.
10. Reinstall the Oil Pan:
With the oil pan thoroughly cleaned and dried, you can now reinstall it onto the engine block. Carefully position the oil pan gasket or sealant in place and align the oil pan with the mounting holes on the engine block. Install and tighten the bolts securely, following the specified torque sequence and specifications for your vehicle.
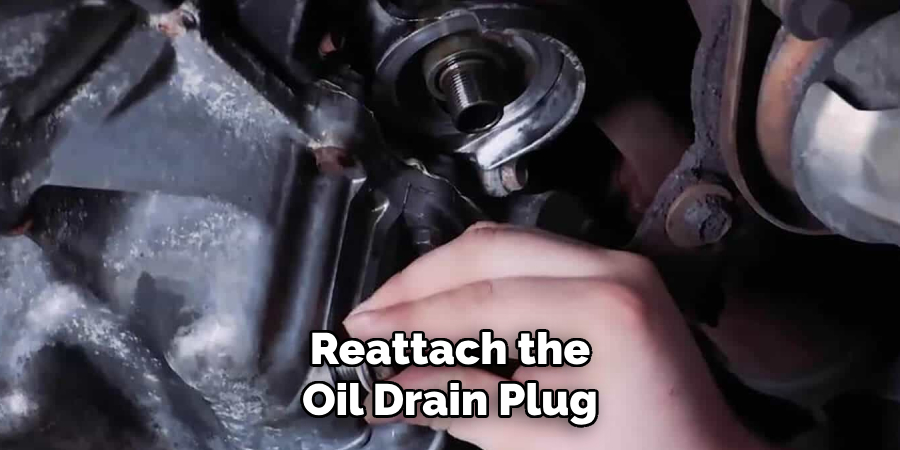
Next, you will need to reattach the oil drain plug and any other components that were removed during the oil pan removal process. Double check all connections and make sure they are tight and secure.
Once everything is properly reinstalled, it’s time to refill the engine with fresh oil. Refer to your vehicle’s manual for the recommended type and amount of oil needed. It’s important to use the right type of oil for your vehicle to ensure proper engine performance.
Conclusion
Cleaning your oil pan is a straightforward, yet crucial maintenance task that can prolong the life of your engine and keep your vehicle running smoothly. It is an excellent project for DIY enthusiasts and automotive hobbyists keen on understanding and caring for the intricacies of their vehicles’ engines.
For those who’ve successfully performed this task, the satisfaction of improving their vehicle’s performance is undeniable. And for beginners, remember, every step you take in learning more about your car’s mechanics is a step towards becoming an accomplished DIY expert.
So grab your tools, roll up your sleeves, and take pride in maintaining your vehicle’s oil pan. Follow these simple instructions outlined in this blog post about how to clean oil pan, and you’ll be able to get the job done with ease.