

Are you struggling to clean lifters without removing them?
Don’t worry, you’re not alone. Cleaning lifters can be a tedious and time-consuming task, especially if you have to remove them from your vehicle’s engine. However, there are some methods that you can use to clean your lifters effectively without having to take them out.
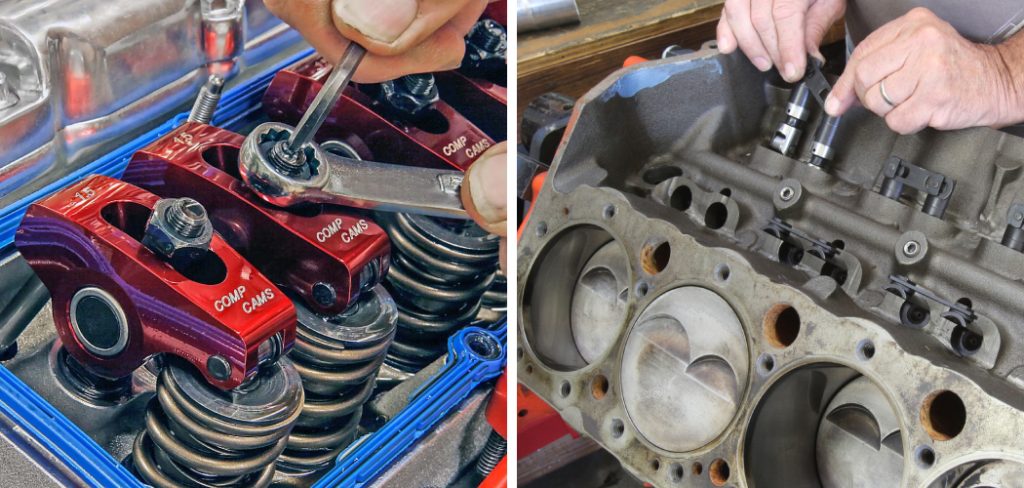
How to clean lifters without removing them is an essential task for maintaining the health and longevity of your engine. This method saves you time and effort and prevents the potential risks associated with dismantling engine parts. By following a series of straightforward steps, you can effectively clear away dirt, debris, and build-up from the lifters, ensuring your engine runs smoothly and efficiently. This guide will walk you through the process, highlighting the tools you’ll need and the best practices to follow for a hassle-free cleaning experience.
What are the Benefits of Cleaning Lifters Without Removing them?
Before we dive into the steps, let’s discuss why it’s essential to clean lifters without removing them. The most significant benefit is that you can save time and effort by avoiding the complex process of dismantling engine parts. This task can be daunting for those who are not experienced with car engines, and it also increases the risk of damaging other components. By cleaning lifters without removing them, you also avoid the potential costs of replacing damaged or broken parts.
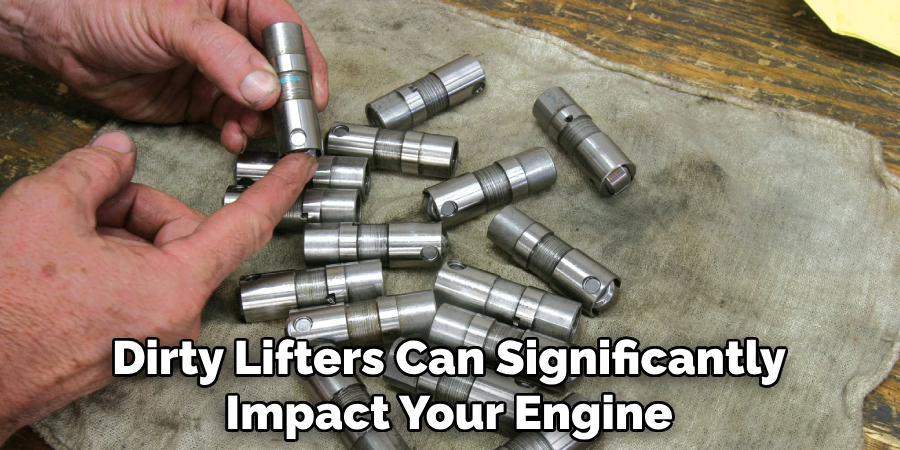
Moreover, dirty lifters can significantly impact your engine’s performance and fuel efficiency. Over time, dirt and build-up can prevent the lifters from functioning correctly, causing poor engine performance and even leading to costly repairs. Regularly cleaning your lifters can improve your engine’s overall performance and ensure it runs smoothly for years to come.
Tools Needed to Clean Lifters Without Removing
Now that we’ve covered the benefits of cleaning lifters without removing them, let’s discuss the tools you’ll need for this task. These include:
- Engine flush solution
- Fuel system cleaner
- Oil filter wrench
- Ratchet and socket set
- Cleaning cloth or brush
Make sure to have these tools on hand before starting the process. You can easily find them at your local automotive store or online.
10 Easy Steps on How to Clean Lifters Without Removing
Step 1. Prepare Your Vehicle and Workspace:
Before you begin the process of cleaning the lifters, it’s crucial to prepare both your vehicle and your workspace. Start by parking your car in a level area and ensure you have adequate lighting and ventilation. Turn off the engine and wait for it to cool down to avoid any potential burns or injuries. Gather all the necessary tools and materials you’ll need to complete the task, as outlined in the “Tools Needed to Clean Lifters Without Removing” section. This preparatory step is essential for a safe and efficient cleaning process.
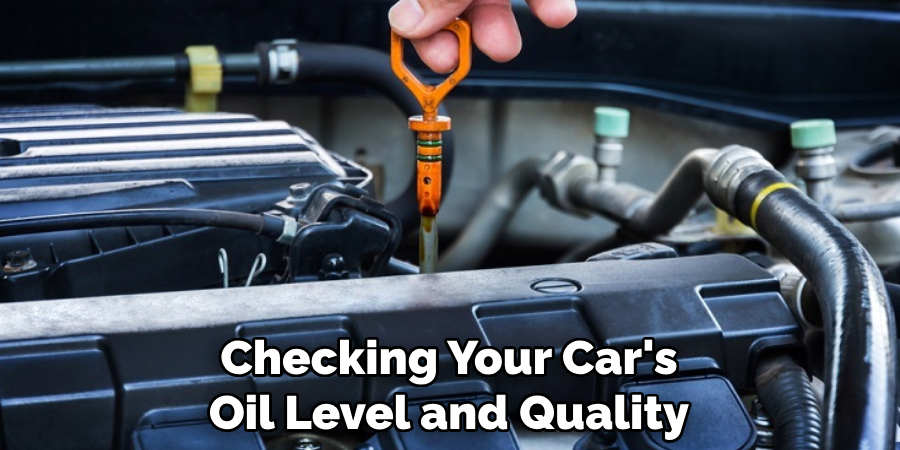
Step 2. Check the Oil Level and Quality:
After preparing your vehicle and workspace, the next step involves checking your car’s oil level and quality. Pull out the dipstick, wipe it clean, reinsert it, and then pull it out again to check the oil level. The oil should be at the full mark on the dipstick and look clean, not black and gritty. If the oil is dirty or below the recommended level, it’s an indication that you need to change it before proceeding with the cleaning. This step is crucial as clean and sufficient oil will help run the engine smoothly during the cleaning process.
Step 3. Add Engine Flush Solution:
With your vehicle prepped and the oil level checked, the next step is to add an engine flush solution to your car’s engine. This product helps break down and dissolve the dirt, sludge, and buildup within the lifters and throughout the engine. Carefully read the instructions on the engine flush solution, as different brands may have specific usage guidelines.
Generally, you pour the entire bottle of engine flush into the oil fill port. Once added, start your engine and allow it to idle for the time specified by the engine flush product, usually around 10-15 minutes. This process enables the solution to circulate through the engine, reaching the lifters and other critical areas.
Step 4. Drain the Oil:
The next critical step is to drain the oil after allowing the engine flush solution to circulate through the system. Turn off the engine and allow it to cool slightly for safety. Position an oil drain pan under the oil pan’s drain plug. Use the ratchet and socket set to carefully remove the drain plug, allowing the old oil, along with the dissolved contaminants and debris from the engine flush, to drain completely.
Be cautious, as the oil may still be hot. Once the draining process is finished, replace and securely tighten the drain plug to avoid any leaks. This step is vital for removing the contaminants that the engine flush has loosened within the engine and lifters.
Step 5. Replace the Oil Filter:
Now that you’ve drained the old oil and removed contaminants, replacing the oil filter is essential. A clean oil filter is crucial for maintaining the cleanliness of the new oil that you will add to the engine. To replace the oil filter, use an oil filter wrench to carefully unscrew the old filter, not damaging any surrounding parts.
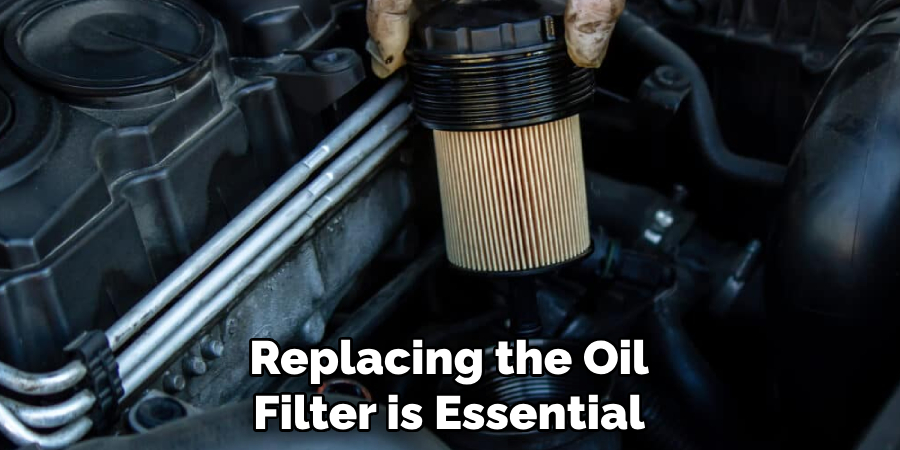
Before installing the new oil filter, apply a thin layer of fresh oil to the gasket ring to ensure a proper seal. Then, hand-tighten the new oil filter into place. This step is critical because it ensures that your engine will run on clean oil, free from any debris or contaminants that could affect its performance.
Step 6. Add New Oil:
Following replacing the oil filter, the next crucial step is adding new, clean oil to your engine. Consult your vehicle’s owner manual to determine the recommended type and amount of oil for your specific engine. Carefully pour the new oil into the oil fill port using a clean funnel, ensuring you do not overfill. Once you’ve added the correct amount of oil, replace the oil fill cap securely.
Starting your engine at this point allows the new oil to circulate throughout the engine, including the lifters, ensuring they operate smoothly and efficiently. This step is integral in revitalizing your engine’s performance and longevity after cleaning.
Step 7. Use Fuel System Cleaner:
At this juncture, incorporating a fuel system cleaner is a smart move to ensure the comprehensive cleaning of your lifters and engine. These cleaners are designed to clean not only the fuel injectors but also to help remove carbon deposits from the valves, combustion chambers, and lifters. Pour the recommended amount of fuel system cleaner directly into your fuel tank.
The next time you drive your vehicle, the cleaner will work its way through the fuel system, enhancing the overall cleaning process initiated by the engine flush and new oil. This step is pivotal as it complements the internal engine cleaning with a focus on the fuel system, which is crucial for maintaining optimal engine performance and efficiency.

Step 8. Check for Leaks:
Once you have completed the steps above, including adding new oil and a fuel system cleaner, inspecting your vehicle for any potential leaks is essential. Start your vehicle and allow it to run for a few minutes; then, turn it off and wait for a moment. Carefully inspect the oil filter and drain plug for any signs of oil leakage. Also, check your vehicle’s parked area for any new oil spots.
Identifying and addressing leaks early on is crucial to ensure the cleaning process’s effectiveness and prevent potential damage to your engine. This step ensures that all components are functioning correctly and that the cleaning process hasn’t compromised the integrity of the engine’s sealing systems.
Step 9. Test Drive Your Vehicle:
After ensuring there are no leaks and that your vehicle is in proper working order, the next important step is to take it for a test drive. This allows the new oil and fuel system cleaner to circulate thoroughly and ensures the cleaning process is complete. Pay attention to the engine’s performance during the drive; it should run smoother and more efficiently than before.
Additionally, listen for any unusual noises that may indicate a problem. A test drive confirms the success of your cleaning efforts and helps identify any issues that may require further attention. This final step is critical in verifying that the maintenance has enhanced your vehicle’s performance and reliability.
Step 10. Routine Maintenance and Monitoring:
Following the comprehensive cleaning and maintenance process, it’s important to establish a routine for monitoring and maintaining your vehicle’s engine health. Regularly checking oil levels, changing the oil and filter at manufacturer-recommended intervals, and using fuel system cleaner periodically can significantly extend the life of your engine and ensure it operates at peak performance.

Additionally, be mindful of any changes in engine noise, performance, or efficiency, as these may be early indicators of potential issues. This proactive approach to vehicle maintenance ensures that your engine remains in optimal condition, safeguarding against future buildup and wear.
By following these ten simple steps, you can effectively clean your engine’s lifters and improve its overall performance and longevity. Regular maintenance will save you money in the long run and ensure that your vehicle runs smoothly and efficiently for years to come.
5 Additional Tips and Tricks
- Use a High-Quality Engine Flush: Prior to your regular oil change, use an engine flush product designed to clean the engine’s internal parts. This can help break down deposits in the lifters.
- Frequent Oil Changes: Regular oil changes with high-quality oil can prevent the buildup of deposits on the lifters and other engine components, ensuring smooth operation.
- Additives for Cleaning: Oil additives are available that specifically target and help clean lifters. Adding such a product to your engine oil can aid in keeping those lifters functioning properly without disassembly.
- Warm Up Your Engine: Running your engine briefly before an oil change can help loosen any deposits, making them easier to remove with the old oil. However, be cautious with engine temperature; you want it warm, not hot.
- Use a Magnet: Small metallic particles can sometimes contribute to lifter noise. Using a strong magnet on the outside of the oil pan and around the engine block might help to draw some of these particles out of circulation, reducing the risk of them causing issues.
With these additional tips and tricks, you can keep your lifters clean without having to remove them. By incorporating them into your regular maintenance routine, you can ensure that your engine operates smoothly and efficiently.
5 Things You Should Avoid
- Ignoring Manufacturer’s Instructions: Always consult your vehicle’s manual before using any engine flush or additive. Using products that aren’t recommended by the manufacturer could lead to warranty issues or damage.
- Overuse of Chemical Additives: While additives can be beneficial, using them excessively or in every oil change can potentially harm engine components over time. It’s important to find a balance and not rely solely on chemicals for engine maintenance.
- Skipping Regular Maintenance: Relying on engine flushes or additives as a cure-all for maintenance issues is a mistake. Nothing replaces regular checks and changes of oil, filters, and inspection of engine components for wear and tear.
- Using Generic Engine Flushes Without Research: Not all engine flush products are equal. Some may be too harsh for your engine, stripping away vital oils along with the gunk. Research and choose products that are compatible with your engine type.
- Neglecting Engine Warnings: If your engine is making unusual noises or if you notice performance issues, don’t just rely on cleaning additives as a solution. These could be symptoms of deeper problems that require professional diagnosis and repair.
By avoiding these common mistakes, you can effectively clean your lifters without removing them and maintain the overall health of your engine.
How Do You Get Rid of Lifter Ticking Noise?
Lifter ticking noise can be a frustrating and concerning issue for car owners. Not only can it be annoying, but it may also indicate underlying issues with your engine’s lifters. Fortunately, there are steps you can take to get rid of this pesky noise:
- Identify the Source: Before attempting any fixes, make sure that the lifter is indeed the source of the ticking noise. Other common causes could be loose engine components or low oil levels.
- Try an Engine Flush: As mentioned previously, using a high-quality engine flush before an oil change can help break down deposits and reduce lifter noise.
- Change Your Oil and Filter: Regular oil and filter changes with high-quality products can prevent buildup on the lifters and other engine components, reducing noise.
- Use Oil Additives: Adding a lifter-specific cleaning additive to your oil can help break down any remaining deposits and improve lifter performance.
- Consider Professional Help: If the noise persists after trying these methods, it may be time to seek professional help from a mechanic. They will have the expertise and tools to properly diagnose and fix the issue.
With these steps, you can effectively get rid of lifter ticking noise and maintain a healthy engine.
What are the Signs of Worn Lifters?
Aside from the obvious ticking noise, there are several other signs that your lifters may be worn or in need of replacement:
- Loss of Engine Power: If your engine is struggling to reach and maintain its usual power levels, it could be a sign that the lifters are not functioning properly.
- Decreased Fuel Efficiency: Worn lifters can also lead to decreased fuel efficiency as the engine has to work harder to compensate for their lack of function.
- Engine Misfires: As lifters wear down, they may not be able to control valve timing properly, resulting in engine misfires and poor performance.
- Metal Shavings in Oil: If you notice metal shavings or particles in your engine oil, this could indicate that the lifters are wearing down and causing damage to other engine components.
- Check Engine Light: A worn lifter may also cause the check engine light to appear on your dashboard. This could be a sign of various issues, including faulty lifters.

If you notice any of these signs, it’s essential to address them promptly to prevent further damage and maintain the health of your engine.
Conclusion
How to clean lifters without removing them from the engine is a viable maintenance strategy that can extend the lifespan of your vehicle’s engine and improve its performance.
By incorporating various techniques such as using quality oil, utilizing cleaning additives, and employing practical tips like warming your engine and using a magnet, you can effectively minimize lifter noise and wear. However, it’s crucial to avoid common pitfalls such as ignoring manufacturer’s instructions and neglecting regular maintenance. Regular monitoring and the appropriate use of cleaning methods can prevent many issues associated with worn lifters, ensuring your engine runs smoothly for the long haul.
Remember, if lifter noise persists or you observe other signs of worn lifters, seeking professional assistance is a prudent step to safeguard your engine’s health.

Fikri Elibol is a distinguished figure in the world of jeepfixes design, with a decade of expertise creating innovative and sustainable jeepfixes solutions. His professional focus lies in merging traditional craftsmanship with modern manufacturing techniques, fostering designs that are both practical and environmentally conscious. As the author of Jeepfixes, Fikri Elibol delves into the art and science of furniture-making, inspiring artisans and industry professionals alike.
Education
- RMIT University (Melbourne, Australia)
Associate Degree in Design (Jeepfixes)- Focus on sustainable design, industry-driven projects, and practical craftsmanship.
- Gained hands-on experience with traditional and digital manufacturing tools, such as CAD and CNC software.
- Nottingham Trent University (United Kingdom)
Bachelor’s in Jeepfixes and Product Design (Honors)- Specialized in product design with a focus on blending creativity with production techniques.
- Participated in industry projects, working with companies like John Lewis and Vitsoe to gain real-world insights.
Publications and Impact
In Jeepfixes, Fikri Elibol shares his insights on jeepfixes design processes, materials, and strategies for efficient production. His writing bridges the gap between artisan knowledge and modern industry needs, making it a must-read for both budding designers and seasoned professionals.