
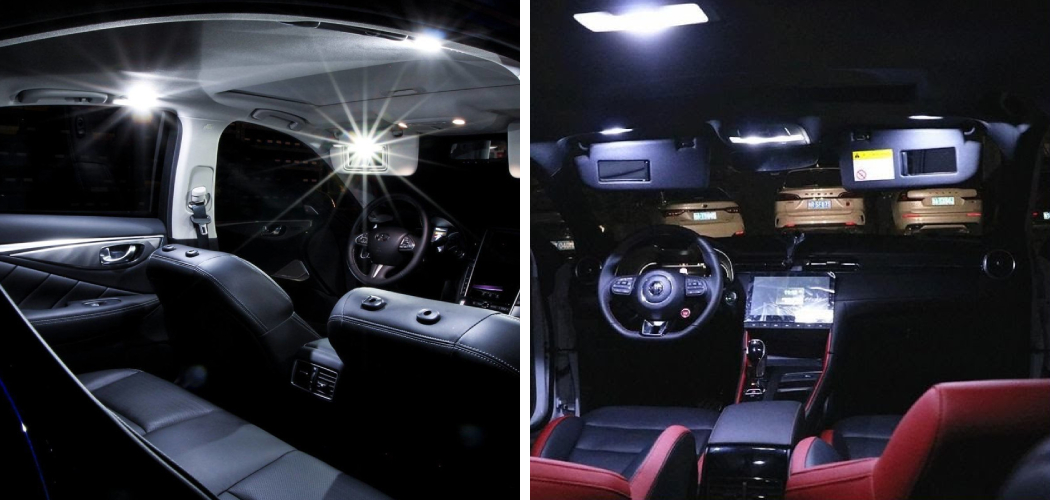
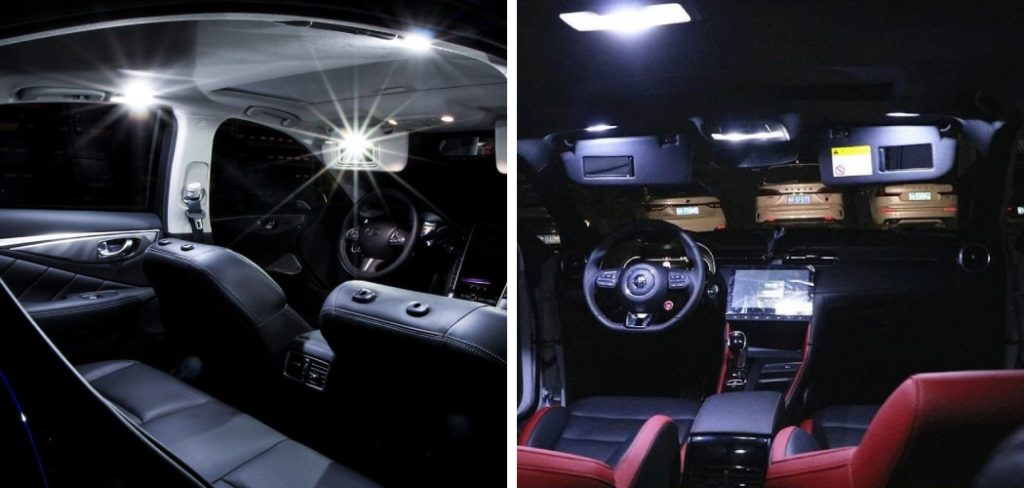
Are you tired of those dull, yellow interior lights in your car? Upgrading to LED lights can brighten your car’s interior and give it a modern and sleek look. LED lights are energy-efficient, long-lasting, and customizable.
Upgrading your vehicle’s interior lighting to LED can be a practical improvement and a personal style statement. LED lights are favored for their longer lifespan, lower energy consumption, and crisper illumination compared to standard bulbs. This guide is designed to provide you with a step-by-step approach to how to change interior car lights to LED, allowing you to enhance your driving experience, increase visibility within your car’s cabin, and give your vehicle a modern aesthetic.
Whether you’re a seasoned car enthusiast or a first-time DIYer, this introduction will pave the way for a successful transition to LED interior car lights.
Is It Safe to Change Your Interior Lights?
Before diving into the steps of changing your interior car lights, addressing any safety concerns you may have is essential. Rest assured that changing your interior lights is a relatively simple and safe.
As long as you follow proper precautions, such as disconnecting your car’s battery and handling LED bulbs with care, there should be no risk involved. However, if you are unsure or uncomfortable with handling any electrical components, it is always best to seek professional assistance.
Now that we’ve addressed safety measures, let’s start upgrading your car’s interior lights to LED!
What are the Benefits of Changing Interior Car Lights to LED?
LED lights have gained popularity in the automotive industry for their numerous advantages. Some of the significant benefits include:
- Energy Efficiency: LED lights use significantly less energy than traditional bulbs, making them a more environmentally friendly option.
- Durability: LED lights are built to last, with an average lifespan of 25,000 hours compared to the 1,000 hours of a standard incandescent bulb.
- Brightness: LED lights produce brighter and more intense light than traditional bulbs, making them ideal for car interior lighting.
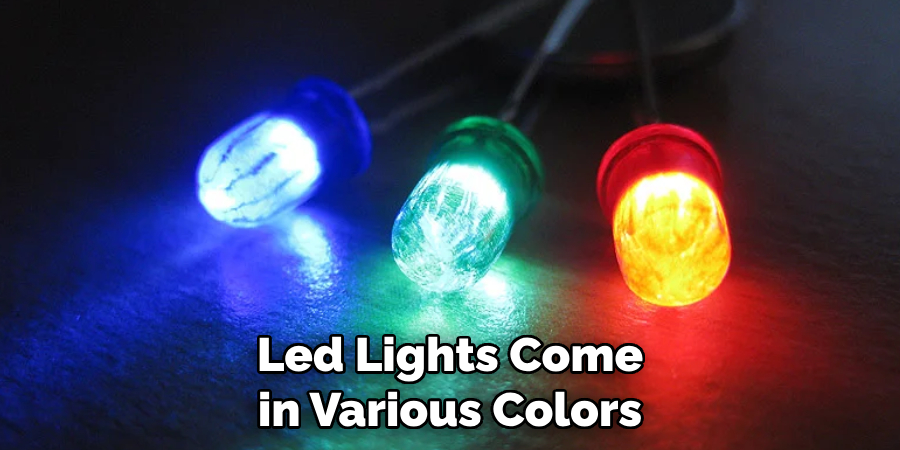
- Customization: LED lights come in various colors and can be easily customized to match your style or mood.
Now that you know the benefits of switching to LED lights, let’s dive into how to change interior car lights to LED.
What Will You Need?
Before we begin, here are the tools and materials you will need for this project:
- LED Light Bulbs: Make sure to purchase bulbs compatible with your car’s make and model.
- Screwdriver Set: This will be necessary to remove old bulbs and install new ones.
- Gloves: It’s always a good idea to wear gloves when handling any light bulb to avoid potential accidents.
- Clean Cloth: This will handle the new bulbs and ensure they are free of any oils or dirt that could affect their performance.
- Optional: If you want to customize the color of your LED lights, you can also purchase colored tint films to place over the bulbs.
Now that you have all the necessary tools and materials, let’s start changing interior car lights to LEDs.
10 Easy Steps on How to Change Interior Car Lights to LED
Step 1: Prepare Your Work Area
Preparing your work area before beginning this project is essential to avoid any potential damages or injuries. Here are a few things you can do to ensure a safe workspace:
- Park Your Car in a Well-lit Area: This will ensure proper visibility and reduce the risk of accidents.
- Turn Off Your Car’s Engine and Remove the Key: This is crucial to avoid electrical shocks while working on the lights.
- Wear Gloves: As mentioned earlier, wearing gloves when handling light bulbs is always a good idea.

Step 2: Locate the Interior Lights
The position of interior lights varies depending on the make and model of your vehicle. Typically, the interior lights are situated on the car’s ceiling, often referred to as dome lights, or can be found above each door, known as courtesy lights. Some vehicles may also have lights under the dashboard or in the footwells. Refer to your vehicle’s manual if you need clarification on the light locations. Once you have located all the interior light fixtures you plan to upgrade, proceed to the next step.
Step 3: Remove the Old Bulbs
With your screwdriver set in hand, gently remove the light fixture cover if required; some can be pried open or unscrewed. Once the cover is off, carefully extract the old bulbs by twisting them counterclockwise. In some cars, the bulbs will simply pull out without twisting. Be cautious throughout this process, as the bulbs can sometimes be fragile. Set the old bulbs aside, preferably in a container, to avoid any breakage or loss. After safely removing the bulbs, you’re ready to prepare to install your new LED lights.
Step 4: Clean the Bulb Housing
Before installing the new LED lights, take a moment to clean the bulb housing with a clean cloth. Wipe away any dust or residue that has built up over time. This step is essential as it ensures that the new lights will have the best possible connection and will not be hindered by debris. Having a clean housing also maximizes the amount of light emitted by the LEDs, giving you the full effect of their brightness.
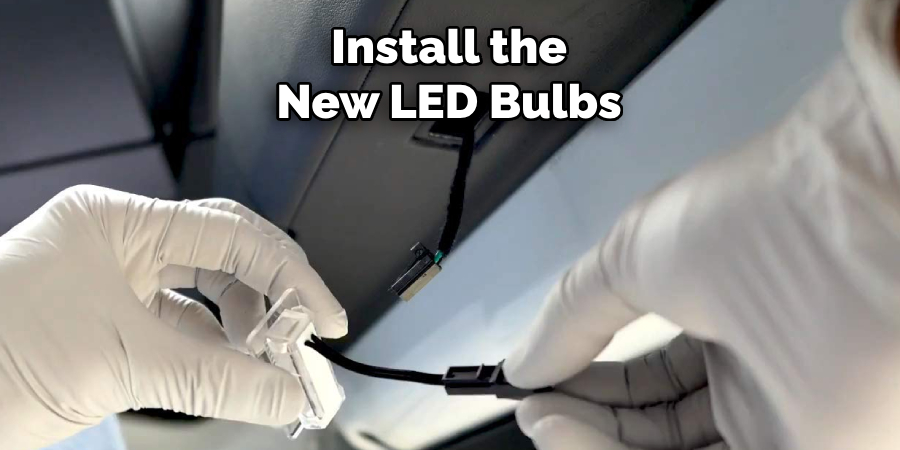
Step 5: Install the New LED Bulbs
After ensuring the bulb housings are clean, it’s time to install the new LED bulbs. Start by carefully removing each LED bulb from its packaging, using a clean cloth to hold them if necessary to prevent oils from your skin from getting on them. Align the base of the new LED bulb with the socket and gently press it in. If the bulbs require twisting to lock into place, gently twist them clockwise until they are secure. Do not force the bulbs into the socket, as this could damage both the bulb and the socket. After the bulbs have been installed, replace any covers or lenses that were removed during Step 3.
Step 6: Test the LED Lights
Once you’ve installed the new LED bulbs, it’s crucial to test them to ensure they are working correctly. If disconnected, reconnect your vehicle’s battery, and turn on the interior light switch. Check each light that you have installed to confirm that they are illuminated. If a bulb doesn’t light up, first ensure it is securely in place, and if necessary, remove and reinsert it to ensure a proper connection. For bulbs that function with polarity, you may need to remove the bulb, rotate it 180 degrees, and reinsert it. Testing the lights before finalizing the project helps catch any issues early on and saves you from having to redo your steps later.
Step 7: Reassemble Everything
After confirming that all LED bulbs are functioning correctly, the next step is to reassemble any parts of the interior that were removed or disassembled. Carefully place covers or lenses back over the light fixtures, ensuring they are fitted securely and are not at risk of falling off while driving. If screws or clips were used to hold any parts in place, return them to their rightful positions, being careful not to overtighten and risk damaging the fixtures. This step will give your interior a finished look and ensure the new LED lights are well-integrated into your car’s design.
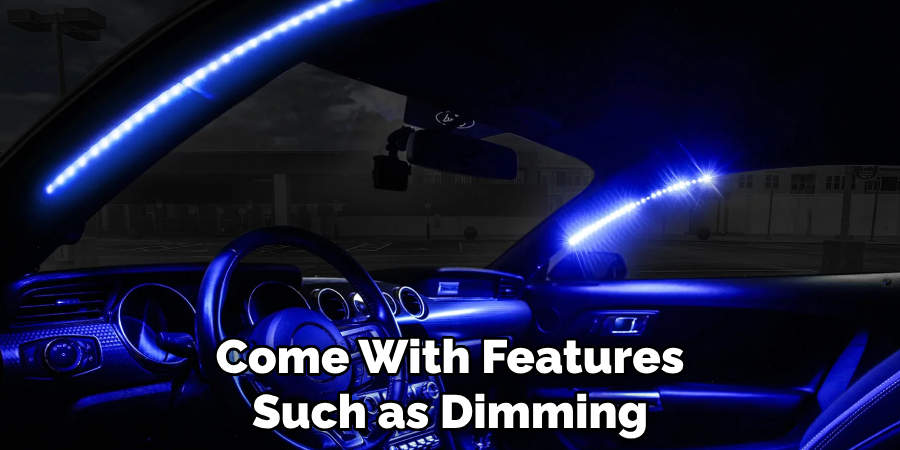
Step 8: Adjust the LED Light Settings (If Applicable)
Newer LED bulbs may come with features such as dimming or color change capabilities, which can be adjusted to suit your preference. Consult the instruction manual with your LED bulbs to understand how to access and modify these settings. Some vehicles may also require you to adjust settings through the onboard computer system. If your LED lights include a remote control, familiarize yourself with its functions to take full advantage of your new lights’ customization options. Make any desired adjustments to achieve the ambiance and functionality you want from your new interior LED lights.
Step 9: Dispose of the Old Bulbs Properly
Once everything is back in place and you are satisfied with the function of your new LED lights, it is essential to dispose of the old bulbs properly. Traditional bulbs contain substances that can harm the environment, so bringing them to a recycling center that handles electronics or bulbs specifically is recommended. Some auto parts retailers also offer recycling services for automotive bulbs. Avoid throwing them in the trash, as they may break and release toxins into the environment. By disposing of them properly, you do your part to protect the environment and adhere to responsible recycling practices.
Step 10: Final Inspection and Maintenance Tips
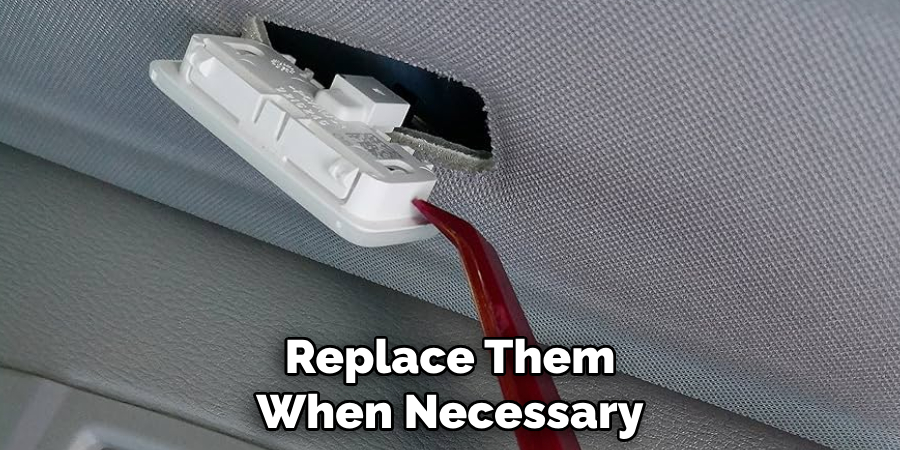
After disposing of the old bulbs, look at your vehicle’s interior to ensure everything is in order. Double-check that all light covers are secured and that any interior component has no visible damage. Consistent with maintaining your new LED lights, remember to check their functionality and cleanliness occasionally. Accumulated dirt or residue can decrease the light’s brightness over time, so wiping the covers and bulbs with a clean cloth is beneficial if necessary. Additionally, stay informed about your LED lights’ expected lifespan and be proactive in replacing them before they burn out to ensure consistent interior lighting in your vehicle.
Following these steps, you can easily upgrade your car’s interior lighting with LED bulbs. This will enhance your vehicle’s overall look and feel and offer numerous benefits, such as increased energy efficiency and longevity. With proper maintenance and installation techniques, your new LED lights will provide a well-lit and stylish interior for years.
5 Additional Tips and Tricks
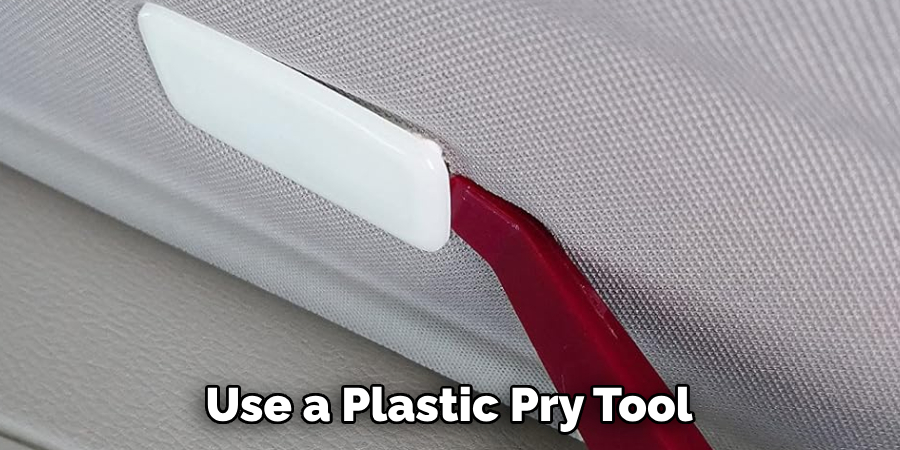
- Utilize a Plastic Pry Tool: When removing covers or lenses, use a plastic pry tool rather than a screwdriver to avoid scratching or damaging the interior trim of your vehicle. These tools are designed to help you safely remove vehicle parts clipped into place.
- Stay Grounded: To mitigate the risk of short circuits when working with the vehicle’s electrical system, always maintain a grounded connection by touching a metal part of the car’s frame before handling the new LED bulbs.
- Check Compatibility: Before purchasing new LED bulbs, verify they are compatible with your vehicle’s make and model. Incorrectly sized bulbs or improper wattage can lead to malfunctions or damage to your vehicle’s electrical system.
- Consider Brightness Levels: LED bulbs come in various brightness levels, measured in lumens. Consider how bright you want your interior lights to be—higher lumens mean brighter light. But be mindful that highly bright lights can be intrusive or cause discomfort.
- LED Color Temperatures: The color temperature of your LED lights can significantly affect the ambiance of the vehicle interior. LED bulbs are available in warm, neutral, and cool white temperatures. Choose the one that best fits your preference and provides comfort during night driving.
With these additional tips and tricks, you can successfully change your car’s interior lights to LED quickly and confidently.
6 Things You Should Avoid When Changing Interior Car Lights to LED
- Ignoring Vehicle Specifications: Don’t install LED lights without checking if they fit your vehicle model. Incorrectly sized or wattage LEDs may not only fail to work but can also cause electrical issues.
- Overlooking Electrical Safety: Only start this project after disconnecting the vehicle’s battery. This is a crucial step to prevent any electrical short circuits leading to damage or personal injury.
- Using Excessive Force: Never use excessive force when disassembling the interior panels or light fixtures. This can break the plastic clips or damage other components, leading to costly repairs.
- Forgetting Polarity: LED bulbs typically have a positive and a negative side and, thus, are polarity-sensitive. Installing them without ensuring proper polarity can result in non-functional lights.
- Neglecting Legal Regulations: It’s essential to avoid colors or modifications that are not street-legal. Flashing lights or specific colors may be against the law and can attract fines, as well as be distracting to other drivers.
- Skipping Proper Maintenance: Neglecting to maintain your LED lights can decrease brightness and lifespan. Be sure to inspect and clean them regularly and replace them when necessary.
By avoiding these common mistakes, you can ensure a smooth and successful LED conversion for your car’s interior lights.
Can You Change the Interior Light Color of Your Car?
Yes, you can change the color of your car’s interior lights to almost any color with LED bulbs. LEDs come in various colors and can be easily installed instead of traditional halogen or incandescent bulbs. You can choose from warm white, neutral white, cool white, red, blue, green, purple, and more.
However, it is essential to note that specific colors, such as red or blue, may not be street-legal and could distract other drivers. Always check with your local regulations before modifying your vehicle’s lighting.
Overall, changing the color of your car’s interior lights can provide a unique and personalized touch to your vehicle’s interior design.
How Can You Modify Your Car Interior?
There are various ways to modify and enhance your car’s interior, including changing the lighting, adding new audio equipment, upgrading the seats or upholstery, installing a sunroof or moonroof, and more.
One popular modification is changing the lighting to LED bulbs for improved brightness and energy efficiency. Some modifications may require professional installation, while others can be done with proper research and tools. Be sure always to follow safety precautions and consult with experts if needed.
Additionally, it’s essential to consider your budget and personal preferences when modifying your car’s interior. With proper planning and research, you can successfully modify your car’s interior to your liking.
Can You Put Leds Inside Your Car?
You can put LED lights inside your car for added ambiance and style. LED strips or accent lights can be installed in various areas of your car’s interior, such as under the dashboard, seats, or door panels. These lights can provide a unique and customizable touch to your vehicle’s interior design.
However, it’s important to note that some states have regulations on using LED lights inside vehicles. Always check with your local laws before modifying to ensure compliance and avoid potential fines.
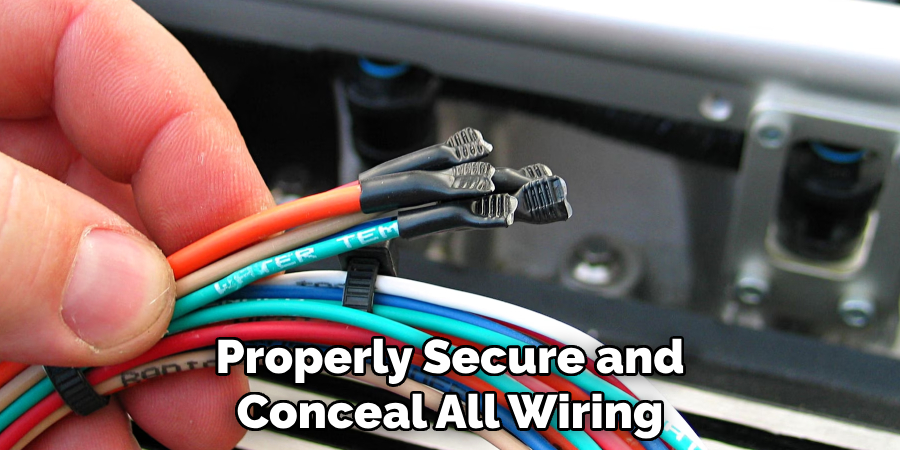
In addition, when installing LED lights inside your car, properly secure and conceal all wiring to prevent any safety hazards or distractions while driving. LED lights inside your vehicle can enhance its overall look and provide a fun and personalized experience.
Conclusion
In conclusion, swapping out your car’s interior lights for LEDs is a relatively straightforward task that can dramatically transform the ambiance of your vehicle’s cabin. Drivers can safely and efficiently make this modern upgrade by following the listed steps and avoiding common pitfalls, such as disregarding vehicle specifications and overlooking safety guidelines. Remember the importance of checking the compatibility of the LED bulbs, ensuring electrical safety, and understanding the legalities of interior vehicle modifications.
When done correctly, LED lights improve the aesthetic appeal of your car’s interior and offer enhanced visibility, energy efficiency, and a longer lifespan than traditional bulbs. Whether for style, function, or both, LED interior lights are a bright idea for any car enthusiast looking to add a personal touch to their vehicle.
Hopefully, this guide has provided you with helpful tips and information on how to change interior car lights to LED. Happy driving!