
An engine run stand is an invaluable tool for both professional mechanics and automotive enthusiasts alike. It allows for the testing, tuning, and breaking in of engines before they are installed in a vehicle. In this guide on how to build a engine run stand, we will walk through the essential steps of constructing a sturdy and reliable engine run stand. From gathering materials to assembling the frame and integrating the necessary electrical components, we’ll cover everything you need to know to make your engine run both functionally and safely. Whether you’re a seasoned gearhead or a beginner with a penchant for engines, this guide will set the foundation for your next automotive project.

What is an Engine Run Stand?
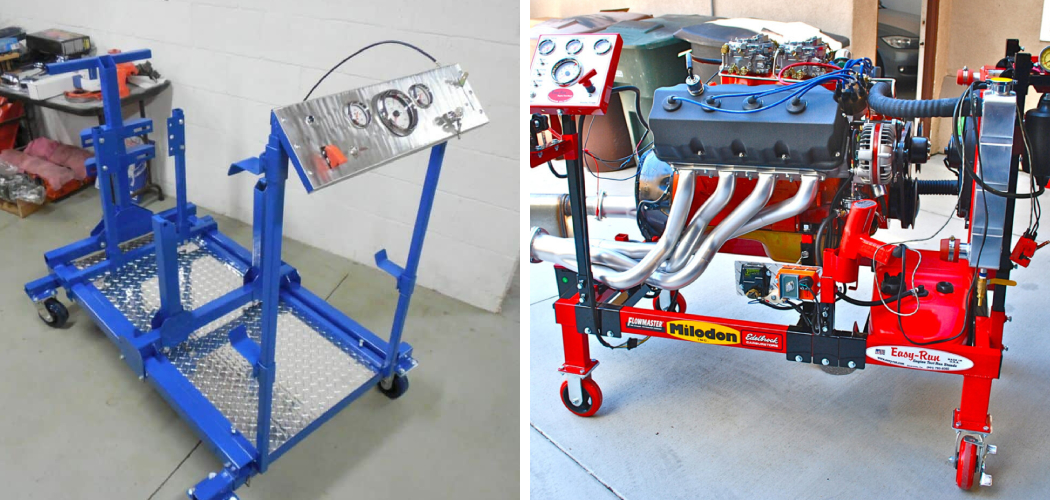
An engine run stand is essentially a portable testing station for engines that allows them to be started and run outside of a vehicle. They typically consist of a frame, casters for mobility, and various electrical components such as ignition switches, fuel systems, and gauges. Engine run stands come in different sizes and configurations to accommodate a wide range of engine types and sizes. Some are designed for specific engine layouts, while others are more versatile and can adapt to different engines with the help of adjustable mounts.
Materials Needed
Before getting started, it’s important to gather all the necessary materials and tools. Here is a list of items you will need to build an engine run stand:
Steel Square Tubing (2 Inch) x 8 Feet:
You will need eight pieces of steel square tubing, each measuring 2 inches in diameter and 8 feet in length. This will serve as the main frame for your engine run stand.
Steel Angle Iron (1 Inch) x 6 Feet:
Six pieces of steel angle iron, each measuring 1 inch by 6 feet, will be used to create the engine mounts and support brackets.
Casters:
Choose four heavy-duty casters with a minimum weight capacity of 500 pounds each. These will allow for easy mobility of your engine run stand.

Engine Mounts:
You can either purchase pre-made engine mounts or custom fabricate them using steel plates and bolts. The number and size of the mounts will depend on the engine type and size you plan to test on your stand.
Electrical Components:
To make your engine run stand functional, you will need electrical components such as an ignition switch, starter motor, fuel system (fuel tank, lines, and pump), battery, and gauges for oil pressure and temperature.
Tools:
In addition to the materials listed above, you will also need various tools to construct your engine run stand, including a welder, angle grinder, drill, saw, and measuring tape.
10 Simple Step-by-step Instructions on How to Build a Engine Run Stand
Step 1: Measure and Cut Steel Tubing
Using a saw or angle grinder, cut the 2-inch steel square tubing into four equal lengths of 6 feet. These will serve as the legs of your engine run stand. Then, cut two more pieces measuring 2 feet each to be used as cross beams for added stability. It’s important to make precise cuts to ensure the frame is level and sturdy. You can use a measuring tape and angle gauge to ensure accuracy. But if you don’t have these tools, you can always use a square or level to check for 90-degree angles. The two remaining pieces of tubing will be used for the engine mount support brackets.
Step 2: Weld the Frame Together
Lay out the four legs and two cross beams on a flat surface, making sure they are evenly spaced. Use a welder to tack-weld the pieces together at each corner. Once all corners are tack welded, go back and complete the full welds along each joint for added strength and stability. If you don’t have welding experience, it is best to seek help from a professional or take a welding class. The quality of the welds is crucial for the safety and functionality of your engine run stand. You can also opt to have the frame welded by a professional if you do not have access to a welder.
Step 3: Attach Casters
Flip the frame over and attach the casters to the bottom of each leg using bolts and washers. Make sure the casters are securely attached and evenly distributed for proper weight distribution. Otherwise, your engine run stand may tip over when the engine is running. It’s also a good idea to use locking casters for added stability and safety. But if you opt for non-locking casters, make sure to secure the stand in place when in use.
Step 4: Fabricate Engine Mounts
Using the two remaining pieces of steel tubing, fabricate engine mounts that are specific to your engine type and size. You can use pre-made mounts if available, but custom fabricating the mounts allows for a more secure fit and ensures the engine is supported properly. It’s essential to have a secure and stable engine mount to prevent the engine from shifting or falling when running. The engine mount should also be able to withstand the vibration and weight of the engine.
Step 5: Install Engine Mounts
Attach the fabricated or pre-made engine mounts to the top of the cross beams using bolts. Make sure they are securely fastened and adjusted to fit your specific engine layout. The mounts should hold the engine securely in place without any movement. You can also add additional support brackets between the engine and frame for added stability. This step may require some trial and error to get the engine positioned correctly. It’s important to take your time and make sure the engine is level and properly supported.

Step 6: Install Electrical Components
Next, install the necessary electrical components such as an ignition switch, starter motor, fuel system, battery, and gauges. Follow the manufacturer’s instructions for proper installation and wiring. It’s essential to have these components properly installed and functioning to ensure a safe and successful engine run. You may also want to add an emergency shut-off switch for added safety. The electrical components will allow you to turn the engine on and test its functionality.
Step 7: Test for Stability
Before placing your engine on the stand, it’s important to test for stability by gently shaking or pushing the frame. If there is any movement or instability, go back and reinforce the weak areas with additional welding or support brackets. It’s crucial to have a sturdy and stable frame to ensure safety when running the engine. If the frame is not stable enough, it can tip over or cause damage to the engine. The more secure and stable the frame is, the safer your engine run stand will be.
Step 8: Mount and Secure Engine
Carefully lift your engine onto the stand and secure it in place using the mounting bolts. Make sure the engine is properly positioned and supported by the mounts to prevent any movement when running. If needed, you can also add additional support brackets between the engine and frame for added stability. It’s important to take your time and make sure the engine is securely mounted before proceeding. The last thing you want is for the engine to fall or shift during testing. You can also double-check the stability by gently shaking or pushing the engine to ensure it is securely mounted.
Step 9: Connect Fuel System and Battery
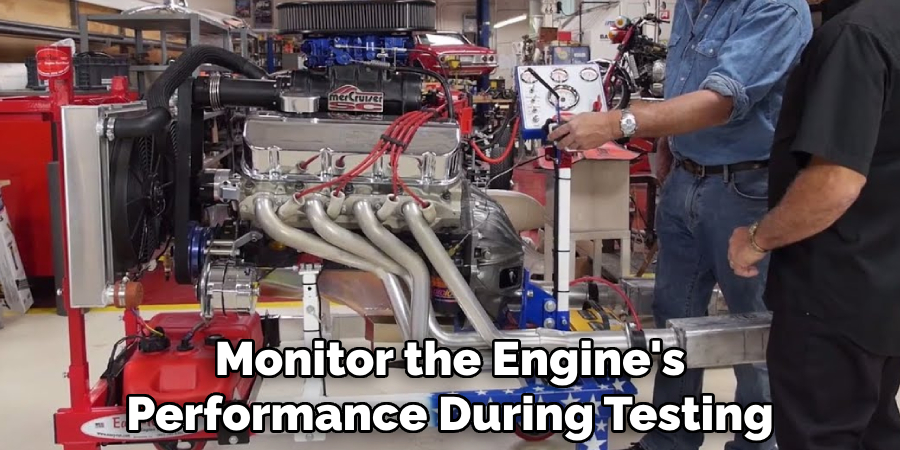
Connect the fuel system (fuel tank, lines, and pump) and battery to the appropriate components of your engine. Make sure all connections are secure and follow proper safety precautions when dealing with fuel. You may also want to install a fire extinguisher nearby in case of any accidents. Connect the gauges for oil pressure and temperature to monitor the engine’s performance during testing. The fuel system and battery are essential components for running the engine, so make sure they are properly connected and functioning.
Step 10: Start the Engine
With all components properly installed and connected, you’re ready to start your engine! Turn on the ignition switch and use the starter motor to start the engine. Pay attention to any unusual noises or vibrations and monitor the gauges for proper oil pressure and temperature readings. It’s normal for a newly built engine to have some minor adjustments needed, so make sure to listen and observe closely during testing. The engine run stand is a great way to test and break in a new engine before installing it in your vehicle.
Once you’re satisfied with the performance of your engine on the stand, you can move on to installing it in your vehicle. Congratulations on successfully building and testing your own engine run stand! With proper maintenance and care on how to build a engine run stand, it will serve as a valuable tool for future engine projects. Happy testing!
Additional Tips
- Make Sure to Use High-quality Materials and Follow Proper Safety Precautions When Building Your Engine Run Stand.
- Take Your Time During the Build Process to Ensure Accuracy and Stability.
- Have a Professional Welder Inspect Your Welds if You Are Not Confident in Their Quality.
- Test the Engine on the Stand Before Installing It in a Vehicle to Avoid Any Potential Issues or Adjustments Needed.
- Have a Fire Extinguisher Nearby in Case of Any Accidents.
- Regularly Check and Maintain Your Engine Run Stand for Safe and Efficient Use. Overall, Building an Engine Run Stand is a Great Way to Save Money and Have a Valuable Tool at Your Disposal for Future Projects.
- Remember to Always Prioritize Safety When Working With Engines and Follow Proper Procedures.
- Have Fun and Enjoy the Process of Building and Testing Your Own Engine Run Stand! So, Use These Tips to Build an Efficient Engine Run Stand That Will Help You in All Your Future Projects.

Keep exploring new techniques and methods to improve your skills as a mechanic or DIY enthusiast. Happy building!
Safety Considerations
- Always Wear Appropriate Safety Gear When Working With Engines or Building Equipment.
- Make Sure to Have a Safe and Adequate Workspace for Your Project.
- Follow Proper Guidelines and Instructions From the Manufacturer.
- Regularly Check and Maintain All Parts of Your Engine Run Stand to Ensure Safe Usage.
- Do Not Attempt to Run an Engine That is Not Properly Mounted and Supported on the Stand.
- If You Notice Any Unusual Noises or Vibrations, Immediately Shut Off the Engine and Investigate the Issue.
- Always Have a Fire Extinguisher Nearby in Case of Any Accidents.
- Seek Professional Help or Advice if You are Not Confident in Your Abilities to Safely Build or Use an Engine Run Stand. Safety is the most important aspect of any project, so always prioritize it and follow proper precautions.
- Remember, a properly built and maintained engine run stand can last you for years to come. So take your time, follow safety precautions, and enjoy the process of building and testing your own engine on a stand. Keep learning and honing your skills as you take on new projects in the future. Happy building!
Testing and Troubleshooting
- After the Initial Test Run, Check All Connections and Components to Make Sure They Are Secure and Functioning Properly.
- Monitor Gauges for Any Unusual Readings or Warning Signs During Testing.
- If There Are Any Issues With the Engine’s Performance, Shut It Off Immediately and Investigate the Cause. Troubleshoot Any Problems Before Proceeding With Further Testing.
- Make Sure to Properly Break-in the Engine Before Running It at Full Power for Extended Periods. Follow Manufacturer Recommendations for Break-in Procedures.
- Regularly Check and Maintain Your Engine Run Stand to Ensure Safe and Efficient Use in Future Projects.
- Seek Professional Help or Advice if You Encounter Any Major Issues With the Engine’s Performance on the Stand. Remember, Safety is Always a Top Priority.
- Keep a Log of Your Engine Run Stand’s Usage and Any Adjustments or Maintenance Performed to Track Its Performance and Lifespan.
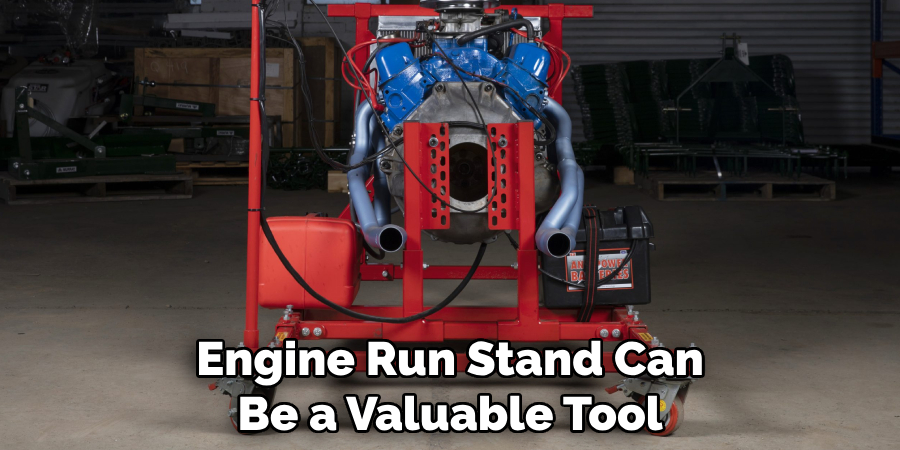
- With Proper Care and Troubleshooting, Your Engine Run Stand Can Be a Valuable Tool for Many Future Projects. Happy Testing!
Maintenance and Upkeep
- After Each Use, Inspect and Clean Your Engine Run Stand to Remove Any Debris or Fluids.
- Check All Connections and Components for Wear or Damage and Repair or Replace as Needed.
- Lubricate Moving Parts Regularly to Ensure Smooth Operation.
- Store Your Engine Run Stand in a Safe and Dry Location When Not in Use to Prevent Corrosion or Damage.
- Regularly Check and Maintain Your Engine Run Stand to Ensure Safe and Efficient Use in Future Projects.
- Follow Manufacturer Recommendations for Any Specific Maintenance Tasks.
- Seek Professional Help or Advice if You Notice Any Significant Wear or Damage to Your Engine Run Stand. Proper maintenance is crucial for the longevity and safe use of your engine run stand.
Frequently Asked Questions
Q: Can I Use an Engine Run Stand for All Types of Engines?
A: Yes, with proper adjustments and custom mounts, you can use an engine run stand for various engine sizes and types. The key is to make sure the stand is sturdy and secure enough to support the weight and vibrations of your specific engine.
Q: How Can I Ensure the Safety of My Engine Run Stand?
A: Use high-quality materials, follow proper safety precautions, and take your time during the building process. Regularly check and maintain your stand for safe use. The more stable and secure the stand is, the safer it will be for testing your engine.
Q: Do I Need Any Special Skills to Build an Engine Run Stand?
A: Basic welding skills are necessary for building a sturdy and stable stand, but with the right instructions and materials, it can be built by anyone. It’s important to take your time and follow proper procedures to ensure a safe and successful build. Overall, an engine run stand is a valuable tool for any mechanic or DIY enthusiast, so don’t be afraid to try building one yourself!
Q: Can I Use an Engine Run Stand for Long-Term Storage of an Engine?
A: It’s not recommended to use an engine run stand for long-term storage as it can cause damage to the engine. It’s best to properly store the engine in a dry and clean area. An engine run stand is meant for temporary testing and adjustments, not long-term storage.
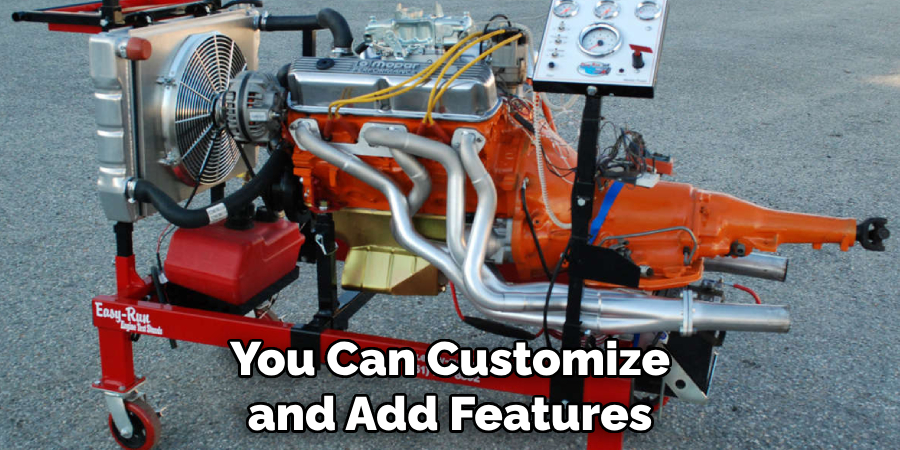
Q: Can I Add Additional Features to My Engine Run Stand?
A: Yes, you can customize and add features such as a transmission adapter or engine cradle for added versatility. Just make sure to properly reinforce the stand to support these additional components. Keep exploring new ideas and improvements to make your engine run stand even more efficiently and functionally.
Conclusion
Congratulations! You have now equipped yourself with the knowledge to build a reliable engine run stand. As you embark on this project, remember that safety is paramount; always wear protective gear and follow the guidelines meticulously. With your new engine run stand, you’ll have the means to thoroughly test and fine-tune engines, ensuring they perform optimally before installation.
Happy wrenching, and enjoy the satisfaction that comes from firing up an engine on the stand you’ve built with your own hands. Stay curious, continue learning, and may your automotive endeavors be rewarding and successful. Thanks for reading this article on how to build an engine run stand.