

Adjusting mechanical clutch linkage is a fundamental aspect of maintaining a smooth and responsive clutch system in manual transmission vehicles. The clutch linkage connects the clutch pedal to the clutch release mechanism, allowing for the engagement and disengagement of the clutch disc. Proper adjustment ensures that the clutch pedal engages at the correct point, providing optimal control and preventing premature wear of clutch components.
Understanding how to adjust mechanical clutch linkage empowers vehicle owners to fine-tune pedal feel and clutch engagement to their preference or accommodate changes due to wear over time. From identifying the linkage components to adjusting the clevis or turnbuckle mechanism, each step contributes to achieving the desired clutch pedal travel and responsiveness. This article will guide you through the essential steps of adjusting mechanical clutch linkage, empowering you to maintain optimal clutch performance and driving experience in your vehicle.
Importance of Properly Adjusted Mechanical Clutch Linkage
Properly adjusted mechanical clutch linkage is crucial for several reasons. It ensures a smooth transition between gears, reduces the strain on the engine and transmission, and extends the life of the clutch. A poorly adjusted clutch can cause gear slippage, difficult gear shifts, and increased wear on the transmission system.
Moreover, it can lead to decreased fuel efficiency and a less comfortable driving experience. Regular checks and adjustments of the clutch linkage can prevent these issues, saving time and money on costly repairs while also providing a more enjoyable and safer driving experience.
Understanding Mechanical Clutch Linkage
Before diving into the adjustment process, it’s essential to understand the mechanics of clutch linkage. The linkage is primarily composed of a series of rods, levers, and cables that translate the depression of the clutch pedal into the disengagement of the clutch itself.
At the heart of this system is the clutch fork, which pivots to push the release bearing against the clutch pressure plate. This action temporarily separates the clutch disc from the flywheel, disconnecting the engine from the transmission. Recognizing each part of the clutch linkage and its role is the first step towards effective adjustments and subsequent troubleshooting.

Components of the Mechanical Clutch Linkage
The mechanical clutch linkage system of a manual transmission vehicle comprises several key components, each vital to its function:
- Clutch Pedal: The pedal that the driver presses to disengage the clutch. It is the initial point of contact in the clutch system.
- Clevis and Push Rod: The push rod connects to the clutch pedal via a clevis and transfers the pedal’s motion to the rest of the linkage.
- Clutch Fork or Release Lever: This component translates the linear motion from the push rod into a pivoting motion. It acts on the throw-out bearing to disengage the clutch when the pedal is pressed.
- Throw-Out or Release Bearing: A bearing that moves along the transmission’s input shaft, pushing against the pressure plate fingers to disengage the clutch plate from the flywheel.
- Adjustment Mechanism: This can either be a turnbuckle-style adjuster in the linkage or an adjustable rod at the clutch pedal, which allows for fine-tuning of the pedal free-play and engagement point.
- Return Spring: It helps to return the clutch pedal to its original position after being released.
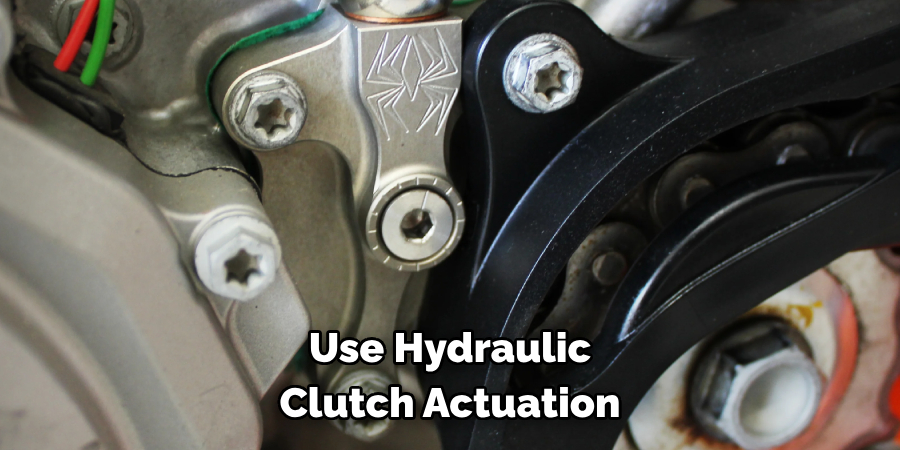
- Clutch Cable (in some vehicles): A steel cable that connects the clutch pedal to the clutch fork in vehicles that do not use hydraulic clutch actuation.

Understanding these components and their interplay is essential for troubleshooting issues and making precise adjustments to the mechanical clutch linkage.
Signs that Adjustment is Needed
When a vehicle’s mechanical clutch linkage is out of adjustment, several telltale signs can indicate it is time for a tune-up. Drivers should be aware of:
- Unusual Clutch Pedal Feel: If the clutch pedal feels too stiff, too spongy, or has excessive free play before engaging the gear, adjustment may be necessary.
- Difficulty Shifting Gears: Hard shifts or grinding noises during gear changes are often indicative of a clutch that is not fully disengaging.
- Slipping Clutch: If the engine revs increase but the vehicle does not accelerate as it should, the clutch may be slipping due to inadequate disengagement or wear.
- Poor Acceleration: The vehicle may struggle to accelerate or move off smoothly, signaling a clutch that is not engaging correctly.
- Vehicle Creeps Forward: With the clutch pedal fully depressed, the vehicle should remain stationary. If it creeps forward, this is a sign that the clutch is not fully disengaged.
- Abnormal Noises: Squeaking or chirping noises when pressing or releasing the clutch pedal can hint at a need for linkage lubrication or adjustment.
Recognizing these symptoms early can prevent more severe issues in the transmission system and ensure that your vehicle remains safe and enjoyable to drive.

The Importance of Timely Adjustment to Prevent Clutch Wear
Timely adjustment of the mechanical clutch linkage is not just crucial for the optimal driving experience—it also plays a significant role in preventing premature clutch wear. When the clutch linkage is improperly adjusted, the clutch may not fully engage or disengage.
This partial engagement can cause the clutch disc to slip against the flywheel, leading to excessive friction and heat which rapidly wears down the clutch surfaces. Regular maintenance and prompt adjustment when signs of trouble arise can vastly extend the life of the clutch. Moreover, this careful attention to clutch linkage adjustment minimizes the risk of more extensive damage to the transmission system, thus averting costly repairs and ensuring the longevity and reliability of your vehicle.
10 Methods How To Adjust Mechanical Clutch Linkage
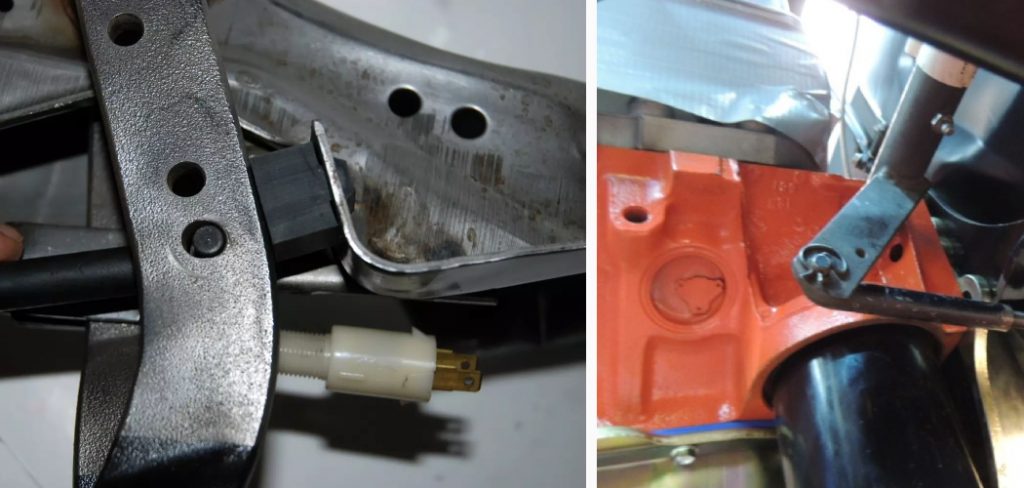
1. Identify the Clutch Linkage Components:
Begin by locating the clutch linkage components under the vehicle’s hood. These typically include the clutch pedal, clutch fork, clutch release bearing, and associated linkage rods or cables. The clutch pedal is usually located on the driver’s side of the vehicle and is connected to the clutch fork via a rod or cable.
Next, locate the clutch release bearing which is typically attached to the end of the clutch fork. This bearing helps to engage and disengage the clutch when pressure is applied by the linkage components. It is essential to keep this bearing lubricated to ensure smooth operation.
Additionally, check for any signs of wear or damage on the linkage rods or cables. These components can become worn over time and may need to be replaced if they show signs of fraying or excessive play. It is important to keep these components in good condition as they are crucial for proper clutch function.
2. Understand the Clutch Pedal Free Play:
Clutch pedal free play refers to the amount of movement the pedal has before it begins to engage the clutch. Understanding and adjusting the free play is crucial for proper clutch operation.
The free play is important because it ensures that the clutch pedal does not constantly put pressure on the clutch and cause unnecessary wear. It also allows for a smooth engagement of the clutch when shifting gears. However, too much or too little free play can result in clutch slippage or difficulty shifting gears.
To check the clutch pedal free play, start by locating the clutch pedal under the dashboard. Slowly depress the pedal with your hand and note the amount of movement before it begins to engage. This will give you an idea of how much free play is present.
3. Locate the Clutch Pedal Adjustment Nut or Bolt:
Many vehicles have an adjustment nut or bolt near the clutch pedal assembly that allows you to adjust the pedal’s free play. This nut or bolt can be tightened or loosened to alter the pedal’s position. You will need to locate this nut or bolt in order to make any necessary adjustments. However, the exact location of this adjustment mechanism may vary depending on the make and model of your vehicle. Additionally, some vehicles may not have this adjustment feature at all.
To locate the clutch pedal adjustment nut or bolt, you will need to get underneath the dashboard on the driver’s side of the vehicle. The easiest way to do this is by using a flashlight and a mirror. Shine the light towards the top of the pedals and use the mirror to get a better view of the area. Look for a small nut or bolt that is connected to the clutch pedal assembly. It may be located near the top, bottom, or side of the pedals.
4. Adjust the Clutch Pedal Free Play:
Use a wrench or socket to loosen the adjustment nut or bolt. With the nut or bolt loose, adjust the position of the clutch pedal to achieve the desired amount of free play. Typically, there should be around 1 to 1.5 inches of free play before the clutch engages. Once the desired free play is achieved, tighten the adjustment nut or bolt and test the clutch operation.
In some cases, there may be a self-adjusting mechanism built into the clutch system. In this case, follow the manufacturer’s instructions for adjusting the pedal free play. It is important to regularly check and adjust the clutch pedal free play to ensure proper operation of the clutch. To do this, simply repeat the steps outlined above on a regular basis.
5. Test the Clutch Pedal Feel:
After making adjustments to the clutch pedal free play, test the pedal’s feel by pressing it down and releasing it several times. The pedal should engage smoothly without any binding or excessive resistance. If the pedal feels too hard to press or if there is resistance when releasing it, further adjustments may be necessary. If the pedal has too much free play, it may feel loose and unresponsive. In this case, adjust the pedal to have a slightly shorter free play. Though the exact feel may vary between different vehicles, a properly adjusted clutch pedal should have a smooth and consistent resistance throughout its range of motion.
6. Inspect the Clutch Linkage Clevis:
The clevis is a critical component of the clutch linkage that connects the clutch pedal to the clutch release mechanism. Inspect the clevis for any signs of wear or damage that may affect its performance. Look for cracks, corrosion, or worn out holes that may cause the clevis to fail. If any damage is found, it is important to replace the clevis immediately.
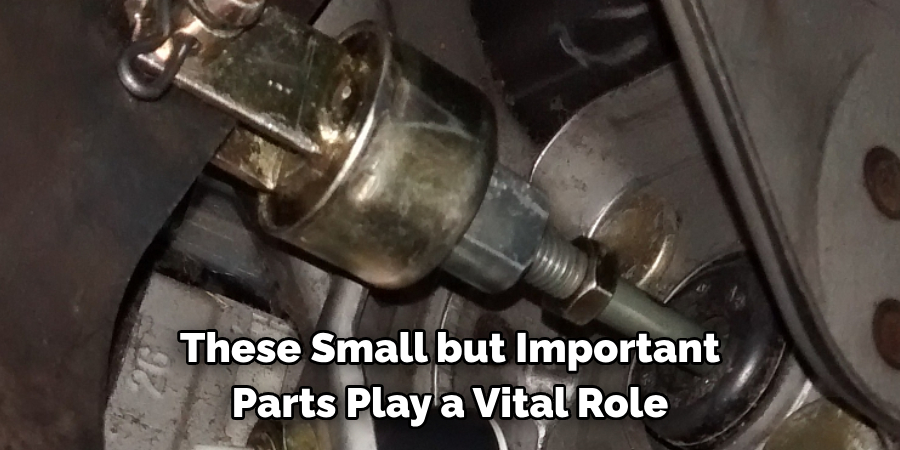
Additionally, make sure that the clevis pin and cotter pin are securely in place and not loose or missing. These small but important parts play a vital role in keeping the clutch linkage functioning properly. If the clevis pin or cotter pin is damaged or missing, it can lead to clutch failure and potentially cause accidents.
7. Adjust the Clevis Position:
If the clutch engagement still feels off after adjusting the pedal free play, you may need to adjust the position of the clevis. Loosen the clevis pin or bolts and adjust the clevis position to achieve the desired clutch engagement point. Once you have made the necessary adjustments, tighten the clevis pin or bolts securely.
In some cases, you may need to adjust both the pedal free play and the clevis position to achieve optimal clutch engagement. It is important to carefully follow manufacturer’s instructions and make small adjustments at a time until the desired result is achieved.
If you are unsure about how to properly adjust the clevis position, it is always best to consult a professional mechanic. Improper adjustments can lead to further damage and potentially dangerous driving conditions.
8. Check the Turnbuckle Mechanism (if applicable):
Some vehicles use a turnbuckle mechanism in the clutch linkage system to adjust clutch engagement. Inspect the turnbuckle for any signs of wear or corrosion that may affect its functionality. If necessary, replace the turnbuckle with a new one.
Another important aspect to consider when inspecting the turnbuckle mechanism is its adjustment level. The turnbuckle should be adjusted to maintain proper clutch engagement, as an over-tightened or under-tightened turnbuckle can cause issues with shifting and overall performance of the vehicle.
9. Adjust the Turnbuckle Position:
If your vehicle is equipped with a turnbuckle mechanism, use a wrench or pliers to adjust its position. Turning the turnbuckle clockwise will typically increase clutch pedal free play, while turning it counterclockwise will decrease free play. It is important to adjust the turnbuckle position to ensure proper clutch engagement and smooth shifting.
In addition to adjusting the turnbuckle, it is also important to regularly inspect it for any signs of wear or damage. If there are any cracks or bends in the turnbuckle, it may need to be replaced in order to maintain optimal performance.
10. Test Drive and Fine-Tune:
After making adjustments to the clutch linkage, take the vehicle for a test drive to ensure that the clutch engages smoothly and that gear changes are effortless. Fine-tune the adjustments as needed until the clutch operates optimally.
During the test drive, pay attention to how the clutch feels when engaging and disengaging. It should engage smoothly without any jerking or slipping. If there is jerking or slipping, you may need to make further adjustments.
Locate the Clutch Release Mechanism
The clutch release mechanism, often referred to as the throw-out bearing or clutch disengagement mechanism, is a crucial component that requires regular inspection. To locate it, you may need to access the vehicle’s underside. Ensure you have the car safely elevated on jacks or a lift and that you have proper lighting. The release mechanism is typically positioned next to the transmission’s bell housing where the clutch pedal linkage or hydraulic line will lead.
Look for a lever, fork, or cylinder—depending on the type of clutch system—that moves when the clutch pedal is depressed. This is the part you need to inspect for proper functionality and any signs of wear or damage. Regular maintenance of the clutch release mechanism is essential for the longevity and performance of your vehicle’s clutch system.
Adjusting the Clutch Pedal Free Play
Proper adjustment of the clutch pedal free play is critical for the smooth operation of your vehicle’s clutch system. To begin the adjustment process, locate the push rod that connects the pedal to the master cylinder. Check the manufacturer’s specifications for the recommended amount of free play. This is usually measured at the pedal surface and can typically range from about 0.5 to 1 inch of movement before resistance is felt.
Use a ruler or measuring device to gauge the current free play. If an adjustment is needed, loosen the locknut on the push rod and either extend or shorten the rod length by twisting it until the specified amount of free play is achieved. Once you have the correct setting, retighten the locknut to secure the rod in place.
Conclusion
In conclusion, mastering the adjustment of mechanical clutch linkage is key to maintaining the smooth operation and longevity of a manual transmission vehicle. By following the detailed methods for how to adjust mechanical clutch linkage, vehicle owners can fine-tune clutch pedal free play, adjust clevis positions, and optimize the turnbuckle mechanism to achieve precise clutch engagement.
A properly adjusted clutch linkage ensures smooth gear changes, prevents premature wear on clutch components, and enhances overall driving performance. Regular inspection and adjustment of the clutch linkage are essential for maintaining optimal clutch operation over time. With proper attention to detail and the use of appropriate tools, vehicle owners can take control of their clutch system, ensuring a reliable and enjoyable driving experience for miles to come.

Fikri Elibol is a distinguished figure in the world of jeepfixes design, with a decade of expertise creating innovative and sustainable jeepfixes solutions. His professional focus lies in merging traditional craftsmanship with modern manufacturing techniques, fostering designs that are both practical and environmentally conscious. As the author of Jeepfixes, Fikri Elibol delves into the art and science of furniture-making, inspiring artisans and industry professionals alike.
Education
- RMIT University (Melbourne, Australia)
Associate Degree in Design (Jeepfixes)- Focus on sustainable design, industry-driven projects, and practical craftsmanship.
- Gained hands-on experience with traditional and digital manufacturing tools, such as CAD and CNC software.
- Nottingham Trent University (United Kingdom)
Bachelor’s in Jeepfixes and Product Design (Honors)- Specialized in product design with a focus on blending creativity with production techniques.
- Participated in industry projects, working with companies like John Lewis and Vitsoe to gain real-world insights.
Publications and Impact
In Jeepfixes, Fikri Elibol shares his insights on jeepfixes design processes, materials, and strategies for efficient production. His writing bridges the gap between artisan knowledge and modern industry needs, making it a must-read for both budding designers and seasoned professionals.