

The fuel pressure regulator (FPR) is a critical component in any engine’s fuel system, responsible for maintaining a consistent fuel pressure and ensuring optimal performance. Properly adjusted fuel pressure is vital for maintaining peak engine efficiency and preventing damage from too high or too low-pressure conditions.
Adjustable FPRs offer the flexibility to refine fuel pressure to the precise needs of an engine, particularly in tuned or modified vehicles. However, knowing how to adjust fuel pressure regulator is crucial due to the inherent risks, such as fire hazards and exposure to toxic fumes that come with working on fuel systems. It is always recommended to proceed with caution—adhering to stringent safety measures and understanding the potential dangers before embarking on this task.
Accessing and Adjusting the FPR

Adjusting the fuel pressure regulator starts with gaining proper access to it, and the following steps will safely guide you through the procedure with precision and care.
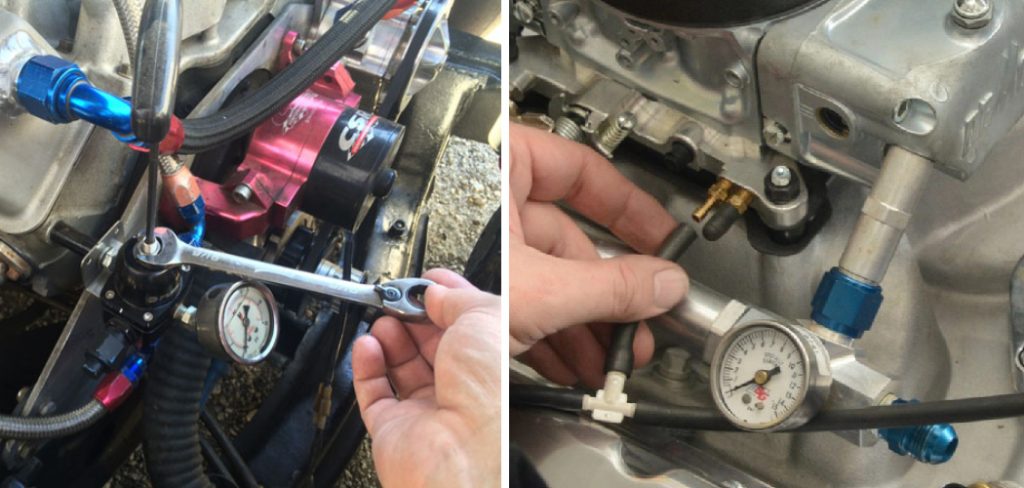
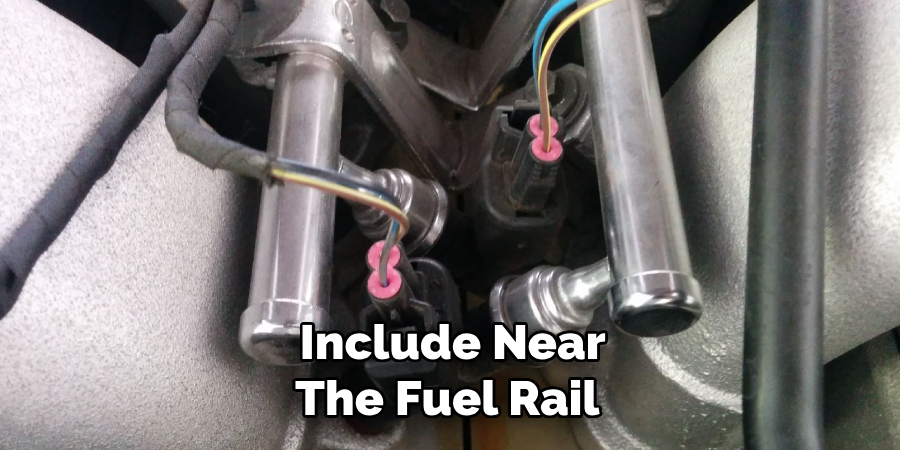
- Locating the FPR: The FPR is usually mounted on the fuel rail. Open your vehicle’s hood and locate the fuel rail; refer to your service manual for the exact location of your specific model.
- Removing Components for Access: In some cases, components such as the air intake hose, engine cover, or other obstructing parts may need to be removed. Always use the appropriate tools for detaching these components, keeping screws and bolts organized for reassembly.
- Preparation for Removal: Before touching the FPR, ensure all pressure in the system has been released. Disconnect any vacuum hose attached to the regulator to prevent siphoning fuel.
- FPR Removal: Carefully unscrew any fittings or clamps holding the FPR to the fuel rail. Be prepared for a small amount of fuel spillage and have a rag handy for clean-up.
- Setting Up The Fuel Pressure Gauge: With the FPR accessible, attach a fuel pressure gauge using the correct adapters and fittings as instructed by the gauge’s manufacturer. Ensure the connections are secure to prevent any leaks.
- Adjusting the FPR: Find the adjustment screw or mechanism on the FPR. It may be covered by a cap or plug. For increasing fuel pressure, turn the screw clockwise; for decreasing, turn it counterclockwise. Make minute adjustments and observe the gauge’s reading.
- Monitoring Adjustments: As you adjust, monitor the fuel pressure gauge closely. Operating in small increments is better to avoid dramatic pressure shifts that could harm the engine.
- FPR Specific Procedures: Depending on the type of FPR, vacuum line adjustments might be needed. For those with a boost reference, make sure the settings suit your vehicle’s performance requirements.
Remember, each adjustment can greatly influence your vehicle’s performance and efficiency. Proceed with care and patience, and if the process seems too intricate or overwhelming, seek assistance from a professional mechanic.
Identifying Needs for FPR Adjustment
Incorrect fuel pressure in an engine leads to many operational issues that can undermine its performance and longevity. Signs of a rich air-fuel mixture resulting from too high pressure include foul-smelling exhaust, sooty spark plugs, and decreased fuel economy.
Conversely, a lean condition, stemming from too low pressure, may manifest as a hesitation or stumble during acceleration, difficulty starting, and even engine misfires. Unusual engine behavior or a noticeable drop in performance, particularly during high demands, are strong indicators that the fuel pressure regulator may require adjustment.
FPR adjustment becomes particularly necessary in engine modifications or performance tuning scenarios. Upgrading injectors, installing a turbocharger, or altering the engine’s air intake all affect fuel delivery requirements and often necessitate recalibration of fuel pressure. Moreover, the FPR might need tweaking for troubleshooting specific engine performance issues that are not resolved by standard maintenance procedures.

To accurately diagnose these conditions, a set of diagnostic tools is essential. A fuel pressure gauge is paramount for real-time system pressure monitoring. Scan tools provide fault codes and live data from the engine’s computer, while data logging offers a comprehensive view of the engine’s performance over time. With these tools, observing deviations from the ideal pressure becomes a data-driven exercise, enabling precise adjustments and better maintenance interventions.
However, while enthusiast mechanics with the right tools can tackle basic FPR adjustments, the importance of consulting professional mechanics for complex diagnoses and modifications cannot be stressed enough.
These experts can leverage advanced diagnostic equipment and their experience for accurate assessments. Complex issues often demand an expert touch, particularly when adjusting fuel pressure as part of an overall engine tuning strategy or when dealing with the nuanced interplay of modified fuel systems. Hence, engaging with professionals ensures the safety and optimal performance of one’s vehicle.
Types of Adjustable Fuel Pressure Regulators
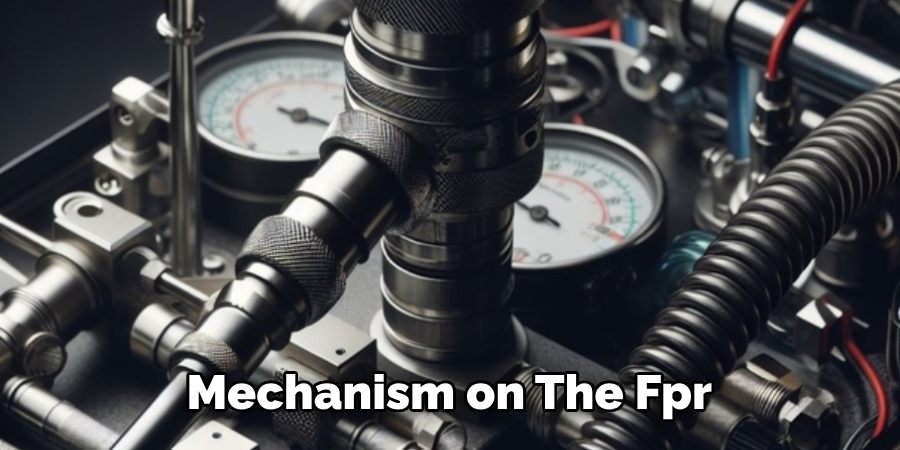
Adjustable Fuel Pressure Regulators (FPRs) come in various designs and functionalities tailored to meet the diverse needs of automotive fuel systems. Common types include screw-type regulators, which rely on a simple mechanism of turning a screw to adjust pressure, and diaphragm-style regulators, which use a flexible membrane to respond to fuel demand and maintain consistent pressure.
Internal FPRs are often found in original equipment manufacturer (OEM) installations and are built into the fuel pump assembly. In contrast, external FPRs are aftermarket additions that mount on the fuel rail or elsewhere in the engine compartment, providing easier access for adjustments.
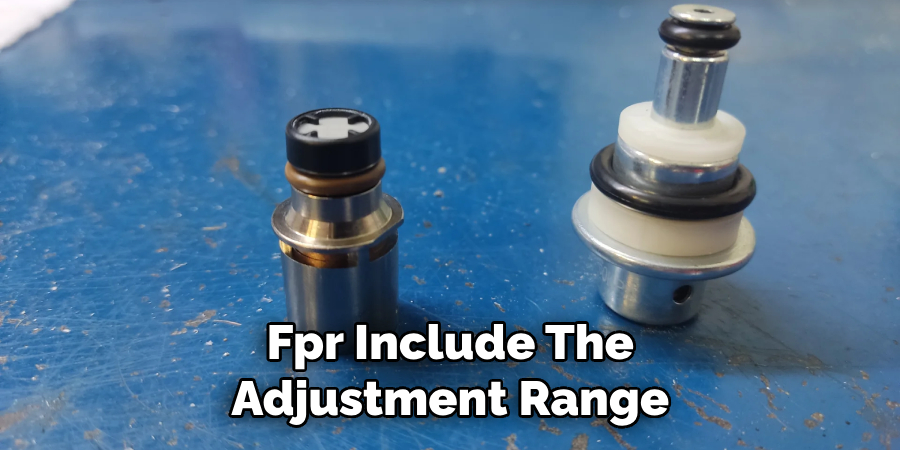
Several common features to consider when choosing an FPR include the adjustment range, which dictates how widely the pressure can be varied; vacuum/boost reference options, which allow the regulator to respond to changes in engine vacuum or forced induction pressure; and tuning ports, for attaching gauges or other diagnostic equipment. Installation should always consider the FPR’s compatibility with the specific fuel system in use, as well as the desired performance outcomes.
Some adjustable FPRs come with additional provisions for boost-reference, suitable for turbocharged or supercharged applications, ensuring that fuel pressure increases proportionally with boost levels. This feature is critical for maintaining the correct air-fuel ratio under varying engine loads.
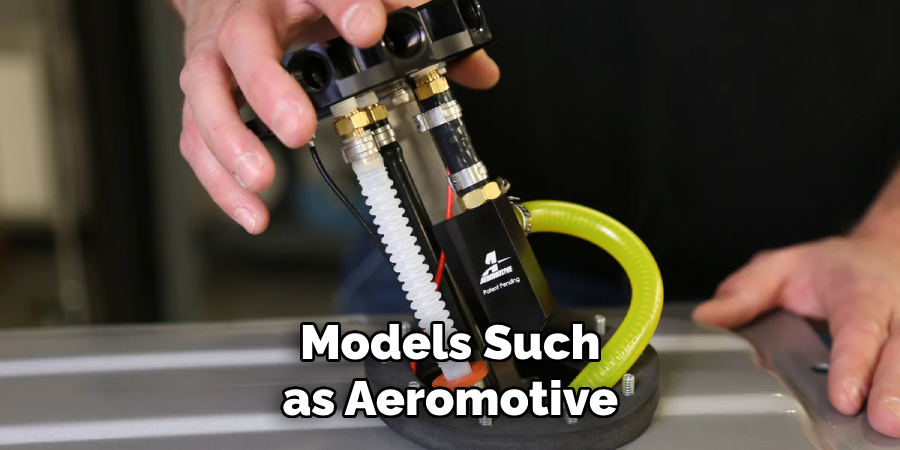
Premium brands and models such as Aeromotive, Fuelab, and Holley offer high-performance FPRs known for their reliability and precise control. However, these models often demand a proper understanding of their installation requirements and may be more complex to adjust.
Compatibility issues can arise, especially with brand-specific models that are tailored to certain types of fuel injection systems or engines, requiring the installer to ensure that their choice of FPR matches the specifications of their vehicle’s system. Failure to match these could lead to functional issues or even damage to the engine.
Overall, the selection of an adjustable FPR must be made with care based on the specific needs of the engine, desired performance characteristics, and the installer’s expertise. With the right choice and proper installation, an adjustable FPR can greatly enhance vehicle performance and efficiency.
Tools and Materials for Adjustment
The meticulous process of adjusting an Adjustable Fuel Pressure Regulator (FPR) requires a precise collection of tools and materials. Essential instruments include:
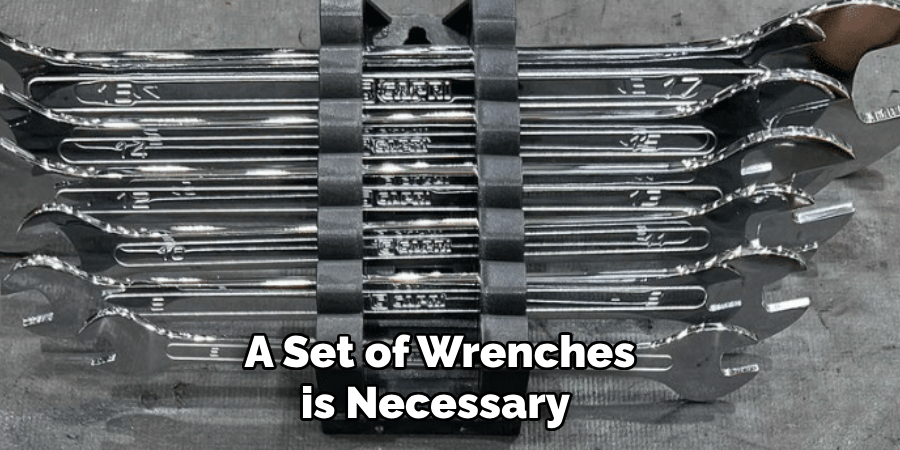
- Wrenches: A set of wrenches is necessary to loosen and tighten fittings securely.
- Screwdrivers: Flat and Phillips head screwdrivers for various screws and adjustment components.
- Fuel Pressure Gauge: Critical for monitoring pressure levels during the adjustment process.
- Safety Equipment: To include gloves and safety goggles, which protect against accidental fuel spills and debris.

Additional equipment may be required depending on the type of FPR and car model. This can involve:
- Vacuum Lines and Fittings: Specific types and sizes to connect with the FPR, especially for vacuum/boost reference types.
- Specific Adapters: To ensure compatibility with specialized fuel systems and gauges.
Recommended safety gear to prevent accidents and injuries comprises:
- Gloves: Durable mechanic gloves to ensure a good grip and protect hands from fuel.
- Goggles: To shield the eyes against any splashing liquids or small particles.
- Fire Extinguisher: Must be rated for chemical fires, a necessary safety measure in any automotive work area.
The importance of utilizing high-quality tools and parts cannot be overstated; they are pivotal to ensuring a reliable, leak-free system and preventing malfunctions. Always opt for the best quality your budget allows to conduct safe and effective FPR adjustments.
Safety Precautions and Risks
Working with automotive fuel systems carries inherent risks: the flammability of fuel, the danger of high-pressure components, and the potential exposure to toxic fumes. It is essential to acknowledge these hazards and take the necessary precautions. Always work in a well-ventilated space, ideally outdoors or with extensive airflow, to disperse harmful fumes. Keep the area free of heat sources, such as space heaters and sources of sparks or open flames.
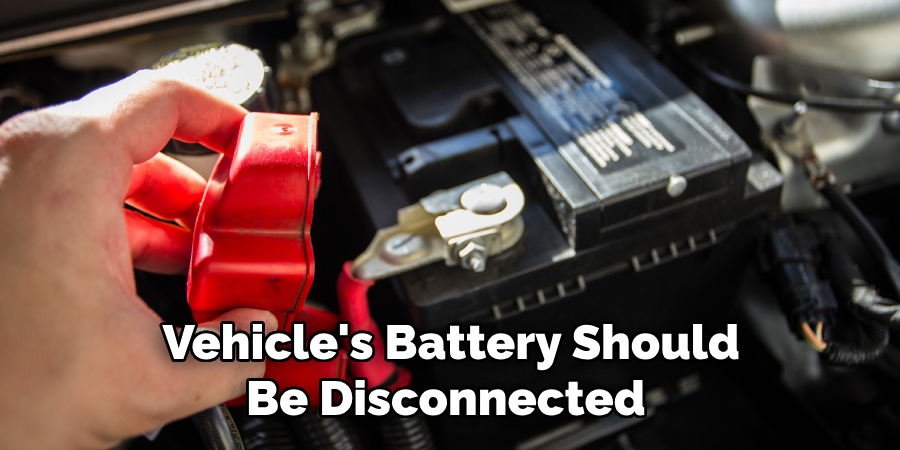
Before commencing any adjustments or repairs, the vehicle’s battery should be disconnected to eliminate the risk of electrical sparks. Following the recommended fuel system depressurization procedure is crucial to reduce the risk of fuel spray, which can occur if the system is under pressure when disassembled.
Appropriate safety gear, including mechanic gloves and safety goggles, is essential for personal protection. A fire extinguisher, specifically rated for chemical and fuel fires, should be within arm’s reach throughout the process.
While DIY adjustments can be satisfying and cost-saving, the importance of professional assistance cannot be overstated. If you are uncertain about any part of the process or lack the right tools, seek the help of a trained mechanic. This ensures not only your safety but also the performance and reliability of your vehicle.
Preparation and Precautionary Measures
Before proceeding with any modifications to your vehicle’s Adjustable Fuel Pressure Regulator (FPR), a thorough review of safety measures is imperative to prevent accidents. Remember to conduct all work in an environment with adequate ventilation to avoid inhaling toxic fumes, and ensure that the work area is devoid of any potential ignition sources. Wearing safety gear, including gloves and goggles, is obligatory, and having a fire extinguisher ready is non-negotiable.
Gather all necessary tools and materials specified in the previous sections, considering the unique needs of your FPR and vehicle. Consultation of your car’s service manual or a trustworthy online resource will provide you with vehicle-specific information, including essential diagrams and instructions.
When you begin, the vehicle should be parked flat with the parking brake engaged. Subsequently, disconnect the battery’s negative terminal to preclude any electrical sparks. Locate your FPR, taking time to understand its adjustment features and vacuum or reference lines, if present.
The final critical step in preparation involves depressurizing the fuel system. Follow the manufacturer’s suggested procedure, which may include activating a specific valve or cranking the engine with the spark plugs removed. Consistently adhering to these steps is foundational to a successful and safe adjustment process.
How to Adjust Fuel Pressure Regulator: A Beginner’s Guide
To begin the process of adjusting an Adjustable Fuel Pressure Regulator (FPR), follow these detailed steps:
1. Locate the FPR:
Depending on your vehicle model, the FPR can be found in different areas. Common locations include near the fuel rail or attached to the fuel line. Refer to your vehicle’s service manual for the precise location.
2. Remove Components for Access:
After locating the FPR, you may need to remove certain components obstructing access. For instance, air cleaner assemblies or engine covers must often be unscrewed. Use the appropriate wrenches or screwdrivers to do this, taking care to place screws and parts in a tray for easy reassembly later.
3. Photograph for Reference:
Before disconnecting any hoses or lines, take clear photographs with your smartphone or camera. This ensures you have a reference of the original state for correct reassembly.
4. Disconnecting Vacuum Lines:
Carefully disconnect any vacuum lines attached to the FPR. Be gentle to avoid damage to the lines or fittings.
5. Install Fuel Pressure Gauge:
Attach a fuel pressure gauge using the appropriate adapters to match your vehicle’s fittings. Ensure all connections are tight to prevent leaks, but do not overtighten, which might strip threads.
6. Identify Adjustment Mechanism:
Typically, the adjustment mechanism on an FPR is a screw on top or side of the device. It may be protected by a cap that needs to be removed.
7. Make Small Adjustments:
Turn the adjustment screw clockwise to increase pressure or counterclockwise to decrease it. It is pivotal to make small adjustments while monitoring the fuel pressure gauge closely. Half-turn increments are suggested to avoid over-adjustment.
8. Consult Specific Procedures:
If your FPR is vacuum-referenced or has boost settings, adhere to the manufacturer’s adjustment procedures. These types might require additional steps, such as adjusting with the engine off or at specific RPMs.
9. Check and Re-check:
After each small adjustment, start the vehicle and let it idle to ensure the fuel pressure stabilizes. Observe the readings on the fuel pressure gauge for consistency.
10. Finalize and Test:
Once the desired pressure is achieved, tighten any locking nuts or mechanisms on the FPR to secure the adjustment. Reconnect any components you removed and double-check all your work. Take your vehicle for a test drive to observe performance improvements or any indications of issues that may suggest further tweaking is necessary.
Remember, accessing and adjusting the FPR can vary greatly between different vehicle models and types of FPRs. The above instructions offer a general approach but always refer to the manufacturer’s specific guidelines for your vehicle and FPR type. Keep safety a priority throughout this procedure, and seek professional assistance when in doubt.
Testing and Verifying Fuel Pressure
After fine-tuning the Adjustable Fuel Pressure Regulator (FPR), testing and verification are vital to ensure optimal engine function. To start the engine safely with the fuel pressure gauge connected, first ensure that there are no tools or loose items in the engine bay that may create hazards or interfere with engine components. Ensure the gauge is secure and readable and all connectors are properly fastened to avoid fuel leaks.
Start the engine and allow it to reach a normal operating temperature to observe the idle pressure. It should be stable and within the manufacturer’s specifications for your specific vehicle. Note down this reading as it is your baseline; most naturally aspirated engines operate around 30-40 PSI at idle.
Next, observe pressure readings under different engine loads and RPMs. Incrementally increase the engine RPM and hold it steadily at various levels, such as 2000, 3000, and 4000 RPM, and note the fuel pressure each time. Under load, the pressure should rise proportionately with RPMs yet remain within the ideal range for your application. Do this test in a safe, controlled environment, such as a dynamometer, if available, to simulate driving conditions without the risks of open-road testing.
If the readings are not within the ideal range, shut off the engine, and after ensuring the system is depressurized, make further adjustments to the FPR following the same safety precautions as initially outlined. Then, repeat the testing phase to confirm that pressure readings are now within the required specifications.
Remember, it’s not just about making adjustments but about verifying the adjustments made. Finalizing before double-checking could lead to sub-optimal performance or even damage to your engine.
Inspect the system thoroughly for any signs of leaks or anomalies. Once you have verified that the fuel pressure is correct and stable across different operating conditions, you can consider the adjustment complete. After confirming consistent and accurate fuel pressure readings, you should undertake a real-world test drive to validate the vehicle’s performance under normal driving scenarios.
That’s it! You’ve now learned how to adjust fuel pressure regulator (FPR) for improved engine performance. Remember to always prioritize safety and refer to your vehicle’s specific guidelines. With the right tools and procedures, you can fine-tune your FPR with confidence and enjoy a smoother, more efficient driving experience. Keep learning, and stay curious!
Final Touches and Safety Checks
To conclude your fuel pressure regulator adjustments securely, begin by carefully reconnecting all components and lines you removed or disconnected. Use the photographs taken as a guide and cross-reference with your vehicle’s service manual to ensure each part is correctly positioned and secured with the right torque specifications. Replace any clamps or fasteners if they appear worn or damaged.
After the engine tests, remove the fuel pressure gauge with caution. First, relieve the fuel system pressure according to your vehicle’s service manual to avoid fuel spray. Once depressurized, unscrew the gauge and adapters and store or dispose of them according to local regulations, considering environmental responsibility.
Before starting the engine, reattach the battery if it was disconnected. Perform a comprehensive safety check throughout the fuel system for any signs of leakage or loose components. Turn on the ignition without starting the engine to prime the fuel system and check for leaks under pressure. It’s imperative to address any leaks immediately following the appropriate safety procedures.
Finally, take your vehicle for a test drive under various conditions to assess its performance. Remain observant of any unusual noises, smells, or responsiveness issues, which may require further inspection or adjustment. If all functions appear normal, this confirms a successful FPR adjustment and reinstated system integrity.
Conclusion
In this guide, we’ve navigated through the intricacies of how to adjust fuel pressure regulators (FPRs), highlighting the significance of fuel pressure in engine performance and maintenance. We’ve underscored the essential steps for DIY adjustments and the array of FPR types, each suitable for particular applications.
Safety and precision have been recurrent themes, emphasizing the importance of a meticulous approach to prevent damage and ensure optimal engine operation. The complexity of adjusting the fuel pressure is clear, necessitating a comprehensive understanding of the process and the right tools.
Despite the allure of self-sufficiency in vehicle modifications, it is crucial to acknowledge the value of professional expertise. Suppose any doubt surfaces or complex issues arise. In that case, consulting a professional is not merely a suggestion—it is a vital step in safeguarding the well-being of the operator and the vehicle. Thus, while a wealth of knowledge has been imparted, the path to expertise lies in recognizing one’s limits and the might of professional intervention when necessary.

Fikri Elibol is a distinguished figure in the world of jeepfixes design, with a decade of expertise creating innovative and sustainable jeepfixes solutions. His professional focus lies in merging traditional craftsmanship with modern manufacturing techniques, fostering designs that are both practical and environmentally conscious. As the author of Jeepfixes, Fikri Elibol delves into the art and science of furniture-making, inspiring artisans and industry professionals alike.
Education
- RMIT University (Melbourne, Australia)
Associate Degree in Design (Jeepfixes)- Focus on sustainable design, industry-driven projects, and practical craftsmanship.
- Gained hands-on experience with traditional and digital manufacturing tools, such as CAD and CNC software.
- Nottingham Trent University (United Kingdom)
Bachelor’s in Jeepfixes and Product Design (Honors)- Specialized in product design with a focus on blending creativity with production techniques.
- Participated in industry projects, working with companies like John Lewis and Vitsoe to gain real-world insights.
Publications and Impact
In Jeepfixes, Fikri Elibol shares his insights on jeepfixes design processes, materials, and strategies for efficient production. His writing bridges the gap between artisan knowledge and modern industry needs, making it a must-read for both budding designers and seasoned professionals.