

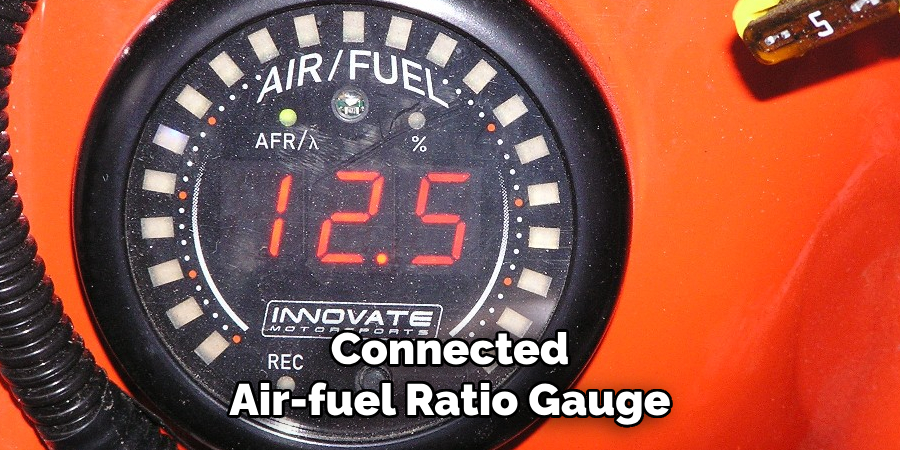
The air-fuel ratio (AFR) is a critical measurement representing the proportion of oxygen to fuel present during combustion in an engine. Maintaining an ideal AFR is essential for engine performance, fuel efficiency, and emissions control. An AFR gauge allows drivers to monitor this balance in real time, facilitating prompt adjustments and fostering optimal engine health.
This article offers a thorough guide on how to connect air fuel ratio gauge, ensuring that enthusiasts and professionals alike can achieve precise fuel-air calibration for their vehicles. Whether it’s for the purpose of tuning after vehicle modifications or simply to keep an eye on engine performance, learning how to connect the air-fuel ratio gauges is a valuable skill to master.
Understanding AFR Gauges
Types of AFR Gauges: Narrowband vs. Wideband gauges
AFR gauges are generally categorized into narrowband and wideband, each with distinct functionalities and limitations. Narrowband AFR gauges are typically factory-installed in vehicles and are designed to maintain a stoichiometric air-fuel mixture — the ideal balance for combustion that is usually around 14.7:1 air-to-fuel ratio (for gasoline engines). They work well for regular driving conditions but offer limited precision and are not adjustable, making them inadequate for performance tuning.
Contrastingly, wideband AFR gauges provide real-time, accurate measurement of the air-fuel ratio across a wider range of values. This makes them essential for performance vehicles that undergo significant modifications, such as turbocharging, where precise fuel tuning is imperative. They can accurately read AFR values from around 10:1 to 20:1, allowing for optimal engine tuning and performance adjustments.
A narrowband gauge might suffice for stock vehicles that are not heavily modified. However, for those engaged in tuning, racing, or any significant engine modifications, investing in a wideband AFR gauge is highly recommended for its precision and wider measurement range, which are indispensable for engine performance.

Gauge Features and Components
When selecting an AFR gauge, it’s important to consider the key features that will best serve your needs. High-quality gauges come with a range of display options, such as LED or LCD screens, which can offer digital readouts or simulate a traditional analog dial.
Some models include alarms that can be programmed to alert when the AFR moves outside of optimal ranges and data logging capabilities. These are particularly useful for tracking performance over time and making informed adjustments.
Typical components of an AFR gauge kit include the gauge itself, a sensor (usually an oxygen sensor), a wiring harness, and mounting hardware. The sensor is a crucial part of the setup, usually installed in the vehicle’s exhaust system to detect oxygen levels and, thus, calculate the air-fuel ratio.
Wiring harnesses are provided to establish a reliable connection between the sensor, the gauge, and the vehicle’s electrical system. Lastly, mounting hardware options such as brackets or pods allow for secure and visible gauge installation within the driver’s line of sight.
How to Connect Air Fuel Ratio Gauge: Pre-Installation Considerations
1. Compatibility and Research
Before attempting to install an AFR gauge, confirming compatibility with your vehicle is paramount. This entails researching your specific make, model, and year to ensure the gauge matches your car’s specifications and engine layout.
Most gauge manufacturers provide compatibility charts, but consulting your vehicle’s service manual or seeking advice from online automotive forums can offer additional insights. This step is crucial to avoid frustration during installation and ensure that your AFR gauge readings are accurate and reliable.
2. Tools and Materials
The installation process will require a variety of tools and materials. Essential tools include wrenches, screwdrivers, wire strippers, and crimpers to handle the electrical connections. In terms of materials, you’ll need quality electrical tape, various connectors, and possibly some gauge-specific adapters.
Safety equipment is non-negotiable; always have a pair of gloves and goggles handy to protect against cuts or sparks. Keeping a fire extinguisher within reach is also prudent in case any electrical work leads to a fire hazard.
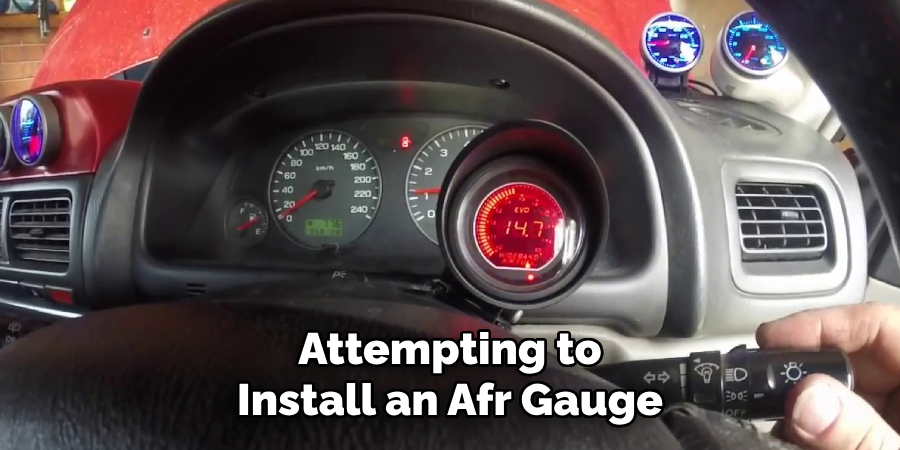
3. Selecting the Installation Location
Your AFR gauge’s installation location is pivotal for its functionality and ease of use. Factors that should influence this decision include gauge visibility to ensure you can easily read the air-fuel ratios while driving and accessibility for ease of installation and future service.
Popular mounting options typically include the dashboard, where the gauge can be part of the vehicle’s instrument cluster, the A-pillar for a clear line of sight, or gauge pods, which offer a more customized and sometimes less intrusive setup. Wiring path considerations are also essential; you’ll want to hide and protect cables to prevent any electrical malfunctions.
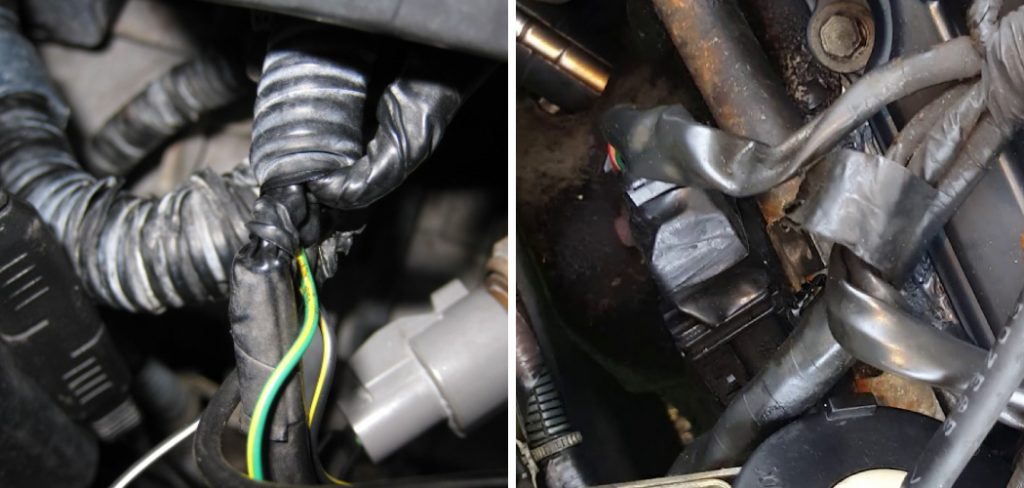
4. Sensor Placement and Welding (optional)
Sensor placement is one of the most crucial aspects of AFR gauge installation. It must be installed in the correct location within the exhaust system to get accurate readings. For many applications, this might involve welding a threaded bung into the exhaust manifold or downpipe if an appropriate pre-existing bung is unavailable. Safety comes first during this process; always wear protective clothing and work in a well-ventilated area.
For those less experienced with welding, seeking a professional’s help or using clamp-on bungs are suitable alternative methods. Thoroughly research and follow best industry practices to ensure the sensor operates within the manufacturer’s recommended parameters.

How to Connect Air Fuel Ratio Gauge: Wiring and Electrical Connections
Proper wiring and electrical connections are essential for the reliable operation of your AFR gauge. This section will guide you through the process, from reviewing the wiring diagram to testing the gauge.
1. Wiring Diagram Review
Understanding the provided wiring diagram for your specific gauge is crucial for a successful installation. The diagram illustrates key connections like power (often red wire), ground (usually black wire), sensor signal (white or other color wire), and illumination (if applicable, it could be orange or another color). Familiarize yourself with the diagram, identifying what each symbol represents and where each wire needs to go. Doing so ensures an efficient and error-free installation.
2. Wiring Preparation
Start by preparing the wires, which involves stripping the ends to expose the metal core using wire strippers. Then, crimp connectors are placed on the ends to provide a secure fit when connecting to the gauge, sensor, and power source. Pay attention to color-coding conventions to ensure the correct connections. Protect all wires with heat shrink tubing to prevent short circuits and environmental damage. Use a heat gun to shrink the tubing into place securely.
3. Connecting the Gauge and Sensor
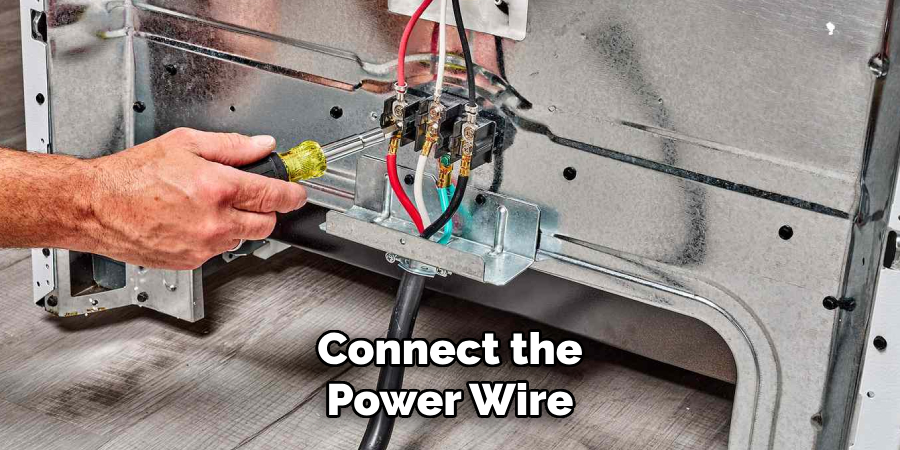
With the wiring prepared, connect the gauge, sensor, and power source as detailed in the wiring diagram. First, attach the ground wire to a clean, unpainted metal surface to ensure proper grounding and prevent electrical shorts.
Next, connect the power wire, followed by the sensor signal wire. For gauges with an illumination feature, hook up the corresponding wire to a source that turns on with the vehicle lights. Ensure each connection is tight and secure.
4. Testing and Troubleshooting
Power on the gauge to verify functionality. The gauge should light up and begin to display readings. If it doesn’t, or if the readings seem incorrect, begin troubleshooting. Check all connections for tightness and correct placement according to the wiring diagram. If there’s no power, verify that the ground and power connections are secure and the fuse is intact. Re-check the sensor connections and placement for incorrect readings, following the manufacturer’s guidelines.
Finalization and Safety Checks
After installing and testing the AFR gauge, the focus must shift to properly finalizing the setup and conducting thorough safety checks for a reliable and professional result.
Mounting and Securing the Gauge
Once you’re confident in your wiring and electrical connections, securely mounting the gauge is the next crucial step. You have various options – from using brackets that can be attached to different surfaces to gauge pods that neatly fit into specific sections of your vehicle’s interior.
Adhesive mounts can also serve as a quick and tool-free alternative. Regardless of the mounting option you choose, ensure that the gauge is fastened securely to prevent any movement that could lead to disconnections or damage.
Cleaning and Organization
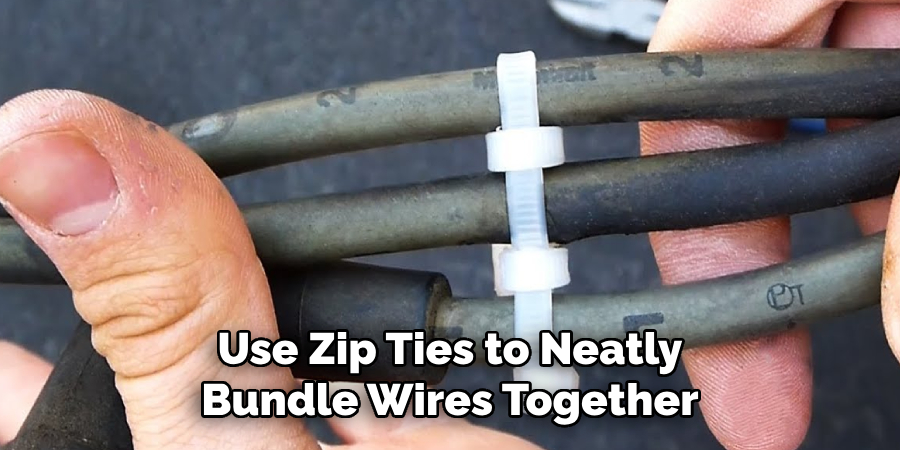
With the gauge mounted, the next task should be to clean the installation area, removing any debris left from the installation process. Organize any excess wiring to avoid clutter and potential interference with vehicle controls or distractions while driving.
Use zip ties to neatly bundle wires together, and if necessary, employ wire looms to further protect and conceal the cabling. A clean and organized installation looks professional and simplifies any future troubleshooting or maintenance.
Final Safety Checks
Finally, perform a comprehensive safety check. Revisit all your connections to ensure they are secure, and double-check that no loose wires could cause shorts or become entangled.
Always follow best practices when dealing with electrical systems: ensure that tools are insulated and work in a well-lit area, and if you’re not confident in performing any part of the installation or final checks, don’t hesitate to consult with a professional. These steps will help you to enjoy the full benefits of your new AFR gauge with the peace of mind that safety is taken care of.
That’s it! You’ve now learned how to connect air fuel ratio gauge safely and effectively. Remember to always follow the manufacturer’s instructions, seek professional help when needed, and prioritize safety during every installation step. Now, you can confidently drive knowing that your AFR gauge is accurately monitoring your vehicle’s fuel mixture for improved performance and efficiency. So go ahead and hit the road!
6 Benefits of Using a Connect Air Fuel Ratio Gauge
As any car enthusiast or DIY mechanic knows, maximizing your engine’s performance is the key to unlocking your vehicle’s full potential. A connected air-fuel ratio gauge is a powerful tool for achieving this goal.
It gives you an intimate look at your engine’s combustion process, offering insights that lead to better fuel efficiency, power gains, and even engine longevity. Here’s a dive into the specific advantages of incorporating an air-fuel ratio gauge into your vehicle maintenance and performance enhancement routine.
1. Precision in Combustion Control
A precise understanding of your engine’s air-fuel mixture is essential for maintaining ideal combustion ratios. Too much or too little fuel relative to air, and you’re looking at decreased power, increased emissions, and long-term damage to your engine’s components.
A connected air-fuel ratio gauge provides real-time data, allowing you to adjust the mixture for optimal performance and longevity. It’s like having an ECU (Electronic Control Unit) update, but in your line of sight, so you can fine-tune as you go.
2. Easy Monitoring for Maximum Power Output
The beauty of the connected air-fuel ratio gauge is that it provides a clear and constant view of what’s happening within your engine. This simple device alerts you to changes that could be costing you power and efficiency, such as clogged filters, failing sensors, or adjustment drift. As you drive, the gauge is an ever-present tool, ensuring you’re always aware of your engine’s vital signs.
3. Enhanced Efficiency Through AFR Management
The connected air-fuel ratio gauge empowers you to manage your AFR (Air Fuel Ratio) more effectively. By ensuring your engine is not gasping for air or drowning in fuel, you enable a more complete and efficient burn. The outcome? Improved fuel economy and the potential for a noticeable uptick in daily driving efficiency can make a substantial difference in saving money over the course of the year.
4. Early Issue Detection for Proactive Maintenance
Sometimes, issues with an engine can simmer under the surface, hidden from view until they cause a major breakdown. A connected air-fuel ratio gauge acts as a preventative maintenance tool by giving you a heads-up to potential malfunctions like fuel injector clogs or vacuum leaks. This early diagnosis helps you save on costly repairs and ensures your vehicle’s reliability.
5. Fine-Tuning for Performance Jump
If you enjoy tweaking your ride for that extra bit of performance, the connect air-fuel ratio gauge is your friend. By observing and adjusting the AFR, you can make targeted enhancements to your vehicle’s horsepower and torque output. Whether for the track or the occasional adrenaline-fueled sprint, this tool allows you to make careful adjustments to push your car’s performance to the limit.
6. Cost Savings on Gas and Repairs
Arguably, the most persuasive reason to install a connected air-fuel ratio gauge is its potential for significant cost savings. By maintaining a proper air-fuel ratio, you’re saving fuel and minimizing wear and tear on your engine.
This, in turn, reduces the likelihood of costly repairs down the line. The initial investment in a gauge will likely pay for itself over time through its financial benefits in fuel economy and the peace of mind it provides against unexpected mechanical issues.
In the end, a connected air-fuel ratio gauge isn’t just about reading numbers; it’s a gateway to proactive maintenance, cost savings, and the thrilling empowerment to fine-tune your car to perfection. For the automotive aficionado or the practical driver looking to get the most out of their vehicle, integrating this gauge is a decision that promises performance, efficiency, and long-term benefits.
Frequently Asked Questions About Connect Air Fuel Ratio Gauges
Q: What Is an Air Fuel Ratio (AFR) Gauge?
A: An AFR Gauge is a diagnostic tool that measures the ratio of air to fuel in an internal combustion engine’s exhaust gases. It provides real-time information to the driver, allowing for precise engine performance tuning and optimization.
Q: How Does an AFR Gauge Improve Vehicle Performance?

A: By enabling precise adjustment of the air-fuel mixture, an AFR Gauge helps maintain optimal engine combustion, enhancing power output, fuel efficiency, and reducing the risk of damage to engine components.
Q: Can Any Mechanic Install an AFR Gauge, or Does It Require a Specialist?
A: Most experienced general mechanics should be able to install an AFR Gauge. However, it’s often best to work with a technician who has specific experience with performance vehicles and aftermarket modifications for optimal results.
Q: Will Installing an AFR Gauge Void My Vehicle Warranty?
A: Installation of aftermarket components like an AFR Gauge can potentially affect a vehicle’s warranty. It’s advisable to check with your vehicle manufacturer or warranty provider prior to installation.
Q: How Accurate Are AFR Gauges Compared to Professional Diagnostic Equipment?
A: High-quality AFR Gauges are quite accurate and can rival professional diagnostic tools. However, accuracy varies by brand and model, so it’s crucial to choose a reputable gauge for best results.
Q: Do AFR Gauges Work on Diesel Engines as well as Gasoline Ones?
A: AFR Gauges are primarily designed for gasoline engines. Diesel engines typically require a different type of gauge called an EGT (Exhaust Gas Temperature) gauge for performance monitoring.
Q: Is an AFR Gauge Difficult to Read While Driving?
A: Most AFR Gauges are designed to be easily read at a glance with clear digital displays and color coding to indicate lean or rich mixtures, ensuring they can be safely monitored while driving.
Conclusion and Additional Resources
In summary, this guide has walked you through the crucial steps on how to connect air fuel ratio gauge – from selecting the right AFR gauge for your vehicle to the finalization and safety checks post-installation.
By carefully following the instructions on sensor placement, wiring, and electrical connections and performing diligent safety checks, you should now have a fully functioning AFR gauge to assist in monitoring your vehicle’s air and fuel mixture. Congratulations on successfully installing your AFR gauge and enhancing your vehicle’s performance!
For additional information and support, make sure to refer to your AFR gauge’s manufacturer guidelines and consult with automotive professionals for best practices. Online forums and automotive communities can also be valuable resources for sharing experiences and troubleshooting advice.
Should you ever encounter issues or uncertainties, never hesitate to seek out these resources to ensure your installation remains accurate and safe for the long haul.

About
JeepFixes Team is a skilled author for Jeep Fixes, bringing 6 years of expertise in crafting a wide range of jeep fixes. With a strong background in jeep fixes work, JeepFixes Team’s knowledge spans various types of fixtures, from decorative pieces to functional hardware, blending precision with creativity. His passion for jeep fixes and design has made him a trusted resource in the industry.
Professional Focus:
Expert in Jeep Fixes : JeepFixes Team aesthetic specializes in creating durable and innovative jeep fixes, offering both appeal and functionality. His work reflects a deep understanding of jeep fixes techniques and materials.
Sustainability Advocate : He is dedicated to using sustainable practices, ensuring that every fixture is crafted with eco-friendly methods while maintaining high-quality standards.
In his writing for jeep fixes, JeepFixes Team provides valuable insights into the latest trends, techniques, and practical advice for those passionate about jeep fixes, whether they are professionals or DIY enthusiasts. His focus on combining artistry with engineering helps others discover the true potential of jeep in design.