
A flywheel plays a critical role in the smooth operation of an engine by maintaining consistent angular momentum and facilitating the starting process. However, over time and with extensive use, the teeth of a flywheel can become worn or damaged, which can lead to starting difficulties.
Understanding how to repair the teeth on a flywheel is essential for ensuring the longevity and performance of your vehicle or machinery. In this section, we’ll guide you on how to repair flywheel teeth through the symptoms of a damaged flywheel, the tools you’ll need for repair, and a step-by-step process for restoring the flywheel teeth to optimal condition.
What is a Flywheel?
Before we dive into the repair process, let’s first understand what a flywheel is and its importance in an engine. A flywheel is a mechanical device that stores rotational energy and maintains a consistent momentum for smooth operation.
It is typically located at the back of the engine and is connected to the crankshaft. In addition to providing stability and balance, it also helps to smooth out the power delivery from the engine, making it more efficient.
Why are Flywheel Teeth Important?
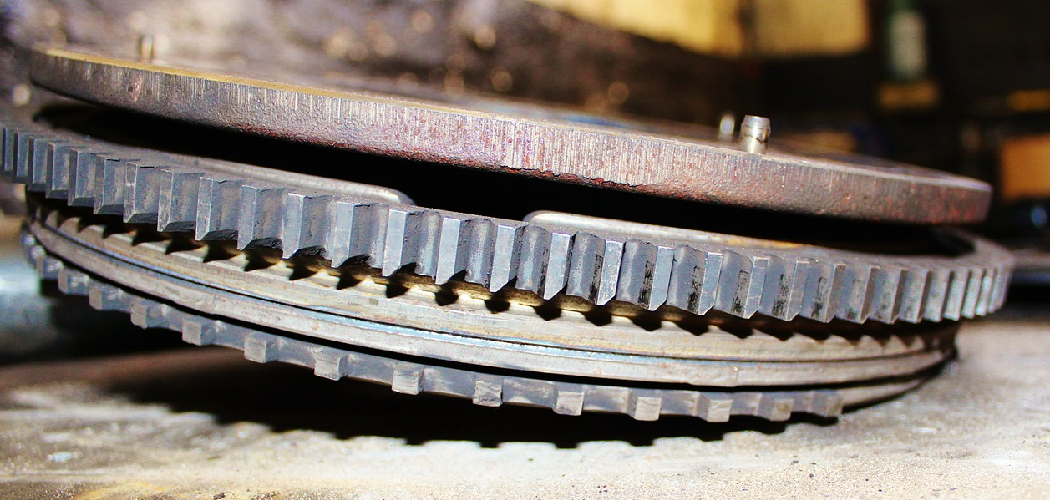
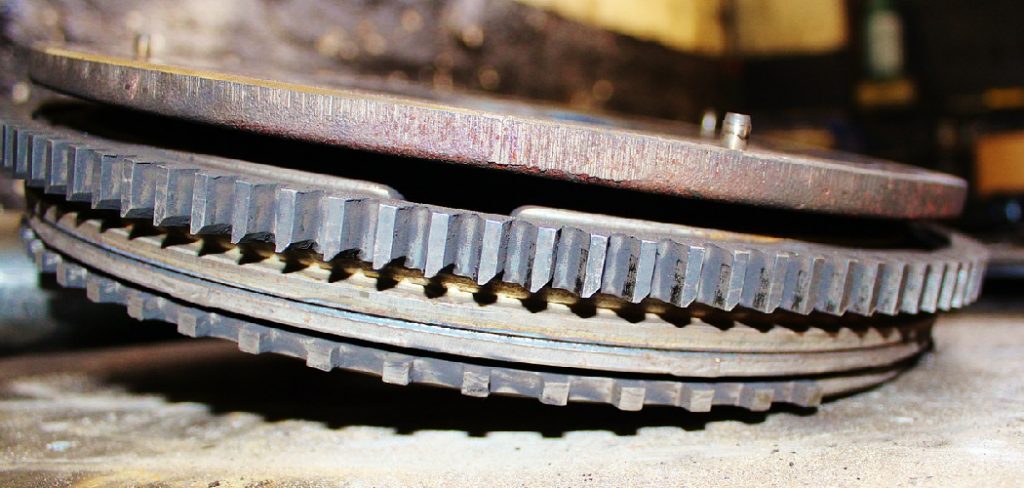
The teeth on a flywheel play a crucial role in the starting process of an engine. When the starter motor engages with the flywheel, it uses these teeth to turn the crankshaft and initiate the combustion process. Without properly functioning teeth, the engine may struggle to start or not start at all.
Symptoms of Damaged Flywheel Teeth
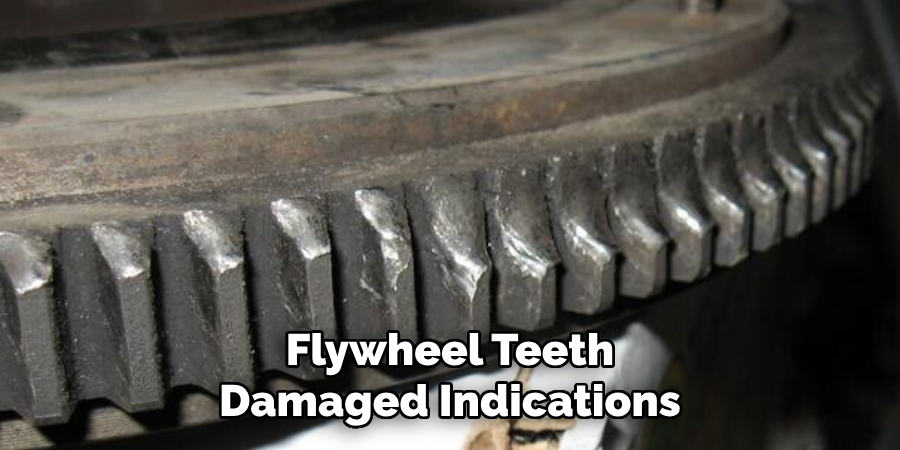
There are a few indications that your flywheel teeth may be damaged or worn out. The most common symptom is difficulty starting the engine, which typically presents as a grinding or clicking noise when attempting to start the vehicle. Other signs include rough idling and vibration while driving, unusual noises coming from the transmission, and even stalling.
Tools You’ll Need for Repair
Before beginning the repair process, it’s important to gather all the necessary tools and equipment. These include a flywheel puller, pry bar or crowbar, socket set, torque wrench, and replacement flywheel teeth.
It’s also recommended to have a repair manual specific to your vehicle or machinery for reference. It’s crucial to follow the manufacturer’s recommendations and specifications for your particular model.
10 Simple Step-by-step Repair Instructions on How to Repair Flywheel Teeth
Step 1: Preparation
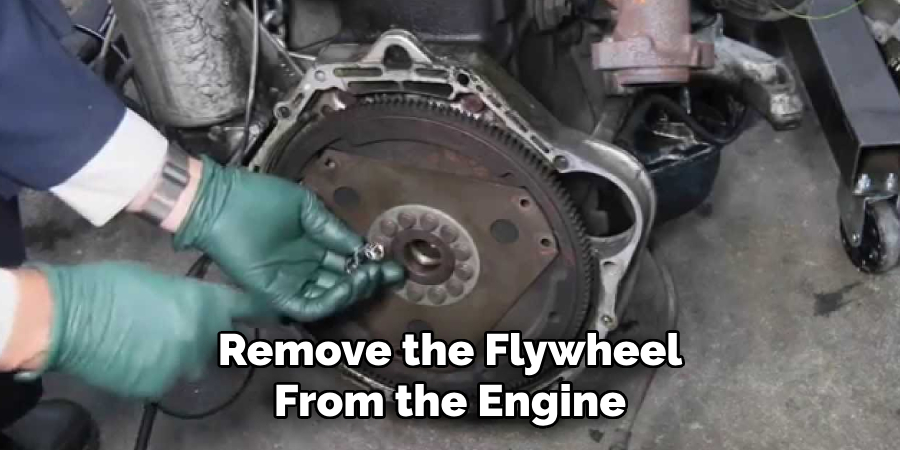
Before starting any repair work, make sure the vehicle or machinery is on a flat, stable surface and the engine is cool. You may also want to disconnect the battery to prevent any electrical issues. The first step is to remove the flywheel from the engine. This can be done by following the instructions in your repair manual and using a flywheel puller tool.
It’s important to take note of the orientation of the flywheel and mark it with a permanent marker for reassembly. Why is this important? Each flywheel has a specific balance and must be reassembled in the same position to avoid vibration and potential damage to the engine.
Step 2: Inspect the Flywheel
Once you have removed the flywheel, inspect it for any visible damage. Use a flashlight to check for cracks, chips, or wear on the teeth. If there is significant damage, it may be necessary to replace the entire flywheel. If the damage is minor, you can move on to repairing the teeth.
The teeth should be symmetrical and evenly spaced, with no jagged edges or missing pieces. It’s also important to check the condition of the starter ring gear that engages with the flywheel teeth.
Step 3: Remove the Damaged Teeth
Using a pry bar or crowbar, carefully remove the damaged teeth from the flywheel. Be careful not to damage any of the surrounding teeth or the flywheel itself. It may help to heat up the area around the damaged tooth with a torch or heat gun to make removal easier.
But be careful not to overheat the flywheel, as this can cause warping. The teeth should come off relatively easily, but you may need to use some force.
Step 4: Clean the Area
Once all the damaged teeth have been removed, use a wire brush or sandpaper to clean the area around each tooth. This will remove any debris or rust that may prevent the new teeth from adhering properly.
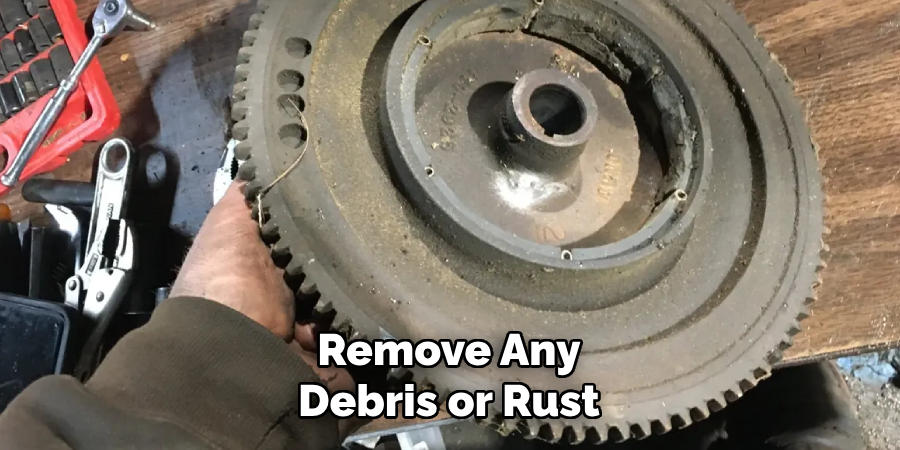
If there are any significant grooves or imperfections in the flywheel surface, it’s best to have it resurfaced by a professional. It’s essential to have a smooth and level surface for the teeth to be installed correctly. The starter ring gear should also be cleaned and inspected for any damage.
Step 5: Apply Adhesive
Next, apply an adhesive specifically designed for metal surfaces to the cleaned area. This will provide a strong bond between the new teeth and the flywheel. Follow the instructions on the adhesive for proper application and drying time.
But generally, an even layer should be applied to the flywheel surface where the new teeth will be installed. It’s also recommended to apply a small amount of adhesive to the base of each tooth before installing it.
Step 6: Install New Teeth
Carefully place the new teeth onto the adhesive in the correct orientation. Make sure they are evenly spaced and symmetrical with the existing teeth. Use a socket or hammer to gently tap them into place, ensuring a secure bond with the flywheel surface. Allow sufficient time for the adhesive to dry before moving on to the next step. If any excess adhesive seeps out, wipe it away with a cloth before it dries.
Step 7: Check Alignment
Once all the new teeth are installed, check for proper alignment. Use a straight edge or ruler to ensure that each tooth is at the same height and level as the surrounding teeth. This will help to prevent any issues with the starter motor engaging with the flywheel in the future. Why is this important?
Misaligned teeth can cause damage to the starter motor and flywheel, leading to costly repairs. It’s crucial to ensure proper alignment before reassembling the flywheel.
Step 8: Torque the Teeth
Using a torque wrench, tighten each tooth to the manufacturer’s specifications. This will ensure that they are secure and won’t loosen over time. It’s crucial not to over-torque the teeth, as this can cause them to crack or break. Refer to your repair manual for the exact torque setting for your particular model.
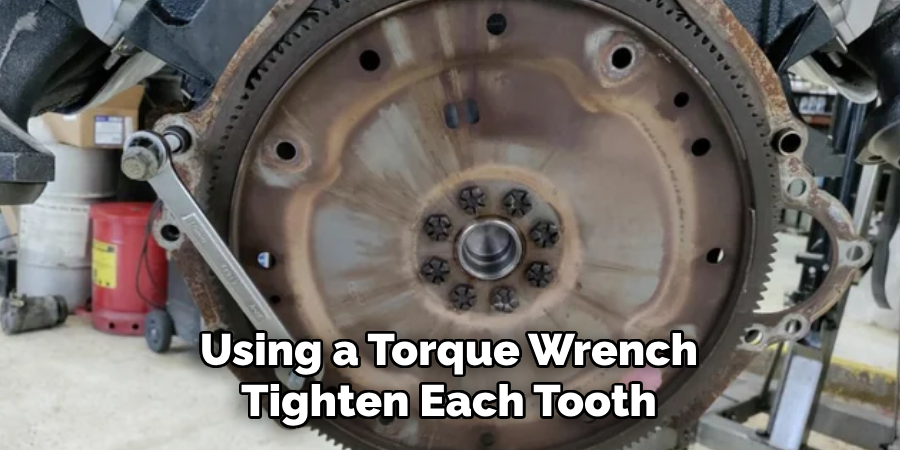
Why is this important? Proper torque will ensure that the teeth can withstand the force and pressure of the engine’s rotation without becoming damaged. You may also want to use a thread-locking compound for added security.
Step 9: Reinstall Flywheel
Once the new teeth are installed and secured, it’s time to reassemble the flywheel onto the engine. Remember to align it in the same position as marked before removal. Use a torque wrench to tighten the bolts to the manufacturer’s specifications. It’s also recommended to apply a small amount of thread locker to the bolts for added security.
The flywheel should now be ready for use. Reconnect the battery and start the engine to test the repairs. But if the flywheel still doesn’t engage properly with the starter motor, it may be necessary to replace the entire flywheel.
Step 10: Regular Maintenance
To prevent future damage to the flywheel teeth, it’s essential to perform regular maintenance on your vehicle or machinery. This includes checking for any signs of wear and tear on the teeth and cleaning them regularly. It’s also recommended to have a professional inspect and resurface the flywheel every few years to ensure it’s in good condition.
Regular maintenance can help extend the life of your flywheel and prevent costly repairs in the future. With these simple steps on how to repair flywheel teeth, you can repair flywheel teeth and keep your engine running smoothly for years to come. Remember to always follow safety precautions and consult a professional if you’re unsure about any step in the repair process. Happy repairing!
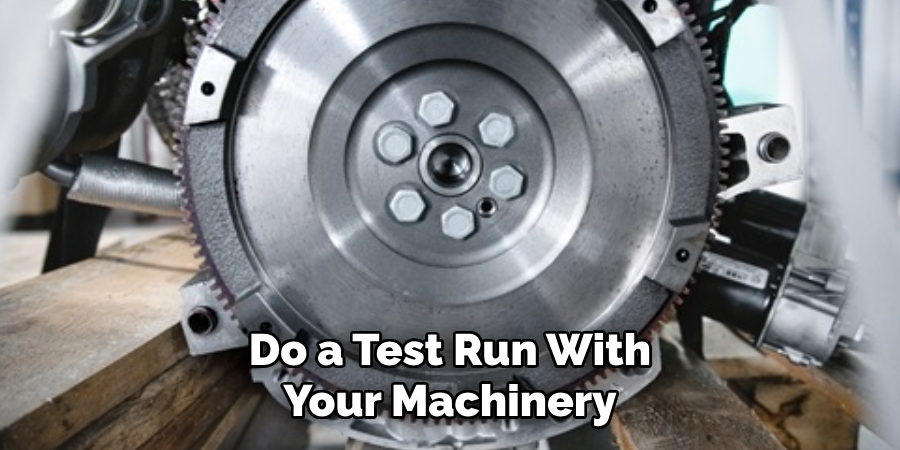
Testing and Quality Assurance
Before reassembly, it’s crucial to test and ensure the quality of your repair. Carefully inspect each tooth for proper alignment and torque. With the engine running, listen for any unusual noises or vibrations that could indicate an issue with the flywheel teeth. It’s also recommended to do a test run with your machinery or vehicle to check for any performance issues.
If you notice any problems during testing, it’s best to stop and consult a professional. It’s better to address any issues before they become more significant problems down the road. Regular maintenance checks can also help catch any potential issues early on and prevent costly repairs.
Common Flywheel Teeth Repair Challenges and Solutions
Some common challenges that may arise during flywheel teeth repair include difficulty removing the damaged teeth, trouble aligning and installing the new teeth, and issues with torquing. If you encounter any of these problems, here are some solutions to help you overcome them:
- For Difficult Removal of Damaged Teeth, Apply Heat to the Surrounding Area and Use a Pry Bar or Crowbar for Leverage.
- To Ensure Proper Alignment and Installation, Use a Straight Edge or Ruler to Check the Height and Level of the Teeth.
- If You’re Having Difficulty With Torqueing, Make Sure You’re Using a High-quality Torque Wrench and Following the Manufacturer’s Specifications.
- If You’re Unsure About Any Step in the Repair Process, Don’t Hesitate to Consult a Professional for Assistance. It’s Better to Be Safe Than Sorry When It Comes to Repairing Essential Components Like Flywheel Teeth.
By following these steps and being prepared for any challenges that may arise, you can successfully repair flywheel teeth and keep your engine running smoothly for years to come.
Do You Need to Take Support From a Professional?
While repairing flywheel teeth can be done at home, it may be a more complicated task for those without experience or the necessary tools. If you’re unsure about any step in the process or don’t feel comfortable doing it yourself, it’s always best to seek assistance from a professional mechanic.

They have the expertise and equipment needed to ensure that the repair is done correctly and safely. Additionally, if there are any underlying issues causing damage to the flywheel teeth, a professional can diagnose and address them before they become more severe problems.
So, when in doubt, it’s always better to seek professional support for safe and effective repairs. However, with proper precautions and care, repairing flywheel teeth can be a manageable task for those with some mechanical knowledge and experience. So, if you’re up for the challenge, follow these steps and get your engine running smoothly again in no time!
How Much Could It Cost?
The cost of repairing flywheel teeth can vary depending on the severity of the damage and the type of vehicle or equipment. DIY repairs can save you money in labor costs, but professional assistance may be needed for more complicated tasks or if specialized tools are required.
Additionally, the cost of replacement teeth and adhesive should also be factored into the overall expense. It’s always recommended to consult with a professional for an accurate estimate of the cost before beginning any repair. Regular maintenance and addressing issues early on can also help prevent more expensive repairs in the future.
Overall, the cost of repairing flywheel teeth is significantly lower than having to replace the entire flywheel or starter motor, making it a worthwhile investment in maintaining your vehicle or machinery. So, don’t delay repairing those damaged flywheel teeth and save yourself from potentially costly repairs down the line.
Additional Resources and References
For more information on repairing flywheel teeth and other essential maintenance tasks, here are some helpful resources to check out:
- “How to Repair a Flywheel” by Popular Mechanics Magazine
- “Signs Your Clutch Needs Replacement or Adjustment” by Bridgestone Tires
- “Flywheel Resurfacing Explained” by Advance Auto Parts
You can also consult your vehicle or machinery’s owner’s manual for specific instructions and guidance on maintenance and repairs. Don’t forget to always prioritize safety and seek professional assistance when needed. Happy repairing!
Frequently Asked Questions
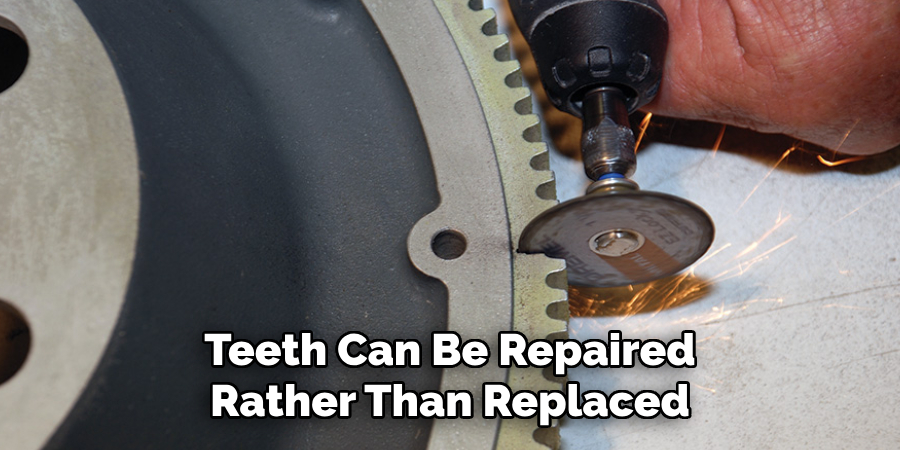
Q: Can Flywheel Teeth Be Repaired or Do They Need to Be Replaced?
A: In most cases, flywheel teeth can be repaired rather than replaced. However, if the damage is severe or extends beyond a few teeth, replacement may be necessary. You should consult a professional for an accurate assessment of the damage and recommended course of action.
Q: How Often Should Flywheel Teeth Be Inspected and Repaired?
A: It’s recommended to inspect flywheel teeth during routine maintenance checks or if you notice any unusual noises or vibrations while operating your machinery or vehicle. It’s also best to address any damage as soon as possible to prevent further issues down the line.
Q: Can I Repair Flywheel Teeth Myself?
A: With the right tools and some mechanical knowledge and experience, flywheel teeth repair can be done at home. However, if you’re unsure about any step in the process or don’t have the necessary tools, it’s best to seek professional assistance for safe and effective repairs.
So, evaluate your skills and capabilities before attempting a DIY repair. Overall, regular maintenance checks and addressing any issues early on can help prevent costly repairs and keep your engine running smoothly for years to come!
Q: What Are Some Common Signs of Damaged Flywheel Teeth?
A: Some common signs of damaged flywheel teeth include difficulty starting the engine, grinding noises when starting or shifting gears, and vibrations while driving. If you notice any of these symptoms, it’s essential to have your flywheel teeth inspected and repaired as soon as possible to prevent further damage and potential breakdowns.
So, don’t ignore these signs and take prompt action for the safe and efficient operation of your vehicle or machinery. Remember, prevention is always better than cure!
Conclusion
In conclusion, timely attention to the condition of the flywheel teeth can prevent further damage to the starting system of your engine. Although repairing or replacing a flywheel is a technical task that might require professional intervention, understanding the process can aid in making informed decisions regarding vehicle maintenance.
If you suspect your flywheel is damaged, we recommend assessing the situation promptly and consulting with a skilled mechanic to determine the best course of action. Regular maintenance and awareness can go a long way in preserving the integrity and functionality of your vehicle’s flywheel system. Thanks for reading this article on how to repair flywheel teeth