
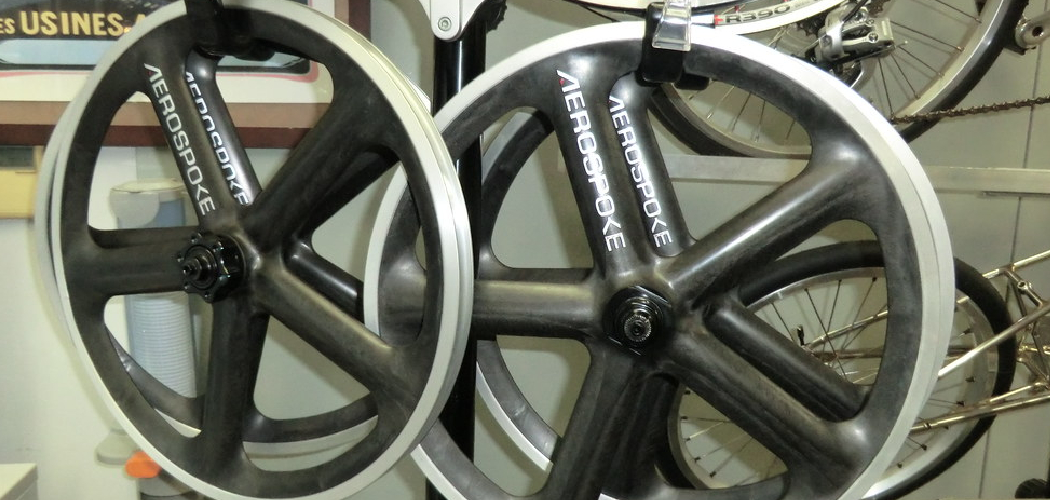
When it comes to customizing your vehicle’s wheels, one of the most important things to consider is backspacing. Backspacing refers to the distance between the mounting surface of a wheel and its inner lip. It plays a crucial role in determining how your car will sit on its suspension, as well as its overall handling characteristics.

You may want to measure the backspacing on your wheels for several reasons. For one, it can help you determine if a particular wheel will fit properly on your vehicle. Additionally, knowing the backspacing of your wheels is necessary for calculating proper tire and wheel combinations.
But how to measure back spacing on a wheel? In this guide, we’ll walk you through the steps to ensure you get accurate measurements every time.
Understanding Backspacing on a Wheel
Before we dive into the measurements, it’s important to have a basic understanding of backspacing on a wheel. As mentioned earlier, this refers to the distance from the mounting surface to the inner lip of the wheel.
It is usually measured in inches and can range from negative (meaning the inner lip is closer to the vehicle) to positive (meaning the inner lip is further away from the vehicle).
Regarding customizing your wheels, backspacing is crucial in determining how wide or narrow you can go with your tires and how they will sit on the suspension. Too little backspacing can cause the inner part of the tire to rub against suspension components, while too much backspacing can affect handling and stability.
Tools and Materials You Will Need to Measure Back Spacing on a Wheel
- Tape measure
- Straight edge ruler
- Marker or pen
- A piece of cardboard or stiff paper
- Jack and jack stands (optional)
Step-by-step Guidelines on How to Measure Back Spacing on a Wheel
Step 1: Prepare your Vehicle
To get accurate measurements, it’s important to have your vehicle on level ground. If you don’t have a garage or driveway that is flat and even, use a jack and jack stands to elevate the wheel you want to measure.
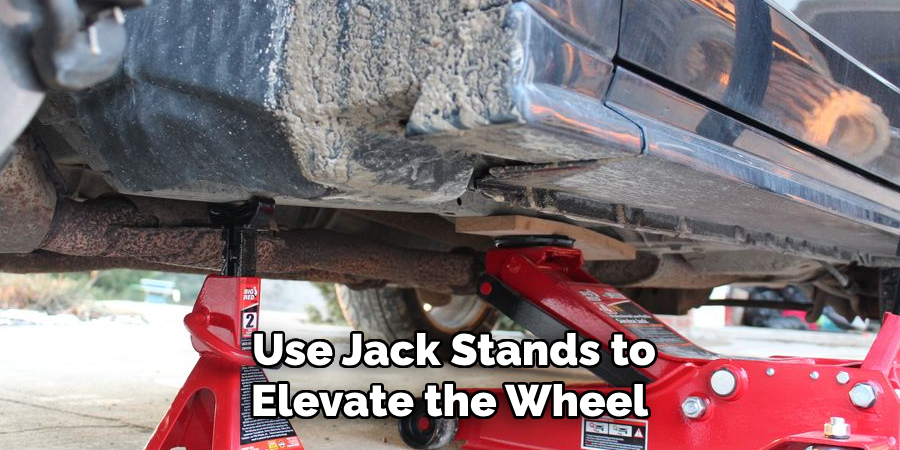
This will ensure that the wheel is at the same height as if it were on level ground. Preparing your vehicle also means making sure the tire is properly inflated and there are no obstructions around the wheel that may interfere with your measurements.
Step 2: Measure the Wheel Width
Using a tape measure, measure the width of your wheel from edge to edge. Make sure you measure across the mounting surface and not just the face of the wheel. Write down this measurement as it will come in handy later. While most aftermarket wheels will have the width stamped on the back of the wheel, it’s always a good idea to double-check. If you’re unsure, measure the width at multiple points to get an accurate average.
Step 3: Create a Center Point for Measurement
Using the straight-edge ruler, draw a line across the back of the wheel from one edge to another. This will create a center point for your measurements. Creating a center point is crucial, especially if your wheel has different backspacing on each side.
If you have a directional wheel, make sure the center point is perpendicular to the front of the wheel. This will ensure accurate measurements.
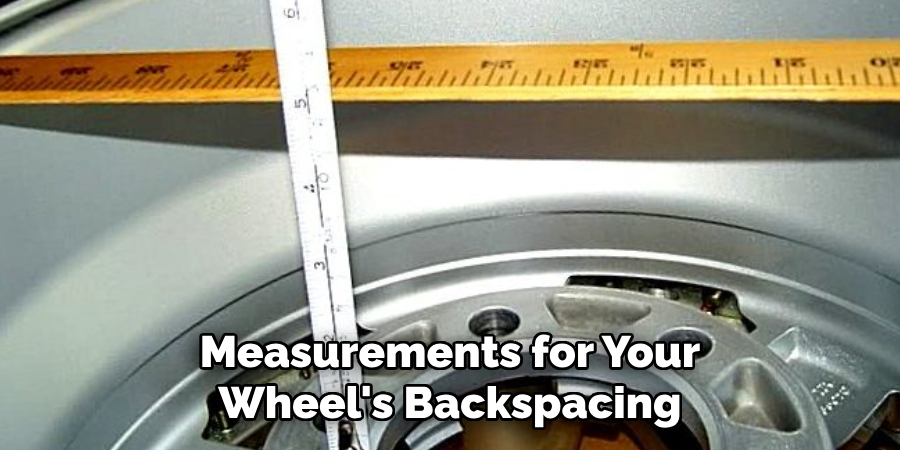
Step 4: Measure from the Mounting Surface to the Center Point
Using your tape measure, measure from the mounting surface (where the wheel bolts onto the hub) to the center point you created in step 3. Make sure you measure at multiple points to get an accurate average.
This measurement is your backspacing. This measurement can also be referred to as “backspace” or “mounting depth.” If you have a directional wheel, make sure to measure from the center point on both sides of the wheel, as they may differ.
Step 5: Calculate Backspacing
To calculate backspacing, subtract the wheel’s width (measured in step 2) from the backspacing measurement (obtained in step 4). The resulting number is your backspacing.
For example, if your wheel’s width is 8 inches and the backspacing measurement is 5 inches, then your backspacing would be 3 inches. Make sure to label this measurement as it will come in handy when choosing new tires and wheels.
Step 6: Repeat for All Wheels
If you are measuring backspacing for all four wheels, make sure to repeat the process for each one. It’s also a good idea to double-check your measurements to ensure accuracy. If you are measuring backspacing for different wheel sizes, make sure to label each measurement accordingly. Make sure to keep a record of your measurements for future reference.
Following these steps will ensure that you get accurate measurements for your wheel’s backspacing. Remember, backspacing is an important factor to consider when customizing your vehicle’s wheels, so take the time to measure it correctly and make any necessary adjustments before making any changes. Happy customizing!
Additional Tips and Tricks to Measure Back Spacing on a Wheel
1. If you are using a ruler, make sure to use the same unit of measurement on both sides. For example, if one side is measured in inches, the other should also be in inches. This will ensure accuracy in your measurement.
2. Use a marker to make small notches on the ruler or tape measure at specific intervals, such as every 1/4 inch or 1 cm. This will help you easily see and count the number of intervals when measuring backspacing.
3. Pay attention to any protruding features on the wheel, such as spokes or raised logos, when measuring backspacing. These may affect the measurement and should be taken into account.
4. Be cautious when measuring backspacing on aftermarket wheels, as they may have different offsets or dimensions than the original factory wheels. Make sure to check with the manufacturer for accurate specifications.
5. If you are unsure about measuring back spacing yourself, it is always best to consult a professional mechanic or wheel specialist who has experience in this area. If done incorrectly, inaccurate back spacing measurements can lead to improper fitting of wheels and potentially dangerous driving conditions.
6. When measuring backspacing on a wheel with tires mounted, make sure to factor in the width of the tire as well. This will affect the overall backspacing measurement and should not be ignored.
7. If you are measuring backspacing for multiple wheels, it may be helpful to create a chart or spreadsheet to track and compare the measurements. This will make it easier to determine any discrepancies between wheels.
8. Take your time when measuring backspacing, as accuracy is key. It may require multiple measurements and adjustments to ensure an accurate result.
9. Pay attention to the direction of rotation for directional wheels when measuring backspacing. This may affect the measurement and should be noted.
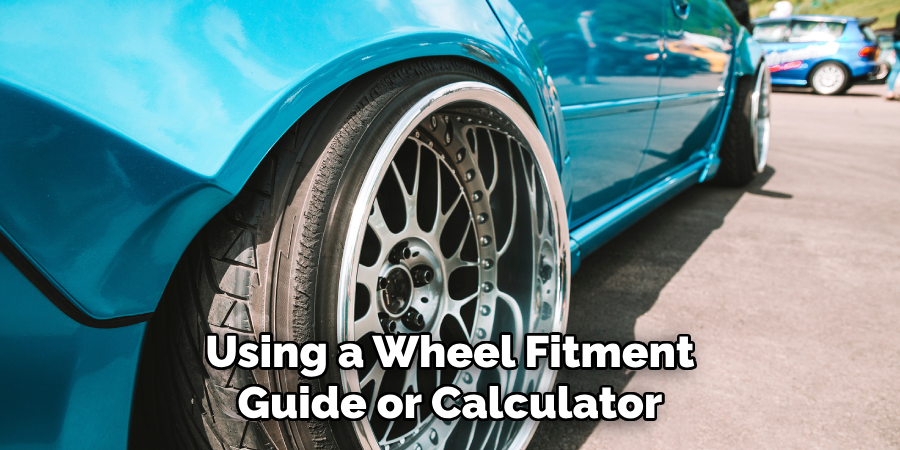
10. If using a wheel fitment guide or calculator, double-check the backspacing measurement with your measurements to ensure accuracy.
11. Remember that backspacing is just one factor to consider when fitting new wheels on your vehicle. Make sure to also take into account factors such as offset, bolt pattern, and tire size for proper fitting.
Following these additional tips and tricks will help ensure accurate measurements for backspacing on your wheels. It is important to take the time and effort to properly measure before making any changes or purchases, as it can greatly affect the performance and safety of your vehicle.
Don’t hesitate to seek professional help if needed, especially when dealing with aftermarket wheels. Happy measuring!
Things You Should Consider to Measure Back Spacing on a Wheel
1. The first thing to consider when measuring backspacing on a wheel is the definition of backspacing. Backspacing refers to the distance between the inboard edge of the wheel and the mounting surface where the hub meets the axle flange.
2. The second thing to keep in mind is that measuring backspacing requires removing the tire from the wheel. This means you will need a jack and proper tools to safely and accurately remove the tire.
3. Once the tire is removed, you can start measuring backspacing. First, place the wheel face down on a flat surface. This will ensure that your measurements are accurate and not affected by any curves or slopes.
4. Next, measure the overall width of the wheel from one end to the other. Make sure to take this measurement at the widest point of the wheel.
5. Once you have the overall width, measure the distance from the mounting surface to the back edge of the wheel. This will give you your backspacing measurement.
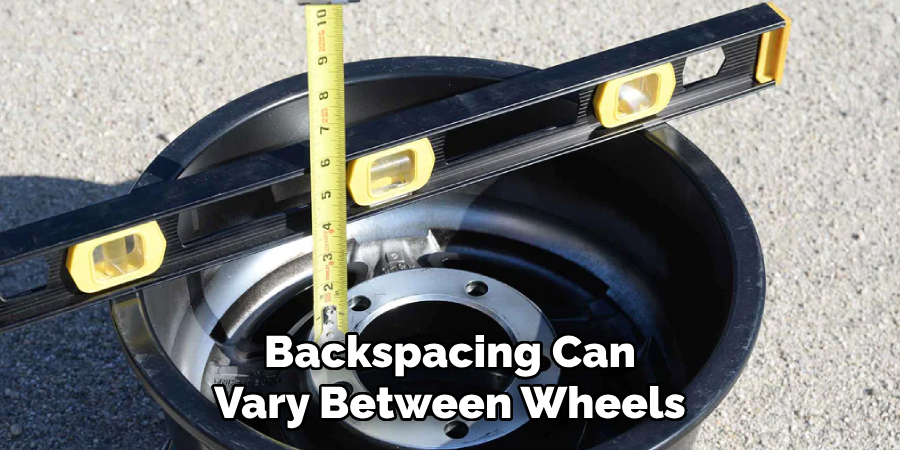
6. It is important to note that backspacing can vary between wheels even if they are the same size. This is due to different designs and offsets used by manufacturers.
7. When measuring backspacing, it is also important to consider the desired offset for your vehicle. Offset refers to the distance between the mounting surface and the centerline of the wheel. This can affect the handling and performance of your vehicle, so make sure to consult with an expert or do thorough research before making a decision.
8. Another factor to keep in mind is the tire size and width. Different tire sizes and widths can also affect the backspacing measurement, so make sure to consider this when measuring.
9. It is recommended to measure backspacing on all four wheels of your vehicle, as they may vary from each other. This will ensure proper fitment and prevent any issues with handling or performance.
10. Lastly, always double-check your measurements before purchasing new wheels. A small measurement error can result in a poor fit and potential safety hazards while driving.
Following these considerations when measuring backspacing on a wheel will help ensure proper fitment and optimal performance for your vehicle. It is always best to consult with an expert or refer to manufacturer specifications for accurate measurements. Remember, accuracy is key when it comes to any adjustments or modifications to your vehicle’s wheels. Happy measuring!
Common Mistakes to Avoid When Measuring Backspacing
1. Using an Incorrect Measuring Tool:
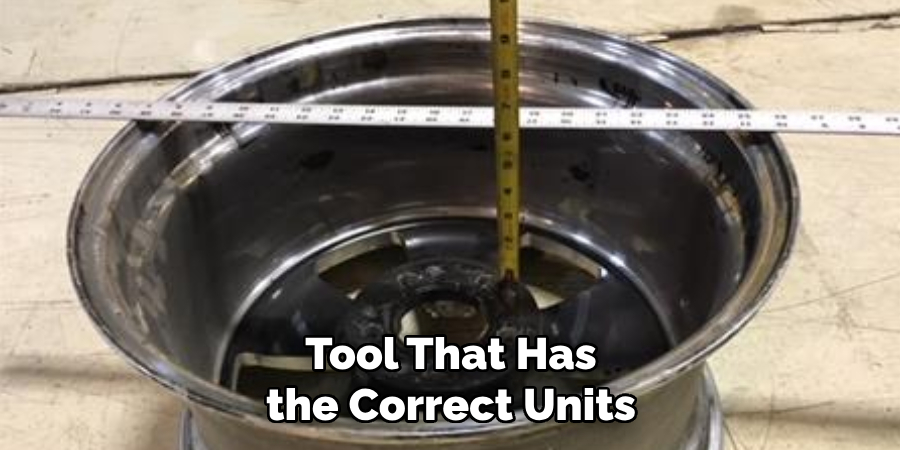
One of the most common mistakes is using an incorrect measuring tool when measuring backspacing. Backspacing is typically measured in inches, so using a ruler or tape measure with metric units can lead to inaccurate measurements. It is important to use a tool that has the correct units for the measurement being taken.
2. Not Measuring from the Correct Point:
When measuring backspacing, it is important to measure from the correct point on the wheel. This is typically the mounting surface, where the wheel attaches to the hub. Measuring from any other point on the wheel can result in an incorrect measurement.
If you are unsure of the correct point to measure from, consult a wheel specialist or refer to the manufacturer’s guidelines.
3. Failing to Account for Wheel Width:
Another mistake that is often made when measuring backspacing is failing to account for the width of the wheel. Backspacing measures the distance from the mounting surface to the inner edge of the rim, so if the wheel is wider than average, the backspacing measurement will be affected. Make sure to factor in the width of the wheel when taking measurements.
4. Not Considering Offset:
Offset is another important factor to consider when measuring backspacing. Offset refers to the distance from the centerline of the wheel to the mounting surface. If a wheel has a high offset, it will have less backspacing, and if it has a low offset, it will have more backspacing. Make sure to take offset into account when measuring backspacing to ensure accuracy.
5. Incorrectly Measuring Lug Patterns:
Backspacing is often measured in conjunction with the wheel’s lug pattern, which refers to the number of bolts or studs on the wheel. This is important because it determines whether the wheel will properly fit on the vehicle’s hub.
However, it is common for people to measure lug patterns incorrectly, resulting in an ill-fitting wheel. Make sure to accurately measure the number of bolts or studs when measuring backspacing.
By avoiding these common mistakes, you can ensure accurate and precise measurements when it comes to backspacing. Taking the time to carefully measure and account for all factors will ultimately result in a proper fit for your wheels and tires, leading to safer and smoother driving.

If you are unsure about any aspect of measuring backspacing, consult a professional or refer to manufacturer guidelines for assistance. Remember, accuracy is key in obtaining the best fit for your vehicle. So, take your time and double-check all measurements to avoid any potential mistakes. Happy measuring!
Frequently Asked Questions
Why Measuring Back Spacing is Important?
Measuring backspacing on a wheel is important for several reasons. First, it ensures proper fitment of the wheel onto your vehicle. With incorrect backspacing, the wheels may either protrude too far out or be too tucked in, causing clearance issues and affecting overall handling and performance.
Secondly, measuring back spacing helps determine the ideal offset for your vehicle. This can improve the appearance of your vehicle and also prevent excessive stress on the suspension components.
Lastly, measuring backspacing is necessary when upsizing or downsizing wheels to ensure compatibility with your specific vehicle’s make and model.
Can I Measure Back Spacing on My Own?
Yes, measuring backspacing is a simple process that can be done at home with the proper tools. All you need is a straight-edge ruler or tape measure, and a way to accurately mark the wheel. This can be done by placing tape on the wheel’s edge or using a washable marker.
What if I Don’t Have the Tools to Measure Back Spacing?
If you do not have the tools to accurately measure backspacing, it is recommended to have a professional measure for you. This will ensure accuracy and prevent any potential damage to your vehicle.
Can I Measure Back Spacing Without Removing the Wheel?
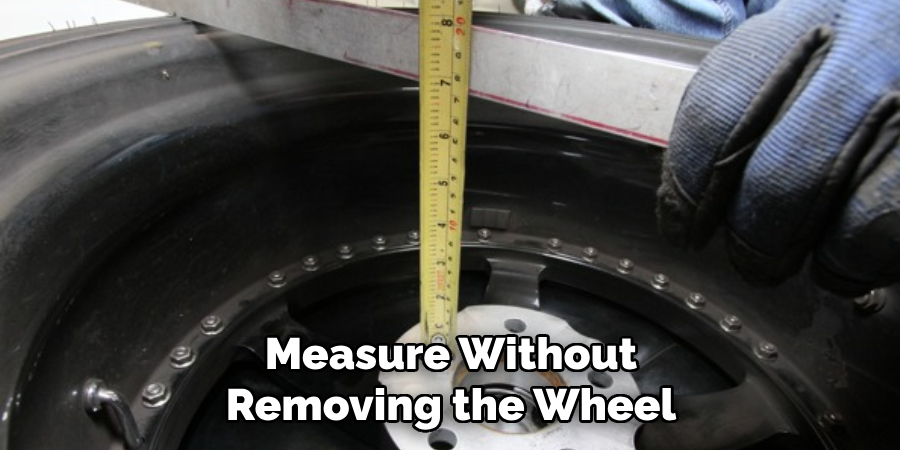
Yes, you can measure backspacing without removing the wheel. This is known as “stacking” and involves placing a piece of wood or other flat object behind the wheel to simulate the hub surface. The measurement is then taken from the face of the wheel to the edge of the wood.
How Do I Know What Back Spacing Measurement is Right for My Vehicle?
The backspacing measurement that is suitable for your vehicle depends on several factors, including the make and model of your vehicle, desired tire size, and overall appearance preference. It is recommended to consult with a professional or refer to your vehicle’s manual for the recommended backspacing measurement.
Conclusion
Now you know how to measure back spacing on a wheel and why it is important. By following these simple steps, you can ensure proper fitment and improve the overall appearance and performance of your vehicle. If you are unsure about measuring backspacing on your own, it is always best to seek professional help for accurate results.
Keep in mind that choosing the right backspacing measurement for your vehicle can greatly impact its handling, so be sure to do your research and consult with experts if needed. So, make sure to double-check your backspacing measurement before purchasing new wheels for your vehicle. Happy measuring!