

Blending paint on a car is an art that requires precision, patience, and the proper techniques. It’s a crucial step in auto body repair that helps to match new paint to the existing car color seamlessly, ensuring a factory-quality finish.
Whether you are dealing with scratches, dents, or rust spots, the blending process helps camouflage these imperfections without repainting the entire vehicle. In this guide, we’ll walk you through the essentials of how to blend in paint on a car, from preparing the surface to applying the base coat and clear coat.
We aim to empower you with the knowledge to achieve a smooth, undetectable repair that blends perfectly with your car’s original paint job.
What Is the Importance of Blending Paint on a Car?
Blending paint on a car is essential for a professional, flawless finish. It helps to seamlessly merge the new paint with the old, ensuring no visible lines or inconsistencies. This is especially important when repairing only a tiny section of the car, as any mismatch in color or texture can be easily noticed. Blending also helps to maintain the value of your car, as a poorly blended paint job can significantly decrease its resale value.
Moreover, blending eliminates the need for repainting the entire car, saving you time and money. It also allows for a quicker turnaround when repairing minor damages, making it a cost-effective option for professionals and DIY enthusiasts.
What Tools and Materials Do You Need?
Before blending paint on your car, ensure you have the necessary tools and materials. These include:
- Sandpaper of Various Grits (320, 600, 1000): To prep the surface and remove any imperfections.
- Masking Tape: To protect areas of the car that do not require painting.
- Tack Cloth: To remove dust and debris before painting.
- Primer: To promote adhesion and prevent rust.
- Base Coat Paint: To match your car’s original color (make sure to shake the can well before use).
- Clear Coat: To protect the paint and give it a glossy finish.
- Paint Sprayer or Touch-up Paint Pen: Depending on the size of the repair area.

Once you have gathered all the necessary tools and materials, you can proceed to the blending process.
10 Easy Steps on How to Blend in Paint on a Car
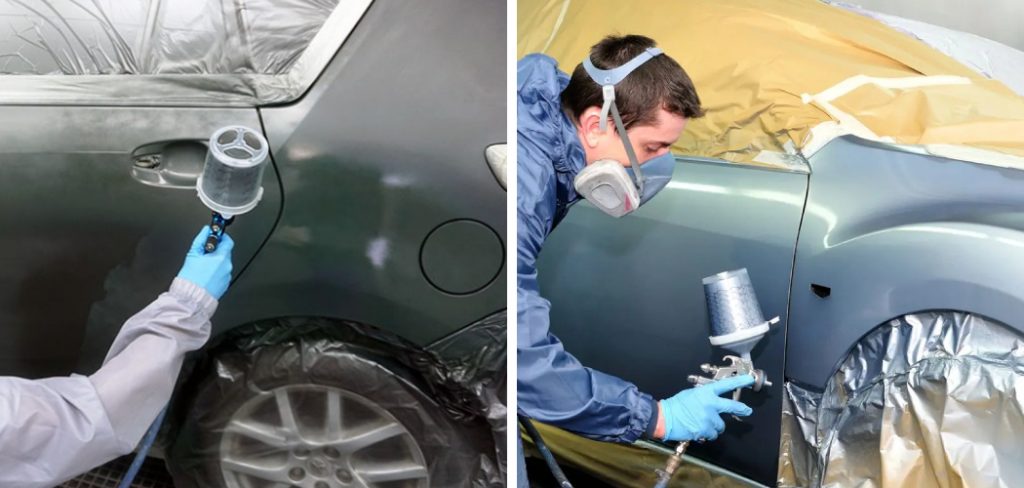
Step 1: Prepare the Surface
First, clean the surface using a mild soap and water to remove any dirt, grime, or wax. Then, use 320-grit sandpaper to sand down the damaged area until it is smooth gently. Next, use a finer grit (600 or 1000) to feather out the edges of the repair area. This will help create a seamless transition between the old and new paint.
Step 2: Tape Off the Area
Once the surface is prepared, use masking tape to outline the repair area. It is crucial to tape off a slightly larger area than the one you’re working on to avoid overspray and ensure the new paint blends smoothly into the old paint. Lay the tape carefully along the edges, ensuring it adheres well to avoid bleeding. This step is about precision; proper masking will contribute to a clean, sharp finish after the paint blends in.
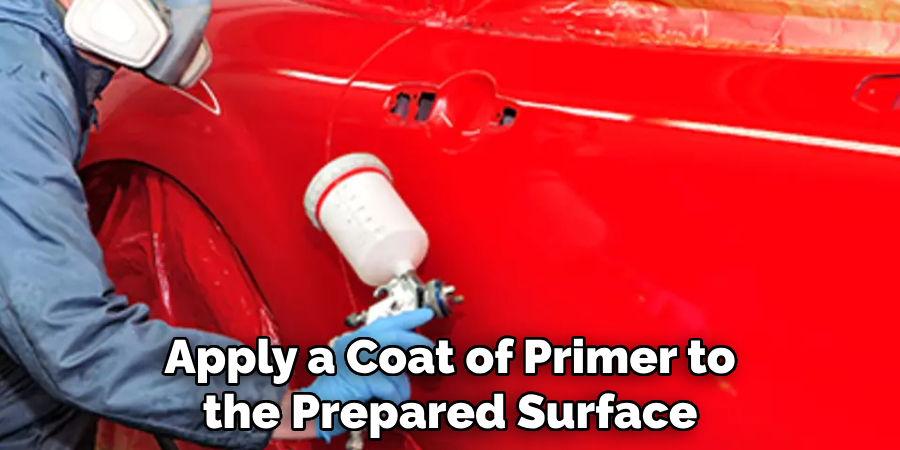
Step 3: Apply the Primer
Once the area is taped off, apply a coat of primer to the prepared surface. Be sure to cover the entire sanded area with an even layer, which will help the base coat paint adhere better and enhance the durability of the repair. Allow the primer to dry completely according to the manufacturer’s instructions before moving on to the base coat. Remember, patience during drying time is key to a professional-quality finish.
Step 4: Apply the Base Coat Paint
After the primer has fully dried, begin applying the base coat paint. Use a paint sprayer or touch-up paint pen, depending on the size of the area, and spray or apply the paint in thin, even layers. Start painting from the outside of the repair area and work your way inward to ensure smooth blending with the surrounding original paint. Keep the coats light to prevent runs and drips. Typically, several coats may be necessary for full coverage. Allow enough drying time between each coat, following the guidelines provided by the paint manufacturer.
Step 5: Check for Color Matching
Before proceeding with additional coats, it’s essential to check for color matching between the new base coat and the existing car paint. In natural daylight, examine the blended area for any noticeable differences. If the color does not match perfectly, you may need to apply additional layers or adjust the shade by blending different paint tones. Precise color matching is essential to make the repair undetectable, so take your time to achieve the right hue. Once satisfied with the color match, allow the paint to dry completely as per the manufacturer’s recommendations before moving on to the next step.
Step 6: Apply the Clear Coat
After ensuring that the base coat is completely dry and matches the existing paint, apply the clear coat. This protective layer provides a glossy finish and aids in the paint job’s longevity. Spray the clear coat in a smooth, even layer over the base coat, extending slightly beyond the area of the base coat to ensure a seamless blend. The clear coat should be applied in multiple thin layers, allowing for proper drying time as recommended by the product specifications. Once applied, the clear coat enhances the appearance and seals the paint against weather and sunlight.
Step 7: Wet Sand the Clear Coat
It’s time for wet sanding after the clear coat is dry to the touch. This process will help to eliminate any texture differences between the old and new paint and ensure a smooth, uniform surface. Begin with coarser grit sandpaper, such as 1000 grit, and dip it in a water solution and a few drops of dish soap to lubricate the surface.
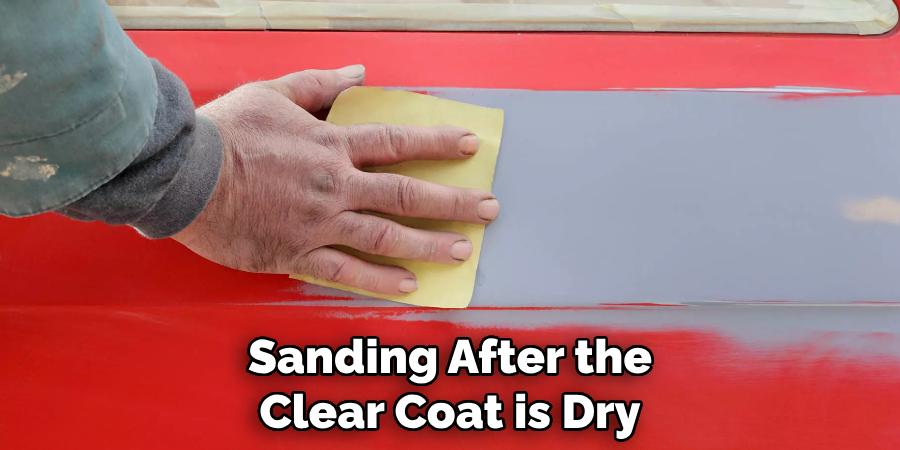
Sand the area lightly and evenly, then move on to a finer grit, such as 2000 grit, to refine the finish further. Wet sanding requires a delicate touch to avoid damaging the clear coat, so apply gentle pressure and keep the sandpaper wet at all times. Rinse the area and check regularly until the desired smoothness is achieved.
Step 8: Buff the Clear Coat
Once the wet sanding is complete and the surface is satisfactorily smooth, the next step involves buffing the clear coat to a high shine. Start using a rubbing compound and a buffing pad attached to a power buffer. Move the pillow in circular motions across the surface, applying moderate pressure to remove sanding scratches and smooth out imperfections.
Work in small sections to ensure an even shine, and periodically wipe away the compound to check your progress. After buffing, use a finer polishing compound further to enhance the clarity and gloss of the clear coat. Remember to keep the pad clean and change it as necessary to avoid scratches from debris caught in the pad.
Step 9: Wash the Car
With the buffing stage completed, it is now essential to wash the entire car to remove any residual compound and dust from the sanding and buffing process. Use a high-quality car shampoo and a clean sponge or wash mitt to cleanse the car’s surface gently. Rinse thoroughly with water to ensure all traces of soap and compound are gone. This step is crucial to inspect the final results and to prepare the surface for the last step of waxing, which will seal and protect the newly blended paint.
Step 10: Apply Wax
Applying wax is the final step in protecting your car’s new paint job. For longer-lasting protection, select a high-quality car wax, ideally a polymer sealant. Apply the wax in a thin, even layer using a foam applicator pad, working in small sections and using circular motions. Allow the wax to dry to a haze as per the product’s instructions, then buff it off with a clean microfiber towel until you achieve a brilliant shine.
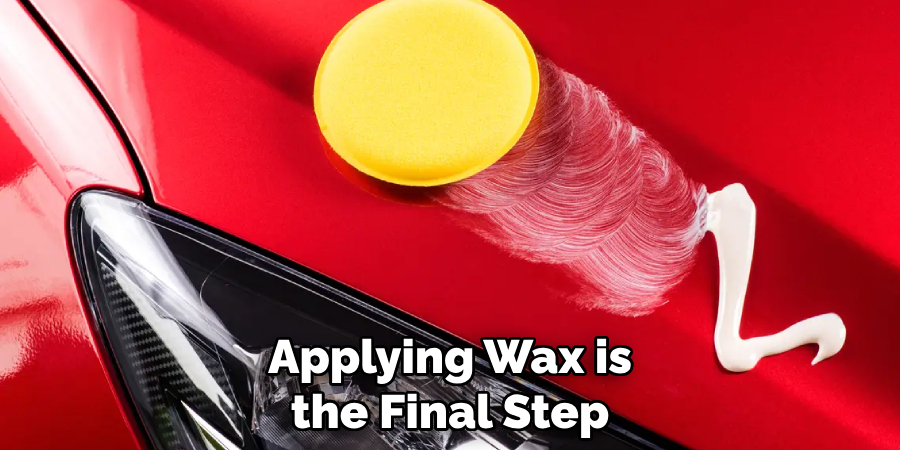
This layer of wax will seal the clear coat, providing extra gloss to your car’s finish and protecting it from UV rays, pollutants, and other environmental elements. Remember to wax under shade and ensure the car’s surface is cool to the touch to prevent the wax from drying too quickly.
By following these steps and taking the necessary time and care, you can achieve a professional-quality car paint repair at home. Regular maintenance, such as washing and waxing your car, will also help keep the new paint looking its best for years.
5 Additional Tips and Tricks
- Use a Tack Cloth: Before blending the paint, it’s crucial to remove all dust and particles from the car’s surface. A tack cloth can be lightly used over the area to ensure a clean, smooth surface, which will help create a seamless blend.
- Keep a Wet Edge: When spraying the new paint, try to maintain a ‘wet edge’ by overlapping each stroke of the spray gun by about 50 percent. This technique helps blend paint naturally by avoiding hard edges and ensuring a continuous paint flow.
- Gradual Fading: To achieve a perfect blend, gradually fade the paint as you move away from the repaired area. This can be done by increasing the air pressure and moving the gun faster or by reducing the paint flow as you get further away.
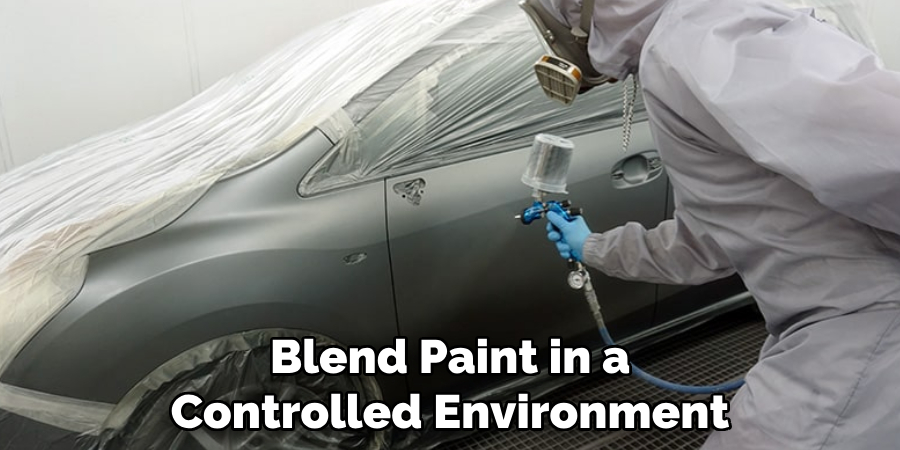
- Control Environmental Conditions: Temperature and humidity significantly influence how paint dries. Blend paint in a controlled environment to ensure the best match and uniform appearance whenever possible.
- Practice Patience with Drying Times: Allow adequate time for the base coat to dry completely before applying the clear coat. Rushing this can lead to a cloudy or mottled finish and will affect how well the new paint blends with the old.
With these additional tips, achieving a seamless blend when painting your car is within reach. Remember to take your time and practice on test panels before attempting the final repair, and you’ll be sure to get professional results.
6 Things You Should Avoid When Blending Paint on a Car
- Avoid Skipping Surface Prep: Never overlook the importance of proper surface preparation. Failing to clean, sand, and prime the area adequately can lead to poor adhesion of the new paint, compromising the entire finish.
- Steer Clear of Poor Masking Techniques: Poor masking can result in overspray and hard edges that are difficult to blend. Always use high-quality masking materials and take the time to mask off the area carefully.
- Don’t Rush the Process: Patience is vital when blending paint. Hurrying through the steps can cause mistakes like uneven coverage or a mismatched color. Take your time to ensure each layer is adequately applied.
- Avoid Using Mismatched Paint: Using the right type or shade of paint is a sure way to succeed at blending. Make sure you have the correct match by using the vehicle’s paint code and mixing the paint precisely.
- Beware of Inadequate Lighting: Proper lighting is essential to see how the paint is blending while you work. Without adequate lighting, it can be easy to miss areas that need more attention or to apply paint unevenly.
- Don’t Overload the Clear Coat: Applying too much clear coat to speed up drying time can lead to runs and drips, making it challenging to achieve a smooth blend. Apply thin layers and allow proper drying time between coats for best results.
By avoiding these common mistakes, you can ensure a successful blending process and achieve professional-looking results when painting your car.
5 Different Techniques for Blending Paint on a Car
- Feather Edge Technique: This involves gradually fading the paint away from the repair area by feathering out the edges with light strokes of the spray gun.
- Cross Hatch Technique: Similar to the feather edge technique, this method overlaps each stroke in a crisscross pattern to blend the paint naturally.
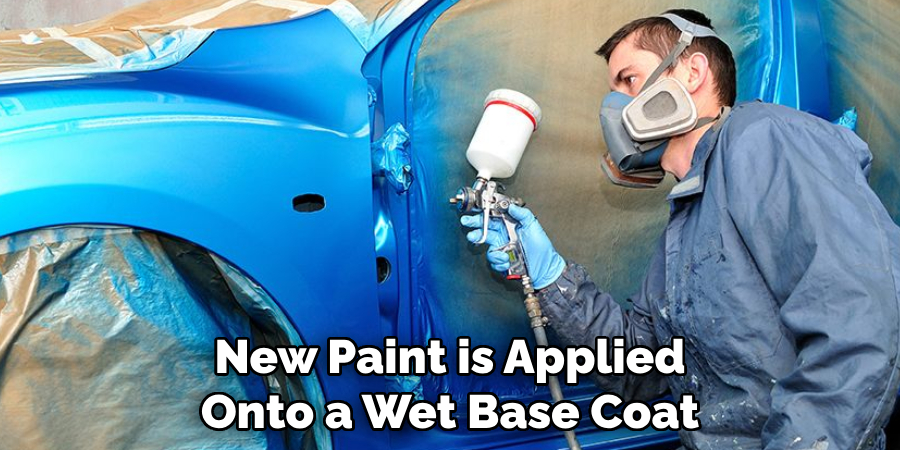
- Wet on Wet Technique: The new paint is applied onto a wet base coat, allowing for more effortless blending and a smoother finish.
- Tack Coat Technique: This involves lightly dusting the area with thin layers of paint until the desired coverage and blend is achieved.
- Airbrush Technique: For small or intricate areas, an airbrush can be used to blend paint in a more precise and controlled manner.
It’s essential to experiment with different techniques and find what works best for your specific repair. Each method has its advantages and may work better for certain types of repairs or paints.
How Do You Blend Uneven Paint?
If you notice uneven areas in your paint job, there are a few steps you can take to help blend them for a smoother finish.
First, lightly sand the area with fine-grit sandpaper to smooth out any bumps or imperfections. Then, use a rubbing compound or polishing compound to further even out the surface and remove any scratches. After that, apply a thin layer of primer to the area and let it dry completely. Finally, carefully apply your base coat and clear coat, following the tips and techniques mentioned earlier in this guide. With patience and attention to detail, you should be able to blend any uneven paint for a seamless finish.
Remember, practice makes perfect when it comes to blending paint on a car. Take your time, gather the necessary materials, and follow these tips to achieve professional-looking results every time.
What Paint is Best for Blending?
When it comes to blending paint on a car, it’s essential to use the same type and brand of paint that was originally used on the vehicle. This ensures a seamless match and prevents any potential issues with compatibility between different types of paint.
If you are still determining the exact type or brand of paint used on your car, you can consult the vehicle’s manual or take a paint sample to a professional for color matching. It’s always best to use high-quality, automotive-grade paint for the best results. Overall, taking the time and effort to prepare and blend paint on your car properly will result in a flawless finish that you can be proud of.

Conclusion
Blending paint on a car may seem like a daunting task, but with the proper techniques and preparation, it can be easily achieved. Remember to properly clean and prep the area, use high-quality materials, take your time, and practice patience when blending paint. Avoid common mistakes and experiment with different techniques to find what works best for your specific repair.
Hopefully, this guide on how to blend in paint on a car has provided helpful tips and information on how to achieve a seamless blend when painting your car. With these tools, you’ll be well on your way to achieving professional-looking results and restoring the appearance of your vehicle.
By following these tips and using the correct type of paint, you can achieve professional-looking results and restore your car’s appearance to its former glory. So go ahead, confidently tackle those paint touch-ups with the knowledge and skills to blend like a pro!

About
JeepFixes Team is a skilled author for Jeep Fixes, bringing 6 years of expertise in crafting a wide range of jeep fixes. With a strong background in jeep fixes work, JeepFixes Team’s knowledge spans various types of fixtures, from decorative pieces to functional hardware, blending precision with creativity. His passion for jeep fixes and design has made him a trusted resource in the industry.
Professional Focus:
Expert in Jeep Fixes : JeepFixes Team aesthetic specializes in creating durable and innovative jeep fixes, offering both appeal and functionality. His work reflects a deep understanding of jeep fixes techniques and materials.
Sustainability Advocate : He is dedicated to using sustainable practices, ensuring that every fixture is crafted with eco-friendly methods while maintaining high-quality standards.
In his writing for jeep fixes, JeepFixes Team provides valuable insights into the latest trends, techniques, and practical advice for those passionate about jeep fixes, whether they are professionals or DIY enthusiasts. His focus on combining artistry with engineering helps others discover the true potential of jeep in design.