

Before diving into the step-by-step process of attaching a fog light bracket to your vehicle, it’s important to understand the necessity of fog lights and the role they play. Primarily, fog lights are designed to improve road visibility during poor weather conditions, such as fog, dust, or heavy rain. They differ from regular headlights by producing a wide, bar-shaped beam of light with a sharp cutoff to avoid glare, which can further impair visibility.
Proper installation of fog light brackets is crucial for optimal positioning and performance of the fog lights themselves. This guide on how to attach fog light bracket will provide you with the essential information and steps required to securely mount the bracket, ensuring your fog lights function effectively and enhance your driving safety.
Understanding Fog Light Brackets
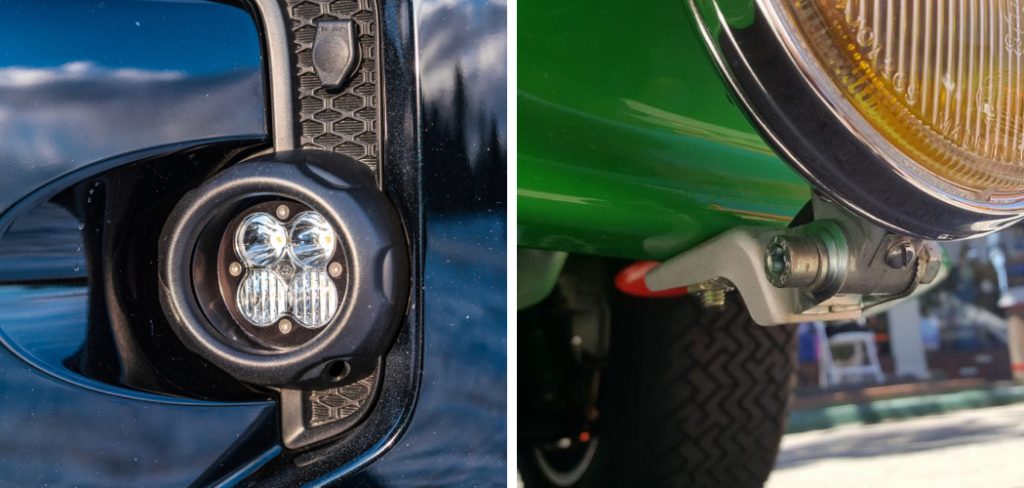
Fog light brackets are metal frames designed to hold the fog lights in place on your vehicle. They are typically made of high-quality steel, aluminum, or plastic materials and come in various shapes and sizes to fit different fog light models. Fog light brackets are an essential component that not only secures the fog lights but also allows for adjustments to ensure proper positioning. Additionally, they help to dissipate heat generated by the fog lights, preventing damage or malfunction.
Why You Might Need to Attach Fog Light Brackets?
Some vehicles come equipped with built-in fog light brackets, while others may not have them at all. If your vehicle does not already have fog light brackets, you will need to attach them before installing the fog lights themselves. It’s important to note that improper installation of fog light brackets can result in damage to your vehicle or poor performance of the fog lights. Therefore, it’s crucial to follow the correct steps and use appropriate tools for the best results.
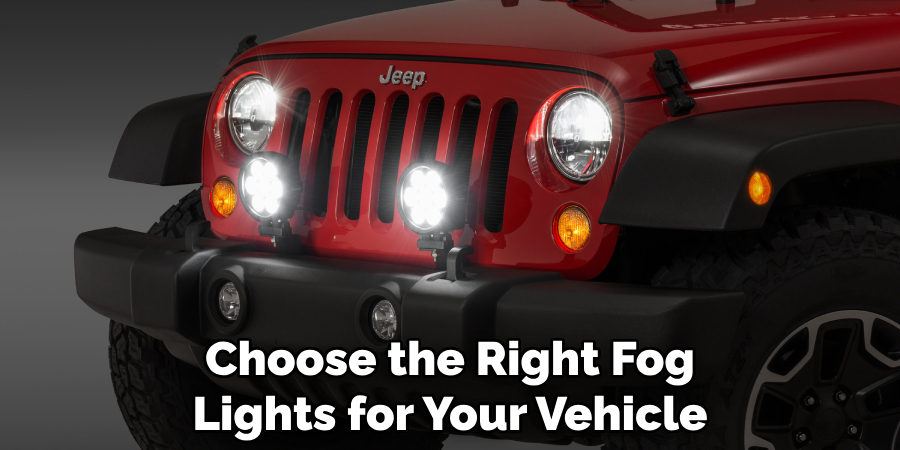
Selecting the Right Fog Lights
Before purchasing a fog light bracket and beginning the installation process, it’s essential to choose the right fog lights for your vehicle. Consider factors such as compatibility with your vehicle model, brightness level, and durability. You can consult with a professional or research online for the best options. It’s also crucial to check local laws and regulations regarding fog lights to ensure they are street-legal in your area. You don’t want to invest time and money in installing fog lights only to find out they are not allowed on the road.
Tools and Materials Required
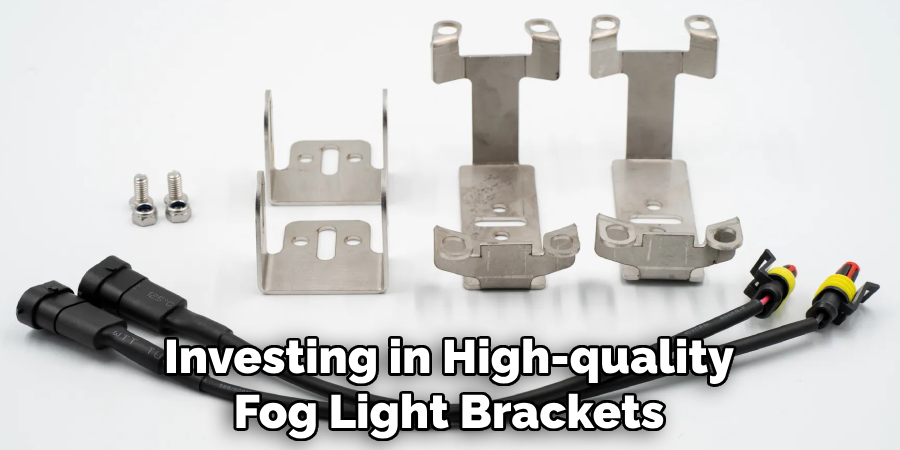
Fog Light Bracket Kit:
Before starting the installation process, ensure you have the appropriate fog light bracket kit that includes all the necessary components. These kits can be found at automotive stores or online and usually come with detailed instructions for easy installation.
Wrenches and Screwdrivers:
You will need a set of wrenches and screwdrivers to loosen and tighten bolts during the installation process. The specific sizes required will depend on your vehicle and fog light bracket model, so it’s essential to have a variety on hand.
Drill:
If the fog light bracket does not come with pre-drilled holes, you will need a drill to create them for proper mounting. Make sure to use a drill bit that is slightly smaller than the size of the bolts provided in the bracket kit.
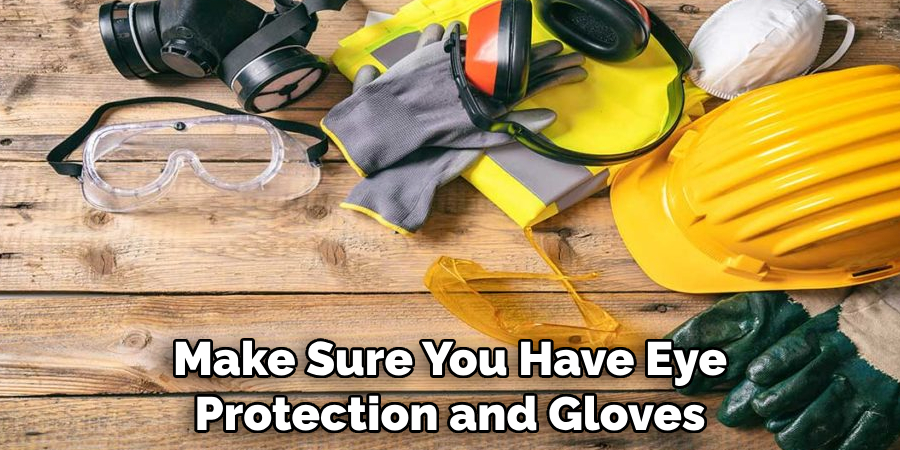
Safety Gear:
As with any automotive task, it’s crucial to prioritize safety. Make sure you have eye protection and gloves on hand to protect yourself from any potential hazards during the installation process.
10 Simple Step-by-step Guidelines on How to Attach Fog Light Bracket
Step 1: Locating the Ideal Mounting Position
Before attaching the fog light bracket, determine the best mounting position for your vehicle. The ideal placement will vary depending on the make and model of your vehicle, so refer to the manual or consult a professional for guidance. You want to ensure the fog lights are not obstructed by any vehicle components and provide maximum visibility. The fog light bracket should be mounted securely on a flat surface. It’s vital to avoid any unnecessary drilling into the vehicle’s body or frame. The fog light bracket should be attached to existing holes in the vehicle’s frame or bumper for a more secure fit.
Step 2: Removing Existing Components (if applicable)
If your vehicle already has fog lights installed, you will need to remove them and any existing brackets before attaching the new bracket. Use a wrench or screwdriver to loosen and remove any bolts holding the components in place. The process may vary depending on your vehicle model, so it’s essential to refer to the manual or seek professional assistance if needed. It’s also crucial to disconnect the electrical connections for the fog lights before removing them. You can secure them with tape to avoid tangling.
Step 3: Attaching the Fog Light Brackets
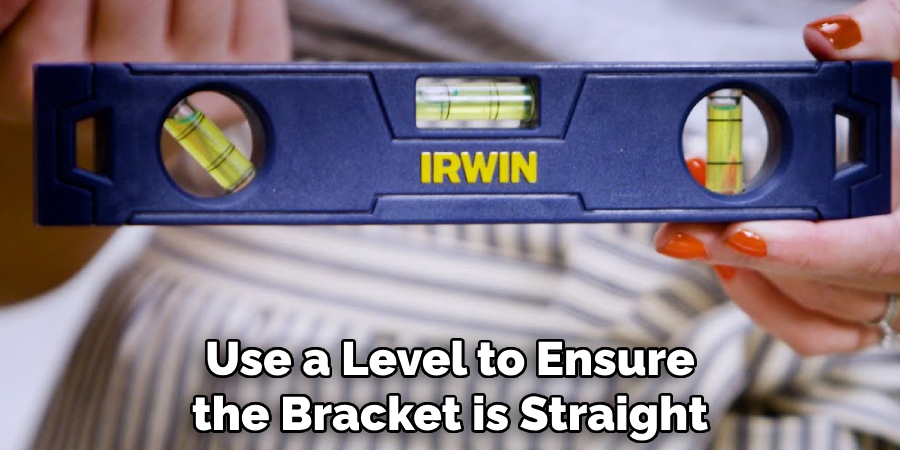
Once you have determined the ideal mounting position and removed any existing components, it’s time to attach the fog light brackets. Place the bracket against the designated spot on your vehicle and use a marker or pencil to mark the areas where you will need to drill holes for proper mounting. It’s essential to double-check the position and alignment before drilling. You can also use a level to ensure the bracket is straight. The number of holes required will depend on the bracket model, but typically there will be two to four.
Step 4: Securing the Brackets with Bolts and Fasteners
Using the marks as a guide, drill holes into the marked areas on your vehicle. Secure the fog light brackets in place using bolts and fasteners provided in the kit. Make sure to tighten them securely for stable positioning. The specific tightening method may vary depending on the bracket’s design, so refer to the instructions for guidance. It’s essential to ensure the bracket is securely attached as it will support the weight of the fog lights. You can also use a torque wrench to ensure the bolts are tightened to the appropriate torque.
Step 5: Connecting the Fog Lights to the Brackets
With the brackets securely in place, you can now attach the fog lights. Most fog light models will come with bolts and clips for easy attachment to the bracket. Follow the instructions provided by the manufacturer for proper installation. The fog lights should be facing forward and adjusted to the desired position for optimal visibility. You can use a level to ensure they are straight. If your fog light bracket allows for adjustments, make sure to test and adjust the position accordingly. But be careful not to overtighten the bolts as it can damage the fog light or bracket.
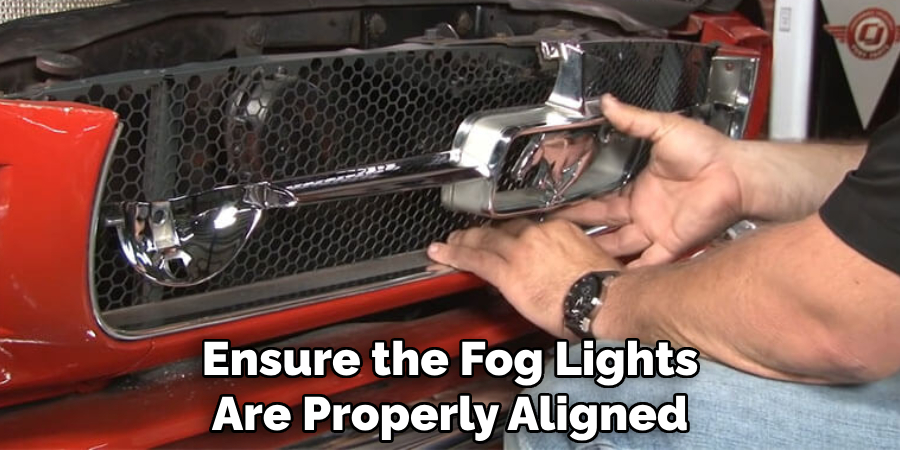
Step 6: Adjusting Fog Light Angles for Proper Alignment
To ensure the fog lights are properly aligned, adjust their angles accordingly. The ideal angle will vary depending on your vehicle and personal preference, but generally, they should be angled slightly downwards to prevent blinding other drivers. The fog light brackets should allow for easy adjustment, but make sure to test and adjust until you are satisfied with the positioning. It’s also crucial to make sure the fog lights are tightly secured in place. But, avoid overtightening as it can damage the bracket or fog lights. You can use a torque wrench to ensure the bolts are tightened to the appropriate torque.
Step 7: Wiring and Electrical Connections
With the fog lights attached and properly aligned, it’s time to connect them to the vehicle’s electrical system. Refer to the manual or consult a professional for guidance on proper wiring connections. It’s essential to ensure the wires are correctly connected and securely fastened. You may also need to install a switch if your vehicle does not have one already. Make sure to test the fog lights before proceeding to the next step. Otherwise, you may need to troubleshoot any issues with the wiring.
Step 8: Testing Fog Lights and Adjustments
Before finalizing the installation, it’s crucial to test the fog lights for functionality and proper alignment. Turn on the fog lights and make any necessary adjustments to ensure they are working correctly and providing optimal visibility without blinding other drivers. It’s also essential to check that all wiring connections are secure and there are no loose bolts or fasteners. If you encounter any issues, refer to the instructions or seek professional assistance. You may also need to adjust the fog light angles again after testing.
Step 9: Weatherproofing and Rust Prevention
To prevent rust and ensure the longevity of your fog light bracket, apply a layer of weatherproofing sealant around the mounting holes. This will help protect the metal from moisture and other environmental factors that can cause rust. It’s also essential to regularly inspect and maintain the bracket to prevent any potential issues in the future. The frequency of maintenance will depend on your vehicle and driving conditions. You can also use rust-proof bolts and hardware for added protection.
Step 10: Legal and Compliance Considerations
Before hitting the road with your newly installed fog lights, make sure to check for any regulations or laws regarding their use in your area. Some areas may have restrictions on when and where you can use them, so it’s vital to comply with local laws to avoid any fines or penalties. It’s also essential to ensure the fog lights do not cause glare or obstruct other drivers’ visibility. Regularly check and adjust the fog lights as needed to comply with regulations and ensure safe driving.

Overall on how to attach fog light bracket, installing fog light brackets can be a simple and practical upgrade for your vehicle, providing improved visibility in low-visibility weather conditions. With proper installation and maintenance, you can enjoy the benefits of fog lights while ensuring safety and compliance on the road. So, carefully follow the steps outlined in this guide or seek professional assistance for a hassle-free installation process.
Do You Need to Use Professionals?
Installing fog lights with brackets may seem like a straightforward process, but it’s essential to note that it involves working with your vehicle’s electrical system and drilling into its body. If you are not confident in your abilities or do not have the necessary tools, it’s best to seek professional assistance. This will ensure proper installation and avoid any potential damage to your vehicle. Additionally, professionals can provide guidance on compliance with local laws and regulations. It may cost more, but it can save you time and hassle in the long run.
Overall, whether you choose to install the fog light brackets yourself or seek professional help, safety should always be a top priority. By following proper installation techniques and regularly maintaining your fog lights and brackets, you can enjoy improved visibility and a safer driving experience.
How Much Will It Cost?
The cost of installing fog light brackets will vary depending on various factors, such as the type and size of your vehicle, the fog light model, and whether you choose to install them yourself or seek professional assistance. Typically, fog light brackets can cost anywhere from $50 to $200, while professional installation services can range from $150 to $300.
It’s essential to do research and compare prices before making a decision to ensure you get the best value for your money. Remember, investing in high-quality fog light brackets can save you from potential accidents and costly repairs in the long run. It’s always better to prioritize safety and reliability over cost. So, make sure to consider all factors and choose the best option for your vehicle and budget.
Frequently Asked Questions
Q: Can I Install Fog Lights on My Own?
A: It is possible to install fog lights on your own, but it requires some technical knowledge and skills. If you are not confident in your abilities, it’s best to seek professional assistance for a safer and more efficient installation process. The fog light brackets also come with specific instructions for proper installation, so make sure to carefully follow them. You can also refer to online tutorials or guides for additional assistance.
Q: Do I Need a Relay for My Fog Lights?
A: While it’s not always necessary, using a relay is recommended for fog light installations as it helps control the flow of power and prevents any potential damage to the vehicle’s electrical system. It also ensures that the fog lights turn on and off correctly. Consult your vehicle’s manual or a professional for guidance on using a relay with your specific fog light model. The fog light bracket manufacturer may also provide recommendations.
Q: Can I Use My Existing Switch for My Fog Lights?
A: If your vehicle already has a switch for aftermarket accessories, you can use it to control your fog lights. However, make sure to check the capacity of the switch and ensure it can handle the extra load from the fog lights. If you need to install a new switch, make sure to follow the proper wiring instructions for safe and efficient operation.
Q: How Do I Choose the Right Fog Lights for My Vehicle?
A: There are various factors to consider when choosing fog lights for your vehicle, including size, type (LED or halogen), and mounting options. It’s also essential to check the regulations in your area regarding fog lights, as some regions may have restrictions on certain types of fog lights. Consult with a professional or refer to the manual for your vehicle to ensure you select the right fog lights that are compatible with your vehicle and comply with local laws.
Q: How Do I Maintain My Fog Lights?
A: To ensure your fog lights continue to function correctly, it’s essential to regularly inspect and clean them. Dirt and debris can accumulate on the lens, reducing visibility, so make sure to clean them with a mild soap and water solution. It’s also crucial to keep an eye out for any potential issues such as loose connections or damaged wiring and address them promptly.
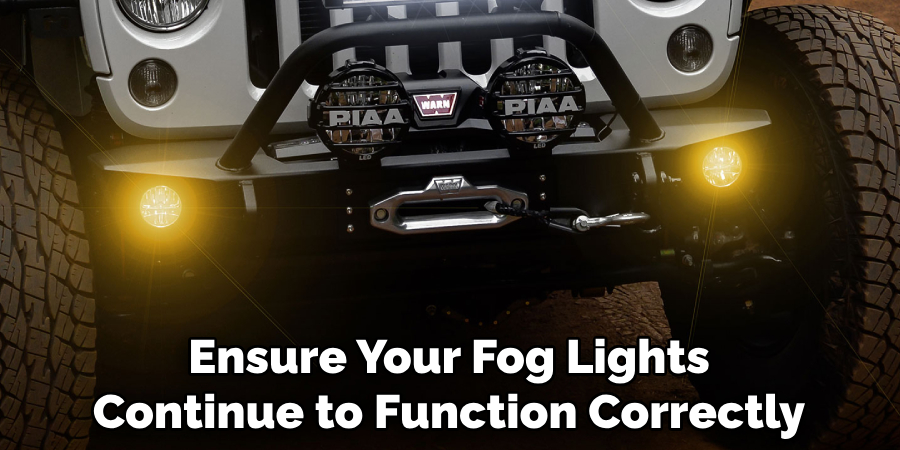
Regular maintenance will help prolong the life of your fog lights and ensure they function properly when needed. Overall, proper care and maintenance are crucial for safe and efficient use of fog lights on your vehicle. So, make sure to follow these steps and consult with a professional if you encounter any issues during installation or usage.
Conclusion
In conclusion on how to attach fog light bracket, properly attaching a fog light bracket ensures that your fog lights are securely in place, offering optimal illumination during poor visibility conditions. Remember to confirm that all fasteners are tightened and that the lights are aimed correctly to avoid blinding other drivers. Regular maintenance checks will help you detect any issues early on, ensuring your safety and the efficiency of your vehicle’s lighting system. Now get those fog lights attached and experience the difference it makes on your next drive!