
Dielectric grease is a popular lubricant used to protect and insulate electrical components from moisture, corrosion, and dirt. It is commonly found in automotive parts, home appliances, and electronic devices. However, there are instances when you need to remove dielectric grease from these surfaces for maintenance or repair purposes.

In this guide, we will discuss the step-by-step process on how to remove dielectric grease effectively without damaging the components. You will also learn about the different methods and tools you can use for this task.
Understanding Dielectric Grease
Before we delve into the removal process, let’s first understand what dielectric grease is and why it is used in various industries.
Dielectric grease, also known as silicone grease or silicone dielectric compound, is a translucent substance made of silicone oil and a thickening agent. It has excellent insulating properties and can withstand high temperatures, making it ideal for use in electrical applications.
The grease also has water-resistant properties, which makes it useful in protecting electrical connections and components from moisture. It also has anti-corrosion properties, preventing rust or oxidation on metal surfaces.
Tools and Materials You Will Need to Remove Dielectric Grease
- Disposable gloves
- Safety glasses
- Lint-free cloth or paper towels
- Non-conductive cleaning solution (isopropyl alcohol or electrical contact cleaner)
- Soft-bristled brush or toothbrush
- Plastic scraper or old credit card
Step-by-step Guidelines on How to Remove Dielectric Grease
Step 1: Preparing for the Removal Process

Before starting, make sure to gather all the necessary tools and materials. Wear disposable gloves and safety glasses to protect your hands and eyes from any potential hazards. It is also advisable to work in a well-ventilated area as some cleaning solutions may have strong fumes. If working on sensitive electronic components, make sure to ground yourself to avoid damaging them. Preparing the surface to be cleaned is also essential. If possible, remove any loose debris or dirt using a soft-bristled brush or compressed air.
Step 2: Removing Excess Grease
Using a plastic scraper or an old credit card, gently scrape off as much excess grease from the surface as possible. Be careful not to apply too much pressure and damage delicate components. You can also use a lint-free cloth or paper towels to wipe off the grease. While this may not remove all the grease, it will make the cleaning process easier. Make sure to dispose of the wiped-off grease properly.
Step 3: Applying a Cleaning Solution
Once most of the excess grease is removed, it’s time to apply a cleaning solution. Isopropyl alcohol and electrical contact cleaners are both effective options for removing dielectric grease.
These solutions can dissolve the grease without causing damage to the surface. Apply the solution to a lint-free cloth or paper towel and gently wipe the surface in a circular motion. You can also spray the solution directly onto the surface, but be careful not to oversaturate it.
Step 4: Scrubbing the Surface
If there are still remnants of grease, use a soft-bristled brush or toothbrush to scrub the surface gently. Make sure to use a non-conductive brush to avoid damaging the components. You can dip the brush in the cleaning solution and continue scrubbing until all traces of grease are removed. This step may require some patience and elbow grease, depending on the amount of grease present.
Step 5: Wiping Off the Solution

After scrubbing, use a clean lint-free cloth or paper towel to wipe off the cleaning solution and any remaining grease. Make sure to remove all traces of the solution as it can attract dirt and dust if left behind. You may need to repeat this step a few times until the surface is completely clean. If necessary, you can also use compressed air to blow off any leftover debris.
Step 6: Drying and Inspecting the Surface
Once the surface is clean, allow it to air dry completely. You can also use a hairdryer on a low setting to speed up the drying process. After drying, inspect the surface closely for any remnants of grease or debris. If you notice any, repeat the previous steps until the surface is spotless. Make sure to avoid using any sharp or abrasive tools that can damage the surface.
Following these steps will help you effectively remove dielectric grease from various surfaces without causing any damage. It’s important to note that some components may require special care, so make sure to refer to the manufacturer’s instructions before proceeding with the removal process.
Additional Tips and Tricks to Remove Dielectric Grease
1. If the dielectric grease is still fresh and hasn’t hardened, try using a warm, damp cloth to wipe it away. This can help soften the grease and make it easier to remove.
2. Another helpful method is to use rubbing alcohol or nail polish remover on a cotton ball or paper towel to gently rub away the grease. Be cautious when using these substances as they may damage certain surfaces.
3. For hard-to-reach areas, try using a toothbrush or old toothbrush to scrub away the grease. The bristles can help loosen and remove the grease from small crevices.
4. If the grease has already hardened, you may need to use a scraper or putty knife to gently scrape it off of surfaces. Be careful not to apply too much pressure or use sharp objects that may damage the surface.
5. After removing the majority of the grease, use a degreaser cleaner to thoroughly clean the area and remove any remaining residue.
6. To prevent future buildup of dielectric grease, avoid overusing it and only apply it sparingly where needed.
7. Consider using alternative lubricants such as silicone grease or white lithium grease which can easily be wiped away with soap and water.
8. If the dielectric grease has gotten onto clothing, try using a pre-treatment stain remover before washing it in hot water to remove any remaining residue.
9. Never use heat such as a blow dryer or heat gun to try and melt away the grease as this may cause damage or create a fire hazard.
10. If all else fails, seek professional help or consult the manufacturer for specific recommendations on how to remove the dielectric grease without causing damage. It’s always better to be safe than sorry when it comes to delicate surfaces or equipment.
These tips and tricks can help make removing dielectric grease a much easier task. Remember to always exercise caution and use appropriate cleaning methods to avoid any potential damage.
With proper care and maintenance, you can effectively remove dielectric grease without causing harm to your belongings or equipment. So don’t let a little bit of grease stand in the way – use these methods to quickly and safely remove it whenever needed. Happy cleaning!
Things You Should Consider to Remove Dielectric Grease
1. The first thing that you should consider when removing dielectric grease is safety. This type of grease is made up of silicone-based oils and thickening agents, which may be harmful if it comes into contact with your skin or eyes. Therefore, before beginning the removal process, make sure to wear protective gear such as gloves and safety glasses.
2. The second thing to consider is the type of surface or material which the dielectric grease is applied. Depending on the type of surface, different methods may need to be used to remove the grease effectively without causing any damage. For example, if the grease is on a metal surface, using solvents such as mineral spirits may work well, but these may not be safe for use on plastic surfaces.
3. Another important factor to consider is the amount of time that the grease has been applied. If it has only been a short period, it may be easier to remove as it hasn’t had enough time to fully set and harden. However, if the grease has been left on for an extended period, it may require more effort and specialized tools for its removal.
4. It is also crucial to assess the extent of the grease buildup. If there is only a small amount of grease, it may be possible to remove it with simple household items such as dish soap and water. However, if there is a thick layer or multiple layers of grease, more aggressive methods such as using a degreaser or taking apart the affected components may be necessary.
5. Additionally, it is essential to read the instructions for any products or tools that you plan on using for the removal process. Some solvents and cleaners may not be safe for certain materials, and others may require specific dilution ratios or application methods for optimal results.
6. Another consideration is the location of the grease buildup. If it is in an area that is difficult to access or requires specialized equipment, it may be best to seek professional help rather than trying to remove it yourself. This can prevent potential damage to the surface or components and ensure that the grease is completely removed.
7. Finally, after removing the grease, it is crucial to clean and dry the area thoroughly. Any residue left behind can attract dirt and debris, which can lead to further issues in the future. It is also essential to dispose of the grease and any used cleaning materials properly, following all safety guidelines and regulations.
Following these considerations can help ensure a safe and effective removal of dielectric grease, without causing any harm to yourself or the affected surfaces. It is always best to take precautionary measures and carefully assess the situation before attempting to remove this type of grease.
When in doubt, it is best to seek professional assistance in order to prevent any potential damage or safety hazards. Therefore, make sure to take these factors into account when dealing with dielectric grease to ensure a successful removal process. So, be careful and stay safe! Stay away fromsafety hazards! Happy cleaning!
Troubleshooting Common Issues to Remove Dielectric Grease
1. Grease is Too Thick or Hardened:
One of the most common issues encountered when removing dielectric grease is that it has become too thick or hardened over time. This can make it difficult to remove as it may not spread evenly or easily on the surface it was applied to. To address this issue, you can try using a heat gun or hairdryer to warm up the grease, making it easier to spread and remove. It is important to be cautious when using heat as too much can cause damage to sensitive components.
2. Grease Has Attracted Dirt and Debris:
Dielectric grease is known for its ability to repel water, but this also means that it can attract dirt and debris. If you notice that the grease has become dirty or contaminated, it may not be providing the necessary protection and conductivity for your electrical connections. In this case, it is best to remove the old grease and reapply a fresh layer.
3. Grease Has Created a Blockage:
When dielectric grease is applied too thickly or in large amounts, it can create a blockage in electrical connections and prevent proper conductivity. This can result in poor performance or even failure of the component. To troubleshoot this issue, carefully remove excess grease with a clean cloth or cotton swab.
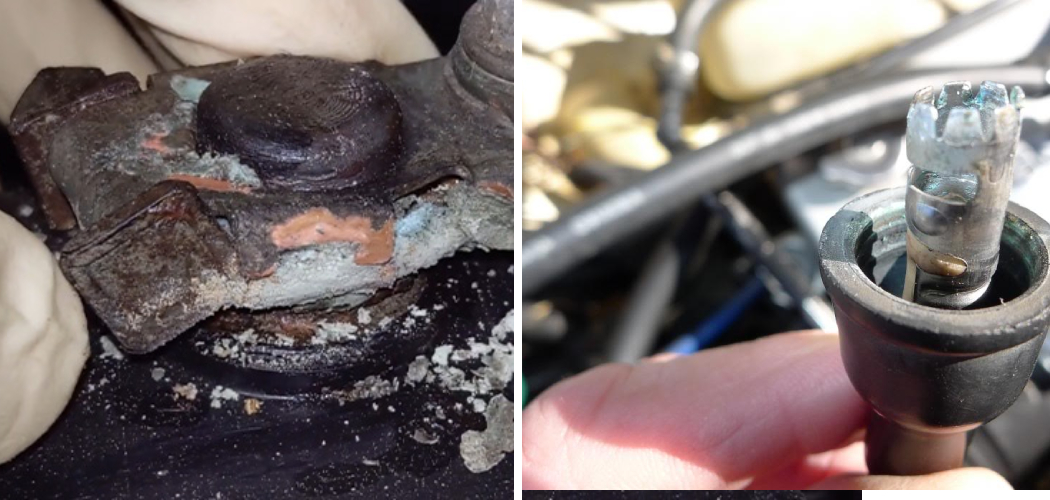
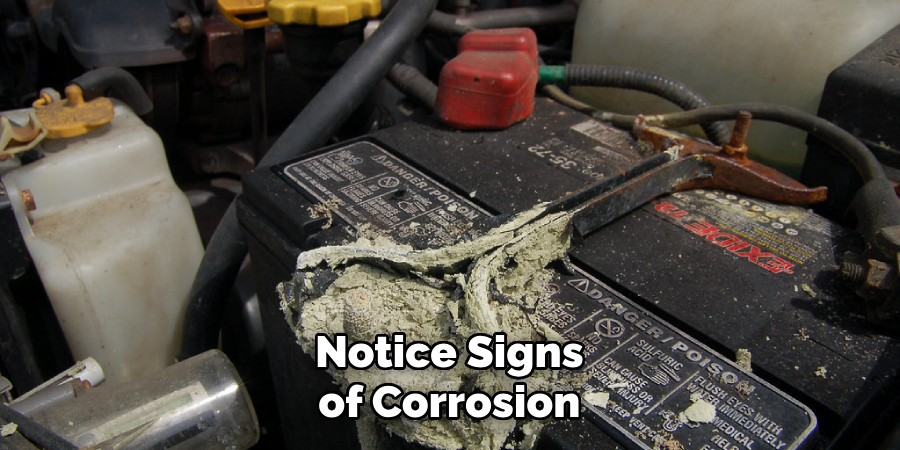
4. Grease Has Caused Corrosion:
While dielectric grease is designed to protect against corrosion, if it is not applied correctly or if it is contaminated, it can actually cause corrosion. This is because the grease can trap moisture and other contaminants, creating a corrosive environment. If you notice signs of corrosion on your electrical connections, it is important to clean and reapply the grease properly.
Following these troubleshooting tips can help you effectively remove and reapply dielectric grease for optimal performance and protection of your electrical connections. Remember to always use caution when working with electrical components and consult a professional if needed.
With proper maintenance, dielectric grease can provide long-lasting protection for your electronic devices and equipment. So, it is important to regularly check and maintain the cleanliness of your electrical connections to ensure the best performance.
Precautions Need to Be Followed for Removing Dielectric Grease
1. First and foremost, make sure to wear protective gear such as gloves and safety glasses before handling dielectric grease. This will protect your skin and eyes from potential irritation or damage.
2. When removing dielectric grease from electrical connections, always disconnect the power source first to prevent any accidents or electrocution.
3. Use a clean cloth or paper towel to wipe away excess grease before attempting to remove it with any cleaning products. This will prevent spreading the grease and making a bigger mess.
4. Avoid using harsh chemicals or solvents to remove dielectric grease, as they can damage the surrounding materials or cause harm to your skin.
5. Instead, opt for gentle household cleaners such as dish soap, rubbing alcohol, or white vinegar mixed with water.
6. Apply the cleaner to a cloth or Q-tip and gently rub it onto the greased area, being careful not to get any inside the electrical connection. Repeat as necessary until the grease is fully removed.
7. If the grease has hardened or become stuck, you may need to use a plastic scraper or toothbrush to gently scrape it away before cleaning with a gentle cleaner.
8. After removing all of the dielectric grease, make sure to thoroughly dry the area before reapplying any new grease or reconnecting the electrical connection.
Following these precautions will not only ensure a safe and successful removal of dielectric grease, but also prevent any damage or malfunction to the electrical equipment. Additionally, it is important to properly dispose of any used cloths or materials that have come into contact with the grease, as it can be harmful to the environment if not disposed of correctly. Happy cleaning!
Frequently Asked Questions
How Do I Know if I Need to Remove Dielectric Grease?
It is important to regularly inspect electrical connections and their surrounding areas for any signs of damage or corrosion. If you notice hardened or dirty dielectric grease on the connections, it may be time to remove it. Another indicator is if you are experiencing any issues with the electrical components that are typically protected by dielectric grease, such as lights flickering or difficulty starting your vehicle.
Can I Just Wipe Off The Dielectric Grease?
While wiping off the excess grease may provide some temporary relief, it is not a long-term solution. Dielectric grease is designed to protect against moisture and corrosion, so simply wiping it off does not address the underlying issue.
What Will Happen if I Don’t Remove Dielectric Grease?
Leaving dielectric grease on electrical connections for too long can cause it to harden and potentially trap moisture, leading to corrosion and potential damage to the electrical components. This can result in malfunctioning or even non-functioning parts, which can be costly to repair or replace.
Conclusion
Now you know how to remove dielectric grease and why it is important to do so. Regularly inspecting and maintaining your electrical connections can help prevent any potential issues and ensure the proper functioning of your vehicle’s electrical components. Remember to always follow precautions and consult a professional if needed. With proper care, dielectric grease can continue to protect your electrical connections for years to come.