

How to install door skins is often a project that homeowners put off for a long time. Whether it’s a simple way to refresh the look of your home without a significant renovation or your door skins are looking worn out and need replacing, this task can seem like a hassle to tackle.
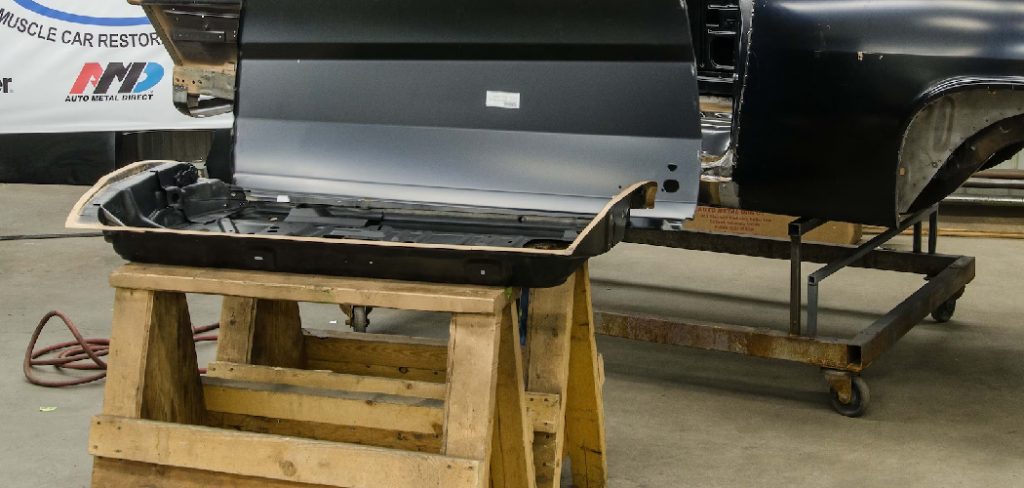
However, once you dive in, you will discover that replacing door skins is a fairly straightforward DIY project that doesn’t require many tools or skills. In this blog post, I will walk you through the entire process, from gathering your materials to the final installation. By the end, you will be surprised at how easy it is to transform the look of your doors.
Let’s get started with the steps to install new door skins and breathe fresh life into the appearance of your home’s doors!
What Will You Need?
Before we dive into the steps to install door skins, let’s first gather all the necessary materials and tools. Here’s a list of what you will need:
- New door skins (make sure they are properly sized for your doors)
- Screwdriver
- Utility knife
- Hammer
- Measuring tape
- Wood glue or adhesive caulk
- Sandpaper
- Paint or stain (optional)
- Paintbrush (optional)
Once you have all the materials ready, we can move on to the installation process.
10 Easy Steps on How to Install Door Skins
Step 1: Remove Existing Door Skins
The first step is to remove the existing door skins from your doors. Use a screwdriver to carefully remove the screws that hold the old skin in place. Then, use a utility knife to cut through any adhesive or caulking holding the skin to the door frame. Once the old skin is completely removed, clean and sand down the door frame to make sure it’s smooth and free of any debris or rough edges.

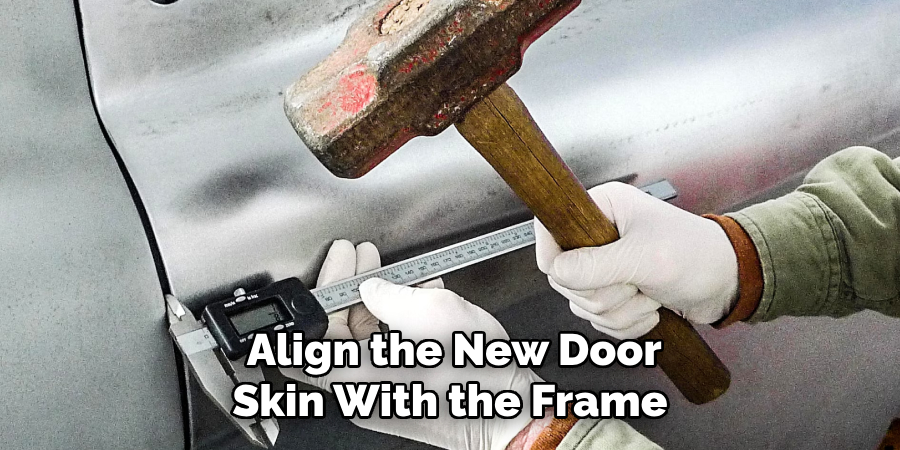
Step 2: Measure and Cut New Door Skins
Using a measuring tape, carefully measure your door frames to ensure you have the dimensions for your new door skins. Record the height and width, and consider any slight variances affecting the fit. With the measurements in hand, place the new door skin on a flat surface and mark your cutting lines on the skin.
Then, using a utility knife or saw, cut the door skin to the precise dimensions. Remember to cut slowly and closely follow your lines to ensure a snug fit when the door skin is placed onto the frame. After cutting, do a dry fit to ensure the skin aligns perfectly with the door. If necessary, trim any excess material before proceeding to the next steps.
Step 3: Apply Adhesive to the Door Frame
Once you have confirmed that your new door skin fits perfectly, it’s time to secure it. Start by applying a generous amount of wood glue or adhesive caulk to the door frame. Ensure the adhesive is spread evenly across the surface for a strong bond. This step is crucial as it determines the door skin’s durability and longevity. Allow the glue to become slightly tacky to the touch before placing the door skin to avoid any slippage.
Step 4: Attach the Door Skin to the Frame
Carefully align the new door skin with the frame, starting from one edge and gently smoothing it across to avoid air pockets or misalignment. Once you’ve confirmed it’s correctly positioned, press the skin firmly against the door frame.
For areas that don’t stick as quickly, you may use a hammer — with a piece of scrap wood to protect the skin — to lightly tap the skin into place. Check the alignment again to ensure the edges are flush with the door frame. After the skin is attached, let the adhesive dry according to the manufacturer’s instructions to ensure a secure bond.
Step 5: Secure the Door Skin with Screws
After allowing the adhesive to dry, further secure the door skin by adding screws. Carefully drill pilot holes to prevent wood splitting, especially near the edges. Place the screws at each corner of the door and at intervals along the sides to ensure the door skin is firmly attached and will not warp over time.
Use screws that are long enough to penetrate both the door skin and the frame but not so long that they protrude out the opposite side. Once in place, the screws should be tightened so the head sits flush with the door skin. If you plan to paint or stain the door, fill the screw heads with wood filler for a smooth finish.
Step 6: Trim any Overhanging Edges
After securing the door skin with screws, inspect the edges for any areas where the skin might be overhanging the door frame. If you find any overhang, it’s important to trim it down for an aesthetically pleasing fit. Use your utility knife to carefully trim the excess material, ensuring that you cut away from your body for safety.
Work slowly to maintain control and achieve a clean, straight edge. Sand any rough or uneven spots after trimming for a smooth, finished look. This step is crucial for a professional-quality appearance.
Step 7: Sand the Door Skin
Once all edges are trimmed and any excess has been removed, sand the entire surface of the door skin. Start with coarse sandpaper to remove any rough spots or irregularities, and gradually move to finer-grit sandpaper for a smooth finish.
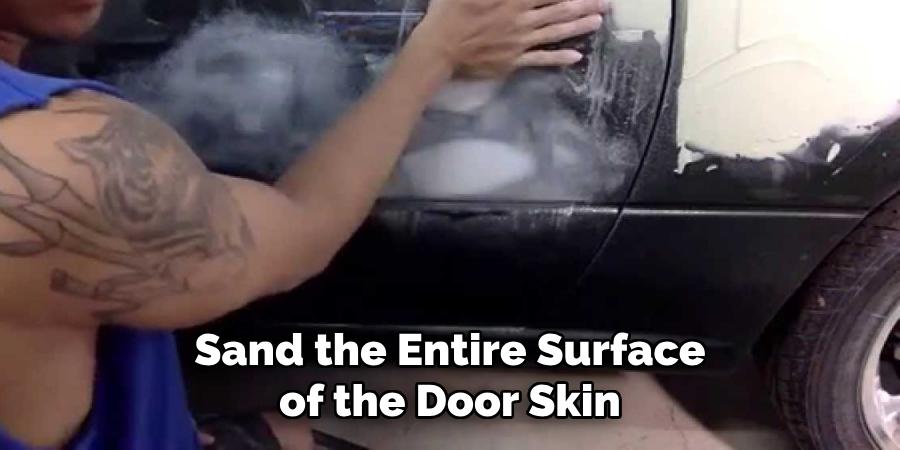
Pay special attention to the edges and corners, ensuring they are not sharp and match the contour of the door frame. Sanding helps with the final appearance and prepares the surface for painting or staining, significantly enhancing the look of your newly installed door skin.
Step 8: Apply Primer or Stain
Before you can paint or stain the door skin, apply a good-quality primer if painting or a pre-stain conditioner if staining. This will ensure an even, consistent finish and increase the paint’s or stain’s durability. For illustration, use a brush or roller to apply the primer, covering the entire door skin surface.
Allow the primer to dry completely, following the manufacturer’s guidelines. If staining, use a cloth or brush to apply the pre-stain conditioner, and then apply the stain itself, working in the direction of the grain to achieve the best results. Allow the paint to soak in for the recommended time before wiping away the excess with a clean cloth.
Step 9: Apply Top Coat for Protection
After the primer or stain has thoroughly dried, applying a top coat for added protection is essential. Choose a clear polyurethane or varnish designed explicitly for the finish you have applied (paint or stain). Using a clean brush or roller, apply the top coat evenly across the door skin, covering all areas thoroughly.

This layer will help protect against scratches, moisture, and wear over time. Follow the manufacturer’s instructions for drying times, and apply a second coat if recommended. Once the top coat is completely dry, your door skin will have a durable and attractive finish that complements the overall look of your door.
Step 10: Reattach the Hardware and Hang the Door
With the door skin installed and finished, the final step is to reattach any hardware removed at the beginning of the installation process. This includes door handles, hinges, and locks. Position each piece of hardware in its original location and secure it with screws. If necessary, drill new pilot holes for any hardware that does not align with the previous screw locations.
Once all hardware is in place, carefully hang the door back in its frame. Ensure the hinges are aligned correctly and the door opens and closes smoothly. Adjust as needed for proper clearance and swing. Your entry is ready for use, boasting a fresh, updated appearance with the new skin installed.
Following these steps, you can easily install a new door skin and give your door a fresh look. Whether for aesthetic purposes or to replace damaged or worn-out skins, this process is simple with the right tools and techniques.
5 Things You Should Avoid
- Avoid Rushing the Process: Take time to measure, align, and attach the door skin correctly. Rushing can lead to mistakes such as misalignment or improper adhesion, affecting the door’s appearance and functionality.
- Avoid Skimping on Materials: Use quality adhesive, primer, stain, and screws. Subpar materials can lead to a finish that is not durable and may require redoing the work sooner than anticipated.
- Avoid Over Sanding: While it’s essential to sand for a smooth finish, over-sanding can damage the door skin and create uneven surfaces. Sand with a gentle hand, and be mindful of the pressure you apply.
- Avoid Painting or Staining Without Proper Ventilation: Always work in a well-ventilated area to avoid inhaling fumes from adhesives, primer, stains, or top coat.
- Avoid Imperfect Hardware Installation: Ensure it’s done precisely when reattaching hardware. Misplaced hardware can prevent the door from functioning correctly and damage the new door skin.
By avoiding these common mistakes, you can ensure a successful installation of your door skin and achieve the desired results.
Conclusion
In conclusion, how to install door skins may seem intimidating at first, but by following these steps and tips, you can successfully transform the look of your doors. Remember to correctly measure and cut your door skin before installing. Take your time and patience; each step is crucial for a seamless finish.
Utilize a suitable adhesive and clamps to ensure a strong adhesion between the door skin and frame. Remember the importance of sanding and priming before painting for a professional-looking result. And lastly, feel free to get creative with designs or patterns to personalize your doors.
Installing door skins not only enhances the appearance of your home it also adds value and character. With some essential tools and knowledge, you can quickly achieve a professional-grade finish that will leave you feeling proud every time you walk through those newly installed doors.
So why wait? Get started on transforming your doors today!

About
JeepFixes Team is a skilled author for Jeep Fixes, bringing 6 years of expertise in crafting a wide range of jeep fixes. With a strong background in jeep fixes work, JeepFixes Team’s knowledge spans various types of fixtures, from decorative pieces to functional hardware, blending precision with creativity. His passion for jeep fixes and design has made him a trusted resource in the industry.
Professional Focus:
Expert in Jeep Fixes : JeepFixes Team aesthetic specializes in creating durable and innovative jeep fixes, offering both appeal and functionality. His work reflects a deep understanding of jeep fixes techniques and materials.
Sustainability Advocate : He is dedicated to using sustainable practices, ensuring that every fixture is crafted with eco-friendly methods while maintaining high-quality standards.
In his writing for jeep fixes, JeepFixes Team provides valuable insights into the latest trends, techniques, and practical advice for those passionate about jeep fixes, whether they are professionals or DIY enthusiasts. His focus on combining artistry with engineering helps others discover the true potential of jeep in design.