
Attention all car enthusiasts and DIYers! Are you tired of constantly replacing your air filter in hopes of improving your vehicle’s performance? Look no further because we have the perfect solution for you. In this blog post, we will be discussing the step-by-step guide on how to clean Airaid filter like a pro.

Whether you’re a seasoned mechanic or a beginner with minimal knowledge about cars, our easy-to-follow instructions will have you confidently maintain and maximize your air filter’s efficiency in no time. So sit back, grab yourself a cup of coffee, and get ready to learn everything there is to know about cleaning an Airaid filter. Let’s dive in!
Necessary Items
Before we start, gathering all the items needed to clean an Airaid filter is essential. These items include:
- Airaid Filter Cleaning Solution
- Water
- Large Bucket or Tub
- Soft-Bristled Brush
- Microfiber Cloth or Towel
- Rubber Gloves
Having these items ready before beginning is crucial, as you will need them during the cleaning process.
10 Steps on How to Clean Airaid Filter
Now that we have everything we need, let’s dive into the step-by-step guide on how to clean an Airaid filter. Please ensure you are working in a well-ventilated area and wearing rubber gloves for safety.
Step 1: Remove the Airaid Filter

The first step in cleaning an Airaid filter is to remove it from your vehicle. You can locate the air filter inside your car’s engine bay, usually within a plastic or metal housing. Carefully remove the housing and take out the filter.
Step 2: Inspect the Filter
Before cleaning, it is essential to inspect your filter’s condition. Look for any visible dirt, debris, or discoloration which may affect the filter’s efficiency. If you notice any significant damage or tears in the filter material, replacing it instead of cleaning it is best.
Step 3: Prepare the Cleaning Solution
Mix the Airaid filter cleaning solution with water in a large bucket or tub according to the manufacturer’s instructions. Some answers may require dilution, so read the label carefully.
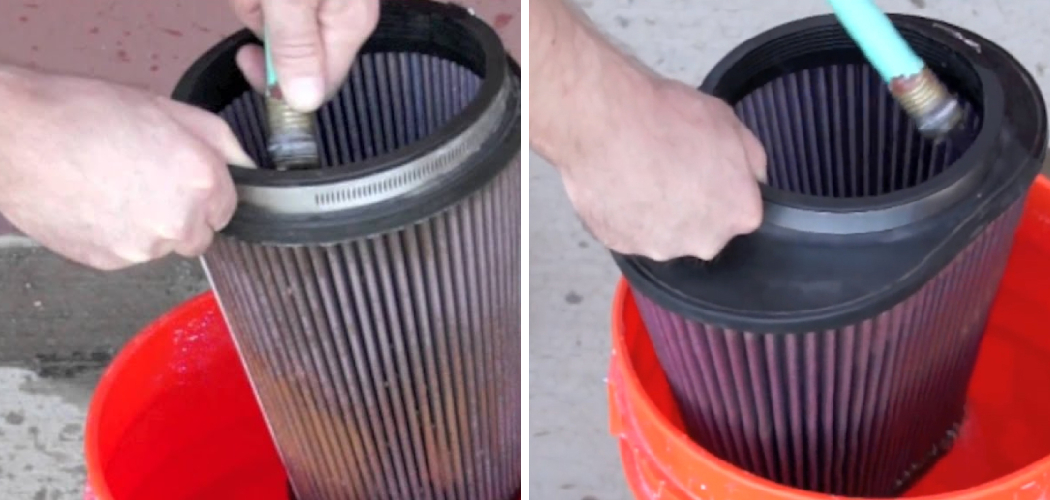
Step 4: Soak the Filter
Submerge your Airaid filter into the cleaning solution and let it soak for 10-15 minutes. This will help loosen and dissolve any dirt or grime buildup. Be sure to submerge the filter completely for maximum effectiveness.
Step 5: Gently Scrub the Filter
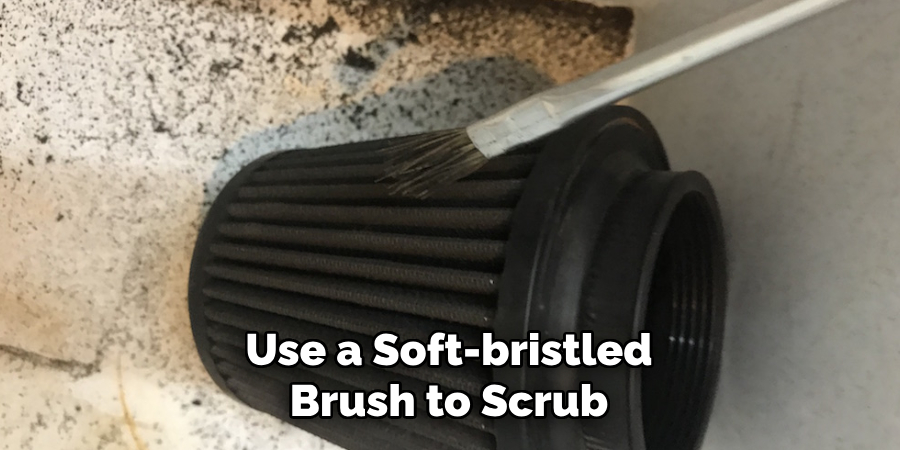
After soaking, use a soft-bristled brush to scrub the entire surface of the filter gently. Pay extra attention to any heavily soiled areas. Do not use a stiff-bristled brush or harsh chemicals, which may damage the filter material.
Step 6: Rinse the Filter
Rinse the filter thoroughly with water to remove all traces of the cleaning solution. Rinse both sides of the filter and remove any remaining debris or grime.
Step 7: Dry the Filter
Use a microfiber cloth or towel to pat dry the filter. Avoid using compressed air as it may damage the filter material. Allow the filter to air dry completely before proceeding to the next step.
Step 8: Apply Filter Oil
Once your filter is completely dry, apply a light layer of Airaid filter oil onto both sides. This will help trap dust and debris more effectively.
Step 9: Reinstall the Filter
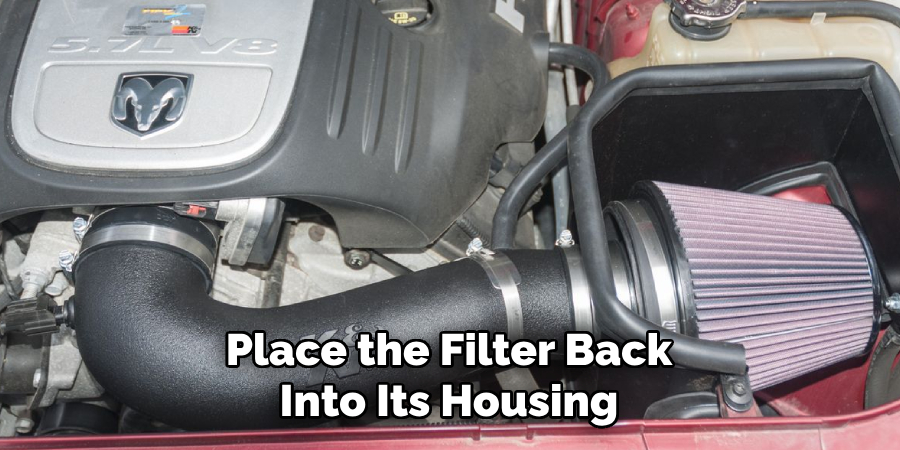
Carefully place the filter back into its housing, ensuring it is properly seated and sealed. Reattach the housing and make sure all connections are secure.
Step 10: Test Your Car
Start your engine and let it run for a few minutes to ensure everything works correctly. Congratulations, you have successfully cleaned your Airaid filter! Repeat this process every 30,000 miles or as the manufacturer recommends to maintain optimum performance.
Cleaning an Airaid filter is simple but crucial in maintaining your vehicle’s performance. By following these ten easy steps, you can save money and improve the efficiency of your air filter. Remember to inspect and clean your filter regularly for the best results.
8 Things to Avoid when Cleaning an Airaid Filter
While cleaning an Airaid filter is a simple process, there are some things you should avoid to ensure its effectiveness and longevity. These include:
1. Using Harsh Chemicals or High-pressure Water
Avoid using any harsh chemicals or high-pressure water when cleaning your filter. These can damage the filter material, leading to decreased performance. Use a mild cleaning solution and gentle scrubbing with a soft-bristled brush.
2. Not Following the Manufacturer’s Instructions
It is essential to read and follow the instructions provided by the manufacturer for your specific Airaid filter model. This will ensure that you use the correct cleaning solution and follow the recommended steps.
3. Skipping Regular Inspections
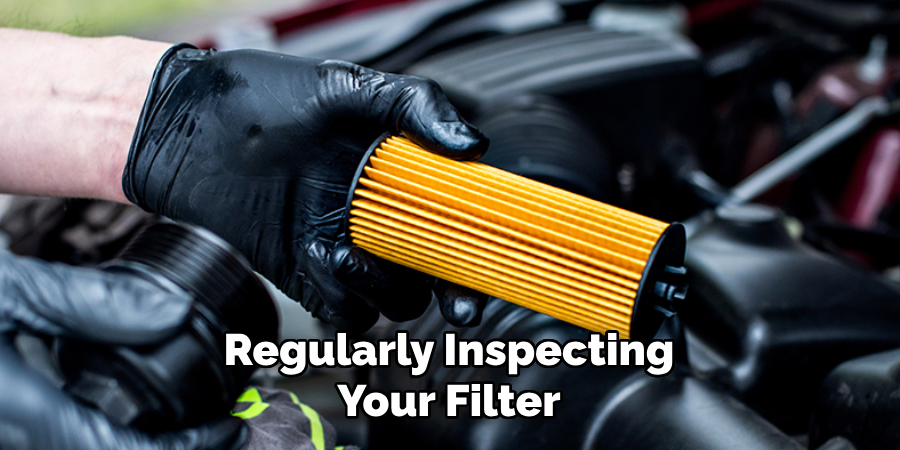
Regularly inspecting your filter for visible dirt or debris is crucial in maintaining efficiency. Skipping this step may result in clogged filters and decreased performance.
4. Not Letting the Filter Dry Completely
Allowing your filter to air dry completely before reinstalling it is crucial in preventing water damage or mold growth.
5. Using Compressed Air
Avoid using compressed air to dry or clean your filter, as it may damage the filter material and decrease efficiency.
6. Not Wearing Rubber Gloves
Rubber gloves protect your hands from harsh chemicals and any potential contamination on the filter.
7. Reinstalling a Damaged Filter
If you notice any significant damage or tears in the filter material, it is best to replace it instead of trying to clean it. A damaged filter will not effectively filter out dirt and debris, leading to decreased performance.
8. Not Cleaning the Filter at Recommended Intervals
Regularly cleaning your Airaid filter is crucial in maintaining efficiency and prolonging its lifespan. Be sure to follow the recommended intervals provided by the manufacturer for the best results.
By avoiding these mistakes, you can ensure that your Airaid filter continues to function effectively, providing clean air for your engine. Cleaning an Airaid filter is a simple and essential maintenance task that should be noticed. By following the step-by-step guide mentioned above and avoiding common mistakes, you can ensure that your filter functions at its best, improving your vehicle’s performance and longevity.
Frequently Asked Questions about Airaid Filter Cleaning
How Often Should I Clean My Airaid Filter?
It is recommended to clean your Airaid filter every 30,000 miles or as directed by the manufacturer. However, if you frequently drive in dusty or dirty conditions, it may be necessary to clean the filter more often. Inspecting the filter regularly will help determine how often it needs to be cleaned.
Can I Use Any Cleaning Solution on My Airaid Filter?
No, using a cleaning solution designed explicitly for Airaid filters is essential. Using harsh chemicals or high-pressure water can damage the filter material and decrease efficiency. Refer to the manufacturer’s instructions for the recommended cleaning solution.
Can I Reinstall a Damaged Filter?
No, it is best to replace a damaged filter instead of trying to clean it. A damaged filter will not effectively filter out dirt and debris, leading to decreased performance and potential damage to your engine.
Will Cleaning My Airaid Filter Improve Performance?
Regularly cleaning and maintaining your Airaid filter can improve your vehicle’s performance. A clean filter allows for better airflow, increasing horsepower, and improved gas mileage.
How Do I Know When It is Time to Replace My Airaid Filter?
Inspecting your filter regularly for any visible dirt or debris is crucial. If you notice a significant build-up of dirt or damage to the filter material, it may be time to replace it. Refer to the manufacturer’s instructions for their recommended replacement interval.
Can I Clean my Airaid Filter with Water?
It is not recommended to clean your Airaid filter with water, as this can damage the filter material and decrease its efficiency. Use a mild cleaning solution and gentle scrubbing with a soft-bristled brush. Regular cleaning and maintenance of your Airaid filter is essential in keeping your vehicle running smoothly and efficiently.
By following the steps mentioned above and avoiding common mistakes, you can ensure that your filter functions at its best, providing clean air for your engine and improving overall performance.
Conclusion
Now that you know the importance of cleaning your airaid filter and how to do it properly, take action and ensure your vehicle is running at its best. Pay attention to this crucial component of your car’s engine. Regularly cleaning your airaid filter ensures better gas mileage, increased horsepower and torque, and a longer lifespan for your vehicle. So, remember to give your airaid filter some TLC next time you’re out on the road.
And don’t let the process intimidate you – it’s a simple and quick task that will benefit your wallet and the environment. Let’s all do our part in keeping our air clean while also enjoying the full potential of our vehicles.
So, whether you’re a seasoned car enthusiast or a new driver just learning the ropes, maintaining the health and cleanliness of your airaid filter should be at the top of your priority list. With these easy steps on how to clean airaid filter, you can easily incorporate this into your car care routine without breaking a sweat.